Herunterladen Inhalt Inhalt Diese Seite drucken

Werbung

Verfügbare Sprachen

Verfügbare Sprachen

XP100 • XP200 • XP300
OWNERS MANUAL
A
U
D
I
O

Werbung

Inhaltsverzeichnis
loading

Inhaltszusammenfassung für Samson XP 200

  • Seite 1 XP100 • XP200 • XP300 OWNERS MANUAL...
  • Seite 2 Safety Instructions/Consignes de sécurité/Sicherheitsvorkehrungen/Instrucciones de seguridad WARNING: To reduce the risk of fire or electric shock, do not expose this unit to rain ATTENTION: Pour éviter tout risque d’électrocution ou d’incendie, ne pas exposer cet or moisture. To reduce the hazard of electrical shock, do not remove cover or back. appareil à...
  • Seite 3: Inhaltsverzeichnis

    Expedition Pro XP200 ..................48 Expedition XP300 ....................50 Colocación e instrucciones de montaje ............54 Colocación e instrucciones de montaje ............55 Accesorios Expedition ..................56 Specifications ......................57 Copyright 2001-2006, Samson Technologies Corp. Printed October, 2005 v4.1 Samson Technologies Corp. Phone: 1-800-3-SAMSON (1-800-372-6766) Fax: 516-364-3888 www.samsontech.com...
  • Seite 4: Introduction

    This will enable you to receive online technical support and will allow us to send you updated information about this and other Samson products in the future. If your Expedition Pro system was purchased outside of the U. S., contact your local distributor for warranty details. Also, be sure to check out our website (http://www.samsontech.com) for complete information about our full product line.
  • Seite 5: System Features

    System Features The Samson Expedition Pro system uses state-of-the art technology to bring a revolutionary new degree of flex- ibility and portability to professional audio. Its main fea- tures include: • A built-in telescoping handle and locking wheels that make it easier than ever before to transport your audio system.
  • Seite 6 (see below). • The top panel of both the XP200 and XP300 provides a prewired compartment that accommodates a variety of Samson wireless systems that offer superior RF and audio performance already proven on stages around the world. Receivers supported include the UM1 or M32 UHF models or the VM1 VHF model.
  • Seite 7: Guided Tour

    Expedition Pro XP100 Guided Tour 1: 1/4" input - Use this standard 1/4" connector to connect signal from a power amplifier (rated at up to 250 watts into 8 ohms) to the XP100. 2: Speakon™ input - Alternatively, you can use this Speakon™ connector to connect signal from a power amplifier (rated at up to 250 watts into 8 ohms) to the XP100.
  • Seite 8 Expedition Pro XP100 Using two XP100s in mono: A single mono signal (bus or aux send) is routed from a mixer to a power amplifier. One speaker output of the power amplifier is connected to either the XP100 1/4" input (solid line) or Speakon™ input (dotted line), and a con- nection is made between either the 1/4"...
  • Seite 9: Expedition Pro Xp200

    Expedition Pro XP200 Guided Tour 1: Input connector - Use this balanced female XLR connector to route line- level signal into the XP200. 2: Output VU meter - This three-segment bar meter shows the XP200 output level. For optimum signal-to-noise ratio, set the Volume control (see #6 below) so that program material is usually at or around 0 VU, with occasional but not steady excursions to the red “+3 dB”...
  • Seite 10 Expedition Pro XP200 Using two XP200s in mono: A single mono signal (bus or aux send) is routed from a mixer to one XP200’s XLR input, and a con- nection is made between that XP200’s XLR output to a second XP100’s XLR input. ������...
  • Seite 11: Expedition Pro Xp300

    Expedition Pro XP300 Guided Tour 1: Equalizer - These controls allow you to shape your sound by boosting or cutting the amount of bass (at 100 Hz) or treble (at 10 kHz) by up to 15 dB. A center detent in each knob indicates no boost or cut (that is, flat response).
  • Seite 12 Expedition Pro XP300 6: Line inputs - Use these 1/4" jacks to connect line-level sources to the XP300. Channels 1 and 2 are mono 1/4" connectors; channel 3/4 uses a stereo (TRS) 1/4" connector, with tip carrying left signal and ring carrying right signal.
  • Seite 13 Expedition Pro XP300 17: Limiter switch - Use this switch to turn the built-in limiter circuitry on or off. In order to maximize speaker protection, we recommend that this switch be left in the “on” position during normal operation. 18: Voltage selector - Make sure this is set correctly for the country you are in before turning on the power to the XP300.
  • Seite 14 Expedition Pro XP300 Using one XP300 and an XP200 (stereo operation): In this example, microphones are connected to the XLR mic inputs of chan- nels 1 and 2 of an XP300, and a stereo keyboard is connected to the stereo 1/4" TRS connector of channel 3/4 of the XP300 (using a Y-cord, with the tip carrying the left signal and the ring carrying the right signal).
  • Seite 15: Positioning And Mounting Instructions

    Positioning and Mounting Instructions General Positioning Tips • Operating a microphone or turntable in front of a speaker is a sure formula for feedback and/or rumble problems, so always place the Expedition Pro in front of any mics or turntables that are being used. •...
  • Seite 16 Positioning and Mounting Instructions Before fly-mounting, wall-mounting or ceiling-mounting the Expedition Pro, you must first install a Samson MP 1030 mounting bracket to the fly points, as shown in the illus- trations on the right Standard cabling and hardware can then be attached to the MP 1030 mounting bracket in environments where the Expedition Pro needs to be “flown.
  • Seite 17: Expedition Pro Accessories

    XP300 provides a prewired compartment that accommodates any of three differ- ent Samson wireless receivers: the UM1 or M32 UHF models or the VM1 VHF model. Output signal from a wireless receiver mounted in an XP300 arrives at channel 2 of the onboard mixer.
  • Seite 18: Introduction

    Samson. Si vous avez acquis votre Expedition Pro hors des Etats-Unis, vous pouvez prendre connaissance des détails de la garantie auprès de votre dis- tributeur.
  • Seite 19: Caractéristiques Techniques

    Caractéristiques techniques Les enceintes Samson Expedition Pro bénéficient des dernières avancées technologiques, ce qui leur permet d'offrir des performances exceptionnelles en matière de modularité et de mobilité. Voici quelques-unes de leurs caractéristiques : • La poignée télescopique et les roulettes intégrées faci- litent grandement le transport et le déplacement de...
  • Seite 20 – voir ci-dessous). • Les XP200 et XP300 disposent sur leur des- sus d'un compartiment précâblé pouvant recevoir divers systèmes sans fil Samson dont les performances audio ont maintes fois été prouvés sur les scènes du monde entier. Vous avez le choix entre les récepteurs UHF UM1...
  • Seite 21: Visite Guidée

    Expedition Pro XP100 Visite guidée 1 : Entrée Jack 6,35 mm – Reliez à ce Jack 6,35 mm standard la sortie d'un amplifi- cateur de puissance (d'au plus 250 Watts dans 8 Ohms). 2 : Entrée Speakon™ - Vous pouvez également relier à cette embase Speakon® la sor- tie d'un amplificateur de puissance (d'au plus 250 Watts dans 8 Ohms).
  • Seite 22 Expedition Pro XP100 Emploi de deux XP100 en mono : Reliez un signal mono (bus ou départ auxiliaire) du mélangeur à l'amplificateur de puissance. Reliez ensuite l'une des sorties HP de l'amplificateur de puissance à l'entrée Jack 6.35 mm (ligne pleine) ou à l'entrée Speakon™ (ligne pointillée) de l'XP100.
  • Seite 23: Expedition Pro Xp200

    Expedition Pro XP200 Visite guidée 1 : Connecteur d'entrée – Connecteur XLR femelle symétrique chargé d'accueillir recevoir les signaux niveau ligne sur l'XP200. 2 : VU-mètre de sortie – Cet afficheur de niveau à trois segments indique le niveau de sortie de l'XP200. Pour obtenir un rapport signal/bruit optimal, réglez le poten- tiomètre de volume (voir n°6 ci-dessous) de sorte que le signal audio fluctue aux environs de 0 VU sans jamais atteindre ou presque le segment rouge "+3 dB".
  • Seite 24 Expedition Pro XP200 Emploi de deux XP200 en mono : Reliez un signal mono (bus ou départ auxiliaire) du mélangeur à l'entrée XLR de l'XP200, puis reliez la sortie XLR de la première XP200 à l'entrée XLR de la seconde XP200. ������...
  • Seite 25: Expedition Pro Xp300

    Expedition Pro XP300 Visite guidée 1 : Egaliseur – L'égaliseur deux bandes vous permet d'obtenir précisément le son désiré grâce aux 15 dB d'amplification/atténuation proposés sur les fréquences graves (à 100 Hz) et aiguës (à 10 kHz). Lorsque les potentiomètres d'égalisation sont en position centrale crantée, aucune égalisation n'est appliquée (réponse plate).
  • Seite 26 Expedition Pro XP300 entrées par le biais du potentiomètre de balance – voir n°3 ci-avant). En pratique, ces potentiomètres de volume permettent de réaliser le mixage des signaux reçus sur les différentes entrées du mélangeur de l'XP300. 5 : Connecteur d'insertion (sub) – Connecteur Jack 6,35 mm permet d'insérer un signal niveau ligne juste avant l'étage des amplificateurs de puissance de l'XP300.
  • Seite 27 Expedition Pro XP300 cassette. Les signaux reçus à ces entrées sont affectés à la voie stéréo 3/4. Si l'XP300 est équi- pée d'une platine cassette TD30 en option, sachez que les sorties de cette dernière sont égale- ment affectées à la voie 3/4, ainsi que tout signal niveau ligne reçu à l'entrée Jack 6,35 mm niveau ligne stéréo (voir n°6 en page précédente) et tout signal reçu à...
  • Seite 28 Expedition Pro XP300 Emploi d'une XP300 et d'une XP200 (configuration stéréo) : Dans cet exemple, reliez les microphones aux entrées micro XLR des voies 1 et 2 de l'XP300 ainsi qu'un clavier stéréo au connecteur Jack 6,35 mm stéréo de la voie 3/4 de l'XP300 (par le biais d'un câble en Y avec signal gauche sur pointe et signal droit sur bague).
  • Seite 29: Consignes De Positionnement Et De Montage

    Consignes de positionnement et de montage Conseils de positionnement d'ordre général • L'utilisation d'un microphone ou d'une platine disque devant une enceinte est la meilleure manière de provoquer du Larsen et/ou du ronflement. Evitez donc toujours de placer les enceintes Expedition Pro à proximité des micros et des platines disques en cours d'utilisation.
  • Seite 30 Consignes de positionnement et de montage Avant de pouvoir suspendre les enceintes Expedition Pro ou de les fixer au mur ou au plafond, vous devez au préalable installer le support de fixation Samson MP 1030 sur les points d'ancrage (voir illustrations de droite).
  • Seite 31: Einleitung

    Sie nicht, die beigefügte Garantiekarte auszufüllen und abzuschicken. Damit haben Sie die Möglichkeit auf unseren technischen Online-Support und auf Zusendung aktueller Informationen über diese und andere Samson-Produkte . Falls Sie Ihr System außerhalb der USA gekauft haben, erkundigen Sie sich bei Ihrem Händler nach den Garantiebedingungen.
  • Seite 32: Produktmerkmale Des Expedition Pro-Systems

    Produktmerkmale des Expedition Pro-Systems Die Samson-Expedition Pro-Lautsprechersysteme sind auf dem neuesten Stand der Technik. So verleihen sie professionellen Audio-Produkten eine noch nicht dagewe- sene Modularität und Mobilität. Hier die wesentlichen Merkmale: • Ein eingebauter Teleskopgriff und Laufrollen erleichtern enorm den Transport.
  • Seite 33 Einsatz kommt (siehe unten). • Der XP200 und der XP300 stellen auf ihrer Oberseite ein anschlussbereites Fach bereit, in dem die diversen kabellosen Systeme von Samson – durch ihre hervorragende Leistung schon auf Bühnen überall auf der Welt bewährt – untergebracht werden.
  • Seite 34: Expedition Pro Xp100

    Expedition Pro XP100 Überblick 1: Klinken-Eingang – Benutzen Sie diese Standard-Klinken-Buchse zum Anschluss eines Signals von einem Verstärker (bis 250 Watt an 8 Ohm). 2: Speakon™-Eingang – Sie können alternativ diesen Speakon"-Anschluss Verbindung des XP100 mit einem Verstärker verwenden (bis 250 Watt an 8 Ohm) 3: Zusatz-Klinken-Buchse –...
  • Seite 35 Expedition Pro XP100 Mono-Betrieb zweier XP100: Ein einzelnes Mono-Signal (Bus oder Aux-Send) geht vom Mischer zum Verstärker. Dann einen der Lautsprecherausgänge des Verstärkers mit dem Klinken-Eingang (durchgezogene Linie) oder mit dem Speakon™-Eingang (punktierte Linie) des XP100 verbinden. Sodann die Zusatz-Klinken-Buchse an den Klinken-Eingang (durchgezogene Linie) des zweiten XP100 oder die Zusatz- Speakon™-Buchse an den Speakon™-Eingang des zweiten XP100 (punktierte Linie) anschließen.
  • Seite 36: Expedition Pro Xp200

    Expedition Pro XP200 Überblick 1: Eingang – Diesen symmetrisierten XLR-Anschluss für die Einspeisung von Line-Pegel-Signalen in den XP200 benutzen. 2: VU-Anzeige: Dies ist die dreistufige Ausgangspegel-Anzeige des XP200. Für optimalen Rauschabstand den Volume-Regler (6) so einstellen, dass das Audiosignal um 0 VU bleibt und das rote -3-dB-Segment nur gelegentlich auf- flackert.
  • Seite 37 Expedition Pro XP200 Mono-Betrieb zweier XP200: Ein einzelnes Mono-Signal (Bus oder Aux-Send) geht vom Mischer zum XLR-Eingang des XP200. Dann den XLR-Ausgang des ersten XP200 an den XLR-Eingang des zweiten XP200 anschließen. ������ �������� ������� ������� Stereo-Betrieb zweier XP200: Den linken Kanal eines Stereo-Signals (Bus oder Aux-Send), das vom Mischer kommt, mit dem XLR-Eingang des einen XP200, dann das Signal des rechten Kanals mit dem XLR-Eingang des anderen XP200 verbinden.
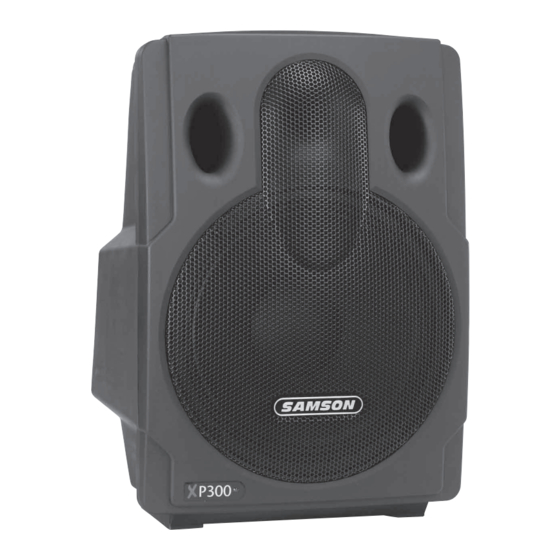
  • Seite 38: Expedition Pro Xp300

    Expedition pro XP300 Überblick 1: Equalizer – Diese beiden Regler erlauben Ihnen Klangbeeinflussung durch Anhebung oder Absenkung der Bässe (bei 100 Hz) beziehungsweise der Höhen (bei 10 kHz) um bis zu 15 dB. In der Mittelstellung der Regler findet keine Klangveränderung statt (d.
  • Seite 39 Expedition Pro XP300 kommen. 5: Insert (sub) – Dieser Klinken-Verbinder leitet ein Line-Pegel-Signal direkt vor den Verstärker des XP300. Wird normalerweise für den Signal-Return vom optionalen EX500-Subwoofer verwendet. 6: Line-Eingänge – Diese Klinken-Buchsen dienen der Verbindung von Line-Pegel-Quellen mit dem XP300.
  • Seite 40 Expedition Pro XP300 Kanal 3/4, zusätzlich zu dem Line-Signal, das am Stereo-Line-Eingang (TSR) (siehe 6. auf der vorhergehenden Seite) anliegt, und dem Signal am Mikrofon-Eingang (7. auf der vorangehen- den Seite). 16: Netzanschluss – Hier das mitgelieferte 3-Pin-IEC-Netzkabel anschließen. 17. Limiter – Mit diesem Schalter (de-)aktivieren Sie den eingebauten Limiter. Zu maxi- malem Schutz der Lautsprecher empfehlen wir, diesen Schalter bei Normalb etrieb immer auf ”On”...
  • Seite 41 Expedition Pro XP300 Stereo-Betrieb eines XP300 und XP200: Bei diesem Anschlussbeispiel die Mikrofone an die XLR-Mikro-Eingänge von Kanal 1 und 2 des XP300 anschließen, sowie ein Stereo-Keyboard an die Stereo-Klinken-Buchsen von Kanal 3/4 des XP300 (per Y-Kabel, Spitze trägt das linke, Ring das rechte Signal). Weiter wird der rechte Ausgang des XP300 mit dem XLR-Eingang des XP200 ver- bunden.
  • Seite 42: Anweisungen Zur Positionierung Und Montage

    Anweisungen zur Positionierung und Montage Allgemeine Hinweise zur Positionierung • Das Betreiben eines Mikrofons oder Plattenspielers direkt vor einem Lautsprecher ist eine recht sichere Methode, um Rückkopplung und/oder Brummen zu provozieren. Plazieren Sie deshalb den Expedition Pro vor den Mikrofonen oder Plattenspielern. •...
  • Seite 43 Anweisungen zur Positionierung und Montage Vor dem Aufhängen, Wand- oder Decken-Montage der Expedition Pro muss eine Samson- MP1030-Halterung an den Verankerungspunkten angebracht werden (siehe Illustration rechts). Der MP 1030 ist kompatibel zu Standard-Kabeln und –Zubehör, die der hängenden Installation dienen.
  • Seite 44: Zubehör Für Die Expedition Pro-Lautsprechersysteme

    VM1 VHF-Modell. Das Ausgangssignal eines im XP300 installierten Funkempfängers liegt an Kanal 2 des internen Mischers an. Weiterhin ist bei Ihrem Samson-Händler noch eine Reihe von Zubehör erhältlich, das die Fähigkeiten der Expedition Pro-Systeme erweitert – darunter folgende: • Der EX500-Aktiv-Subwoofer – die ideale Ergänzung zu jedem Expedition Pro-System (oder zu jedem Lautsprecher generell) –...
  • Seite 45: Introducción

    Si la ha adquirido en otro país, póngase en con- tacto con su distribuidor Samson para que le informe de los detalles de lo que debe hacer. Conserve el embalaje original y los materiales de protección que viene dentro de él, y si es...
  • Seite 46: Características Del Sistema

    Características del sistema El sistema Samson Expedition Pro usa tecnología de última generación para hacer que el audio profesional llegue a un revo- lucionario nuevo grado de flexibilidad y portatibilidad. Entre sus características principales se incluye: • Anclaje telescópico y ruedas que hacen que su sistema audio sea aun más fácil de transportar de lo que nunca pudo pensar.
  • Seite 47 XP300 dispone de un compartimento pre- cableado para poder albergar una gran variedad de sistemas inalámbricos de Samson que le ofrecen un rendimiento audio y RF superior ya demostrado en escenarios a todo lo ancho del mundo. Los receptores aceptados incluyen los modelos UHF UM1 o M32 o el modelo de VHF VM1.
  • Seite 48: Expedition Pro Xp100

    Expedition Pro XP100 Recorrido guiado 1: Entrada de 6.3 mm – Utilice este conector standard de 6.3 mm para hacer pasar la señal desde una etapa de potencia (con una potencia de hasta 250 vatios a 8 ohmnios) al XP100. 2: Entrada Speakon™...
  • Seite 49 Expedition Pro XP100 Uso de dos XP100s en mono: Una única señal mono (bus o envío auxiliar) es enviada desde una mesa de mezclas a una etapa de potencia. Una salida de altavoz de la etapa de potencia es bien al conector de entrada de 6.3 mm del XP100 (línea continua) o al conector de entrada Speakon™(línea de puntos), y después se realiza una conexión entre bien la extensión de 6.3 mm y la entrada del segundo XP100 (línea conti- nua) o entre la extensión Speakon™...
  • Seite 50: Expedition Pro Xp200

    Expedition Pro XP200 Recorrido guiado 1: Conector de entrada – Utilice este conector hembra XLR balanceado para hacer pasar una señal con nivel de línea al XP200. 2: Medidor VU de salida – Este medidor de barra de tres segmentos muestra el nivel de salida del XP200.
  • Seite 51 Expedition Pro XP200 Uso de dos XP200 en mono: Una única señal mono (bus o envío auxiliar) es enviada desde un mezclador a la entrada XLR de uno de los XP200, y después se realiza una conexión entre la salida XLR de este XP200 y la entrada XLR de un segundo XP200. ������...
  • Seite 52: Expedition Xp300

    Expedition XP300 Recorrido guiado 1: Ecualizador – Estos controles le permiten dar forma a su sonido realzando o cortando la cantidad de graves (a 100 Hz) o agudos (a 10 kHz) en hasta 15 dB. Una muesca central en cada mando le indica la posición de sin realce ni corte (es decir, respuesta plana).
  • Seite 53 Expedition XP300 de línea justo antes de las etapas de potencia del XP300. Se usa normalmente para devolver la señal desde un subwoofer opcional EX500. 6: Entradas de línea – Utilice estas clavijas de 6.3 mm para conectar fuentes con nivel de línea al XP300. Los canales 1 y 2 tienen conectores mono de 6.3 mm;...
  • Seite 54 Expedition XP300 16: Entrada AC - Conecte aquí el cable de alimentación “IEC” de tres puntas y gran calibre. 17: Interruptor de limitador – Utilice este interruptor para activar o desactivar la circuitería de limitador interno. De cara a conseguir la máxima protección del altavoz, le recomendamos que deje este interrup- tor en la posición “on”...
  • Seite 55 Expedition XP300 Uso de un XP300 y un XP200 (funcionamiento stereo): En este ejemplo, hemos conectado micrófonos a las entradas de micro XLR de los canales 1 y 2, y un teclado stereo a la clavija TRS stereo del canal 3/4 del XP300 (usando un cable en Y, con la señal izquierda en la punta y la derecha en el anillo).
  • Seite 56: Colocación E Instrucciones De Montaje

    Colocación e instrucciones de montaje Consejos generales de colocación • El uso de un micrófono o tocadiscos delante de un altavoz es una fórmula segura de conseguir problemas de realimentaciones y/o zumbidos, por lo que evite siempre colocar el Expedition delante de cualquier micro o giradiscos que esté usando. •...
  • Seite 57: Colocación E Instrucciones De Montaje

    Colocación e instrucciones de montaje Antes de realizar un montaje colgado, montaje en pared o en techo del Expedition, primero debe colocar una abrazadera de montaje Samson MP 1030 en los puntos de anclaje, tal como se muestra en la ilustración de la derecha Puede unir cableado y piezas standard a la abrazadera de montaje MP 1030 en aquellas configura- ciones en las que el Expedition deba quedar “flotando”.
  • Seite 58: Accesorios Expedition

    XP300 dispone de un compartimento precableado que puede albergar cualquiera de los siguientes tres receptores inalámbricos de Samson: los modelos UHF UM1 o M32 o el modelo de VHF VM1. La señal de salida de un receptor inalámbrico colocado en un XP300 llega a la uni- dad a través del canal 2 del mezclador interno.
  • Seite 59: Specifications

    Specifications Power Rating: (@ 8Ω): XP100 250 Watts Program; 400 Watts Max. Peak XP200, XP300 200 Watts Total,160 Watts LF; 40 Watts HF Frequency Response: (all models) 60 Hz – 15 kHz ± 3 dB Sensitivity: XP100 97 dB SPL @ 1W/1m Crossover Frequency: XP100 2.3 kHz (12 dB Per Octave)
  • Seite 60 Samson Technologies Corp. Phone: 1-800-3-SAMSON (1-800-372-6766) Fax: 516-364-3888 www.samsontech.com...

Inhaltsverzeichnis