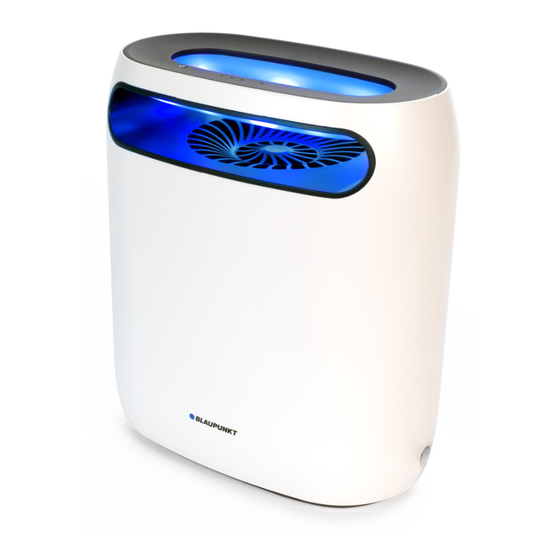
Herunterladen Inhalt Inhalt Diese Seite drucken

Werbung

Verfügbare Sprachen
  • DE

Verfügbare Sprachen

  • DEUTSCH, seite 25
BP-GIKLED11
1.
User manUal
1. Introduction
To all residents of the european Union
Important environmental information about this product
This symbol on the device or the package indicates that disposal of the device after its lifecycle could harm
the environment. Do not dispose of the unit (or batteries) as unsorted municipal waste; it should be taken to
a specialized company for recycling. This device should be returned to your distributor or to a local recycling
service. Respect the local environmental rules.
If in doubt, contact your local waste disposal authorities.
Please read the manual thoroughly before bringing this device into service. If the device was damaged in
transit, do not install or use it and contact your dealer.
2. safety Instructions
Read and understand this manual and all safety signs before using this appliance.
Indoor use only.
Power supply polarisation.
This device can be used by children aged from 8 years and above, and persons with reduced physical,
sensory or mental capabilities or lack of experience and knowledge if they have been given supervision or
instruction concerning the use of the device in a safe way and understand the hazards involved. Children
shall not play with the device. Cleaning and user maintenance shall not be made by children without
supervision.
Keep this device away from rain, moisture, splashing and dripping liquids. Never put objects filled with
liquids on top of or close to the device.
Always disconnect mains power when the device is not in use or when servicing or maintenance activities
are performed. Handle the power cord by the plug only.
All cords and cables should be routed so that they will not be walked on or pinched by items placed upon
or against them. Pay particular attention to the point where they exit the unit.
Remove all flammable materials close to the device before switching on.
Do not install the device on a flammable surface (linoleum, carpet, wood, paper, cardboard, plastic, etc.).
Protect this device from heat sources such as radiators, heat registers, stoves, or other appliances (including
amplifiers) that produce heat.
Do not remove the cover under any conditions. There are no user-serviceable parts inside. Never operate
this device when its cover is removed.
BP-GIKLED11.indd 1
1
11/12/2018 13:25:52

Werbung

Inhaltsverzeichnis

Fehlerbehebung

loading

Inhaltszusammenfassung für Blaupunkt BP-GIKLED11

  • Seite 1 Protect this device from heat sources such as radiators, heat registers, stoves, or other appliances (including amplifiers) that produce heat. • Do not remove the cover under any conditions. There are no user-serviceable parts inside. Never operate this device when its cover is removed. BP-GIKLED11.indd 1 11/12/2018 13:25:52...
  • Seite 2: General Guidelines

    – of any nature (financial, physical…) arising from the possession, use or failure of this product. • Keep this manual for future reference. 4. Overview General front cover container air inlet air outlet back cover (1) BP-GIKLED11.indd 2 11/12/2018 13:25:52...
  • Seite 3 BP-GIKLED11 power input fan box control panel back cover (2) base plate trap Control Panel power indicator on-off light intensity indicator light timer button auto mode BP-GIKLED11.indd 3 11/12/2018 13:25:52...
  • Seite 4: Operation

    For best results, turn off other light sources and prevent from installing the appliance in the draught. 6. Troubleshooting Problem Reason Possible solution Power supply not connected well Reconnect the power supply Appliance does not start On-off button not pressed Press the on-off button BP-GIKLED11.indd 4 11/12/2018 13:25:52...
  • Seite 5: Care And Maintenance

    2. Take out the fan and clean with a dry cloth. 3. Clean the container and trap – rinse with water if necessary. 4. Remove and clean the funnel – rinse with water if necessary. 5. Re-assemble by proceeding in reverse order. container trap funnel BP-GIKLED11.indd 5 11/12/2018 13:25:52...
  • Seite 6: Technical Specifications

    © COPYrIGHT nOTICe All worldwide rights reserved. No part of this manual may be copied, reproduced, translated or reduced to any electronic medium or otherwise without the prior written consent of the copyright holder. BP-GIKLED11.indd 6 11/12/2018 13:25:52...
  • Seite 7: Veiligheidsvoorschriften

    Houd dit toestel uit de buurt van warmtebronnen zoals radiatoren, verwarmingselementen, fornuizen of andere toestellen (incl. versterkers) die warmte produceren. • Demonteer of open dit toestel nooit. De gebruiker mag geen onderdelen vervangen. Gebruik dit toestel nooit wanneer de behuizing geopend is. BP-GIKLED11.indd 7 11/12/2018 13:25:52...
  • Seite 8: Algemene Richtlijnen

    – van welke aard dan ook (financieel, fysisch…) voortvloeiend uit het bezit, gebruik of falen van dit product. • Bewaar deze handleiding voor verdere raadpleging. 4. Omschrijving algemeen voorkant behuizing opvangbak luchtinlaat luchtuitlaat BP-GIKLED11.indd 8 11/12/2018 13:25:52...
  • Seite 9 BP-GIKLED11 ventilator achterkant behuizing (1) voedingsingang ventilatorbehuizing controlepaneel achterkant behuizing (2) basisplaat Bedieningspaneel voedingsled aan-uit lichtsterkte indicatieled timer knop automatische modus BP-GIKLED11.indd 9 11/12/2018 13:25:53...
  • Seite 10: Problemen En Oplossingen

    Voor de beste resultaten, schakel andere lichtbronnen uit en vermijd tocht. 6. Problemen en oplossingen Probleem Oorzaak mogelijke oplossing De voeding is niet goed aangesloten Sluit de voeding opnieuw aan Het toestel schakelt niet in De aan/uit-knop is niet ingedrukt Druk op de aan/uit-knop BP-GIKLED11.indd 10 11/12/2018 13:25:53...
  • Seite 11: Reiniging En Onderhoud

    7. Verwijder de ventilator en reinig met een droge doek. 8. Reinig de opvangbak en val - spoel met water indien nodig. 9. Verwijder en reinig de trechter - spoel met water indien nodig. 10. Monteer de onderdelen in omgekeerde volgorde. opvangbak ventilator trechter BP-GIKLED11.indd 11 11/12/2018 13:25:53...
  • Seite 12: Technische Specificaties

    Het is niet toegestaan om deze handleiding of gedeelten ervan over te nemen, te kopiëren, te vertalen, te bewerken en op te slaan op een elektronisch medium zonder voorafgaande schriftelijke toestemming van de rechthebbende. BP-GIKLED11.indd 12 11/12/2018 13:25:53...
  • Seite 13: Consignes De Sécurité

    Protéger l’appareil des sources de chaleur telles que les radiateurs, climatiseurs, poêles ou toutes autres unités (y compris les amplificateurs) produisant de la chaleur. • Ne jamais démonter ni ouvrir le boîtier. L’appareil ne contient aucune pièce réparable par l’utilisateur. Ne jamais utiliser l’appareil si le boîtier est ouvert. BP-GIKLED11.indd 13 11/12/2018 13:25:53...
  • Seite 14: Consignes D'entretien

    (financière, corporelle, etc.), causés par la possession, l’utilisation ou le dysfonctionnement de ce produit. • Garder ce mode d’emploi pour toute référence ultérieure. 4. description en général couvercle frontal récipient entrée d’air sortie d’air BP-GIKLED11.indd 14 11/12/2018 13:25:53...
  • Seite 15 BP-GIKLED11 ventilateur couvercle arrière (1) entrée d’alimentation boîtier du ventilateur panneau de contrôle couvercle arrière (2) plaque de base piège à insectes Panneau de contrôle LED d’alimentation on-off intensité lumineuse indicateur LED minuterie bouton mode automatique BP-GIKLED11.indd 15 11/12/2018 13:25:53...
  • Seite 16: Problèmes Et Solutions

    Pour les meilleurs résultats, éteindre toute autre source de lumière et éviter d’installer l’appareil dans une zone de courants d’air. 6. Problèmes et solutions Problème Cause solution proposée L’alimentation n’est pas Reconnecter l’alimentation correctement connectée L’appareil ne démarre pas Le bouton on/off n’est pas actionné Appuyer sur le bouton on/off BP-GIKLED11.indd 16 11/12/2018 13:25:53...
  • Seite 17: Entretien

    13. Nettoyer le récipient et le piège à insectes - si nécessaire, rincer à l’eau. 14. Retirer et nettoyer l’entonnoir - si nécessaire, rincer à l’eau. 15. Remonter les pièces dans l’ordre inverse. récipient ventilateur piège à insectes entonnoir BP-GIKLED11.indd 17 11/12/2018 13:25:53...
  • Seite 18: Spécifications Techniques

    Tous droits mondiaux réservés. Toute reproduction, traduction, copie ou diffusion, intégrale ou partielle, du contenu de ce mode d’emploi par quelque procédé ou sur tout support électronique que ce soit est interdite sans l’accord préalable écrit de l’ayant droit. BP-GIKLED11.indd 18 11/12/2018 13:25:54...
  • Seite 19: Manual Del Usuario

    Nunca quite la carcasa. El usuario no habrá de efectuar el mantenimiento de ninguna pieza. Nunca maneje el aparato sin la carcasa. • Nunca maneje el aparato si está dañado. No intente hacer funcionar el aparato si el cable de alimentación está dañado. BP-GIKLED11.indd 19 11/12/2018 13:25:54...
  • Seite 20: Normas Generales

    índole (financiera, física, etc.), causados por la posesión, el uso o el fallo de este producto. • Guarde este manual del usuario para cuando necesite consultarlo. 4. descripción General tapa frontal depósito orificios de ventilación salida de aire ventilador tapa trasera (1) BP-GIKLED11.indd 20 11/12/2018 13:25:54...
  • Seite 21 BP-GIKLED11 entrada de alimentación carcasa del ventilador panel de control tapa trasera (2) base trampa Panel de control LED de alimentación encendido-apagado intensidad luminosa luz indicadora temporizador botón modo automático BP-GIKLED11.indd 21 11/12/2018 13:25:54...
  • Seite 22: Solución De Problemas

    6. solución de problemas problema razón solución posible El aparato no está enchufado de Vuelva a enchufarlo. manera correcta. El aparato no se enciende. El botón de encendido/apagado no Pulse el botón de encendido/ está pulsado. apagado. BP-GIKLED11.indd 22 11/12/2018 13:25:54...
  • Seite 23: Cuidado Y Mantenimiento

    24. Limpie el depósito y la trampa - Si fuera necesario, enjuague. 25. Quite y limpie el embudo - Si fuera necesario, enjuague. 26. Siga estos pasos en orden inverso para volver a montarlo. depósito ventilador trampa embudo BP-GIKLED11.indd 23 11/12/2018 13:25:54...
  • Seite 24: Mantenimiento

    © dereCHOs de aUTOr Todos los derechos mundiales reservados. Está estrictamente prohibido reproducir, traducir, copiar, editar y guardar este manual del usuario o partes de ello sin el consentimiento previo por escrito del propietario del copyright. BP-GIKLED11.indd 24 11/12/2018 13:25:54...
  • Seite 25: Sicherheitshinweise

    Stellen Sie das Gerät nicht in der Nähe von Hitzequellen auf wie z.B. Radiatoren, Heizkörpern, Öfen oder anderen Geräten, die Hitze erzeugen (auch Verstärkern). • Öffnen Sie niemals das Gehäuse. Es gibt keine zu wartenden Teile. Betreiben Sie niemals das Gerät ohne das Gehäuse. BP-GIKLED11.indd 25 11/12/2018 13:25:54...
  • Seite 26: Allgemeine Richtlinien

    Art (finanziell, physisch, usw.), die durch Besitz, Gebrauch oder Defekt verursacht werden, haftbar gemacht werden. • Bewahren Sie diese Bedienungsanleitung für künftige Einsichtnahme auf. 4. Beschreibung allgemeines Abdeckung (Vorderseite) Auffangbehälter Lufteintrittsöffnungen Luftaustrittsöffnung Lüfter Abdeckung (Rückseite) (1) BP-GIKLED11.indd 26 11/12/2018 13:25:54...
  • Seite 27 BP-GIKLED11 Netzeingang Ventilator-Gehäuse Bedienfeld Abdeckung (Rückseite) (2) Basis Falle Bedienfeld Stromversorgungs-LED ein-aus Lichtstärke Kontrollleuchte Zeitschaltuhr Taste automatischer Modus BP-GIKLED11.indd 27 11/12/2018 13:25:54...
  • Seite 28: Problemlösung

    Grund mögliche lösung Sie haben den Stecker nicht korrekt Stecken Sie den Stecker wieder in in die Steckdose gesteckt. die Steckdose. Das Gerät schaltet nicht ein. Sie haben den EIN/AUS-Schalter Drücken Sie den EIN/AUS-Schalter nicht gedrückt. BP-GIKLED11.indd 28 11/12/2018 13:25:54...
  • Seite 29: Pflege Und Wartung

    29. Reinigen Sie den Auffangbehälter und die Klappe - spülen Sie ggf. mit Wasser. 30. Entfernen und reinigen Sie den Trichter - spülen Sie ggf. mit Wasser. 31. Gehen Sie in umgekehrter Reihenfolge vor, um wieder zusammenzubauen. Auffangbehälter Lüfter Falle Trichter BP-GIKLED11.indd 29 11/12/2018 13:25:55...
  • Seite 30: Technische Daten

    © UrHeBerreCHT alle weltweiten rechte vorbehalten. Ohne vorherige schriftliche Genehmigung des Urhebers ist es nicht gestattet, diese Bedienungsanleitung ganz oder in Teilen zu reproduzieren, zu kopieren, zu übersetzen, zu bearbeiten oder zu speichern. BP-GIKLED11.indd 30 11/12/2018 13:25:55...
  • Seite 31: Instrukcja Obsługi

    Urządzenie należy chronić przed źródłami ciepła, takimi jak grzejniki, nawiewy ciepłego powietrza, piece lub inne urządzenia (np. wzmacniacze), które wytwarzają ciepło. • Pod żadnym pozorem nie zdejmować pokrywy. W urządzeniu nie ma części, które mogą być serwisowane przez użytkownika. Nie używać urządzenia, gdy pokrywa jest usunięta. BP-GIKLED11.indd 31 11/12/2018 13:25:55...
  • Seite 32: Informacje Ogólne

    Importer ani dystrybutorzy nie ponoszą odpowiedzialności za jakiekolwiek szkody (nadzwyczajne, przypadkowe lub pośrednie) dowolnej natury (finansowe, fizyczne…), wynikające z posiadania, użytkowania lub usterki niniejszego produktu. • Zachować niniejszą instrukcję na przyszłość. 4. Przegląd Informacje ogólne pokrywa przednia pojemnik wlot powietrza wylot powietrza BP-GIKLED11.indd 32 11/12/2018 13:25:55...
  • Seite 33 BP-GIKLED11 wentylator osłona tylna (1) wejście zasilania skrzynka wentylatora panel sterowania osłona tylna (2) płyta podstawowa pułapka Panel sterowania kontrolka zasilania wł.-wył. natężenie światła lampka wskaźnikowa timer przycisk tryb automatyczny BP-GIKLED11.indd 33 11/12/2018 13:25:55...
  • Seite 34: Sposób Użytkowania

    Aby uzyskać najlepsze rezultaty, należy wyłączyć inne źródła światła i unikać montażu urządzenia w przeciągu. 6. Wykrywanie i usuwanie usterek Usterka Przyczyna możliwe rozwiązanie Zasilanie nie jest prawidłowo Ponownie podłączyć zasilanie podłączone Urządzenie nie uruchamia się Przycisk wł./wył. nie został wciśnięty Wcisnąć przycisk wł./wył. BP-GIKLED11.indd 34 11/12/2018 13:25:55...
  • Seite 35: Pielęgnacja I Konserwacja

    33. Wyjąć wentylator i oczyścić suchą ściereczką. 34. Oczyścić pojemnik i pułapkę - w razie potrzeby spłukać wodą. 35. Wyjąć i oczyścić lejek - w razie potrzeby spłukać wodą. 36. Ponownie zamontować, postępując w odwrotnej kolejności. pojemnik wentylator pułapka lejek BP-GIKLED11.indd 35 11/12/2018 13:25:55...
  • Seite 36: Specyfikacja Techniczna

    © InFOrmaCja O PraWaCH aUTOrskICH Wszelkie prawa są zastrzeżone na całym świecie. Żadna część niniejszej instrukcji nie może być kopiowana, powielana, tłumaczona ani przenoszona na jakikolwiek nośnik elektroniczny (lub w inny sposób) bez wcześniejszej pisemnej zgody właściciela praw autorskich. BP-GIKLED11.indd 36 11/12/2018 13:25:55...
  • Seite 37: Manual Do Utilizador

    (incluindo amplificadores) que produzam calor. • Não remova a tampa sob quaisquer condições. Não existem peças no interior que possam ser reparada pelo utilizador. Nunca coloque o aparelho a funcionar se a tampa não estiver no devido lugar. BP-GIKLED11.indd 37 11/12/2018 13:25:55...
  • Seite 38: Normas Gerais

    (excepcionais, acidentais ou indiretos) - de qualquer natureza (financeira, física...) decorrentes da posse, utilização ou mau funcionamento deste produto. • Guarde este manual para posterior consulta. 4. descrição Geral tampa frontal recipiente entrada de ar saída de ar ventilador tampa traseira (1) BP-GIKLED11.indd 38 11/12/2018 13:25:55...
  • Seite 39 BP-GIKLED11 entrada da alimentação caixa da ventoinha painel de controlo tampa traseira (2) base armadilha Painel de Controlo indicador de corrente on-off Intensidade da luz luz indicadora temporizador botão modo automático BP-GIKLED11.indd 39 11/12/2018 13:25:55...
  • Seite 40: Como Utilizar

    6. resolução de problemas Problema motivo soluçâo possível A fonte de alimentação não está Volte a conetar a fonte de bem conetada alimentação O aparelho não liga. Botão on-off não foi pressionado Pressione o botão on-off BP-GIKLED11.indd 40 11/12/2018 13:25:55...
  • Seite 41: Cuidados E Manutenção

    39. Limpe o recipiente e a armadilha - passe por água se necessário. 40. Retire e limpe o funil - passe por água se necessário. 41. Reinstale tudo procedendo na ordem inversa. recipiente ventilador armadilha funil BP-GIKLED11.indd 41 11/12/2018 13:25:56...
  • Seite 42: Direitos De Autor

    © dIreITOs de aUTOr Todos os direitos mundiais reservados. Nenhuma parte deste manual pode ser copiada, reproduzida, traduzida ou resumida por qualquer eletrónica, ou de outra forma, sem prévio consentimento por parte da detentora dos direitos de autor. BP-GIKLED11.indd 42 11/12/2018 13:25:56...

Inhaltsverzeichnis