SilverStone Case Storage CS380 Handbuch
Flexible 8-bay compact nas tower
Inhaltsverzeichnis
Inhaltsverzeichnis

Verwandte Anleitungen für SilverStone Case Storage CS380


Inhaltszusammenfassung für SilverStone Case Storage CS380
- Seite 1 Case Storage CS380 Flexible 8-bay compact NAS tower...
-
Seite 3: Inhaltsverzeichnis
The following manual and guides were carefully prepared by the SilverStone engineering team to help you maximize the potential of your SilverStone product. Please keep this manual for future reference when upgrading or performing maintenance on your system. A copy of this manual can also... -
Seite 4: Product Overview
NAS builds. Equipped with two 120mm intake fans, a 120mm rear exhaust fan, and easily removable filters, keeping everything cool and dust-free is as easy as in any SilverStone premium chassis. Safety features such as lockable front door and power button are also included. -
Seite 5: Disassemble Chart
Case Storage CS380 Disassemble Chart RIGHT SIDE PANEL 12025 FAN LEFT SIDE PANEL 5.25” DRIVE BAY X2 POWER SW RESET SW USB 3.0 X2 + SPK + MIC DRIVE TRAY x8 12025 FAN X2 PICTURE ITEM PURPOSE SECURE 5.25" DRIVE SCREW-P/W-M3 SECURE MOTHERBOARD/3.5"... -
Seite 6: Left Side
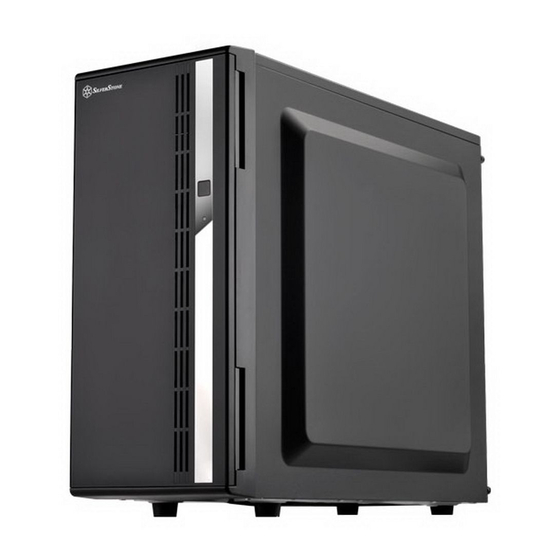
Case Storage CS380 Exterior Overview FRONT LEFT SIDE RIGHT SIDE BACK BOTTOM... -
Seite 7: Front Panel Function Guide
Case Storage CS380 Front panel function guide Power button lock Open Locked The front door contains a power button lock. When the power button lock is locked, you will disable the power button on the front door, the only way to press the power button is by opening the front door again. -
Seite 8: Installation Chart
Case Storage CS380 Installation Chart Before you begin, please make sure that you have all components collected check that all components do not have compatibility problems with each other or with the case if possible, assemble the components outside the case first to make sure they are working keep the motherboard manual ready for reference during installation prepare a Philips screwdriver Loosen two screws from both left and right side panels to remove them... - Seite 9 Case Storage CS380 Installation Chart Install power supply into the case Bauen Sie das Netzteil ins Gehäuse ein Installez la source d’alimentation dans le châssis Instale la fuente de alimentación en la carcasa Installazione dell’alimentatore nel case Установите в корпус блок питания 安裝電源供應器...
- Seite 10 Case Storage CS380 Installation Chart Insert the I/O shield included with your motherboard Installieren Sie das hintere I/O-Blech im Gehäuse Installez la plaque arrière de la carte mère dans le boîtier Instale la placa trasera de E/S de la placa base en la carcasa Installare la placca I/O della scheda madre nella sede preposta Установите...
- Seite 11 Case Storage CS380 Installation Chart Insert standoffs as required by your motherboard in corresponding mounting holes, then install motherboard Stecken Sie die Abstandshalter wie für Ihr Motherboard erforderlich in die entsprechenden Befestigungsbohrungen. Installieren Sie dann das Motherboard Insérez les entretoises comme requis par votre carte mère dans les trous de montage correspondant, puis installez la carte mère Inserte los soportes según sea necesario para su placa base en los agujeros de montaje correspondientes, luego instale la placa base Inserire nei corrispondenti fori di fissaggio i distanziatori, come richiesto dalla scheda madre, quindi installare la scheda madre При...
- Seite 12 Case Storage CS380 Installation Chart We recommend that you start cable manage now and connect cables such as the ATX 24pin, front I/O connectors, and any other connectors from front panel devices Wir empfehlen, jetzt mit dem Verlegen der Kabel zu beginnen und die 24-poligen ATX-, Front-I/O- und sämtliche weiteren Kabel von Geräten an der Frontblende anzuschließen Nous vous recommandons de commencer à...
- Seite 13 Case Storage CS380 Installation Chart Remove the 5.25" drive bay covers to install required 5.25" devices Dem Sie die Abdeckung der 5,25-Zoll-Laufwerkschächte ab, installieren Sie die gewünschten 5,25-Zoll-Geräte Retirez les caches des baies 5,25" pour installer vos appareils Quite las cubiertas para bahía de dispositivos de 5,25" para instalar los dispositivos de 5,25" necesarios Per installare le necessarie periferiche da 5,25", rimuovere il cover del bay da 5,25"...
- Seite 14 Case Storage CS380 Installation Chart Remove hot-swap trays and install 3.5" or 2.5" drives as needed, secure with screws then reinstall back into the drive cage Entfernen Sie die Hot-Swapping-Einsätze und installieren Sie wie erforderlich 3,5- oder 2,5-Zoll-Laufwerke; befestigen Sie sie mit Schrauben und installieren Sie die Einsätze wieder im Käfig Retirez les plateaux hot-swap et installez les disques 3,5"...
- Seite 15 Case Storage CS380 Installation Chart Connect all cables for drives as needed including ones installed in 5.25" bay and the backplane Schließen Sie wie erforderlich alle Kabel für die Laufwerke an, einschließlich derer im 5,25-Zoll-Schacht und an der Backplane Connectez tous les câbles pour les lecteurs selon le besoin, y compris ceux installés dans la baie 5,25" et le fond de panier Conecte todos los cables para dispositivos según sea necesario, incluidos los instalados en la bahía de 5,25"...
- Seite 16 Case Storage CS380 Installation Chart Remove expansion slot covers to install required expansion cards. Unused slots should have covers installed Entfernen Sie Steckplatzabdeckungen, installieren Sie die gewünschten Erweiterungskarten. Bei nicht verwendeten Steckplätzen sollten die Abdeckungen angebracht bleiben Retirez les équerres pour installer vos cartes d'extension. Les emplacements inutilisés doivent garder leur équerre Quite las cubiertas de los zócalos de expansión para instalar las tarjetas de expansión necesarias.
- Seite 17 Case Storage CS380 Installation Chart Reinstall both left and right side panel to complete installation Installieren Sie zum Abschluss der Installation die linke und rechte Seitenwand wieder Réinstallez les deux panneaux latéraux pour terminer le montage Reinstale los paneles laterales izquierdo y derecho para completar la instalación Reinstallare entrambi i pannelli laterali per completare l’installazione Для...
-
Seite 18: Installation Guide
Case Storage CS380 Connector Definition (1) Front Panel Connectors Power switch and reset switch installation guide Please refer to the motherboard manuals for the motherboard’s “Front Panel Connector” or “System Panel Connector” pin definitio Power switch and reset switch have no polarity, so they can be connected in any orientation. Bitte suchen Sie in der Motherboard-Dokumentation nach der Pinbelegung der Anschlüsse des Frontbedienfeldes („Front Panel Conne oder „... - Seite 19 Case Storage CS380 Connector Definition LED indicators installation guide Please refer to the motherboard manuals for the motherboard’s “Front Panel Connector ” or “System Panel Connector” pin definition.; the white/black wires are negative while other colors are positive wires. The Power LED wires are separate pins for compatibility with different motherboard pin definition so please make sure they are connected in the right polarity by referring to your motherboard manual.
-
Seite 20: Front I/O Connector Guide
A continuación tiene la definición de pines de los conectores frontales de E/S, también debe consultar el manual de su placa base para comprobar la referencia de los pines para E/S frontales. Los conectores de E/S de SilverStone son de bloque para simplificar la instalación. -
Seite 21: Guide To Hard Drive Backplane
Case Storage CS380 Guide to hard drive backplane 1.There are one 4pin peripheral connector and three 15pin SATA connectors, SAS8 SATA8 please do not connect all of them from one single cable from the power supply. Please connect them with at least two cables directly from the power supply. -
Seite 22: Component Size Limitations
Case Storage CS380 Component Size Limitations The CS380 can accommodate all standard size components and even some that are out of spec, please refer to the following guidelines for component selection and future upgrade considerations: (1) CPU cooler height limitation 146mm Height limitation for CPU cooler is 146mm with 5mm clearance over the motherboard’s top edge Höhenbeschränkung für CPU-Kühler 146 mm mit einem Freiraum von 5 mm oberhalb der Motherboard-Oberkante... - Seite 23 Component Size Limitations (2) Power supply limitation A : Length limitation The length limitation is 250mm. If redundancy is required, we recommended SilverStone’s GM500-ATXG, an ATX redundant power supply that can fit inside the CS380. B : Power supply cable length recommendation Below is the recommended cable length for retail Micro-ATX motherboards.
- Seite 24 Component Size Limitations A : Limitazione della lunghezza l limite di lunghezza è di 250 mm. Se si richiede ridondanza, si consiglia GM500-ATXG di SilverStone, un alimentatore ridondante ATX integrabile con CS380. B : Raccomandazioni sulla lunghezza del cavo d’alimentazione Di seguito sono elencate le lunghezze raccomandate dei cavi d’alimentazione per le schede madre Micro-ATX vendute al dettaglio.
- Seite 25 PCIE 8/6 ピン (最初の拡張スロットまで) 200mm А : 길이 제한 제한 길이는 250mm입니다. 여분의 전원이 필요한 경우, CS380에 꼭 맞는 ATX 예비 전원공급장치인 SilverStone의 GM500-ATXG를 사용할 것을 권장합니다. B : 권장 전원 공급장치 케이블 길이 다음은 소매 Micro-ATX 메인보드용 권장 케이블 길이입니다. 케이블이 충분히 길지 않을 경 웅연장 케이블을 구매하십시오...
- Seite 26 Case Storage CS380 Component Size Limitations (3) Graphics card / expansion card limitation 9.5" (241mm) 5.9" (149mm) There is a length limit of 9.5" (241mm) and width limit of 5.9" (149mm) Es gilt eine Längenbeschränkung von 241,3 mm und eine Breitenbeschränkung von 149,86 mm Il y a une limite de longueur de 9,5"...
-
Seite 27: Optimal Thermal Performance Layout
Case Storage CS380 Optimal Thermal Performance Layout (1) CPU Cooler If you are installing a tower-style CPU cooler, we recommend that the CPU fan blows rearward to work with CS380’s overall airflow d th t th CPU f Falls Sie einen tower-artigen CPU-Kühler installieren, empfehlen wir, den CPU-Lüfter die Luft nach hinten blasen zu lassen, damit er mit der gesamten Luftbewegung im CS380 zusammenarbeitet Si vous installez un dissipateur de processeur de type "tour", nous vous recommandons que le ventilateur du dissipateur souffle vers l'arrière pour fonctionner dans le même sens que le flux d'air généré... - Seite 28 Case Storage CS380 Optimal Thermal Performance Layout (2) GPU Cooler When choosing a graphics card, we recommend models that have fan blowing exhaust air to the rear slot, this will ensure smooth and efficient airflow within the CS380 for maximum cooling performance Bei der Auswahl von Grafikkarten empfehlen wir Modelle, die warme Luft über eine Öffnung im hinteren Teil des Steckplatzes in die Außenwelt ableiten;...
- Seite 29 Case Storage CS380 Optimal Thermal Performance Layout (3) Tips For Cable Management Please refer to the following diagram. The 24pin and graphics card power cables are recommended to not be routed through the back side. CPU 8pin cable can be routed through the top hole. We recommend using two separate 4pin power cables for connecting to backplane. Bitte beachten Sie folgende Abbildung.
-
Seite 30: Upgrade And Maintenance
Case Storage CS380 Upgrade And Maintenance CS380’s positive air pressure design is an effective configuration that will reduce dust buildup inside the case. Small air particles or lint will accumulate over time on intake filters instead of on the components inside the case. To maintain CS380’s excellent cooling performance for years to come, we recommend to clean all fan filters regularly every three months or half a year (depending on your environment). - Seite 31 Case Storage CS380 Upgrade And Maintenance (1) Fan filter removal guide After removing the side panel, loosen plastic pop rivets to remove filter Lösen Sie nach Entfernen der Seitenblende die Kunststoff-Blindnieten zum Entfernen des Filters Après avoir retiré le panneau latéral, desserrez les rivets en plastique pour enlever le filtre Tras retirar el panel lateral, afloje los remaches de plástico para retirar el filtro Dopo aver rimosso il pannello laterale, allentare i rivetti pop in plastica per rimuovere il filtro После...
- Seite 32 Case Storage CS380 Upgrade And Maintenance PSU filter under the bottom panel can be removed by pulling it away from the chassis Den Netzteilfilter unter der oberen Abdeckung ziehen Sie einfach vom Gehäuse ab Le filtre PSU sous le panneau inférieur peut être retiré en le tirant hors du châssis El filtro de la fuente de alimentación bajo el panel inferior se puede retirar tirando de él hacia fuera del chasis Il filtro PSU sotto il pannello inferiore può...
-
Seite 33: Q&A
Case Storage CS380 Q&A Q : There are lots of capacitors on the backplane, what are they used for? A : They provide additional power stability for hot-swapping hard drives F : Ich habe einen Alles-in-Einem-Flüssigkühler an CPU und Grafikkarte; wie installiere ich sie? A : Wir empfehlen, den Kühler der CPU vorne und den Kühler der Grafikkarte hinten zu installieren Q : Il y a beaucoup de condensateurs sur le fond de panier, à... -
Seite 34: Warranty Terms & Conditions
2. Under warranty, SilverStone Technology’s maximum liability is limited to the current market value for the product (depreciated value, excluding shipping, handling, and other fees). SilverStone Technology is not responsible for other damages or loss associated with the use of product. - Seite 36 NO:G11236571...