
Verwandte Anleitungen für Ayce ML-CS37-36

Inhaltszusammenfassung für Ayce ML-CS37-36
- Seite 1 3,6V AKKUSCHRAUBER TOURNEVIS SANS FIL AVVITATORE A BATTERIA CORDLESS SCREWDRIVER GEBRAUCHSANWEISUNG MANUEL D'UTILISATION I INSTRUZIONE PER L’USO I OPERATOR'S MANUAL...
-
Seite 2: Liste Der Hauptteile
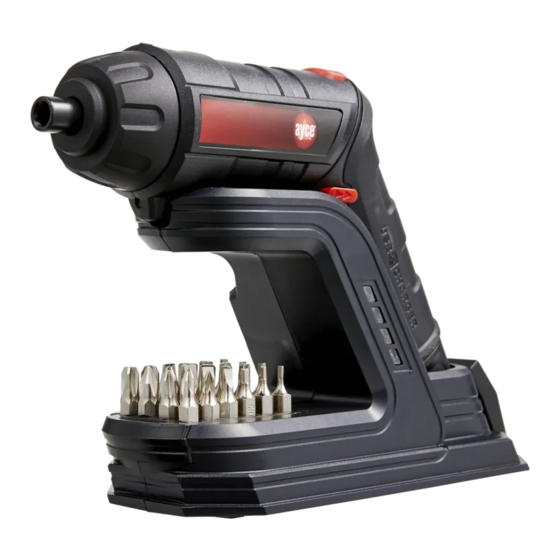
Fach für Bohrer-Bits Docking-Station Ladeprüfanzeige USB-Ladeablage Verriegelungstaste für durchsichtigen Gehäusedeckel USB-Ladekabel Cr-V-Bits, 24 Stk. 1x 60 mm magnetischer bithalter TECHNISCHE SPEZIFIKATIONEN Modell ML-CS37-36 Nennspannung des Akkus DC 3.6 V Akkutyp Li-ion Lastfreie Geschwindigkeit 180/min Drehkrafteinstellung Max. Drehmoment 3.5 Nm Schalldruckpegel LpA (KpA= 3 dB (A)) 57.9 dB(A) -
Seite 3: Bestimmungsgemässer Gebrauch
WARNHINWEIS: e) Verwenden Sie bei Einsatz eines Elektrowerkzeugs im Freien nur für den Ayce Power Tool behält sich das Recht vor, zu jeder Zeit und ohne Vorankündigung die Aussenbereich geeignete Verlängerungskabel. Die Verwendung eines für den Ausführung und technischen Spezifikationen dieses Produktes zu ändern und zu verbessern. -
Seite 4: Zusätzliche Sicherheitsmassnahmen Bezüglich Des Akkus
06 | 6) Wartung lässt. Elektrowerkzeuge, die nicht über den An-/Aus-Schalter geregelt werden a) Lassen Sie das Gerät von qualifiziertem Reparaturpersonal instand setzen, das können, sind gefährlich und müssen repariert werden. ausschliesslich Original-Ersatzteile verwendet. Damit wird sichergestellt, dass die c) Ziehen Sie den Stecker aus der Steckdose und/oder entfernen Sie den Akku, bevor Sicherheit des Elektrogeräts gewahrt bleibt. -
Seite 5: Zusätzliche Sicherheitsmassnahmen Bezüglich Des Ladegerätes
08 | ZUSÄTZLICHE SICHERHEITSMASSNAHMEN BEZÜGLICH DES GERÄUSCH-/VIBRATIONSINFORMATIONEN Ermittlung der Geräuschmesswerte gemäss EN 60745-1 & EN 60745-2-2.. LADEGERÄTES • Dieses Ladegerätes kann von Kindern ab 8 Jahren und darüber verwendet werden Gehörschutz tragen! - Der in diesem Dokument angegebene Schwingungsemissionswert wurde mit einem und von Personen mit eingeschränkten physischen, sensorischen oder geistigen Fähigkeiten oder mangels Erfahrung und Wissen, wenn sie wurden Aufsicht oder Verfahren ermittelt, das dem gemäss EN 60745-1 &... -
Seite 6: Betrieb
10 | BETRIEB Gebrauch nur im Innenbereich AUFLADEN Aufladung des Akkuschraubers WARNUNG: Laden Sie das Gerät an einem sichern Ort in Abwesenheit von Entspricht den CE-Kennzeichnungsvorschriften Feuchtigkeit oder Wärmequellen auf! ANMERKUNG: Während des Ladevorgangs kann das Gerät nicht in Betrieb genommen werden! Recyceln Sie unerwünschte Materialien anstatt diese zu Dieser Lithium-Ionen-Akku wird teilweise aufgeladen ausgeliefert. - Seite 7 12 | 3. Stecken Sie den Ladestecker in die Ladebuchse am Akkuschrauber. 5. Die Ladeleuchte leuchtet grün auf, sobald das Gerät vollständig aufgeladen ist. 4. Legen Sie den Akkuschrauber bzw. die Arbeitsleuchte auf der Docking-Station ab, damit das Gerät aufgeladen wird. DOCKING-STATION Aufladen mit der Docking-Station Die Docking-Station ermöglicht eine saubere und ordentliche Aufbewahrung der Schrauber...
-
Seite 8: Wechseln Der Schrauber-Bits
14 | WECHSELN DER SCHRAUBER-BITS WARNUNG! Ändern Sie niemals die Links-/Rechtsdrehrichtung, während sich Schrauber-Bits einsetzen der Bohrer dreht, da dies ihn beschädigt. Überprüfen Sie stets, dass der Linkslauf- 1. Stecken Sie das Cr-V-Bit direkt in den magnetischen Bit-Halter. /Rechtslauf-Umschalter sich auf der korrekten Stellung für den gewünschten Einsatz befindet! Schieben Sie den Linkslauf-/Rechtslauf-Umschalter stets so weit wie möglich! Verwenden Sie das Gerät nicht, wenn sich der Linkslauf-/Rechtslauf-Umschalter auf... - Seite 9 16 | Drehkraft einstellen Gewinkelte Stellung Drehen Sie den Drehkraft-Einstellring, bis der Pfeil oben am Gerät auf die gewünschte 1. Halten Sie die Sperrtaste für den Handgriff gedrückt. Einstellung zeigt. 2. Drehen Sie den Griff gegen den Uhrzeigersinn, bis er einrastet. Hinweis: Je höher die Zahl, desto grösser ist die Drehkraft.
- Seite 10 18 | D GB b. Schrauben 1. Bohren Sie Löcher für die zu setzenden Schrauben mit einem kleineren Durchmesser vor. 2. Halten Sie das Gerät senkrecht zu der Schraube, die eingeschraubt bzw. entfernt werden soll. Ein Ansatz in einem anderen Winkel kann ein Abrutschen oder Verklemmen des Bits verursachen.
- Seite 11 Fällen von Ihnen zu bezahlen. Zusatzhinweis Servicestelle: Während der Garantiezeit können mängelaufweisende Geräte in jeder Jumbo Filiale zurückgebracht werden. Nach Ablauf der Garantiefrist werden die ayce Produkte in jeder Jumbo Filiale angenommen, damit das Produkt entsprechend geprüft werden kann. CH-Import & Distribution exklusiv durch:...
- Seite 12 22 | EU-Konformitätserklärung 1. Gerätetyp/Produkt: Produkt: 3.6V AKKUSCHRAUBER Typen : ML-CS37-36 Chargen- oder Seriennummer: 1801-2012 2. Name und Anschrift des Herstellers oder seines Bevollmächtigten: CH-Import & Distribution exklusiv durch Jumbo-Markt AG Industriestrasse 34 8305 Dietlikon 3. Die alleinige Verantwortung für die Ausstellung dieser Konformitätserklärung trägt der Hersteller.
-
Seite 13: Technische Zeichnung
24 | TECHNISCHE ZEICHNUNG ERSATZTEILLISTE TEILENAME TEILENAME DREHMOMENT 3-19 MOTORABDECKUNG GABELSCHLÜSSEL ZUM ANPASSEN DES KLICKS BLECHSCHRAUBE DER DREHKRAFTEINSTELLUNG MOTORZAHNRAD SPINDEL MOTOR UNTERLEGSCHEIBE VORDERER GEHÄUSETEIL INNENGEWINDE FEDER FEDER DREHKNOPF SCHEIBE BLECHSCHRAUBE GETRIEBEGEHÄUSE HINTERER GEHÄUSETEIL WELLENSCHUTZHÜLSE SCHALTER STIFT HEBEL SELBSTARRETIERUNG, KERN 3-10 SICHERUNGSRING AKKU 3-11... -
Seite 14: Détails Du Produit
Compartiment de recharge USB Bouton de verrouillage du boîtier transparent Câble de recharge USB 24 mèches en Cr-V 1 porte-embout magnétique 60 mm SPÉCIFICATIONS TECHNIQUES Modèle ML-CS37-36 Tension nominale 3.6V DC Type de batterie Li-ion Régime, n0 180/min Réglage du couple Capacité... -
Seite 15: Domaine D'utilisation
Lorsqu'on utilise un outil à l'extérieur, utiliser un prolongateur adapté à l'utilisat Ayce Power Tool se réserve le droit de modifier et d’améliorer à tout moment et sans ion extérieur. L'utilisation d'un cordon adapté à l'utilisation extérieure réduit le préavis le design et les spécifications techniques de ce produit. - Seite 16 30 | Ne pas utiliser l'outil si l'interrupteur ne permet pas de passer de l'état de CONSIGNES DE SÉCURITÉ COMPLÉMENTAIRES CONCERNANT marche à arrêt et vice versa. T LA BATTERIE rer. Débrancher la fiche de la source d'alimentation en courant et/ou le bloc de AVERTISSEMENT ! batterie de l'outil avant tout réglage, changement d'accessoires ou avant de ranger l'outil.
-
Seite 17: Consignes De Sécurité Spéciales
32 | fabriqués par des enfants sans surveillance. Avertissement : • Avant d’utiliser le chargeur, lisez en totalité le manuel d’utilisation et tous les - L’émission de vibrations durant l’utilisation réelle de l’outil électrique est fonction de marquages la manière dont il est utilisé et peut différer de la valeur totale indiquée. •... - Seite 18 34 | Recycler les matériaux indésirables au lieu de les jeter à RECHARGER la poubelle. Chaque outil et emballage doit être trié et AUFLADEN déposé au centre de recyclage de la région afin d’être Aufladung des Akkuschraubers traité de manière écologique. AVERTISSEMENT : Rechargez le produit dans un endroit sûr à...
-
Seite 19: Station D'accueil
36 | 3. Branchez la prise de recharge dans le point de charge de la station d’accueil. 5. Le voyant de charge passera au vert une fois que l’outil est complètement rechargé. 4. Placez le tournevis/la torche sur la station d’accueil pour permettre à l’outil de se recharger. - Seite 20 38 | REMPLACEMENT DES MÈCHES AVERTISSEMENT : Ne modifiez jamais la position du sélecteur du sens de Insertion des mèches rotation quand la perceuse est en rotation, car cela endommagerait la perceuse. Veillez 1. Insérez la mèche en Cr-V directement dans le support à mèche magnétique. à...
-
Seite 21: Poignée Tournante
40 | Réglage du couple Position angulaire Alignez la flèche en haut de l’outil sur le réglage désiré en faisant pivoter le collier de couple 1. Maintenez enfoncé le bouton de verrouillage de la poignée. de serrage. 2. Faites pivoter la poignée dans le sens contraire des aiguilles d’une montre jusqu’à entendre un clic. - Seite 22 42 | D GB b. Visser une vis 1. Prépercez un trou d’un diamètre inférieur à celui de la vis à visser. 2. Maintenez l’outil perpendiculaire à la vis à visser/dévisser. Si l’outil est positionné de biais, l’embout risque de se coincer ou de riper. 3.
-
Seite 23: Certificat De Garantie
44 | CERTIFICAT DE GARANTIE CARTE DE GARANTIE Félicitations ! Vous avez fait un excellent choix en achetant ce produit de qualité. Prénom Nom de famille Notre engagement de qualité inclut également notre service de reparation. Jumbo offre un excellent service de réparation, pour tous les produitsayce. Rue/N°... - Seite 24 46 | Déclaration UE de conformité 1. Modèle d’appareil/produit Produit : 3.6V TOURNEVIS SANS FIL Type : ML-CS37-36 numéro de lot ou de série: 1801-2012 2. Nom et adresse du fabricant ou de son mandataire: CH-Import & Distribution exklusiv durch...
-
Seite 25: Vue Éclatée
48 | VUE ÉCLATÉE LISTE DES PIÈCES N° Nom de la pièce N° Nom de la pièce COUPLE 3-19 COUVERCLE DU MOTEUR FOURCHETTE DE RÉGLAGE DU COUPLE MANDRIN ENGRENAGE MOTEUR RONDELLE MATE MOTEUR FILETAGE INTÉRIEUR BOÎTIER AVANT PRINTEMPS PRINTEMPS RONDELLE BOUTON ROTATIF BOÎTIER DU CARTER D’ENGRENAGE MANCHON DE PROTECTION D’ARBRE... -
Seite 26: Dettagli Del Prodotto
Indicatore controllo carica Comparto caricatore USB Blocco Cavo di ricarica USB Inserti CRV x 24 1 asta magnetica da 60 mm CARATTERISTICHE TECNICHE Modello ML-CS37-36 Tensione nominale della batteria CC 3.6V Batteria Li-ion Velocità a vuoto 180/min Regolazione coppia Coppia massima 3.5 Nm... -
Seite 27: Uso Previsto
Qualora si lavori all’esterno, utilizzare solo prolunghe concepite per un tale impiego. Ayce Power si riserva il diritto di modificare e migliorare il prodotto e le sue specifiche In questo modo è possibile evitare i rischi di scosse elettriche. -
Seite 28: Manutenzione
54 | ULTERIORI PRECAUZIONI DI SICUREZZA RELATIVE ALLA BATTERIA ) Non utilizzare un apparecchio elettrico se l’interruttore non ne consente l’avvio e l’arresto. t corrett AVVERTENZA! L'apparec tegrat Scollegare l’apparecchio o rimuovere la batteria prima di procedere ad eventuali teria! regolazioni, alla sostituzione degli accessori o prima di riporlo. -
Seite 29: Descrizione Dei Simboli
56 | • Prima di utilizzare il caricabatteria, leggere tutte le istruzioni e le avvertenze sul DESCRIZIONE DEI SIMBOLI caricabatteria 1. Simboli di sicurezza • Il caricabatteria e la batteria forniti sono appositamente progettati per essere L’uso di simboli nel presente manuale ha lo scopo di informare circa i possibili rischi. È utilizzati insieme. -
Seite 30: Funzionamento
58 | FUNZIONAMENTO Separando un prodotto contrassegnato da questo simbolo dai rifiuti domestici, aiuterai a ridurre il volume dei rifiuti Li-ion CARICA destinati agli inceneritori o alle discariche, minimizzando Ricarica della batteria così qualsiasi possibile impatto negativo sulla salute umana e sull’ambiente. AVVERTENZA: Caricare in località... -
Seite 31: Stazione Di Ricarica
60 | 3 Inserire il jack di carica nel punto di ricarica presente sulla stazione di ricarica. 5 La luce dell’indicatore diventa verde quando l’attrezzo è completamente carico. 4 Posizionare l'avvitatore / la torcia sulla stazione di ricarica affinché questo/a possa caricarsi. - Seite 32 62 | CAMBIO DEGLI INSERTI AVVERTENZA! Modificare la direzione solo ad apparecchio spento e Montaggio degli inserti completamente fermo. Assicurare sempre che il controllo avanti/indietro sia regolato 1 Inserire l’inserto CRV direttamente nel portainserti magnetico. in posizione corretta a seconda delle operazioni che si desidera eseguire. Spingere sempre il controllo fino a fine corsa! Non usare mai l'apparecchio con il selettore in posizione intermedia! NOTA: Se si usa il prodotto per la prima volta, dopo aver modificato il controllo,...
- Seite 33 64 | Regolazione della coppia Posizione ad angolo Allineare la freccia sulla sommità dell’attrezzo alla regolazione desiderata ruotando la 1 Tenere premuto il pulsante di blocco dell’impugnatura. ghiera. 2 Ruotare l’impugnatura in senso antiorario fino a quando non scatta in modo udibile in posizione.
- Seite 34 66 | D GB b. Avvitare 1. Pre-forare la superficie con un chiodo di diametro inferiore alla vite da avvitare. 2. Mantenere l'apparecchio perpendicolare alla superficie su cui si desidera avvitare. Tenerlo in modo angolato potrebbe causare lo scivolamento della punta. 3.
-
Seite 35: Certificato Di Garanzia
Durante il periodo di garanzia, gli apparecchi difettosi possono essere restituiti presso qualsiasi punto vendita jumbo. Dopo la scandenza del periodo di garanzia i prodotti ayce vengono accettati presso tutte le filiali jumbo, affinché il prodotto ayce possa essere di nuovo adeguatamente esaminato. - Seite 36 70 | Dichiarazione di conformità UE 1. Modello di apparecchio/Prodotto numero di prodotto : 3.6V AVVITATORE A BATTERIA tipo : ML-CS37-36 lotto o serie: 1801-2012 2. Nome e indirizzo del fabbricante o del suo rappresentante autorizzato: CH-Import & Distribution exklusiv durch...
- Seite 37 72 | VUE ÉCLATÉE LISTE DES PIÈCES Nomi delle parti QTÀ Nomi delle parti QTÀ COPPIA 3-19 COPERTURA DEL MOTORE RASTRELLO CON PROFILO A DIAPASON VITE MANDRINO INGRANAGGIO MOTORE RONDELLA OPACA MOTORE FILETTO INTERNO GUSCIO FRONTALE PRIMAVERA PRIMAVERA RONDELLA PULSANTE ROTAZIONE GUSCIO SCATOLA INGRANAGGI VITE BOCCOLA A INCUDINE...
-
Seite 38: Product Details
Charge Check Indicator USB Charger Compartment Transparent case lock button USB Charging Cable CRV Bits x 24 1x 60mm Magnetic bit holder TECHNICAL SPECIFICATIONS Model ML-CS37-36 Rated voltage 3.6V DC Battery type Li-ion No load speed 180/min Torque setting Max. torque 3.5 Nm... -
Seite 39: Intended Use
Stay alert, watch what you are doing and use common sense when operating a At any time and without prior notice Ayce Power tool reserves the right to change and power tool. Do not use a power tool while you are tired or under the influence of improve the design and the technical specifications of this product. -
Seite 40: Special Safety Instructions
78 | Protect the product against heat. Do not place the product in direct sunlight or use or g) Use the power tool, accessories and tool bits etc. in accordance with these instructions, taking into account the working conditions and the work to be store the product inside cars in hot weather. -
Seite 41: Description Of The Symbols
80 | Conform to CE safety standards. Wear hearing protection! The following information: - That the declared vibration total value has been measured in accordance with a standard test method and may be used for comparing one tool with another; Recycle unwanted materials instead of disposing of them. -
Seite 42: Operation
82 | OPERATION CHARGING Charging the screwdriver WARNING: Charge in a safe location away from moisture or heat sources! NOTE: The product cannot be operated while charging! The battery has been shipped in a low charge condition. Charge it fully before first use. 5 The charge indicator will illuminate green once the tool is completely charged. - Seite 43 85 | 3 Plug the charging jack into the charging point on the docking station. CHANGING DRIVER BITS Inserting Driver Bits 1 Insert the CRV bit directly into the magnetic bit holder. 4 Place the screwdriver / torch onto the docking station to allow the tool to charge. 2 Pull gently on the CRV bit to ensure it is properly secured.
- Seite 44 86 | Adjusting the Torque WARNING! Only change the rotational direction when the product is switched off Align the arrow at the top of the tool with the desired setting by rotating the torque collar. and has come to a complete stop! Always ensure that the forward / reverse rotation control is adjusted to the correct position depending on the intended operation! Always push the forward / reverse rotation control as far as it will go! Do not use the product with the control switch in an intermediate position!
- Seite 45 88 | Angled Position b. Screw driving 1 Hold the handle locking button down. 1. Pre-drill the holes with a smaller diameter of the screw to be screwed. 2. Hold the product perpendicular to the screw to be screwed in/out. Holding it at an angle may cause slipping or jamming of the driver bit.
-
Seite 46: Warranty Certificate
Additional note service center: Defect products can be returned to every jumbo store during the warranty period. After the warranty period, the ayce products are accepted in any jumbo store, so the product may be tested in accordance. CH-Import & Distribution exklusiv durch:... - Seite 47 92 | EU declaration of conformity 1. Apparatus model/Product Product: 3.6V Cordless Screwdriver type: ML-CS37-36 batch or serial number: 1801-2012 2. Name and address of the manufacturer or his authorised representative: CH-Import & Distribution exklusiv durch Jumbo-Markt AG Industriestrasse 34 8305 Dietlikon 3.
-
Seite 48: Technical Drawing
94 | TECHNICAL DRAWING SPARE PARTS LIST No Part Name Part Name TORQUE 3-19 MOTOR COVER TUNING FORK SCREW SPINDLE MOTOR GEAR MAT SLICE MOTOR INNER THREAD FRONT SHELL SPRING SPRING SLICE ROTARY BUTTON GEAR BOX SHELL SCREW BACK SHELL ANVIL SLEEVE SWITCH NEEDLE... - Seite 49 CH-Import & Distribution exklusiv durch: Jumbo-Markt AG Industriestrasse 34 8305 Dietlikon WWW.AYCE.CH...