Herunterladen Inhalt Inhalt Diese Seite drucken
Inhaltsverzeichnis

Werbung

Verfügbare Sprachen
  • DE

Verfügbare Sprachen

  • DEUTSCH, seite 1
de
Gebrauchs- und
Montageanweisung
en
Operating and
installation instructions
fr
Notice de montage
et d'utilisation
nl
Gebruiks- en
montageaanwijzing
it
Istruzioni per l'uso
e l'installatore
es
Instrucciones de uso
y montaje
el
Οδηγίες χρήσης και
τοποθέτησης
de
en
fr
nl
it
es
el

Werbung

Inhaltsverzeichnis
loading

Inhaltszusammenfassung für NEFF D4682X0

  • Seite 1 Gebrauchs- und Montageanweisung Operating and installation instructions Notice de montage et d’utilisation Gebruiks- en montageaanwijzing Istruzioni per l’uso e l’installatore Instrucciones de uso y montaje Οδηγίες χρήσης και τοποθέτησης...
  • Seite 2 Seite 03 – 18 pagina 67 – 082 page 19 – 34 página 83 – 098 page 35 – 50 99 – 114 Σελίδα pagina 51 – 66 Abb. 1 ELEKTRO ELECTR. KAASU ELETT. GASS...
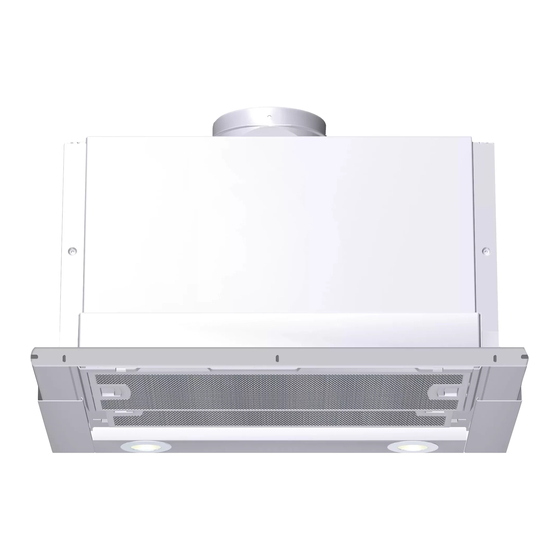
  • Seite 3: Gerätebeschreibung

    Gebrauchsanweisung Gerätebeschreibung Betriebsarten Dies kann erreicht werden, wenn durch nicht verschließbare Öffnungen, z. B. in Türen, Fenstern und in Verbindung mit Zuluft-/Abluftmauerkasten oder durch andere techn. Maßnahmen, wie gegenseitige Verriegelung o. ä., die Verbrennungsluft nachströmen kann. Bei nicht ausreichender Zuluft besteht Vergiftungsgefahr durch zurückgesaugte Verbrennungsgase.
  • Seite 4: Vor Dem Ersten Benutzen

    Vor dem ersten Benutzen Wichtige Hinweise: Bevor Sie das neue Gerät benutzen, Diese Gebrauchsanweisung gilt für lesen Sie bitte sorgfältig die mehrere Geräte-Ausführungen. Gebrauchsanweisung. Es ist möglich, dass einzelne Sie enthält wichtige Informationen für Ihre Ausstattungsmerkmale beschrieben Sicherheit sowie zum Gebrauch und zur sind, die nicht auf Ihr Gerät zutreffen.
  • Seite 5: Bedienen Der Dunstabzugshaube

    Bedienen der Dunstabzugshaube Schalten der Lüfterstufen/Intensivstufe: Der Küchendunst wird am wirkungs- vollsten beseitigt durch: 1. Durch Drücken der Taste können Sie die Lüfterstufen hochschalten bzw. die Einschalten der Dunstabzugshaube ç Intensivstufe einschalten. bei Kochbeginn. In der Intensivstufe wird die höchste Ausschalten der Dunstabzugshaube Leistung erreicht, die nur kurzzeitig erst einige Minuten nach Kochende.
  • Seite 6 Bedienen der Dunstabzugshaube Automatikbetrieb Intervalllüftung Einschalten: Zur Belüftung der Küche im stündlichen Intervall auf kleinster Lüfterstufe, rund Drücken Sie die Taste Ü um die Uhr. Der Lüfter läuft mindestens auf Einschalten: Stufe Drücken Sie die Taste und schieben Sie den Filterauszug ein. Lüfterstufen: Die optimale Lüfterstufe wird über einen Der Lüfter läuft 5 Minuten in Stufe...
  • Seite 7: Einstellen Der Helligkeit

    Bedienen der Dunstabzugshaube Ausschalten: Sonderfunktionen Das Gerät lässt sich im Hand- und Automatisches Einschalten der Automatikbetrieb jeweils auf 2 verschiedene Beleuchtung, z. B. über eine Arten ausschalten. Zeitschaltuhr: Ausschalten direkt: Lüfter und Beleuchtung müssen ausgeschaltet sein. Drücken Sie die Taste Einschalten: Drücken Sie gleichzeitig die Tasten Wichtig: Alle Lüfterfunktionen sind...
  • Seite 8: Filter Und Wartung

    Filter und Wartung Fettfilter: Aus- und Einbauen der Metall-Fettfilter: Achtung: Die Halogenlampen müssen Zur Aufnahme der fettigen Bestandteile ausgeschaltet und abgekühlt sein. des Küchendunstes sind Metall- Fettfilter eingesetzt. 1. Ziehen Sie den Filterauszug bis zum Anschlag aus. Die Filtermatten bestehen aus unbrenn- barem Metall.
  • Seite 9 Filter und Wartung Aktivkohlefilter: Zum Binden der Geruchsstoffe beim Umluftbetrieb. Achtung: Bei zunehmender Sättigung mit fetthaltigen Rückständen erhöht sich die Entflammbarkeit und die Funktion der Dunstabzugshaube kann beeinträchtigt werden. Wichtig: Sättigungsanzeige: Durch rechtzeitigen Wechsel des Bei Sättigung des Aktivkohlefilters Aktivkohlefilters wird der Brandgefahr ertönt nach dem Ausschalten des Lüfters vorgebeugt, die durch Hitzestau beim für 6 Sekunden ein Signal und die Anzeige...
  • Seite 10: Reinigen Und Pflegen

    Reinigen und Pflegen Auswechseln der Lampen Dunstabzugshaube durch Ziehen des 1. Schalten Sie die Dunstabzugshaube aus Netzsteckers bzw. Ausschalten der und machen Sie durch Ziehen des Netz- Sicherung stromlos machen. steckers oder Ausschalten der Sicherung die Dunstabzugshaube stromlos. Beim Reinigen der Fettfilter die zugänglichen Gehäuseteile von Die Halogenbirnen werden bei Betrieb abgelagertem Fett reinigen.
  • Seite 11: Versetzen Des Bedienteiles

    Versetzen des Bedienteiles Einstellung der Sättigungsanzeige Sie können das Bedienteil von der Mitte Sollte die Umstellung der Betriebsart des Filterauszuges an die linke oder (Abluft/Umluftbetrieb) notwendig sein, muss rechte Seite versetzen. auch die Sättigungsanzeige für die Filter Ausserdem kann das Bedienteil vorne in entsprechend umgestellt werden (siehe eine im Sonderzubehör erhältliche, oder Montageanweisung).
  • Seite 12 Montageanweisung: Wichtige Hinweise Über Gas-Kochstellen ist die Montage Altgeräte sind kein wertloser Abfall. der Dunstabzugshaube bei einem Durch umweltgerechte Entsorgung können Mindestabstand von 650 mm wertvolle Rohstoffe wiedergewonnen (bei Dunstabzugshauben mit Automatik- werden. betrieb 700 mm) – Abb. 1 – nur zulässig, Bevor Sie das Altgerät entsorgen, machen wenn folgende Nennwärmebelastungen Sie es unbrauchbar.
  • Seite 13: Vor Der Montage

    Vor der Montage Abluftbetrieb Die Abluft wird über einen Lüftungsschacht Bei nicht ausreichender Zuluft besteht nach oben, oder direkt durch die Außen- Vergiftungsgefahr durch zurückgesaugte wand ins Freie geleitet. Verbrennungsgase. Die Abluft darf weder in einen in Betrieb Ein Zuluft-/Abluftmauerkasten allein stellt befindlichen Rauch- oder Abgaskamin noch die Einhaltung des Grenzwertes nicht in einen Schacht, welcher der Entlüftung...
  • Seite 14 Vor der Montage Abluft nach oben: Optimale Leistung der Dunstabzugs- haube: Ø133/170 Kurzes, glattes Abluftrohr. 28 7 31 3 2 9 3 m i n . Möglichst wenig Rohrbögen. Möglichst große Rohrdurchmesser (am besten l 150 mm) und große Rohr- m in .
  • Seite 15: Vorbereiten Oberschrank

    Vorbereiten Oberschrank 1. Je zwei Befestigungspunkte – rechts Diese Dunstabzugshaube ist zum Ein- bauen in einen Oberschrank mit folgenden und links – an den Schrankinnenseiten Abmessungen vorgesehen: anreißen und mit Stichel vorstechen. Breite: 600 mm Tiefe: 293 bis 350 mm Höhe: mind.
  • Seite 16: Einbauen In Den Oberschrank

    Einbauen in den Oberschrank Ausrichtung der Schranktüre 4. Wandabdeckung falls erforderlich auf kontrollieren, bei Bedarf neu einstellen. das benötigte Maß kürzen (z. B. absägen). 1. Fettfilter abnehmen Wandabdeckung mit den beiliegenden (siehe Gebrauchsanweisung). Klipsen vormontieren. 2. Dunstabzugshaube von unten in den Wandabdeckung am Oberschrank Schrank heben, bis beide Befestigungs- festschrauben.
  • Seite 17: Versetzen Des Bedienteils

    Einbauen in den Oberschrank Sollte die Dunstabzugshaube im Versetzen des Bedienteils: Schrank nach hinten versetzt eingebaut Siehe Gebrauchsanweisung. sein, können die Anschläge für den Filterauszug nach vorne verschoben Montage der Griffleiste: werden. An den Filterauszug muss eine Hierzu Schrauben lösen, Anschläge ver- Griffleiste montiert werden.
  • Seite 18: Elektrischer Anschluss

    Elektrischer Anschluss Ausbauen aus dem Oberschrank Die Dunstabzugshaube darf nur an eine 1. Elektrische Verbindung lösen. vorschriftsmäßig installierte Schutzkontakt- 2. Rohrverbindungen lösen. steckdose angeschlossen werden. Die 3. Filter ausbauen. Schutzkontaktsteckdose möglichst 4. Befestigungsschrauben links und rechts zugänglich in der Nähe der Dunstabzugs- lösen, bis sich die Dunstabzugshaube haube anbringen.
  • Seite 19: Description Of Appliance

    Operating instructions: Description of appliance Operating modes This can be achieved if the combustion air is able to flow through non-lockable openings, e.g. in doors, windows and in conjunction with an air supply/air-intake wall box or by other technical procedures such as reciprocal interlocking.
  • Seite 20: Before Using For The First Time

    Before using for the first time Important notes: Before using your appliance for the first The Instructions for Use apply to several time, please read these Instructions for versions of this appliance. Accordingly, Use carefully. They contain important you may find descriptions of individual information concerning your personal features that do not apply to your safety as well as on use and care of the...
  • Seite 21 Operating the extractor hood Switching on the fan settings/intensive The most effective method of removing setting: vapours produced during cooking is to: 1. To increase the fan settings or switch on Switch the ventilator ON the intensive setting , press the ç...
  • Seite 22 Operating the extractor hood Switching on automatic mode: Intermittent ventilation Used for ventilating the kitchen at hourly Press the button. Ü intervals at the lowest fan setting, round The fan runs at least at Setting the clock. Switching on appliance: Press the button and insert the filter drawer.
  • Seite 23: Switching Off

    Operating the extractor hood Switching off: Special functions There are 2 different methods of switching Switching on the light automatically, e.g. off the appliance whether in manual or via a timer: automatic mode. Fan and light must be switched off. Switching off directly: Switching on: Press the...
  • Seite 24 Filters and maintenance Grease filters: Removing and inserting the metal-mesh grease filters: Metal-mesh filters are used to trap the Warning: The halogen bulbs must be grease particles in the cooking vapours. switched off and cool. The filter mats are made from non- 1.
  • Seite 25 Filters and maintenance Activated carbon filter: For neutralizing odours in recirculating mode. Caution: As the filter becomes more and more saturated with grease, there is an increased risk of fire and the function of the extractor hood may be impaired. Important: Saturation indicator: Change the activated carbon filter promptly...
  • Seite 26: Cleaning And Care

    Cleaning and care Replacing the light bulbs Isolate the extractor hood by pulling out 1. Switch off the extractor hood and pull the mains plug or switching off the fuse. out the mains plug or switch off the electricity supply at the fuse box. When cleaning the grease filters, remove grease deposits from accessible parts of When switched on, the halogen bulbs...
  • Seite 27 Moving the operating unit Setting the saturation indicator You can move the operating unit from If the operating mode is to be switched the middle of the filter drawer to the left over (exhaust air/circulating air mode), the or right side. saturation indicator for the filters must also The operating unit can also be fitted at the be switched over (see Installation...
  • Seite 28: Installation Instructions

    Installation Instructions: Important information The installation of the extractor hood Old appliances are not worthless above gas cooking devices, at a rubbish. Valuable raw materials can be minimum height of 650 mm (or 700 mm reclaimed by recycling old appliances. with automatic cooker hoods) –...
  • Seite 29: Prior To Installation

    Prior to installation Exhaust-air mode The exhaust air is discharged upwards This can be achieved if the combustion air through a ventilation shaft or directly is able to flow through non-lockable through the outside wall into the open. openings, e.g. in doors, windows and in conjunction with an air supply/air-intake wall Exhaust air must not be discharged via box or by other technical procedures such...
  • Seite 30: Before Installation

    Before installation Exhaust air directed upwards: Optimum efficiency of the extractor hood: Ø133/170 Short, smooth exhaust pipe. 28 7 31 3 2 9 3 m i n . As few bends as possible. Pipe diameter as large as possible (ideally 150 mm dia.) and wide pipe m in .
  • Seite 31 Preparing the wall cupboard This extractor hood is designed to be 1. Mark two attachment points on both the installed in a wall cupboard with the follo- right and left inside faces of the cup- wing dimensions: board and make holes with a bradawl. width: 600 mm depth: 293 to 350 mm height: min.
  • Seite 32 Fitting into wall cupboard Check door alignment and readjust if 4. If required, shorten the wall cover to the necessary. required dimension (e.g. saw off). Attach the wall cover with the enclosed 1. Remove grease filter clips. (see Operating instructions). Screw the wall cover to the wall 2.
  • Seite 33 Fitting into wall cupboard If the extractor hood is to be installed Moving the operating unit: further back in the cupboard, the stops See Operating instructions. for the filter drawer can be moved forwards. Attaching the handle moulding: To do this, undo the screws, move the A handle moulding must be attached to stops and retighten the screws.
  • Seite 34: Electrical Connection

    Electrical connection If permanent connection is required: WARNING: THIS APPLIANCE MUST BE EARTHED The extractor hood may only be connected by an electrician registered with the local IMPORTANT: Fitting a Different Plug: electricity board. The wires in the power cord are colour- A disconnecting device must be provided coded as follows: on the installation side.
  • Seite 35: Description De L'appareil

    Mode d’emploi: Description de l'appareil Modes de fonctionnement On y parvient en présence d'ouvertures non obturables ménagées par ex. dans les por- tes, fenêtres et en association avec des ventouses télescopiques d'admission/ évacuation de l'air à travers la maçonnerie ou par d'autres mesures techniques telles qu'un verrouillage réciproque ou assimilé...
  • Seite 36: Avant La Première Utilisation

    Avant la première utilisation Remarques importantes: Lisez attentivement la présente notice La présente notice d'emploi vaut pour d'emploi avant d'utiliser votre appareil plusieurs versions de l'appareil. pour la première fois. Elle contient des Elle peut contenir des descriptions informations importantes non seulement d'accessoires ne figurant pas dans votre pour votre sécurité...
  • Seite 37: Utilisation De La Hotte Aspirante

    Utilisation de la hotte aspirante Réglage des puissances d'aspiration / La méthode la plus efficace pour de l'aspiration intensive: supprimer les buées de cuisson consiste à: 1. En appuyant sur la touche , vous Enclencher la hotte aspirante augmentez la puissance d'aspiration en début de cuisson.
  • Seite 38 Utilisation de la hotte aspirante Mode automatique Aspiration intermittente Enclenchement: Elle permet de ventiler la cuisine une fois par heure pendant 24 heures en utilisant Appuyez sur la touche Ü la puissance d'aspiration la plus basse. Le ventilateur fonctionne au moins sur la Enclenchement: puissance Appuyez sur la touche...
  • Seite 39: Réglage De La Luminosité

    Utilisation de la hotte aspirante Pour débrancher: Fonctions spéciales L’appareil peut être débranché de deux Enclenchement automatique de manières en fonctionnement manuel et en l'éclairage, par ex. au moyen d'un fonctionnement automatique. minuteur: Pour débrancher directement: Le ventilateur et l'éclairage doivent être éteints.
  • Seite 40 Filtre et entretien Filtres à graisse: Retrait et mise en place des filtres à graisse en métal: Vous pouvez utiliser divers filtres pour Attention: les ampoules halogènes doivent retenir les particules grasses en s'être éteintes et avoir refroidi. suspension dans les buées de cuisson. 1.
  • Seite 41 Filtre et entretien Filtre à charbon actif: Ce filtre sert à retenir les substances odoriférantes lorsque la hotte recycle l'air. Attention: Plus elles se saturent en particules grasses et plus elles risquent de s'enflammer. D'autre part, leur saturation risque de gêner le bon fonctionnement de la hotte.
  • Seite 42: Nettoyage Et Entretien

    Nettoyage et entretien Changer les ampoules halogènes Avant tout nettoyage et entretien, mettez 1. Avant tout nettoyage et entretien, mettez d'abord la hotte hors tension en débran- d'abord la hotte hors tension en chant la fiche mâle de la prise de courant débranchant la fiche mâle de la prise de ou en coupant le disjoncteur/fusible.
  • Seite 43 Déplacement du bandeau de Réglage de l'indicateur de saturation commande S'il faut convertir la hotte sur un autre mode (par ex. du mode Air évacué au mode Air Vous pouvez déplacer le bandeau de recyclé), vous devrez aussi modifier en commande, du milieu du tiroir-filtre vers conséquence l'indicateur de saturation du le côté...
  • Seite 44 Notice de montage: Remarques importantes Le montage de la hotte aspirante à la Les anciens appareils ne sont pas des distance minimum de 650 mm au-dessus déchets sans valeur. de foyers au gaz (700 mm pour les hottes Leur élimination respectueuse de aspirantes à...
  • Seite 45: Avant Le Montage

    Avant le montage Evacuation de l'air à l'extérieur L'air vicié est évacué vers le haut par un On y parvient en présence d'ouvertures non conduit d'aération ou directement à l'air obturables ménagées par ex. dans les por- libre par traversée du mur extérieur. tes, fenêtres et en association avec des ventouses télescopiques d'admission/ L'air vicié...
  • Seite 46 Avant le montage Air vicié évacué vers le haut: Pour que la hotte aspirante ait le meilleur rendement, veillez à ce que: Ø133/170 28 7 Le conduit d'évacuation soit court et lisse. 31 3 2 9 3 m i n . Il ait le moins possible de coudes.
  • Seite 47 Préparation du placard en appui mural Cette hotte aspirante a été prévue pour 1. Sur les côtés intérieurs du placard, être encastrée dans un placard en appui marquez les emplacements de quatre mural faisant les dimensions suivantes: points de fixation: 2 à droite et 2 à gauche.
  • Seite 48 Encastrement dans le placard en appui mural Contrôler l'alignement de la porte du 4. Si nécessaire, raccourcissez la coiffe placard. La réaligner si nécessaire. murale jusqu'à la dimension voulue (sciez-la par ex.) 1. Retirez les filtres à graisse A l'aide des clips ci-joints, montez (voir la notice d'utilisation).
  • Seite 49 Encastrement dans le placard en appui mural Si vous voulez monter la hotte plus Déplacement du bandeau de enfoncée dans le placard, vous pouvez commande: avancer les butées du tiroir-filtre. Voir la notice d'utilisation. Pour ce faire, défaites les vis, déplacez Montage de la poignée: les butées puis revissez les vis à...
  • Seite 50: Branchement Électrique

    Branchement électrique Extraction du placard mural La hotte aspirante ne pourra être 1. Défaites le branchement électrique. raccordée qu'à une prise à contacts de terre 2. Défaites les jonctions de conduit. réglementairement posée. Installez cette 3. Démontez le filtre. prise à un endroit le plus accessible possible à...
  • Seite 51: Gebruik Met Circulatielucht

    Gebruiksaanwijzing: Beschrijving van het apparaat Gebruiksmogelijkheden Dit kan men bereiken wanneer er door niet-afsluitbare openingen, bijv. in deuren, ramen en d.m.v. luchtaanvoer-/ luchtafvoersleuven in de muur of door andere technische maatregelen, zoals wederzijdse vergrendeling e.d., verbrandingslucht kan toestromen. Wanneer er onvoldoende lucht wordt aangevoerd, bestaat er vergiftigingsge- vaar door teruggezogen verbrandings- gassen.
  • Seite 52: Vóór Het Eerste Gebruik

    Vóór het eerste gebruik Belangrijke aanwijzingen: Lees de gebruiksaanwijzing zorgvuldig Deze gebruiksaanwijzing geldt voor voordat u het nieuwe apparaat gebruikt. verschillende uitvoeringen van het Ze bevat belangrijke informatie voor uw apparaat. Het is mogelijk dat er een veiligheid en voor het gebruik en het aantal kenmerken worden beschreven onderhoud van het apparaat.
  • Seite 53 Bedienen van de wasemafzuigkap Bedienen van de De keukenwasem wordt op de ventilatorstanden/intensieve stand: doeltreffendste manier verwijderd door: 1. Door op de toets te drukken, kunt u Inschakelen van de afzuigkap een hogere ventilatorstand of de bij het begin van het koken. ç...
  • Seite 54 Bedienen van de wasemafzuigkap Automatische bediening Intervalventilatie Inschakelen: Voor ventilatie van de keuken op de laagste ventilatorstand met een interval Druk op de toets Ü van een uur gedurende de hele dag. De ventilator loopt minimaal op stand Inschakelen: Druk op de toets en schuif de filterlade naar binnen.
  • Seite 55 Bedienen van de wasemafzuigkap Uitschakelen: Speciale functies Het apparaat laat zich in hand- en Automatisch inschakelen van de automatisch bedrijf telkens op twee verlichting, bijv. via een tijdschakelaar: verschillende manieren uitschakelen. Ventilator en verlichting moeten Uitschakelen direct: uitgeschakeld zijn. Druk op de toets Inschakelen: Druk gelijktijdig op de toetsen Belangrijk: Alle ventilatorfuncties zijn...
  • Seite 56 Filter en onderhoud Vetfilters: Metalen vetfilters verwijderen en aanbrengen: Voor de opname van de vettige bestand- Attentie: De halogeenlampen moeten delen van de keukenwasem worden uitgeschakeld en afgekoeld zijn. metalen vetfilters gebruikt. 1. Trek de filterlade tot aan de aanslag naar De filtermatten bestaan uit onbrandbaar buiten.
  • Seite 57 Filter en onderhoud Koolstoffilter: Voor het opnemen van de reukstoffen als de afzuigkap werkt met luchtcirculatie. Let op: Bij toenemende verzadiging met vethoudende resten neemt de ontvlam- baarheid toe en kan de werking van de wasemafzuigkap nadelig worden beïnvloed. Verzadigingsaanduiding: Belangrijk: Bij verzadiging van het actieve-koolfilter Door het koolstoffilter op tijd te vervangen,...
  • Seite 58: Reiniging En Onderhoud

    Reiniging en onderhoud Lamp vervangen Wasemafzuigkap stroomloos maken 1. Schakel de wasemafzuigkap uit en maak door de stekker uit het stopcontact te het apparaat stroomloos door de stekker trekken of de zekering uit te schakelen. uit het stopcontact te trekken of de zekering uit te schakelen.
  • Seite 59 Verplaatsen van het Instelling van de bedieningspaneel verzadigingsaanduiding U kunt het bedieningspaneel verplaatsen Als een verandering van de afvoerkap (wer- van het midden van de filterlade naar de king met luchtafvoer of met luchtcirculatie) linker- of rechterkant. nodig is, moet de verzadigingsaanduiding Bovendien kan het bedieningspaneel voor- voor de filters overeenkomstig worden aan worden gemonteerd in een als extra...
  • Seite 60 Montagevoorschrift: Belangrijke voorschriften Boven een gasfornuis is de montage Oude apparaten zijn geen waardeloos bij een minimumafstand van 650 mm (bij afval. Door een milieubewuste afvoer wasemafzuigkappen met automatische kunnen waardevolle materialen opnieuw werking 700 mm) – afb. 1 – alleen worden gebruikt.
  • Seite 61: Voor De Montage

    Voor de montage Afzuigkap met luchtafvoer De afvoerlucht wordt via een afvoerschacht Dit kan men bereiken wanneer er door naar boven of rechtstreeks door de niet-afsluitbare openingen, bijv. in deuren, buitenmuur naar buiten geleid. ramen en d.m.v. luchtaanvoer-/ luchtafvoersleuven in de muur of door De afvoerlucht mag niet worden andere technische maatregelen, zoals afgevoerd via een in gebruik verkerende...
  • Seite 62: Vóór De Montage

    Vóór de montage Luchtafvoer naar boven: Voor een optimaal vermogen van de wasemafzuigkap: Ø133/170 Korte, gladde afvoerpijp. 28 7 31 3 2 9 3 m i n . Zo weinig mogelijk pijpbochten. Zo groot mogelijke buisdiameter (optimaal 150 mm ø) en grote buisboch- m in .
  • Seite 63 Voorbereiding bovenkast Deze wasemafzuigkap is bedoeld voor 1. Links en rechts aan de binnenzijden van montage in een bovenkast met de de kast twee bevestigingspunten volgende afmetingen: aftekenen en met een priem voorsteken. Breedte: 600 mm Diepte: 293 tot 350 mm Hoogte: min.
  • Seite 64 Inbouwen in de bovenkast Uitlijning van de kastdeuren 4. Indien nodig de muurafdekking inkorten controleren, indien nodig opnieuw uitlijnen. tot de juiste maat (bijv. afzagen). Muurafdekking voormonteren met 1. Vetfilter verwijderen behulp van de bijgevoegde clips. (zie de gebruiksaanwijzing). Muurafdekking vastschroeven aan de 2.
  • Seite 65 Inbouwen in de bovenkast Indien de wasemafzuigkap achterin de Verplaatsen van het kast is gemonteerd, kunnen de bedieningspaneel: aanslagen voor de filterlade naar voren Zie de gebruiksaanwijzing. worden verschoven. Hiertoe de schroeven losdraaien, de Montage van de handgreep: aanslagen verschuiven en de schroeven Op de uitschuifbare filterhouder moet weer vastdraaien.
  • Seite 66: Elektrische Aansluiting

    Elektrische aansluiting Verwijderen uit de bovenkast De wasemafzuigkap mag alleen worden 1. Verbinding met het elektriciteitsnet aangesloten op een volgens de verbreken. voorschriften geïnstalleerd geaard 2. Buisverbindingen losmaken. stopcontact. Het geaarde stopcontact 3. Filters verwijderen. moet goed bereikbaar worden aangebracht in de buurt van de wasemafzuigkap.
  • Seite 67: Modi Di Funzionamento

    Istruzioni per l’uso: Descrizione dell'apparecchio Modi di funzionamento È possibile conseguire ciò quando l'aria per la combustione può continuare ad affluire attraverso aperture non chiudibili, per es. in di porte, finestre ed in combinazione con cassette murali per l'alimentazione/ espulsione dell'aria o con altre misure tecniche, come interdizione reciproca e simili.
  • Seite 68 Precede la prima utilizzazione Primo impiego: Prima di usare il nuovo apparecchio, leg- Questo libretto di istruzioni per l'uso gete attentamente le istruzioni per l'uso. è previsto per più versioni dell' Esse contengono informazioni importanti apparecchio. É possibile che siano per la Vostra sicurezza, e anche per l'uso descritti singoli particolari della dotazio- e la manutenzione dell'apparecchio.
  • Seite 69: Uso Della Cappa Aspirante

    Uso della cappa aspirante Commutazione dei gradi di Per eliminare nel modo più efficace i aspirazione/massima potenza: vapori di cottura: 1. Premendo il pulsante potete Accendere la cappa aspirante aumentare i gradi di aspirazione o all'inizio della cottura. ç inserire la massima potenza Spegnere la cappa aspirante La massima potenza deve essere solo alcuni minuti dopo la fine della...
  • Seite 70 Uso della cappa aspirante Funzionamento automatico Aspirazione intermittente Accendere: Per la ventilazione della cucina ad intervalli di un'ora al grado di aspirazione Premete il pulsante Ü minimo e su tutto l'arco del giorno. La ventola funziona almeno al grado Accendere: Premere il pulsante e spingere nell’interno il filtro estraibile.
  • Seite 71: Regolazione Della Luminosità

    Uso della cappa aspirante Disinserimento: Funzioni speciali Nel funzionamento manuale ed automatico, Accensione automatica della luce, per l’apparecchio si disinserisce in 2 modi es. mediante un interruttore a tempo: diversi. Ventole e illuminazione devono essere Disinserimento diretto: spente. Premere il pulsante Attivazione: Premere contemporaneamente i pulsanti Importante: tutte le funzioni delle ventole...
  • Seite 72 Filtri e manutenzione Filtro grassi: Smontaggio e montaggio dei filtri metallici per grassi: Per trattenere i componenti grassi dei Attenzione: le lampadine alogene devono vapori di cottura si utilizzano filtri essere spente e raffreddate. metallici per grassi. 1. Estrarre il filtro fino all’arresto. Le stuoie filtro sono costituite da materiale ininfiammabile.
  • Seite 73 Filtri e manutenzione Filtro a carbone attivo: Per fissare gli odori nel funzionamento a ricircolo d'aria. Attenzione: A causa della progressiva saturazione con residui grassi, l'infiammabilità aumenta, e il funzionamento della cappa aspirante può essere pregiudicato. Indicazione di saturazione: Importante: quando il filtro a carbone attivo è...
  • Seite 74: Pulizia E Manutenzione

    Pulizia e manutenzione Cambio delle lampade Togliere corrente alla cappa aspirante 1. Spegnere la cappa aspirante e togliere estraendo la spina di alimentazione, corrente sfilando la spina di alimenta- oppure togliendo il fusibile. zione, oppure togliendo il fusibile. Quando si lavano i filtri per grassi, pulire Le lampadine alogene accese si anche i depositi di grasso sulle parti surriscaldano.
  • Seite 75 Spostamento dell’elemento di Regolazione dell'indicazione di comando saturazione Se fosse necessaria la commutazione del L’elemento di comando può essere spostato dal centro del filtro estraibile tipo di funzionamento (ad espulsione sul lato sinistro oppure sul lato destro. d’aria/a ricircolo d'aria) deve essere Inoltre l’elemento di comando può...
  • Seite 76 Istruzioni per il montaggio: Avvertenze importanti Sopra a fornelli a gas il montaggio Gli apparecchi dismessi non sono rifiuti della cappa aspirante è ammesso ad una senza valore. distanza minima di 650 mm (per cappe Attraverso lo smaltimento ecologico aspiranti automatiche 700 mm) – fig. 1 – possono essere recuperati materiali solo se non si superano i carichi termici pregiati.
  • Seite 77: Prima Del Montaggio

    Prima del montaggio Funzionamento ad espulsione d’aria L'aria di scarico viene condotta verso l'alto, È possibile conseguire ciò quando l'aria per la combustione può continuare ad affluire attraverso un pozzo di ventilazione, oppure attraverso aperture non chiudibili, per es. in direttamente all'aperto, attraverso la parete di porte, finestre ed in combinazione con esterna.
  • Seite 78 Prima del montaggio Scarico verso l'alto: Rendimento ottimale della cappa aspirante: Ø133/170 Tubo di scarico corto, liscio. 28 7 31 3 2 9 3 m i n . Il minor numero possibile di gomiti di tubo. Massimo diametro possibile del tubo m in .
  • Seite 79 Preparazione del pensile Questa cappa aspirante è prevista per il 1. Tracciare rispettivamente due punti di montaggio in un pensile con le seguenti fissaggio – a destra e a sinistra – sui lati dimensioni: interni del pensile e praticare con un punteruolo fori preliminari.
  • Seite 80 Montaggio nel pensile Controllare l'allineamento della porta 4. Accorciare la lista di copertura per la del pensile, se necessario regolare di parete, se necessario, alla misura nuovo. richiesta (per es. segarla). Montare preliminarmente la lista di 1. Smontare il filtro grassi copertura per la parete con le accluse (vedi istruzioni per l’uso) mollette.
  • Seite 81 Montaggio nel pensile Se la cappa aspirante dovesse essere Spostamento dell’elemento di montata spostata indietro nel pensile, gli comando: arresti per l'estraibile del filtro possono Vedi istruzioni per l’uso. essere spostati in avanti. A tale scopo allentare le viti, spostare gli Montaggio della maniglia integrata: arresti e stringere di nuovo.
  • Seite 82: Allacciamento Elettrico

    Allacciamento elettrico Smontaggio dal pensile La cappa aspirante deve essere collegata 1. Staccare l'alimentazione elettrica. solo ad una presa con contatto di terra instal- 2. Staccare il tubo. lata a norma. Installare la presa con contatto di 3. Smontare i filtri. terra in luogo possibilmente accessibile, in prossimità...
  • Seite 83: Modalidades De Funcionamiento

    Instrucciones para el uso: Modalidades de funcionamiento Descripción del aparato Para ello, es necesario que existan aperturas no bloqueables por las que el aire de combustión pueda renovarse y ventilarse sin dificultad, por ejemplo por puertas, ventanas o cajas murales para la ali- mentación o evacuación del aire o también pueden tomarse otras otras medidas como por ejemplo instalando...
  • Seite 84: Antes De La Primera Utilización

    Antes de la primera utilización Antes de la puesta en marcha inicial Antes de emplear el aparato nuevo del aparato: deberá leer detenidamente las instrucciones de servicio de la cocina Las presentes instrucciones de servicio eléctrica. son válidas para diferentes modelos de En ella se facilitan informaciones y aparato;...
  • Seite 85 Manejo de la campana extractora Seleccionar los escalones de potencia La manera más eficaz de absorber los del ventilador / Escalón intensivo: vahos producidos en la cocina durante la 1. Pulsando la tecla se puede aumentar preparación de los alimentos es: la potencia del ventilador o ajustar el Conectando la campana extractora ç...
  • Seite 86: Funcionamiento A Intervalos

    Manejo de la campana extractora Funcionamiento automático Funcionamiento a intervalos Conexión: Para ventilar la cocina en intervalos de una hora, con el ventilador ajustado a la Pulsar la tecla Ü mínima potencia, las veinticuatro horas El ventilador trabaja como mínimo, en el del día.
  • Seite 87 Manejo de la campana extractora Desconexión: Funciones especiales En el funcionamiento manual y automático, Activación automática de la iluminación, el aparato puede ser desconectado de 2 por ejemplo a través de un maneras diferentes. temporizador: Desconexión directa: El ventilador y la iluminación tienen que estar desconectados.
  • Seite 88 Filtros y mantenimiento Filtro antigrasa: Desmontar y montar los filtros antigrasa metálicos: Para retener las partículas de grasa ¡Atención! Las lámparas halógenas tienen contenidas en el vaho de la cocina se que estar desconectadas y frías. montan filtros metálicos. 1. Desplegar completamente el cajón de Las esterillas de filtro son de metal filtro extraíble, hasta el tope.
  • Seite 89 Filtros y mantenimiento Filtro de carbón activo: Para retener los olores durante el funcionamiento de la campana extractora con evacuación del aire al interior (recirculación del aire). ¡Atención! A medida que crece el grado de saturación de la esterilla de filtro con partículas de grasa, aumenta su inflamabilidad, influyendo negativamente en el Indicación del grado de...
  • Seite 90: Limpieza Y Cuidados

    Limpieza y cuidados Sustituir las lámparas Desconectar la campana extractora de la 1. Desconectar la campana extractora de red eléctrica extrayendo el cable de la red eléctrica,.extrayendo el cable de conexión de la toma de corriente o a conexión de la toma de corriente o a través del fusible.
  • Seite 91 Cambiar de posición el cuadro Ajustar la indicación del grado de mandos de saturación del filtro El cuadro de mandos de la campana se En caso de que fuera necesario modificar la puede desplazar de la posición central modalidad de funcionamiento de la campa- sobre el cajón de filtro extraíble al lado na extractora de evacuación del aire al derecho o izquierdo.
  • Seite 92 Instrucciones de montaje: – Advertencias importantes Esta campana extractora sólo deberá Los aparatos eléctricos usados incorporan materiales valiosos que se pue- montarse con un lateral junto a un armario o den recuperar. Por ello deberán entregarse a pared alta. Distancia mínima a observar: dicho efecto en un centro oficial de recogida 300 mm.
  • Seite 93: Antes Del Montaje

    Antes del montaje Funcionamiento con evacuación del aire al exterior El aire de evacuación pasa a través de un Esto se puede lograr a través del libre acceso del aire de combustión a través de túnel de ventilación hacia arriba o unas aberturas sin posibilidad de cierre ni directamente hacia el exterior, a través de la bloqueo, por ejemplo puertas, ventanas,...
  • Seite 94 Antes del montaje Evacuación del aire al exterior, hacia Optima potencia de la campana arriba: extractora: Ø133/170 28 7 31 3 Tubo de evacuación corto y liso. 2 9 3 m i n . Menor número de codos posible. Usar tubos de gran diámetro m in .
  • Seite 95 Preparar el armario superior Esta campana extractora ha sido diseña- 1. Marcar dos puntos de fijación por cada da para su montaje en un armario superior lateral, en el interior del armario. con las siguientes medidas: Perforarlos con un buril. Anchura: 600 mm Profundidad: 293 a 350 mm...
  • Seite 96 Montaje de la campana en el armario superior Verificar la posición de la puerta del 4. Adaptar el revestimiento mural a las armario. En caso necesario, alinearla de medidas necesarias (cortándolo con nuevo. una sierra, por ejemplo). Premontar el revestimiento mural con 1.
  • Seite 97 Montaje de la campana en el armario superior En caso de montar la campana en el Cambiar de posición el cuadro de armario superior en posición desplazada mandos: hacia atrás, se pueden desplazar los Véanse las instrucciones de uso. topes del cajón de filtro extraíble hacia adelante.
  • Seite 98: Conexión Eléctrica

    Conexión eléctrica Desmontar la campana extractora del armario superior La campana extractora sólo podrá conectar- se a una toma (caja) de corriente provista de 1. Desempalmar la conexión a la red puesta a tierra. La toma de corriente deberá eléctrica. encontrarse o montarse lo más cerca posible 2.
  • Seite 99 Οδηγίες χρήσεως Περιγραφή της συσκευής Τρ ποι λειτουργίας Αυτ µπορεί να επιτευχθεί, ταν χάρη σε ανοίγµατα που δεν κλείνουν, π.χ. σε π ρτες, παράθυρα και σε συνδυασµ µε πλαίσιο εντοιχισµού εισ δου/εξ δου αέρα ή χάρη σε άλλα τεχνικά µέτρα, πως αµοιβαία...
  • Seite 100: Πριν Την Πρώτη Χρήση

    Πριν την πρώτη χρήση Σπουδαίες υποδείξεις: Tο παρ ν εγχειρίδιο οδηγιών χρήσης Προτού χρησιµοποιήσετε την καινούρ- για συσκευή, διαβάστε µε προσοχή τις ισχύει για διάφορα µοντέλα της οδηγίες χρήσης. Περιέχουν σηµαντικές συσκευής. Eνδέχεται ορισµένα µεµονωµένα χαρακτηριστικά του εξο- πληροφορίες για την ασφάλειά σας καθώς...
  • Seite 101 Χειρισµ ς του απορροφητήρα κουζίνας Ρύθµιση των βαθµίδων των Οι ατµοί κουζίνας µπορούν να αεριστήρων/Εντατική βαθµίδα: απορροφηθούν µε τον πλέον αποτελεσµατικ τερο τρ πο: Πατώντας το πλήκτρο µπορείτε να ρυθµίσετε τους αεριστήρες σε θέτοντας τον αεριστήρα σε λειτουργία υ“ηλ τερη βαθµίδα ή αντίστοιχα στην κατά...
  • Seite 102 Χειρισµ ς του απορροφητήρα κουζίνας Αυτ µατη λειτουργία Αερισµ ς κατά διαστήµατα: Θέση σε λειτουργία: Για τον αερισµ της κουζίνας λο το εικοσιτετράωρο ανά µία ώρα, στη Πατήστε το πλήκτρο Ü χαµηλ τερη βαθµίδα του αεριστήρα. Ο αεριστήρας ξεκινά τουλάχιστον στη βαθµίδα...
  • Seite 103 Χειρισµ ς του απορροφητήρα κουζίνας Θέση εκτ ς λειτουργίας: Ειδικές λειτουργίες Η συσκευή µπορεί να τεθεί τ σο στη Αυτ µατη ενεργοποίηση του φωτισµού, λειτουργία µε το χέρι σο και στην π.χ. µέσω χρονοδιακ πτη: αυτ µατη λειτουργία κατά δύο τρ πους Ο...
  • Seite 104 Φίλτρα και συντήρηση Φίλτρα λιπών: Αφαίρεση και τοποθέτηση των µεταλλικών φίλτρων λιπών: Για την πρ σληψη των λιπαρών Προσοχή: Οι λαµπτήρες αλογ νου πρέπει συστατικών του ατµού της κουζίνας έχουν να είναι σβηστοί και να έχουν κρυώσει. τοποθετηθεί στη συσκευή µεταλλικά φίλτρα...
  • Seite 105 Φίλτρα και συντήρηση Φίλτρο ενεργού άνθρακα: Για τη συγκράτηση των οσµηρών ουσιών κατά τη λειτουργία ανακύκλωσης αέρα. Προσοχή: Με την αύξηση του κορεσµού των φίλτρων µε κατάλοιπα που περιέχουν λίπος, αυξάνεται η δυνατ τητα ανάφλεξης αυτού και µπορεί να εµποδίζεται η λειτουργία...
  • Seite 106: Καθαρισµ Σ Και Περιποίηση

    Καθαρισµ ς και περιποίηση Αλλαγή των λαµπτήρων Αποµονώνετε τον απορροφητήρα 1. Θέτετε τον απορροφητήρα κουζίνας κουζίνας απ το ηλεκτρικ ρεύµα εκτ ς λειτουργίας και τον τραβώντας το φις απ την πρίζα ή αποµονώνετε απ το ηλεκτρικ ρεύµα αντίστοιχα κατεβάζοντας την ασφάλεια. τραβώντας...
  • Seite 107 Ρύθµιση της ένδειξης Μετατ πιση του πεδίου κορεσµού των φίλτρων χειρισµού Σε περίπτωση που είναι απαραίτητη η Μπορείτε να µετατοπίσετε το πεδίο χειρισµού απ το κέντρο του συρ µενου ρύθµιση του είδους λειτουργίας φίλτρου στην αριστερή ή τη δεξιά πλευρά. (απορρ...
  • Seite 108 Οδηγίες Τοποέτησης: Σηµαντικές υποδείξεις Πάνω απ "µάτια" υγραερίου η Οι παλιές συσκευές δεν αποτελούν τοποθέτηση του απορροφητήρα άχρηστα απορρίµµατα. Με την απ συρσή επιτρέπεται µε την ελάχιστη απ σταση τους σύµφωνα µε τους κανονισµούς για των 650 mm (σε απορροφητήρες µε την...
  • Seite 109 Πριν την τοποθέτηση Λειτουργία απορρ φησης ακάθαρτου αέρα Ο ακάθαρτος αέρας διοχετεύεται µέσω Αυτ µπορεί να επιτευχθεί, ταν χάρη σε ανοίγµατα που δεν κλείνουν, π.χ. σε µιας καταπακτής προς τα πάνω ή π ρτες, παράθυρα και σε συνδυασµ µε καταλήγει απευθείας στο ύπαιθρο πλαίσιο...
  • Seite 110 Πριν την τοποθέτηση Απαγωγή ακάθαρτου αέρα προς τα Ιδανική απ δοση του απορροφητήρα κουζίνας: πάνω: Ø133/170 Κοντ ς λείος σωλήνας απορρ φησης 28 7 31 3 2 9 3 m i n . ακάθαρτου αέρα. Κατά το δυνατ ν λιγ τερες γωνιακές συνδέσεις.
  • Seite 111 Προετοιµασία επάνω ερµαρίου Ο απορροφητήρας αυτ ς έχει προβλεφθεί Χαράξτε απ δύο σηµεία στερέωσης – για την τοποθέτηση σε επάνω ερµάριο µε δεξιά και αριστερά – στις εσωτερικές τις ακ λουθες διαστάσεις: πλευρές του ερµαρίου και ποντάρετέ τα µε σουβλί. Πλάτος: 600 mm Βάθος: 293 έως...
  • Seite 112 Τοποθέτηση στο επάνω ερµάριο 4. Αν χρειάζεται κοντύνετε το Ελέγξτε την ευθυγράµµιση του ερµαρίου, αν χρειάζεται ευθυγραµµίστε κάλυµµα τοίχου στις απαιτούµενες εκ νέου. διαστάσεις (π.χ. µε το πρι νι). Τοποθετήστε το κάλυµµα τοίχου Αφαιρέστε το φίλτρο λιπών προκαταρκτικά µε τα κλιπ που (βλ.
  • Seite 113 Τοποθέτηση στο επάνω ερµάριο Σε περίπτωση που ο απορροφητήρας Μετατ πιση του πεδίου χειρισµού: τοποθετηθεί µέσα στο ερµάριο Βλ. Οδηγίες χρήσης. µετατοπισµένος προς τα πίσω, µπορούν να µετατοπιστούν τα στοπ για Συναρµολ γηση του πήχη λαβής: τη συρ µενη υποδοχή ατµού µε φίλτρο προς...
  • Seite 114 Σύνδεση στο δίκτυο του Αφαίρεση απ το επάνω ερµάριο ηλεκτρικού ρεύµατος 1. ∆ιακ ψτε την ηλεκτρική σύνδεση. Ο απορροφητήρας επιτρέπεται να συνδεθεί 2. Λύστε τις σωληνοσυνδέσεις. µ νο σε πρίζα σούκο εγκατεστηµένη 3. Αφαιρέστε τα φίλτρα. σύµφωνα µε τις προδιαγραφές. Τοποθετήστε...
  • Seite 115 Z5144X5 5 3x 434229 Aluminium: Z5786A0 Metall: Z5786N0 Aluminium: Z5776A0 Metall: Z5776N0 Absenkrahmen Lowering frame Du cadre d’abaissement Z5460X0 Befestigingsframe Dei telai per l’abbassamento Bastidor para bajar...
  • Seite 116 Per Telefon: D-81701 München A-1100 Wien Fax: +49 (0) 89 / 45 90-35 32 Fax: +43 (0) 1/ 6 05 75-5 12 60 Internet: www.neff.de Internet: www.neff.at € 0,12/min. DTAG Für Österreich: Tel: 08 10 / 70 04 00 zum Regionaltarif...

Diese Anleitung auch für:

D4692x0

Inhaltsverzeichnis