Microlab PRO-1 Handbuch
Verfügbare Sprachen
Verfügbare Sprachen
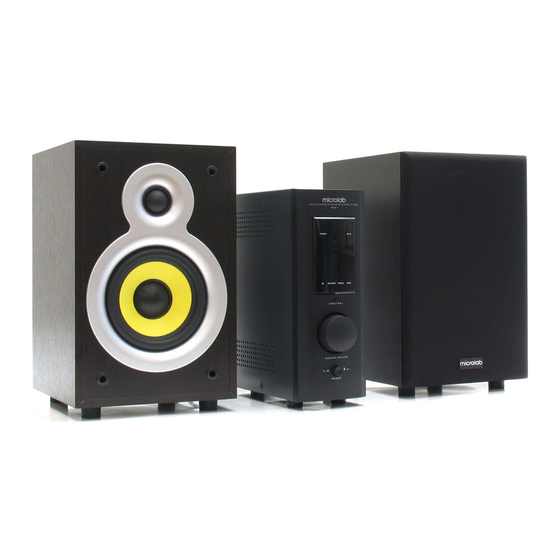
PRO-1
User Manual
www microlab com
www microlab cn
Microlab Electronics Company Limited
Made in China
Professional Sound
All symbols and logo belong to the respective brand holder or registered holder All specifications and information are subject to changes without
Before using, please read the manual carefully
further notice
Slight variations and differences might appear between the printed photos and actual product due to product enhancement
Inhaltsverzeichnis

Inhaltszusammenfassung für Microlab PRO-1
- Seite 5 die mit Flussigkeiten gefullt sind. Wichtige Sicherheitshinweise. 14. Reinigung – Bevor Sie das Gerat reinigen, ziehen Sie den Netzstecker aus der Steckdose. Das Subwoofer-Gehause kann mit einem trockenen Tuch gereinigt werden. Falls Sie ein Aerosolreiniger ACHTUNG benutzen, zerspruhen Sie es nicht direkt auf das Gehause, sondern tranken Sie damit ein Tuch. Achten Sie darauf, die Teile nicht zu beschadigen.
-
Seite 6: Optimale Aufstellung Zum Abhoren
B. Fernbedienung Abbildungen 1.Drucken Sie die Einschalttaste an der Frontplatte, das System startet und schaltet in den Einschlafzustand um. Frontansicht Fernbedienung 2.Drucken Sie die Taste ST-BY auf der Fernbedienung zum Aktivieren des Systems. 3.Drucken Sie die Taste INPUT SEL zur Auswahl zwischen PC oder AUX Eingang. 4.Schalten Sie die Wiedergabe am angeschlossenen Gerat und stellten die gewunschte Lautstarke ein.