Erreka PUMA-I Kurzanleitung Für Die Installation Und Inbetriebnahme
Inhaltsverzeichnis
Verfügbare Sprachen
Verfügbare Sprachen
Quicklinks
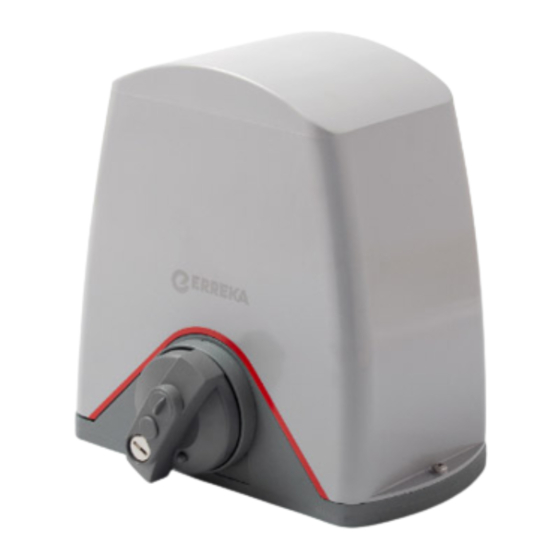
PUMA-I
Guía rápida de instalación y programación
Esta guía rápida es un resumen del manual de instalación completo. Dicho manual contiene advertencias de
seguridad y otras explicaciones que deben ser tenidas en cuenta. Puede descargar el manual de instalación en
AVISO
el apartado "Descargas" de la web de Erreka:
http://www.erreka-automation.com
Cotas de montaje (mm)
Elementos de la instalación completa
Desbloqueo
2
Desbloqueo para
accionamiento manual:
• Introduzca la llave (1) y
gírela sin forzarla, en
sentido horario.
• Gire la maneta (2) 270º
E268C
en
sentido
hasta
el
tope,
forzarla.
E268D
Desbloqueo
D268A
Bloqueo para accionamiento
• Gire la maneta (2) 270º en sentido anti-
horario, sin forzarla.
• Gire la llave (1) en sentido anti-horario y
extráigala.
horario
• Empuje el bombillo (3) hacia adentro y
sin
mueva a mano la puerta para enclavarla en
el mecanismo de accionamiento
Español
Cableado eléctrico
A:
Alimentación general
B/E: Lámpara destellante/
Antena
C:
Fotocélulas (Tx / Rx)
D:
Pulsador/
llave
pared
A V I S O : e l a c c i o n a d o r
PUMA-I se suministara sin
c o n d e n s a d o r p a r a e l
m o t o r , y a q u e n o e s
necesario, debido a la
tecnología Inverter del
cuadro de maniobra. Si
utiliza este cuadro como
r e p u e s t o
d e
o t r o
accionador, no utilice
condensador para el
motor.
Bloqueo
2
3
motorizado:
de
D268B
1
Inhaltsverzeichnis

Verwandte Anleitungen für Erreka PUMA-I


Inhaltszusammenfassung für Erreka PUMA-I
- Seite 17 Kurzführer Installation und Programmierung Deutsch Dieser Kurzführer ist eine Zusammenfassung der kompletten Montageanleitung. Diese enthält Sicherheitshinweise und andere Erläuterungen, die beachtet werden müssen. Die Montageanleitung kann auf HINWEIS der Erreka-Website unter „Downloads“ heruntergeladen werden: http://www.erreka-automation.com Elemente der kompletten Anlage Stromkabel Hauptstromversorgung...
- Seite 18 Hauptanschluss ‹ Da die Steuerung des Antriebs PUMA-1 über Inverter-Technologie verfügt, darf für den Motor kein Kondensator verwendet werden. (ST1) R.E. (DIP6=OFF: FCA) (FT1) (DIP6=ON: FCC) TEIL (DIP6=OFF: FCC (DIP6=ON: FCA) (ST2) GESAMT DL11 SG. A (FT2) DL1 DL2 DL3 DL21 F1-0,315A DL10...
-
Seite 19: Speichern Des Gesamtverfahrwegs
Speichern des Funkcodes für die Gesamtöffnung (nur für Empfänger RSD) Wird ein anderer Empfänger als der RSD verwendet, in der entsprechenden Anleitung nachlesen. Stromversorgung anschließen und Code am Sender auswählen. Die DIPs wie in der Abbildung gezeigt das Tor schließen, wobei DIP1 auf einstellen (DIP1=ON, DIP4=ON). -
Seite 20: Einstellen Der Potentiometer
Wahl der Betriebsarten und Funktionen mit SW1 (DIP1 = OFF) Betriebsarten und Funktionen Option Wirkung DIP1 Die Lampe leuchtet auf und der Vorgang beginnt nach einer Vorblinkzeit von 3 Sekunden. DIP2 Vorblinken Tor in Bewegung Die Blinklampe leuchtet auf und der Vorgang beginnt sofort. Schrittbetrieb beim Öffnen (wird während des Öffnungsvorgangs ein Befehlsgerät betätigt, hält das Tor an;... - Seite 33 PUMA-I ﻫﺫﺍ ﺍﻟﺩﻟﻳﻝ ﺍﻟﺳﺭﻳﻊ ﻫﻭ ﻣﻠﺧﺹ ﻟﺩﻟﻳﻝ ﺍﻟﺗﺣﻣﻳﻝ ﺍﻟﻛﺎﻣﻝ. ﺍﻟﺩﻟﻳﻝ ﻳﺣﺗﻭﻱ ﻋﻠﻰ ﺗﺣﺫﻳﺭﺍﺕ ﺍﻷﻣﺎﻥ ﻭ ﺍﻟﺗﻔﺳﻳﺭﺍﺕ ﺍﻷﺧﺭﻯ ﺍﻟﺗﻲ ﻳﺟﺏ ﺃﻥ ﻳﺗﻡ ﺃﺧﺫﻫﺎ ﺗﺣﺫﻳﺭ Erreka: “ "ﺇﻧﺯﺍﻻﺕ" ﺑﻣﻭﻗﻊDownloads” ﺑﺎﻻﻋﺗﺑﺎﺭ. ﺩﻟﻳﻝ ﺍﻟﺗﺣﻣﻳﻝ ﻫﺫﺍ ﻳﻣﻛﻥ ﺇﻧﺯﺍﻟﻪ ﺑﺎﻟﺫﻫﺎﺏ ﻟﻘﺳﻡ ﺍﻝ http://www.erreka-automation.com ﻋﻧﺎﺻﺭ ﺍﻟﺗﺣﻣﻳﻝ ﺍﻟﻛﺎﻣﻝ...
- Seite 34 ﺍﻟﺗﻭﺻﻳﻼﺕ ﺍﻟﻌﺎﻣﺔ ﻳﺟﺏ ﺃﻻ ﻳﺗﻡ ﺍﺳﺗﺧﺩﺍﻡ ﻣ ُﻛﺛﻑ ﻟﻠﻣﻭﺗﻭﺭ ﻣﻊ ﻣ ُﺷ ﻐ ّ ﻝ . ﺍﻟ ﻣ ُﺭﺯﻭّ ﺩ ﺑﺗﻛﻧﻭﻟﻭﺟﻳﺎ ﻋﺎﻛﺱ ﻟﻭﺣﺔ ﺍﻟﺗﺣﻛﻡPUMA-I ﺍﻟ ﻣ ُ ﺷﺎﺓ ﺍﻟﺣﺭﻛﺔ ﻣﻭﺗﻭﺭ ﺑﺩﻭﻥ ﻣ ُ ﻛ ﺛ ّ ﻑ DL11 LED ﻣﻔﺗﺎﺡ ﺍﻟﺿﻐﻁST1 LED ...
- Seite 36 SW1 (DIP1=OFF) ﺍﻟﻭﻅﻳﻔﺔ ﻭ ﺃﻧﻣﺎﻁ ﺍﻻﺧﺗﻳﺎﺭ ﺑﺎﺳﺗﺧﺩﺍﻡ ﺍﻷﺛﺭ ﺍﻻﺧﺗﻳﺎﺭ ﺍﻷﻧﻣﺎﻁ ﻭ ﺍﻟﻭﻅﺎﺋﻑ DIP1 ﻳﺿﺊ ﺍﻟﺿﻭء ﺍﻟﻭﺍﻣﺽ ﻭ ﺗﺑﺩﺃ ﺍﻟﻌﻣﻠﻳﺔ ﺑﻌﺩ 3 ﺛﻭﺍﻧﻲ ﺗﺣﺫﻳﺭ DIP2 ﺗﺣﺫﻳﺭ ﻣ ُﺳﺑﻕ ﻳﺿﺊ ﺍﻟﺿﻭء ﺍﻟﻭﺍﻣﺽ ﻭ ﺗﺑﺩﺃ ﺍﻟﻌﻣﻠﻳﺔ ﻓﻲ ﺍﻟﺣﺎﻝ ﻓﺗﺢ ﺗﺩﺭﻳﺟﻲ )ﺍﻟﺑﻭﺍﺑﺔ ﺗﺗﻭﻗﻑ ﻟﻭ ﺗﻡ ﺗﻔﻌﻳﻝ ﺃﻱ ﺃﻣﺭ ﺗﺣ ﻛ ﱡ ﻡ ﺧﻼﻝ ﺍﻟﻔﺗﺢ ﻭ (ﺗ...