Velleman components CAMD4 Handbuch
Drehende kamera-attrappe
Verfügbare Sprachen
Verfügbare Sprachen
Quicklinks
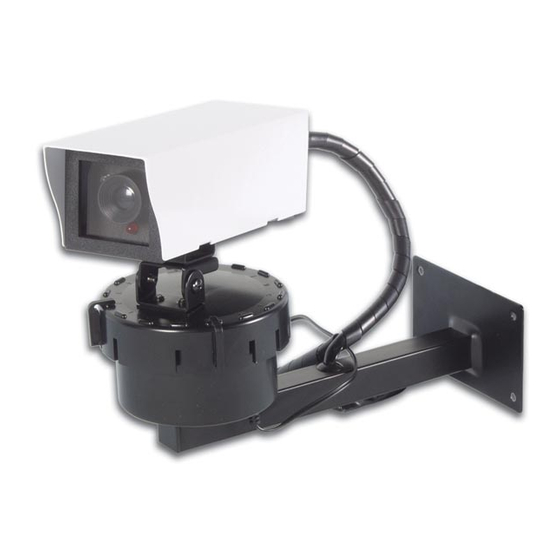
1. Introduction
Thank you for buying the CAMD4 ! This very realistic dummy camera will fool almost anyone and is very user-
friendly. Simply plug the AC/DC adapter into a socket and, if necessary, you can add another 20m of cable (total :
40m).
The camera has a built-in flashing LED and rotating platform. The LED will flash as long as the device is powered via
the adapter. You can set a horizontal travel between 22.5 and 350° at 22.5° intervals. The camera rotates 30 sec.
every 3 minutes.
The camera can be used both indoors and outdoors and can protect your shop, home, office, etc.
2. Contents
• dummy camera
• rotating motor
• 20m of cable
• AC/DC adapter (12Vac/400mA) with cable (1.8m) en jack
• mounting set
Required tools : drill, drill bit (6mm for masonry / 2.5mm for timber), screwdriver, pencil.
3. Connection Diagram
1. camera
2. hinges with fixing screws
3. rotating platform
4. travel stops
5. fixing bolt
6. motor cable
7. AC/DC adapter
8. 20m cable with female plug
4. Use
STEP 1 : Testing
a. Make sure the camera is operational prior to installation.
The two travel stops should be inserted in the available slots. The user can set a travel of 22.5 to 350°, at 22.5°
intervals :
both stops are in slots ...
remove both stops
CAMD4
CAMD4 – Rotating Dummy Camera
Fig. 1
1
2
3
4
5
6
7
1
travel
45°
90°
135°
180°
225°
270°
315°
350°
VELLEMAN

Verwandte Anleitungen für Velleman components CAMD4


Inhaltszusammenfassung für Velleman components CAMD4
-
Seite 12: Anschlussdiagramm
CAMD4 – Drehende Kamera-Attrappe 1. Einführung Wir bedanken uns für den Kauf des CAMD4 ! Diese sehr realistische Kamera-Attrappe wird fast jeden täuschen und ist sehr benutzerfreundlich. Sie brauchen nur den AC/DC Adapter in die Steckdose zu stecken und wenn nötig, können Sie ein zusätzliches Kabel von 20m hinzufügen (also insgesamt 40m). - Seite 13 Wechseln Sie eine Arretierung, indem Sie zuerst den unteren Teil einklicken und langsam den Daumen nach oben bewegen während Sie noch immer Druck ausüben (siehe B in Abb. 2 unten). Abb. 2 Die Arretierungen sollen wie in der linken Abbildung unten angebracht sein. In den anderen Abbildungen werden falsche Montagebeispiele gezeigt. Abb. 3 CAMD4 VELLEMAN...
- Seite 14 Verbinden Sie den Adapter mit dem Kabel, stecken Sie den Adapter in die Steckdose und schalten Sie das Gerät ein. Überprüfen Sie ob die LED blinkt und die Kamera rotiert. SCHRITT 7 Sie können die Kamera dauernd eingeschaltet lassen. Trennen Sie den Adapter oder das Kabel (20m) und den Stecker am Ende des Adapterkabels. CAMD4 VELLEMAN...