Herunterladen Inhalt Inhalt Diese Seite drucken
Inhaltsverzeichnis

Werbung

Verfügbare Sprachen
  • DE

Verfügbare Sprachen

  • DEUTSCH, seite 21
Avaya WLAN 8100 Regulatory Information
- AP 8120
1.0.0.0
NN47251-104, 01.06
December 20, 2010

Werbung

Inhaltsverzeichnis
loading

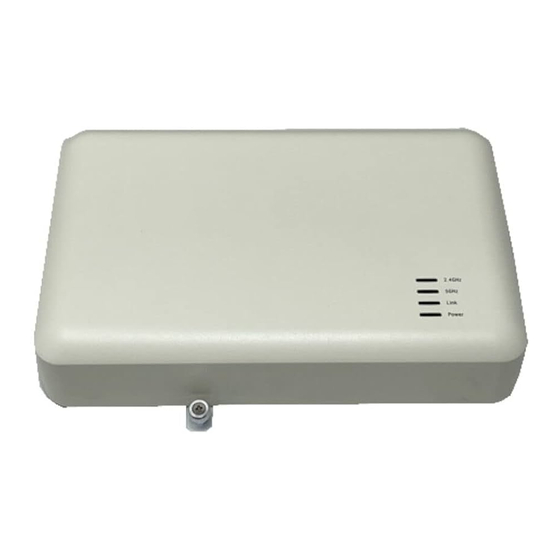
Inhaltszusammenfassung für Avaya WLAN 810

  • Seite 1 Avaya WLAN 8100 Regulatory Information - AP 8120 1.0.0.0 NN47251-104, 01.06 December 20, 2010...
  • Seite 2 Product provided by Avaya including the selection, arrangement and While reasonable efforts have been made to ensure that the design of the content is owned either by Avaya or its licensors and is information in this document is complete and accurate at the time of protected by copyright and other intellectual property laws including the printing, Avaya assumes no liability for any errors.
  • Seite 3: Inhaltsverzeichnis

    Montage mural du point accès WLAN......................37 Installation du point accès avec un adaptateur pour grille de plafond............39 Couvercle du port Ethernet..........................42 Messages de sécurité.............................43 Chapter 6: Português do Brasil....................45 Requisitos de cabo............................45 Avaya WLAN 8100 Regulatory Information - AP 8120 December 20, 2010...
  • Seite 4 Instalando um ponto de acesso LAN sem fio em uma parede...............45 Instalando um ponto de acesso com um adaptador de grade de teto............47 Tampa da porta Ethernet..........................50 Mensagens de segurança..........................51 Chapter 7: Simplified Chinese....................53 Chinese................................53 Avaya WLAN 8100 Regulatory Information - AP 8120 December 20, 2010...
  • Seite 5: Chapter 1: Regulatory Compliance Statements

    Chapter 1: Regulatory Compliance Statements The Avaya WLAN 8100 product line consists of the following models: AP 8120 This section contains regulatory compliance statements for these units. Federal Communications Commission (FCC) Compliance Notices This section includes the following FCC statements for the AP 8120 access point: •...
  • Seite 6: Fcc Caution

    Deployment Statement This product is certified for indoor deployment only. Do not install or use this product outdoors. Canadian IC Statements IC: (Applies to AP 8120) Avaya WLAN 8100 Regulatory Information - AP 8120 December 20, 2010...
  • Seite 7: European Union And European Free Trade Association (Efta) Regulatory Compliance

    SLOVAKIA, SLOVENIA, SPAIN, SWEDEN, UNITED KINGDOM, ICELAND, LICHTENSTEIN, NORWAY, SWITZERLAND. The Avaya WLAN 8100 AP 8120 access point communicates with an Avaya WLAN 8100 Wireless Controller using a standard CAT-5 (Category 5) or higher 1000 Mbps twisted pair Ethernet cable to provide wireless local area networking (WLAN) capabilities. The Avaya WLAN 8100 AP 8120 access point includes two 802.11a+n, b/g+n radios and one, six element,...
  • Seite 8: European Community Declaration Of Conformity

    условия на директива 1999/5 на европейски съюз Czech Èesky Republic Avaya tímto prohlašuje, že tento WLAN Rádio Model AP 8120, je ve shodì se základními požadavky a dalšími pøíslušnými ustanoveními smìrnice 1999/5/ Denmark Dansk Undertegnede Avayaerklærer herved, at følgende udstyr WLAN Radio Model AP 8120, overholder de væsentlige krav og øvrige relevante krav i direktiv...
  • Seite 9 European Community Declaration of Conformity English English Hereby, Avaya declares that this WLAN Radio Model AP 8120, is in compliance with the essential requirements and other relevant provisions of Directive 1999/5/EC. Estonia Eesti Käesolevaga kinnitab Avayaseadme WLAN Radio Model AP 8120, vastavust direktiivi 1999/5/EÜ...
  • Seite 10: Countries Of Operation And Restrictions Of Use In The European Community

    Avaya týmto vyhlasuje, že WLAN Radio ModelAP 8120 spåòa základné požiadavky a všetky príslušné ustanovenia Smernice 1999/5/ES. Slovenia Slovensko Avaya izjavlja, da je ta WLAN Radio Model AP 8120, v skladu z bistvenimi zahtevami in ostalimi relevantnimi doloèili directive 1999/5/ES. Spain Español...
  • Seite 11: Operation Using The 5.15 To 5.25 Ghz, 5.25 To 5.35 Ghz, And 5.470 To 5.725 Ghz Channels In The European Community

    “Master”. Section 4.7 and Tables 5 of this document define the requirements prior to using a channel and during normal operation for a Master device (i.e., Interference Detection Threshold, Channel Availability Check Time, Uniform Spreading, Channel Closing Avaya WLAN 8100 Regulatory Information - AP 8120 December 20, 2010...
  • Seite 12: Transmit Power Control

    4.4.2.2. Antenna Statement Intentional radiators, such as the Avaya WLAN 8100 AP 8120 access points, are not intended to be operated with any antenna(s) other than those furnished by Avaya. An intentional radiator may only be operated with the antenna(s) with which it is authorized.
  • Seite 13: Chapter 2: English

    Chapter 2: English Using the following procedures and information when installing the Avaya AP 8120 access points. Cable requirements The Ethernet ports on the access point cannot accept a CAT-5 cable that has an uneven sheath as shown below. The RJ-45 connector on the cable will not seat properly in the receptacle on the access point.
  • Seite 14 4. Tighten the screws to secure the wall mounting bracket tightly against the wall. 5. Align the mounting tabs on the bottom of the access point sheet metal enclosure with the vertically oriented keyhole slots in the mounting bracket. Avaya WLAN 8100 Regulatory Information - AP 8120 December 20, 2010...
  • Seite 15: Installing An Access Point With A Ceiling Grid Adaptor

    Perform the following procedure to install the access point with a ceiling grid adaptor: Avaya WLAN 8100 Regulatory Information - AP 8120 December 20, 2010...
  • Seite 16 Use a screwdriver to screw down the captive fastener. Securing the two brackets in this manner is essential to prevent them from disengaging from one another. Tighten the captive fastener screw securely. Avaya WLAN 8100 Regulatory Information - AP 8120 December 20, 2010...
  • Seite 17 If the access point and the bracket assembly are correctly engaged, it should be possible to engage the access points captive thumbscrew into the threaded tab provided on the ceiling grid bracket. Avaya WLAN 8100 Regulatory Information - AP 8120 December 20, 2010...
  • Seite 18: Ethernet Port Cover

    To attach this optional cover, hook the top clips over the upper edge of the access point enclosure. Snap the cover into mounting holes on the lower edge of the access point enclosure. Avaya WLAN 8100 Regulatory Information - AP 8120 December 20, 2010...
  • Seite 19: Safety Messages

    Safety Messages Safety Messages Caution: The Avaya WLAN Access Point 8120 radios are disabled by default and can be enabled only by a system administrator. Warning: This situation or condition can cause injury. Warning: High voltage. This situation or condition can cause injury due to electric shock.
  • Seite 20 Do not touch or move the access point when the antennas are transmitting or receiving. Warning: Before using a wireless device in a hazardous location, consult the local codes, national codes, and safety directors of the location for usage constraints. Avaya WLAN 8100 Regulatory Information - AP 8120 December 20, 2010...
  • Seite 21: Chapter 3: Deutsch

    Chapter 3: Deutsch Verwenden Sie die folgenden Verfahren und Informationen zur Installation der Access Points Avaya AP 8120. Kabelanschlüsse Die Ethernet-Ports an den Access Points können nicht mit CAT 5-Kabeln mit einer abgesetzten Kabelhülse verbunden werden (siehe unten). Der RJ-45-Anschluss des Kabels sitzt in diesem Fall nicht richtig auf dem Port des Access Points auf.
  • Seite 22 4. Ziehen Sie die Schrauben an, um die Wandhalterung sicher an der Wand zu befestigen. 5. Richten Sie die Montagelaschen unten am Metallgehäuse des Access Points mit den senkrechten Längsschlitzen an der Wandhalterung aus. Avaya WLAN 8100 Regulatory Information - AP 8120 December 20, 2010...
  • Seite 23: Deckenmontage Eines Access Points (Rasterdecke)

    Haltung geschraubt. Die unverlierbare Schraube an der kleineren Halterung kann je nach Rastergröße auf zweierlei Weise an der größeren Halterung ausgerichtet werden. So führen Sie die Deckenmontage eines Access Points an einer Rasterdecke durch: Avaya WLAN 8100 Regulatory Information - AP 8120 December 20, 2010...
  • Seite 24 Halterung. Sichern Sie die unverlierbare Schraube mit einem Schraubendreher. Es ist sehr wichtig, die beiden Halterungen auf diese Weise zu sichern, damit sie sich nicht voneinander lösen. Ziehen Sie die unverlierbare Schraube fest an. Avaya WLAN 8100 Regulatory Information - AP 8120 December 20, 2010...
  • Seite 25 Deckenhalterung aus, und schieben Sie den Access Point vorsichtig auf die montierte Deckenhalterung. Wenn der Access Point richtig auf die Deckenhalterung aufgesetzt ist, kann die unverlierbare Daumenschraube auf dem Access Point in das Gewinde an der Deckenhalterung geschraubt werden. Avaya WLAN 8100 Regulatory Information - AP 8120 December 20, 2010...
  • Seite 26: Abdeckung Für Ethernet-Port

    Sie zunächst die oben liegenden Klemmstücke am oberen Rand des Gehäuses des Access Points einhaken. Drücken Sie die Abdeckung anschließend in die Montagelöcher am unteren Rand des Gehäuses des Access Points. Avaya WLAN 8100 Regulatory Information - AP 8120 December 20, 2010...
  • Seite 27: Sicherheitshinweise

    Wir benötigen Übersetzungen für diese Meldungen und alle anderen Meldungen, die wir dem Dokument hinzufügen möchten. Caution: Die Frequenzempfänger für den Avaya WLAN Access Point 8120 sind standardmäßig deaktiviert und können nur von einem Systemadministrator aktiviert werden. Warning: Dieser Zustand bzw. diese Bedingung kann zu Verletzungen führen.
  • Seite 28 Berühren oder bewegen Sie den Access Point nicht beim Senden oder Übertragen von Funksignalen. Warning: Informieren Sie sich vor der Verwendung eines Wireless-Geräts in einer Gefahrenumgebung über regionale und überregionale Vorschriften zu Nutzungsbeschränkungen sowie die Sicherheitsrichtlinien für den jeweiligen Standort. Avaya WLAN 8100 Regulatory Information - AP 8120 December 20, 2010...
  • Seite 29: Chapter 4: Español

    Chapter 4: Español Al momento de instalar los puntos de acceso AP 8120 de Avaya, tenga en cuenta el procedimiento y la información que se presentan a continuación. Requisitos del cable Los puertos Ethernet del punto de acceso no admiten cables CAT-5 con terminación de recubrimiento irregular, como el que se muestra en la siguiente imagen.
  • Seite 30 3. Coloque el soporte de pared por sobre las cabezas de los tornillos y muévalo hacia la derecha (desde la perspectiva de alguien ubicado de frente a la pared). Avaya WLAN 8100 Regulatory Information - AP 8120 December 20, 2010...
  • Seite 31 7. Asegure el punto de acceso en el soporte de montaje y apriete los tornillos de ajuste manual. 8. Asegúrese de que el punto de acceso quede bien sujeto tanto al soporte como a la pared. Avaya WLAN 8100 Regulatory Information - AP 8120 December 20, 2010...
  • Seite 32: Instalación De Un Punto De Acceso Con Un Adaptador Para Estructuras De Techos Desmontables

    3. Coloque la pieza más grande en la estructura. Mientras lo hace, fíjese cuál es el ancho del perfil con objeto de determinar la orientación adecuada de la pieza pequeña, que debe instalarse a continuación. Avaya WLAN 8100 Regulatory Information - AP 8120 December 20, 2010...
  • Seite 33 5. Monte el punto de acceso en el soporte. Alinee las lengüetas del punto de acceso con las ranuras con forma de cerradura del adaptador para estructuras de techos Avaya WLAN 8100 Regulatory Information - AP 8120 December 20, 2010...
  • Seite 34: Cubierta Del Puerto Ethernet

    Cierre a presión la cubierta en los orificios de montaje del borde inferior del compartimiento del punto de acceso. Avaya WLAN 8100 Regulatory Information - AP 8120 December 20, 2010...
  • Seite 35: Advertencias De Seguridad

    We need translations for these messages and any others we want to add to the document. Caution: Las radios del punto de acceso WLAN 8120 de Avaya se encuentran desactivadas de manera predeterminada, y sólo puede activarlas un administrador de sistemas.
  • Seite 36 Antes de utilizar un dispositivo inalámbrico en un entorno peligroso, familiarícese con las normativas locales y nacionales, y consulte al encargado de seguridad del lugar para estar al tanto de los usos permitidos. Avaya WLAN 8100 Regulatory Information - AP 8120 December 20, 2010...
  • Seite 37: Chapter 5: Français

    Chapter 5: Français Utilisez les procédures et informations suivantes lors de l'installation des points d'accès AP 8120 d'Avaya. Configuration requise pour les câbles Les câbles CAT-5 dotés d'une gaine irrégulière, comme illustré ci-dessous, ne sont pas adaptés aux ports Ethernet du point d'accès. Sur ce type de câble, le connecteur RJ-45 ne s'insère pas correctement dans le logement du point d'accès.
  • Seite 38 5. Alignez les languettes de montage de la partie inférieure du boîtier en tôle du point d'accès avec les encoches en trous de serrure du support de montage, orientées à la verticale. Avaya WLAN 8100 Regulatory Information - AP 8120 December 20, 2010...
  • Seite 39: Installation Du Point Accès Avec Un Adaptateur Pour Grille De Plafond

    également doté d'une fixation captive et peut être orienté dans deux directions différentes par rapport au grand support, s'adaptant ainsi aux grilles de plafond étroites ou larges. Avaya WLAN 8100 Regulatory Information - AP 8120 December 20, 2010...
  • Seite 40 Utilisez un tournevis pour serrer la fixation captive. Il est indispensable de fixer les deux supports de cette Avaya WLAN 8100 Regulatory Information - AP 8120 December 20, 2010...
  • Seite 41 être possible d'insérer la vis captive du point d'accès dans la languette filetée du support de la grille de plafond. Avaya WLAN 8100 Regulatory Information - AP 8120 December 20, 2010...
  • Seite 42: Couvercle Du Port Ethernet

    Ethernet raccordé au point d'accès. Pour fixer ce couvercle, positionnez les crochets situés en haut du couvercle au-dessus du port du point d'accès. Clipsez le couvercle dans les trous de fixation situés en dessous du port du point d'accès. Avaya WLAN 8100 Regulatory Information - AP 8120 December 20, 2010...
  • Seite 43: Messages De Sécurité

    Messages de sécurité Ces messages ainsi que tout autre message ajouté à ce document doivent être traduits. Caution: Les radios des points d'accès 8120 WLAN d'Avaya sont désactivés par défaut et peuvent uniquement être activés par un administrateur système. Warning: Cette situation ou condition peut provoquer des blessures.
  • Seite 44 Avant d'utiliser un périphérique sans fil sur un site dangereux, consultez les réglementations locales et nationales et interrogez les responsables de la sécurité du site afin de connaître les contraintes d'utilisation. Avaya WLAN 8100 Regulatory Information - AP 8120 December 20, 2010...
  • Seite 45: Chapter 6: Português Do Brasil

    Chapter 6: Português do Brasil Use os seguintes procedimentos e informações ao instalar os pontos de acesso do Avaya AP 8120. Requisitos de cabo As portas Ethernet no ponto de acesso não podem aceitar um cabo CAT-5 com um revestimento irregular como mostrado abaixo. O conector RJ-45 do cabo não se ajustará...
  • Seite 46 4. Aperte os parafusos para segurar com firmeza o suporte de montagem contra a parede. 5. Alinhe as presilhas de montagem na parte inferior do invólucro de metal do ponto de acesso com os slots do suporte de montagem orientados verticalmente. Avaya WLAN 8100 Regulatory Information - AP 8120 December 20, 2010...
  • Seite 47: Instalando Um Ponto De Acesso Com Um Adaptador De Grade De Teto

    Execute o seguinte procedimento para instalar o ponto de acesso com um adaptador de grade de teto: Avaya WLAN 8100 Regulatory Information - AP 8120 December 20, 2010...
  • Seite 48 Use uma chave de fenda para ajustar o prendedor cativo. Prender os dois suportes dessa maneira é essencial para evitar que se soltem. Ajuste firmemente o prendedor cativo. Avaya WLAN 8100 Regulatory Information - AP 8120 December 20, 2010...
  • Seite 49 Se o ponto de acesso e o conjunto de suporte forem acoplados corretamente, o parafuso cativo dos pontos de acesso deverá se ajustar à presilha fornecida no suporte da grade de teto. Avaya WLAN 8100 Regulatory Information - AP 8120 December 20, 2010...
  • Seite 50: Tampa Da Porta Ethernet

    Ethernet ligado ao ponto de acesso. Para prender essa tampa opcional, enganche os clipes ao longo da borda superior da carcaça do ponto de acesso. Encaixe a tampa nos furos de montagem na borda inferior da carcaça do ponto de acesso. Avaya WLAN 8100 Regulatory Information - AP 8120 December 20, 2010...
  • Seite 51: Mensagens De Segurança

    Essas mensagens, e quaisquer outras, devem ser traduzidas para serem incluídas no documento. Caution: Os rádios do ponto de acesso 8120 WLAN da Avaya são desativados por padrão e só podem ser ativados pelo administrador do sistema. Warning: Esta situação ou condição pode causar danos.
  • Seite 52 Antes de usar um dispositivo sem fio em um local perigoso, consulte os códigos locais, nacionais e os responsáveis pela segurança do local para obter informações sobre restrições de uso. Avaya WLAN 8100 Regulatory Information - AP 8120 December 20, 2010...
  • Seite 53: Chapter 7: Simplified Chinese

    Chapter 7: Simplified Chinese Chinese Avaya WLAN 8100 Regulatory Information - AP 8120 December 20, 2010...
  • Seite 54 Simplified Chinese Avaya WLAN 8100 Regulatory Information - AP 8120 December 20, 2010...
  • Seite 55 Chinese Avaya WLAN 8100 Regulatory Information - AP 8120 December 20, 2010...
  • Seite 56 Simplified Chinese Avaya WLAN 8100 Regulatory Information - AP 8120 December 20, 2010...
  • Seite 57 Chinese Avaya WLAN 8100 Regulatory Information - AP 8120 December 20, 2010...

Inhaltsverzeichnis