Werbung
Verfügbare Sprachen
Verfügbare Sprachen
Instruction Manual
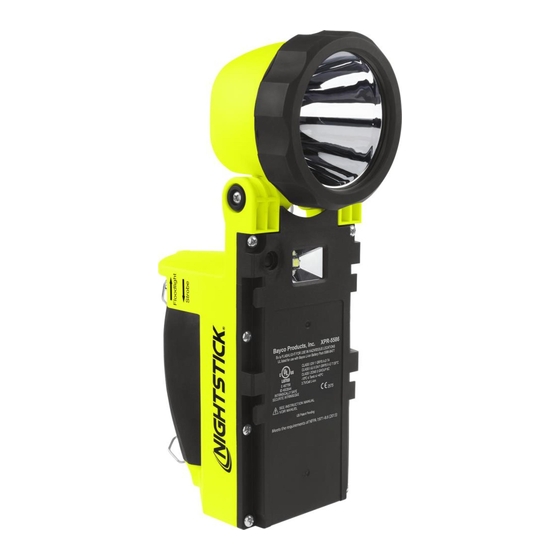
XPR-5586
Please
read
these
instructions
They include important safety information and operating instructions.
THE XPR-5586 IS APPROVED FOR USE
Bayco Products, Inc.
Ex ia FLASHLIGHT FOR USE IN HAZARDOUS LOCATIONS
UL listed for use with Bayco Li-ion Battery Pack 5586-BATT
E 467756
ID 4003544
INTRINSICALLY SAFE
SECURITE INTRINSEQUE
WARNINGS - INTRINSICALLY SAFE
0359
y Warning: To prevent ignition of a hazardous atmosphere, do not attempt to charge this
product in the hazardous environment. This task must ONLY be performed in an area
known to be non-hazardous.
y Warning: Lithium-ion batteries must be used and charged properly. Improper use can
result in serious injury, fire, or death.
y Warning: Use only the included and approved 5586-BATT rechargeable battery pack
from Bayco Products.
y Warning: When exchanging the rechargeable battery pack, use only the approved
5586-BATT rechargeable battery pack from Bayco Products.
y Warning: To prevent ignition of a hazardous atmosphere, the rechargeable battery
pack must only be exchanged in an area known to be non-hazardous.
y Warning: Do not expose the rechargeable battery pack to water or salt water, or allow
the battery pack to get wet.
y Warning: Do not store the rechargeable battery pack with metallic objects that may
cause a short circuit.
y Warning: Substitution of components components is not allowed and may impair
intrinsic safety.
SPECIAL INSTRUCTIONS FOR INTRINSIC SAFETY
y For personal safety, always confirm the rating of any known hazardous or potentially
hazardous location where the light is to be used.
INITIAL USE
Warning: To prevent ignition of a hazardous atmosphere, do not attempt to charge
this product in the hazardous environment. This task must ONLY be performed in
an area known to be non-hazardous.
Fully charge the XPR-5586 before the first use, or if the battery is new or has been
unused for several months. The maximum charge time required is approximately 6 hours.
DAILY USE
WARNING: TO PREVENT IGNITION OF A HAZARDOUS ATMOSPHERE, DO NOT
ATTEMPT TO CHARGE THIS PRODUCT IN THE HAZARDOUS ENVIRONMENT. THIS
TASK MUST ONLY BE PERFORMED IN AN AREA KNOWN TO BE NON-HAZARDOUS.
y Use only the supplied Nightstick charger, 5586-BATT rechargeable battery pack and
AC or DC adapter. For best performance, charge the 5586 when the flashlight beam
starts to dim.
y Connect the AC power adapter to the charger. The LED indicator will not be illuminated
at this point.
y With the flashlight facing forward, slide the 5586 into the charger until the contacts
snap into place.
y The LED indicator changes to constant red indicating the 5586 is properly inserted into
the charger and is in fact charging. The LED indicator remains red until the battery is fully
charged. At full charge, the LED indicator turns green.
y The total time to full charge the 5586 varies depending on the remaining charge in the
battery pack.
y To confirm a full charge, keep the 5586 in the charger and turn it on. The LED indicator
will change to red. Turn off the 5586. If the 5586 is fully charged, the LED indicator will
Bayco Products, Inc. • 640 South Sanden Blvd. • Wylie, TX 75098 • USA • 1-800-233-2155 • 1-469-326-9400 • www.nightstick.com
before
using
your
Nightstick
XPR-5586
CLASS I DIV 1 GRPS A-D T4
CLASS II & III DIV1 GRPS E-G T135°C
CLASS I ZONE 0 GROUP IIC
-10ºC ≤ Tamb ≤ +40ºC
3.7V/Cell Li-ion
turn green. If not, it remains red until the charge is completed and the LED indicator turns
green. The 5586 will now be fully charged.
REPLACING LITHIUM-ION RECHARGEABLE BATTERY
The product is designed to allow the end user to replace it if needed. To replace the
rechargeable battery pack, carefully follow the instructions listed below:
WARNING: WHEN EXCHANGING THE RECHARGEABLE BATTERY PACK, USE
ONLY THE APPROVED 5586-BATT RECHARGEABLE BATTERY PACK FROM
BAYCO PRODUCTS.
WARNING: TO PREVENT IGNITION OF A HAZARDOUS ATMOSPHERE, THE
RECHARGEABLE BATTERY PACK MUST ONLY BE EXCHANGED IN AN AREA
KNOWN TO BE NON-HAZARDOUS.
y Remove 8 screws on the base plate on the bottom of the light.
y Remove the base plate from the light.
XPR-5586
y Remove the U-Clamp from chassis.
y Remove the battery pack electrical connector from the circuit board.
y Connect the new battery pack electrical connector to the circuit board.
y Replace U-Clamp and screws to chassis.
y Replace the base plate and screws on the light.
OPERATION
The XPR-5586 has ten lighting modes:
y High brightness flashlight
y Medium brightness flashlight
y Low brightness flashlight
y High brightness floodlight
y Medium brightness floodlight,
The XPR-5586 has two body switches providing access to all modes.
Constant-on Flashlight
Press the left switch forward for high-brightness flashlight. Press the switch forward
again to turn the light off.
Select Brightness Level
Press and hold the left switch forward. The flashlight will cycle from high to medium
to low mode and then back up again at a rate of approximately one mode per second.
The light will continue to cycle up and down through the various modes as long as the left
switch is held down. When the desired brightness level is reached, release the left switch
and the light will remain in that brightness mode. Press the left switch forward again to
turn the light off.
Rear Facing Lights
Press the left switch backward to turn on the rear facing red lights. Press the the switch
backward again to turn the lights off. Press and hold the left switch backward to activate
the rear facing beacon lights.
Constant-on Floodlight
Press the right switch forward for high brightness floodlight. Press the switch forward
again to turn the light off.
Select Brightness Level
Press and hold the right switch forward. The floodlight will cycle from high to medium
to survival mode and then back up again at a rate of approximately one mode per second.
The light will continue to cycle through the modes as long as the right switch is held down.
When the desired brightness level is reached, release the left switch, and the light will
remain in that brightness mode. Press the right switch forward again to turn the light off.
Floodlight Beacon
Press the right switch backward for floodlight beacon. Press the switch backward
again to turn the floodlight beacon off.
Dual-Light
Dual-Light allows the user to turn on both the Flashlight (at any brightness level) and
the Floodlight (at any brightness level), at the same time. First select the appropriate
brightness level of the flashlight using the directions above. Next select the appropriate
brightness level of the floodlight using the directions above. Both the Flashlight and the
Floodlight are now running. Press and release both the left and right switches forward to
turn the lights off.
WARRANTY
LIMITED LIFETIME WARRANTY
Bayco Products, Inc. warrants this product to be free from defects in workmanship
and materials for the original purchaser's lifetime. The Limited Lifetime Warranty includes
the LEDs, housing and lenses. Rechargeable batteries, chargers, switches, electronics
and included accessories are warranted for a period of two years with proof of purchase.
Normal wear and failures which are caused by accidents, misuse, abuse, faulty installation
and lightning damage are excluded.
We will repair or replace this product should we determine it to be defective. This is the
only warranty, expressed or implied, including any warranty of merchantability or fitness
for a particular purpose.
For a complete copy of the warranty, go to www.nightstick.com/nightstick-product-
support/warranties. Retain your receipt for proof of purchase.
INS-XPR-5586-DL-19
y Survival mode
y Blinking floodlight
y Dual-light
y Constant-on rear green light
y Blinking rear facing light
07-01-2019
Werbung
Inhaltsverzeichnis

Verwandte Anleitungen für NightStick XPR-5586


Inhaltszusammenfassung für NightStick XPR-5586
- Seite 1 Turn off the 5586. If the 5586 is fully charged, the LED indicator will support/warranties. Retain your receipt for proof of purchase. Bayco Products, Inc. • 640 South Sanden Blvd. • Wylie, TX 75098 • USA • 1-800-233-2155 • 1-469-326-9400 • www.nightstick.com INS-XPR-5586-DL-19...
-
Seite 2: Utilisation Initiale
Le voyant DEL passera au rouge. Éteindre la lampe 5586. Si la lampe 5586 est complètement chargée, le voyant DEL passera au vert. Bayco Products, Inc. • 640 South Sanden Blvd. • Wylie, TX 75098 • USA • 1-800-233-2155 • 1-469-326-9400 • www.nightstick.com INS-XPR-5586-DL-19... -
Seite 3: Garantie
AC o DC. Para un mejor rendimiento, cargue la 5586 cuando el rayo de luz comienza a disminuir. Bayco Products, Inc. • 640 South Sanden Blvd. • Wylie, TX 75098 • USA • 1-800-233-2155 • 1-469-326-9400 • www.nightstick.com INS-XPR-5586-DL-19... -
Seite 4: Uso Diário
Pressione o botão direito para trás para acender o farol holofote. Pressione o botão direito para trás novamente para desligar o farol holofote. Bayco Products, Inc. • 640 South Sanden Blvd. • Wylie, TX 75098 • USA • 1-800-233-2155 • 1-469-326-9400 • www.nightstick.com INS-XPR-5586-DL-19... -
Seite 5: Erstmaliger Gebrauch
Sie den linken Schalter nach hinten und halten Sie ihn gedrückt, um die rückwärtsgerichtete lediglich in einem Umfeld vorgenommen warden, das bekannterweise ungefährlich ist. Rundumleuchte zu betätigen. Bayco Products, Inc. • 640 South Sanden Blvd. • Wylie, TX 75098 • USA • 1-800-233-2155 • 1-469-326-9400 • www.nightstick.com INS-XPR-5586-DL-19 07-01-2019... - Seite 6 Produktes. Eine vollständige Kopie der Garantie ist auf www.nightstick.com/nightstick-product- support/warranties ersichtbar. Bewahren Sie den Kassenzettel zum Kaufnachweis auf. Bayco Products, Inc. • 640 South Sanden Blvd. • Wylie, TX 75098 • USA • 1-800-233-2155 • 1-469-326-9400 • www.nightstick.com INS-XPR-5586-DL-19 07-01-2019...