Herunterladen Inhalt Inhalt Diese Seite drucken

Werbung

Verfügbare Sprachen

Verfügbare Sprachen

Werbung

Inhaltsverzeichnis
loading

Inhaltszusammenfassung für Labesto Smartchef LSM7009BK

  • Seite 2 Content - Inhalt - Spis treści Instruction manual – English ..............- 1 - Bedienungsanleitung – Deutsch .............- 10 - Instrukcja obsługi – Polski ………………………………………………………………… - 18 -...
  • Seite 3: Safety Instructions

    English Dear Customer!! Congratulations on purchasing a high quality LABESTO product. This product is based on the latest technological solutions to provide high functionality, safety and ease of use. Please take a few minutes to read the following user's manual and its instructions.
  • Seite 4 7. Regarding the instructions for cleaning the surfaces which come in contact with food or oil, please refer to the paragraph “CLEANING AND MAINTENANCE” of the manual. 8. This appliance is not intended to be operated by means of an external timer or separate remote-control system. 9.
  • Seite 5 20 Do not wind the cord around the appliance and do not bend it. 21 Place the appliance on a stable, level surface from which it cannot fall off. 22 The use of accessory attachment not recommended by the appliance manufacturer may cause injuries. 23 Only the pusher should be used for refilling the mincer.
  • Seite 6 OVERVIEW OF THE COMPONENTS Main Components and Standard/Optional Accessories: crush main body cover(diascope) meat dish dough hook meat grinder stainless steel bowl(7L) flat pasta maker 10. power cord 11. front end shield K beater whisk NOTICE: positions 1-4 are optional attachments ( available if supplied) CONTROL PANEL: BUTTON(-) BUTTON (+)
  • Seite 7 1) Soft Yeast 6) Meat grinder 7) Stiff Yeast 6) Pasta maker 6) Fruit cake 7) Egg Beater 8) Shortcrust And then push “start/stop”once to let the machine start working, it can be working Smart by IC Control (with Suggested Recipes),will be step by step to finsh the work automatic, sound the alarm bell 3 times.
  • Seite 8 OPTIONAL ACCESSORIES - Meat Grinder: ( if supplied) 1. Metal dish 2. Crush 3. Meat grinder 4. Roler 5. Blade 6. Cutter (fine) 7. Cutter (coarse) 8. Cutter (middle) 9. Nut Assembling the unit: put the spiral (4) insi der the mincer (3), the blade (5) on the spiral and choose one of the discs (6,7 or 8) depending on the kind of chopping you want to obtain.
  • Seite 9 SUGGESTED RECIPIES NO SMART mode Recipes Operation Remark white bread Flour weight: 1.5kg (3.3lb 53oz) (1) pour the warm water into the (Stiff yeast dough) 15ml (3tsp) salt bowl.Then add the flour (with fresh 25g (1oz) fresh yeast; or 15g/20m yeast if used), salt and lard.
  • Seite 10 gateau) 150ml (1.4pt) double cream (2) Remove the bowl and the whisk. Sugar to taste Fold in the flour by hand using a large 225g (8oz) strawberries metal spoon 225g (8oz) apricots 1 Halve the (3)Put the mixture into two 18cm (7”) apricots and remove the stones greased and lined sandwich tins.
  • Seite 11 - Components that have come into contact with food can be cleaned in soapy water. - Allow the parts to dry thoroughly before reassembling the device. - Please apply a small quantity of vegetable oil likely to the screens after they have dried. SERVICE.LABESTO.EU For more informations about warranty. Visit us on...
  • Seite 12 Deutsch Sehr geehrte Kunden!!! Herzlichen Glückwunsch zum Kauf des hochwertigen LABESTO-Produkts. Dieses Produkt wurde auf Basis neuester technischer Lösungen entwickelt, um eine hohe Funktionalität, Sicherheit und bequeme Nutzung zu gewährleisten. Bitte nehmen Sie sich ein paar Minuten Zeit, um die Bedienungsanleitung und ihre Vorgaben zu lesen.
  • Seite 13 4. Reinigung und Wartung durch den Benutzer darf nicht von Kindern durchgeführt werden, es sei denn sie sind älter als 8 Jahre und werden beaufsichtigt. 5. Bewahren Sie das Gerät und das Netzkabel außerhalb der Reichweite von Kindern unter 8 Jahren auf. 6.
  • Seite 14 Wasser bzw. andere Flüssigkeiten ein. Lebensgefahr durch Stromschlag! 14. Um den Stecker aus der Steckdose zu entfernen, ziehen Sie ihn heraus. Ziehen Sie nicht am Kabel. 15. Berühren Sie das Gerät nicht, wenn es sich im Wasser befindet. Ziehen Sie den Stecker aus der Steckdose, schalten Sie das Gerät aus und senden Sie es zur Reparatur an eine autorisierte Servicestelle.
  • Seite 15: Umweltgerechte Entsorgung

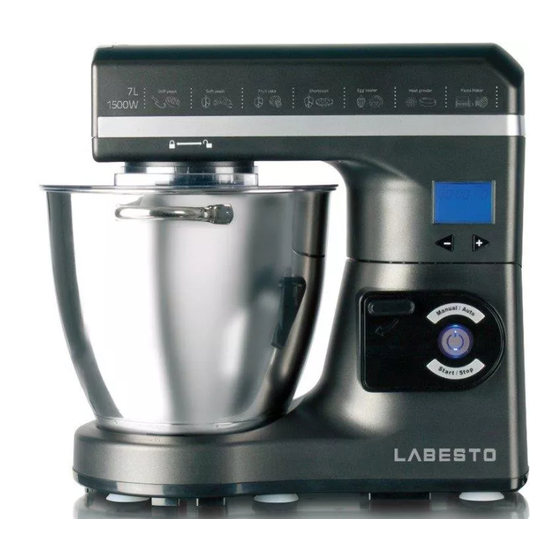
    ÜBERLASTUNGSGEFAHR!! Benutzen Sie das Gerät nur als Mixer oder nur als Fleischwolf oder nur als Nudelmaschine – aber niemals für zwei Funktionen gleichzeitig. Um eine Überlastung zu vermeiden, beachten Sie die maximale Rührzeit beim Mischen von dichten Bestandteilen von 4 Minuten. Danach müssen Sie das Gerät ca. 10 Minuten abkühlen lassen. KONFORMITÄTSERKLÄRUNG entsprechend europäischen Normen.
  • Seite 16 Produktbeschreibung: Küchenmaschine und optionale Aufsätze 1. Stößel 2. Einfüllschale Fleischwolf 3. Fleischwolf 4. Nudel-Aufsatz 5. K-Rührer 6. Schneebesen 7. Schüsseldeckel 8. Knethaken für Teig 9. Edelstahl-Rührschüssel (7l) 10. Versorgungskabel 11. Aufnahme für Aufsätze Bedienfeld: LCD-DISPLAY TASTEN(-) TASTEN(+) MANUAL/AUTO EIN/AUS START/STOPP Vorbereitung der Maschine zur Arbeit: Stellen Sie das Gerät auf eine ebene und trockene Fläche, z.
  • Seite 17 Ein-/Ausbau von Bauteilen Zuerst lösen und heben Sie den Roboterarm durch Drücken des Hebels im Uhrzeigersinn. Wenn der Arm in der geöffneten Position verriegelt ist, kehrt der Hebel in seine Ausgangsposition zurück und Sie hören ein Geräusch des Einrastens. Geben Sie die Zutaten in die Schüssel ein und setzen die Schüssel in die Aufnahme. Rasten Sie die Schüssel durch Drehen in die am Boden angezeigte Richtung ein.
  • Seite 18 Nach Auswahl des gewünschten Modus Arbeit im vorgegebenen Modus starten (mit der Taste „START/STOPP“). Nach dem Programmende schaltet sich das Gerät automatisch ab und meldet sich mit einem 3-fachen Piepton. Drücken Sie danach die „ON/OFF“-Taste und ziehen Sie den Netzstecker. ACHTUNG: Für schwere, dichte Zutaten beträgt die maximale Verarbeitungszeit 4 Minuten, danach müssen Sie das Gerät ca.
  • Seite 19: Reinigung Und Wartung

    - Das Gehäuse des Roboters darf nur mit einem feuchten Tuch gereinigt werden. Gehäuse immer trocken wischen. - Nur die Edelstahlschüssel kann in der Spülmaschine gespült werden. Sonstiges Zubehör wie Rührer, Fleisch- und Teigaufsätze sind nicht spülmaschinengeeignet. - Alle Zubehörteile sollten vor der Wiederverwendung gut getrocknet werden. Sie finden alle Informationen zur Garantie auf SERVICE.LABESTO.EU...
  • Seite 20 Polski Drogi Kliencie!! Gratulujemy zakupu wysokiej jakości produktu marki LABESTO. Ten produkt, został stworzony w oparciu o najnowsze rozwiązania techniczne aby zapewnić wysoką funkcjonalność, bezpieczeństwo i wygodę użytkowania. Prosimy o poświęcenie kilku minut na zapoznanie się z poniższą instrukcją obsługi i jej wskazówkami.
  • Seite 21 zagrożenie np. uduszenia 4. Czyszczenie i konserwacja przez użytkownika nie mogą być wykonane przez dzieci, chyba że są one w wieku powyżej 8 lat i pozostają pod nadzorem. 5. Urządzenie jego przewód zasilający należy przechowywać poza zasięgiem dzieci w wieku poniżej 8 lat. 6.
  • Seite 22 13. Nie wolno zanurzać urządzenia lub wtyczki sieciowej w wodzie lub innych płynach. Istnieje zagrożenie życia na skutek porażenia prądem elektrycznym! 14. Aby wyjąć wtyczkę z gniazdka, należy ją wyciągnąć. Nie należy ciągnąć za kabel. 15. Nie dotykać urządzenia, jeżeli znajdzie się ono w wodzie. Wyjąć...
  • Seite 23: Dane Techniczne

    UWAGA NIEBEZPIECZEŃSTWO PRZECIĄŻENIA!! Proszę używać urządzenia tylko jako miksera lub maszynki do mięsa lub maszynki do makaronu ale nigdy dwóch funkcji jednocześnie. Aby uniknąć przeciążenia, podczas mieszania gęstych składników, maksymalny czas mieszania wynosi 4 minuty a następnie należy pozwolić aby urządzenie wystygło przez około 10 minut. DEKLARACJA ZGODNOŚCI z normami europejskimi.
  • Seite 24: Opis Produktu

    OPIS PRODUKTU: Robot kuchenny, akcesoria i opcjonalne przystawki Popychacz Tacka maszynki do mięsa Komora mielenia Przystawka do makaronu Mieszadło K Trzepaczka Pokrywa misy Mieszadło do ciasta Misa ze stali nierdzewnej(7L) 10. Przewód zasilający 11. Gniazdo do przystawek Panel sterowania: 7. EKRAN LCD 8.
  • Seite 25 Montaż/demontaż elementów składowych W pierwszej kolejności należy zwolnić i unieść ramię robota przez naciśnięcie dźwigni zgodnie z ruchem wskazówek zegara. Zablokowanie ramienia w pozycji otwartej sygnalizowane jest powrotem dźwigni do pierwotnego położenia i dźwiękiem zatrzaśnięcia. Następnie wsyp składniki do misy i umieść ją w gnieździe podstawy. Zakleszcz misę, przekręcając ją...
  • Seite 26 Zamontuj tackę (1) na szczycie rozdrabniacza (3). Na końcu zdejmij klapkę (11) mechanizmu frontowego w korpusie robota i zamontuj do niego maszynkę. Ustaw program w trybie automatycznym Maszynka do mięsa to przystawka dostępna opcjonalnie. Zapytaj o dostępność sprzedawcę produktów marki LABESTO.
  • Seite 27: Czyszczenie I Konserwacja

    Zdejmij zaślepkę (11) i zamontuj maszunkę w gnieździe korpusu robota kuchennego. Ustaw program 6 w trybie automatycznym ( Pasta maker) Maszynka do makaronu to przystawka dostępna opcjonalnie, nie wchodzi w skład zestawu. O dostępność zapytaj sprzedawcę produktów marki LABESTO. CZYSZCZENIE I KONSERWACJA Przed przystąpieniem do czyszczenia i konserwacji sprzętu należy odłączyć wtyczkę zasilania sieciowego.

Inhaltsverzeichnis