Herunterladen Inhalt Inhalt Diese Seite drucken
Inhaltsverzeichnis

Werbung

Verfügbare Sprachen
  • DE

Verfügbare Sprachen

  • DEUTSCH, seite 64
IT
EN
FOGLIO
TECHNICAL
TECNICO
SHEET
Manuale tecnico installatore iPower kit
Technical installation manual - iPower kit
Manuel technique dʼinstallation iPower kit
Technische handleiding voor de installateur iPower kit
Manual técnico del instalador iPower kit
Manual técnico do instalador iPower kit
Assistenza tecnica Italia
Commerciale Italia
Comelit Group S.p.A. - Via Don Arrigoni 5 - 24020 Rovetta S. Lorenzo BG Italy - tel. (+39) 0346 750 011 - fax (+39) 0346 71436
www.comelit.eu
FR
FEUILLE
TECHNISCHE
TECHNIQUE
HANDLEIDING
MT KIT 12
Installationsanleitung iPower Kit
0346/750090
0346/750091
www.simplehome.eu
info@comelit.it
NL
DE
TECHNISCHES
DATENBLATT
Technical service abroad (+39) 0346750092
Export department
(+39) 0346750093
commerciale.italia@comelit.it
ES
PT
HOJA
FICHA
TÉCNICA
TÉCNICA
export.department@comelit.it

Werbung

Inhaltsverzeichnis
loading

Inhaltszusammenfassung für Comelit Group iPower MT KIT 12

  • Seite 1 Technical service abroad (+39) 0346750092 Commerciale Italia 0346/750091 Export department (+39) 0346750093 Comelit Group S.p.A. - Via Don Arrigoni 5 - 24020 Rovetta S. Lorenzo BG Italy - tel. (+39) 0346 750 011 - fax (+39) 0346 71436 www.comelit.eu www.simplehome.eu info@comelit.it commerciale.italia@comelit.it...
  • Seite 2 • Install the equipment by carefully following the instructions given by the manufacturer and in compliance with the legislation in force. • All the equipment must only be used for the purpose it was built for. Comelit Group S.p.A. declines any responsibility for improper use of the apparatus, for modifications made by others under any title or scope, and for the use of accessories and materials which are not the original ones.
  • Seite 3: Inhaltsverzeichnis

    MT KIT 12 SOMMARIO Montaggio telaio posto esterno pag. 10 Cablaggio alimentatore Art. 1397 verso il posto esterno pag. 11 Serrattura in AC (Relé 1) pag. 12 Serratura in DC (Relé 1) pag. 13 Comando locale temporizzato serratura (Relé 1) pag.
  • Seite 4 GROUP S.P.A. CONTENTS Installing the external unit frame Page 10 Wiring between power supply Art. 1397 and the external unit Page 11 AC door-release (Relay 1) Page 12 DC door-release (Relay 1) Page 13 Timed local door-release command (Relay 1) (RTE) Page 14 Installing and adjusting the direction of the camera Page 15...
  • Seite 5 MT KIT 12 SOMMAIRE Montage châssis plaque de rue page 10 Câblage alimentateur Art. 1397 vers la plaque de rue page 11 Gâche en C.A. (relais 1) page 12 Gâche en C.C. (relais 1) page 13 Commande locale temporisée gâche (relais 1) page 14 Montage et orientation module caméra page 15...
  • Seite 6 GROUP S.P.A. INHOUD Montage van het frame van het entreepaneel Biz. 10 Bekabeling voedingstransformator art. 1397 naar entreepaneel Biz. 11 AC deurslot (Relais 1) Biz. 12 DC deurslot (Relais 1) Biz. 13 Lokale slotbediening met tijdsinstelling (Relais 1) Biz. 14 Montage en instelling van de richting van de cameramodule Biz.
  • Seite 7 MT KIT 12 INHALT Montage der Türstation-Grundplatte Seite 10 Verkabelung von Netzteil Art. 1397 zur Türstation Seite 11 Türöffner in WS (Relais 1) Seite 12 Türöffner in GS (Relais 1) Seite 13 Lokale zeitgeschaltete Türöffner-Betätigung (Relais 1) Seite 14 Einbau und Ausrichtung des Kameramoduls Seite 15 Einstelltabelle Dip-Schalter der Türstation Seite 16...
  • Seite 8 GROUP S.P.A. ÍNDICE Montaje del bastidor de la unidad externa Pág. 10 Cableado desde el alimentador art. 1397 hasta la unidad externa Pág. 11 Cerradura de CA (relé 1) Pág. 12 Cerradura de CC (relé 1) Pág. 13 Mando local temporizado de la cerradura (relé 1) Pág.
  • Seite 9 MT KIT 12 SUMÁRIO Montagem da armação do ponto externo Página 10 Cablagem desde o alimentador Art. 1397 até ao ponto externo. Página 11 Fechadura em AC (Relé 1) Página 12 Fechadura em DC (Relé 1) Página 13 Comando local de abertura da fechadura com temporizador (Relé 1) Página 14 Montagem e regulação da orientação do módulo câmara Página 15...
  • Seite 10: Montaggio Telaio Posto Esterno

    GROUP S.P.A. Montaggio telaio posto esterno. Installing the external unit frame. Montage châssis plaque de rue. Montage van het frame van het entreepaneel. Montage der Türstation-Grundplatte. Montaje del bastidor de la unidad externa. Montagem da armação do ponto externo. MT KIT 12...
  • Seite 11: Cablaggio Alimentatore Art. 1397 Verso Il Posto Esterno

    MT KIT 12 Cablaggio alimentatore Art. 1397 verso il posto esterno. Wiring between power supply Art. 1397 and the external unit. Câblage alimentateur Art. 1397 vers la plaque de rue. Bekabeling voedingstransformator art. 1397 naar entreepaneel. Verkabelung Netzteil Art. 1397 zur Türstation. Cableado desde el alimentador art.
  • Seite 12: Gâche En C.a. (Relais 1)

    GROUP S.P.A. Serratura in AC (Relé 1). AC door-release (Relay 1). Gâche en C.A. (Relais 1). AC deurslot (Relais 1). Türöffner in WS (Relais 1). Cerradura de CA (relé 1). Fechadura em AC (Relé 1). MT KIT 12...
  • Seite 13: Serratura In Dc (Relé 1)

    MT KIT 12 Serratura in DC (Relé 1). DC door-release (Relay 1). Gâche en C.C. (Relais 1). DC deurslot (Relais 1). Türöffner in GS (Relais 1). Cerradura de CC (relé 1). Fechadura em DC (Relé 1). MT KIT 12...
  • Seite 14: Comando Locale Temporizzato Serratura (Relé 1)

    GROUP S.P.A. Comando locale temporizzato serratura (Relé 1). Timed local door-release command (Relay 1) (Request to exit). Commande locale temporisée gâche (Relais 1). Lokale slotbediening met tijdsinstelling (Relais 1). Lokale zeitgeschaltete Türöffner-Betätigung (Relais 1). Mando local temporizado de la cerradura (relé 1). Comando local de abertura da fechadura com temporizador (Relé...
  • Seite 15: Montaggio E Orientamento Modulo Telecamera

    MT KIT 12 Montaggio e orientamento modulo telecamera. Installing and adjusting the direction of the camera. Montage et orientation module caméra. Montage en instelling van de richting van de cameramodule. Einbau und Ausrichtung des Kameramoduls. Montaje y orientación del módulo telecámara. Montagem e regulação da orientação do módulo câmara.
  • Seite 16: Tabella Impostazioni Dip Switch Posto Esterno

    GROUP S.P.A. Tabella impostazioni dip switch posto esterno Tableau réglages Dip switches plaque de rue Table of external unit Dip switch settings. MT KIT 12...
  • Seite 17: Einstelltabelle Dip-Schalter Der Türstation

    MT KIT 12 Tabel instellingen dipswitches entreepaneel Tabla de configuración de los interruptores DIP de la unidad externa Einstelltabelle der Dipschalter der Türstation Tabela de configurações do dip switch do ponto externo MT KIT 12...
  • Seite 18: Kit Un Appartement : Câblage Monophasé Pont Art. 1398

    GROUP S.P.A. Kit monofamiliare: cablaggio monofase ponte Art. 1398. Single-residence kit: Single-phase wiring for bridge Art. 1398. Kit un appartement : cablâge monophasé pont Art. 1398. Kit voor eengezinswoningen: bekabeling voor eenfasestroom brug art. 1398. Einfamilienhaus-Set: WS-Verkabelung der Brücke Art. 1398 Kit unifamiliar: cableado monofásico del puente art.
  • Seite 19: Kit Bifamiliare: Cablaggio Monofase Ponti Art. 1398

    MT KIT 12 Kit bifamiliare: cablaggio monofase ponti Art. 1398. Two-residence kit: Single-phase wiring for bridges Art. 1398. Kit deux appartements : cablâge monophasé ponts Art. 1398. Kit voor tweegezinswoningen: bekabeling voor eenfasestroom bruggen art. 1398. Zweifamilienhaus-Set: WS-Verkabelung der Brücken Art. 1398. Kit bifamiliar: cableado monofásico de los puentes art.
  • Seite 20: Kit Deux Appartements Avec Compteur Parties Communes : Câblage Monophasé Ponts Art. 1398

    GROUP S.P.A. Kit bifamiliare con contatore parti comuni: cablaggio monofase ponti Art. 1398. Two-residence kit with shared parts meter: Single-phase wiring for bridges Art. 1398. Kit deux appartements avec compteur parties communes: câblage monophasé ponts Art. 1398. Kit tweegezinswoningen gemeenschappelijke E-meter, bekabeling eenfase. Zweifamilienhaus-Set mit Zähler für gemeinsame Komponenten: WS-Verkabelung der Brücken Art.
  • Seite 21: Distanze Di Collegamento

    MT KIT 12 Distances de connexion Distanze di collegamento Connection distances. A Max Bm Max Bb Max C Max 0,28 mm (Ø 0,6 mm - Ø 6/10 AWG 23) 200 m UTP5 cat. 5 0,2 mm (Ø 0.5 mm AWG 24) 400 m 0,5 mm (Ø...
  • Seite 22: Entfernungen Zwischen Den Geräten

    GROUP S.P.A. Aansluitafstanden Distancias de conexión Entfernungen zwischen den Geräten Distâncias de ligação A Max Bm Max Bb Max C Max 0,28 mm (Ø 0,6 mm - Ø 6/10 AWG 23) 200 m UTP5 cat. 5 0,2 mm (Ø 0.5 mm AWG 24) 400 m 0,5 mm (Ø...
  • Seite 23 MT KIT 12 Estensione massima unità abitativa * servita dal ponte Art. 1398: 300m circa. Attenzione! I gruppi di continuità impediscono il passaggio del segnale. L’insieme di tutti i punti di connessione (prese elettriche e ponti Art. 1398) utilizzabili per il sistema deve trovarsi in ingresso o in uscita del gruppo di continuità.
  • Seite 24: 10A

    GROUP S.P.A. Einschaltung der Haupt-Stromversorgung. Accensione alimentazione generale. Encendido de la alimentación general Switching on the main power supply. Acendimento da alimentação geral. Allumage alimentation générale. Inschakeling hoofdvoeding. Kit monofamiliare: corrispondenza staffa / pulsante di chiamata. Single-residence kit: bracket / call pushbutton alignment. Kit un appartement: correspondance bride / touche dʼappel.
  • Seite 25: 10B

    MT KIT 12 Kit bifamiliare: corrispondenza staffa / pulsante di chiamata e alimentatore monitor / ponte Art. 1398 Two-residence kit: bracket / call pushbutton and monitor power supply / bridge Art. 1398 alignment. Kit deux appartements : correspondance bride / touche dʼappel et alimentateur moniteur / pont Art. 1398 Kit voor tweegezinswoningen: koppeling van grondplaat / beldrukker, voedingstransformator monitor / brug art.
  • Seite 26: Montaggio Monitor

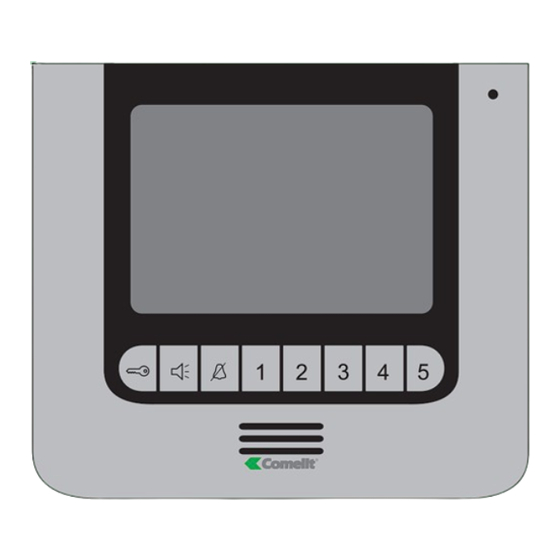
    GROUP S.P.A. Montaggio monitor. Installing the monitor. Montage moniteur. Montage van de monitor. Einbau des Monitors. Montaje del monitor Montagem do monitor. * Non utilizzare ciabatte con interruttore * Do not use power strips fitted with switches * Ne pas utiliser des blocs ménagers avec interrupteur * Gebruik geen wandcontactdozen met schakelaar * Keine Steckerleisten mit Schalter verwenden * No utilizar regletas de enchufes con interruptor.
  • Seite 27: Segnalazione Anomalie E Possibili Soluzioni

    MT KIT 12 Störungsanzeigen und mögliche Abhilfen. Segnalazione anomalie e possibili soluzioni. Señalización de anomalías y soluciones Fault indication and troubleshooting. Indicação de anomalias e possíveis soluções. Signalisation anomalies et solutions possibles. Storingssignaleringen en mogelijke oplossingen. In caso di connessione mancante attendere 1 minuto. Se la segnalazione si ripresenta assicurarsi: •...
  • Seite 28: Utilisation Relais Du Module Numéro De Rue

    GROUP S.P.A. Utilizzo relé del modulo numero civico (Relé 2). Vedi variante PW/AAA Using the house number module relay (Relay 2). See PW/AAA variant Utilisation relais du module numéro de rue (relais 2). Voir variante PW/AAA Gebruik van het relais van de huisnummermodule (Relais 2). Zie variant PW/AAA Gebrauch des Relais des Türstations-Moduls (Relais 2).
  • Seite 29: Installazione Monitor Supplementari Secondari (Max 14)

    MT KIT 12 Installazione monitor supplementari secondari (MAX 14 per unità abitativa). Installing additional secondary monitors (MAX 14 per residential unit). Installation moniteurs supplémentaires secondaires (maxi 14 par habitation). Installatie van extra secundaire monitors (MAX 14 per gezinsunit). Einbau zusätzlicher Monitore (MAX. 14 pro Wohnung). Instalación de monitores adicionales secundarios (14 como máximo por vivienda).
  • Seite 30 GROUP S.P.A. Codice intercom Intercom code Code intercom Intercomcode Intercom-Code Código intercom. Código intercom. 5,6,7 5,6,8 5,7,8 Dip switch ON *Dip 5, 6, 7, 8 OFF: Monitor principale *Dip 5, 6, 7, 8 OFF: Main monitor *Dip 5, 6, 7, 8 OFF : Moniteur principal *Dip 5, 6, 7, 8 OFF : Hoofdmonitor *Dipschalter 5, 6, 7, 8 OFF : Hauptmonitor *Dip 5, 6, 7, 8 OFF : Monitor principal...
  • Seite 31: Abilitare E Disabilitare Il Menu Installatore

    MT KIT 12 Abilitare e disabilitare il menu installatore. Enabling and disabling the installer menu using. Valider et invalider le menu dʼinstallation. In- en uitschakelen van het installateursmenu. Das Installationsmenü mit den Dipschaltern 1 von S2 aktivieren und deaktivieren. Habilitar e inhabilitar el menú Instalador Activar e desactivar o menu instalador La procedura é...
  • Seite 32: Impostazione Lingua Menu

    GROUP S.P.A. IMPOSTAZIONE LINGUA MENU DESCRIZIONE MENU INSTALLATORE Al primo accesso al menu (pulsante 1), viene richiesto di impostare la lingua di utilizzo. Selezionare la lingua desiderata con Titolo menu attualmente aperto. Titolo menu selezionato. uscire dal menu premendo e confermare la scelta Icone menu.
  • Seite 33: Configurazione Password Modem

    MT KIT 12 CONFIGURAZIONE PASSWORD MODEM Inserire la password del ponte collegato all’unità abitativa interessata (punto 14C) modificando il numero selezionato con i pulsanti . Per passare Dal menu installatore (pulsante 1) accedere al menu al numero successivo o precedente usare i “Configura monitor”...
  • Seite 34: Segnalazione Anomalie E Possibili Soluzioni

    GROUP S.P.A. SEGNALAZIONE ANOMALIE E POSSIBILI CONFIGURAZIONE PULSANTI SOLUZIONI Il kit dispone di 2 relé (relé 1 e relé 2) per ogni posto esterno connesso. È possibile configurarne il funzionamento sia durante che in assenza di chiamata (impianto a riposo). Con ogni pulsante configurato per il comando dei relé...
  • Seite 35 MT KIT 12 • PULSANTE PRIVACY / DOTTORE Selezionare la modalità per la quale si vuole • La funzione Privacy permette l'esclusione della chiamata dal modificare la funzione con i pulsanti posto esterno o intercomunicante. confermare la scelta premendo • La funzione Dottore permette l’azionamento automatico dell’apriporta (relé...
  • Seite 36 GROUP S.P.A. • Intercomunicante: • PULSANTI 2 - 3 - 4 - 5 associare il pulsante ad un posto interno. I pulsanti 2, 3, 4 e 5 possono essere programmati INTERCOM X (vedi punto 14 B). tutti con lo stesso procedimento. Di seguito viene illustrata la programmazione del pulsante 2.
  • Seite 37: Attivazione Ripetizione Suoneria

    MT KIT 12 ATTIVAZIONE RIPETIZIONE SUONERIA ATTIVAZIONE RISPOSTA AUTOMATICA Con questa funzione attivata il monitor ripeterà la Con questa funzione impostata, la fonica viene suoneria tre volte dopo la ricezione di una chiamata automaticamente attivata dopo la ricezione di una chiamata Dal menu installatore (pulsante 1) accedere a Dal menu installatore (pulsante 1) accedere al menu...
  • Seite 38: Visualizza Informazioni

    GROUP S.P.A. CONFIGURAZIONE TEMPI DI CHIAMATA VISUALIZZA INFORMAZIONI All’interno di questo menu è possibile modificare: • Tempo attesa risposta: tempo massimo oltre il quale la Dal menu installatore (pulsante 1) accedere al menu comunicazione termina in assenza di risposta. “Impostazioni speciali” con •...
  • Seite 39: Reset Configurazione

    MT KIT 12 Modificare il valore con i pulsanti Confermare la scelta premendo Premere il pulsante per uscire e salvare le modifiche. Se concluse le operazioni di configurazione disabilitare il menu installatore. MENU IMPOSTA TIPO DI RETE RESET CONFIGURAZIONE Dal menu installatore (pulsante 1) accedere al menu “Configura monitor”...
  • Seite 40: Setting The Menu Language

    GROUP S.P.A. SETTING THE MENU LANGUAGE DESCRIPTION OF THE INSTALLER MENU When you first enter the menu (pushbutton 1), you will be asked to set the language. Select the desired language using Name of menu currently open. Name of menu selected. Exit the menu by pressing and confirm your Menu icons.
  • Seite 41 MT KIT 12 SETTING THE MODEM PASSWORD Enter the password for the bridge connected to the relevant residential unit (paragraph 14C), adjusting the number selected using pushbuttons . To move on From the installer menu (pushbutton 1), enter the to the following number or the previous number, use “Program monitor”...
  • Seite 42 GROUP S.P.A. FAULT INDICATION AND TROUBLESHOOTING PROGRAMMING THE PUSHBUTTONS The kit has 2 relays (relay 1 and relay 2) for each external unit connected. Their operation may be programmed either during a call or when the system is in standby. When every pushbutton has been programmed for relay control, a maximum of 2 relays* may be activated at the same time.
  • Seite 43 MT KIT 12 • PRIVACY / DOCTOR BUTTON Select the mode for which you wish to modify the • The Privacy mode disables calls from the external unit or function using pushbuttons and confirm your intercom. selection by pressing • The Doctor mode enables automatic activation of the door-release function (relay 1) in response to a call from the external unit.
  • Seite 44 GROUP S.P.A. If the “Intercom” function was selected in the • PUSHBUTTONS 2 - 3 - 4 - 5 previous step, the pushbutton must be assigned to Pushbuttons 2, 3, 4 and 5 may be all programmed an internal unit. using the same procedure.
  • Seite 45 MT KIT 12 ACTIVATING RINGTONE REPETITION ACTIVATING THE AUTOMATIC RESPONSE When this function is selected, the audio line is When this function is active, the monitor will repeat activated automatically after a call is received. the ringtone three times after a call is received. From the installer menu (pushbutton 1), enter the From the installer menu (pushbutton 1), enter the “Special settings”...
  • Seite 46: Displaying Information

    GROUP S.P.A. PROGRAMMING CALL TIMES DISPLAYING INFORMATION This menu can be used to modify: • Awaiting response time: maximum time beyond which From the installer menu (pushbutton 1), enter the communication will be terminated if there is no response. “Special settings” menu using •...
  • Seite 47: Reset Configuration

    MT KIT 12 Modify the value using pushbuttons. Confirm your selection by pressing Press pushbutton to exit and save the changes. Once you have completed the programming procedures, disable the installer menu. SELECT TYPE OF NETWORK MENU RESET CONFIGURATION From the installer menu (pushbutton 1), enter the “Program monitor”...
  • Seite 48: Réglage Langue Menu

    GROUP S.P.A. RÉGLAGE LANGUE MENU DESCRIPTION MENU DʼINSTALLATION Au premier accès au menu (touche 1), choisir la langue que l’on désire utiliser. Sélectionner la langue désirée avec Titre menu actuellement ouvert. Titre menu sélectionné. quitter le menu en appuyant sur et confirmer le Icônes menu.
  • Seite 49: Configuration Mot De Passe Modem

    MT KIT 12 CONFIGURATION MOT DE PASSE MODEM Saisir le mot de passe du pont relié à l’habitation concernée (point 14C) en modifiant le numéro sélectionné avec les touches . Pour passer au Depuis le menu d’installation (touche 1) accéder au numéro suivant ou précédent, utiliser les menu “Configurer moniteur”...
  • Seite 50: Signalisation Anomalies Et Solutions Possibles

    GROUP S.P.A. SIGNALISATION ANOMALIES ET SOLUTIONS CONFIGURATION TOUCHES POSSIBLES Le kit dispose de 2 relais (relais 1 et relais 2) pour chaque plaque de rue reliée. Il est possible d’en configurer le fonctionnement tant durant qu’en absence d’appel (installation au repos). Avec chaque touche configuré...
  • Seite 51 MT KIT 12 • TOUCHE PRIVACY / DOCTEUR Sélectionner le mode pour lequel on désire modifier • La fonction Privacy permet d’exclure l’appel depuis la plaque la fonction avec les touches et confirmer le de rue ou poste intercommunicant. choix en appuyant sur •...
  • Seite 52 GROUP S.P.A. Si la fonction “Intercomunicant” a été sélectionnée • TOUCHES 2 - 3 - 4 - 5 dans le passage précédent, associer le touche à un Les touches 2, 3, 4 et 5 peuvent être tous poste intérieur. programmés avec la même procédure. Ci-dessous, INTERCOM X (voit point 14 B).
  • Seite 53: Activation Répétition Sonnerie

    MT KIT 12 ACTIVATION RÉPÉTITION SONNERIE ACTIVATION RÉPONSE AUTOMATIQUE Avec cette fonction programmée, la fonction Avec cette fonction active, le moniteur répètera la phonique est automatiquement activée après la sonnerie trois fois après la réception d’un appel réception d’un appel Depuis le menu d’installation (touche 1), accéder au Depuis le menu d’installation (touche 1), accéder au menu “Réglages spéciaux”...
  • Seite 54: Visualiser Informations

    GROUP S.P.A. CONFIGURATION TEMPS DʼAPPEL VISUALISER INFORMATIONS Dans ce menu, il est possible de modifier : • Temps d’attente réponse : temps maximum au-delà duquel la Depuis le menu d’installation (touche 1), accéder au communication se termine en absence de réponse menu “Configurer moniteur”...
  • Seite 55: Reset Configuration

    MT KIT 12 Modifier la valeur avec les touches Confirmer le choix en appuyant sur Appuyer sur le touche pour quitter et enregistrer les modifications. Lorsque les opérations de configuration sont terminées, invalider le menu d’installation. MENU PROGRAMMATION TYPE DE RÉSEAU RESET CONFIGURATION Depuis le menu d’installation (touche 1), accéder au menu “Configurer moniteur”...
  • Seite 56: Instellen Van De Taal

    GROUP S.P.A. INSTELLEN VAN DE TAAL BESCHRIJVING VAN HET INSTALLATEURSMENU Bij de eerste toegang tot het menu (drukknop 1) wordt gevraagd om de gebruikstaal in te stellen. Selecteer de gewenste taal met Titel van het huidige geopende menu. Titel van het geselecteerde menu. sluit het menu af met en bevestig uw keuze met Menupictogrammen.
  • Seite 57 MT KIT 12 CONFIGURATIE VAN HET WACHTWOORD Voer het wachtwoord in van de brug die met de gezinsunit in kwestie is verbonden (punt 14C) door VAN DE MODEM het geselecteerde nummer te wijzigen met de drukknoppen . Gebruik de drukknoppen naar het volgende of vorige nummer te gaan.
  • Seite 58 GROUP S.P.A. STORINGSSIGNALERINGEN EN MOGELIJKE CONFIGURATIE DRUKKNOPPEN OPLOSSINGEN De kit bestaat uit 2 relais (relais 1 en relais 2) voor elk aangesloten entreepaneel. De werking van de kit kan zowel tijdens een oproep als bij afwezigheid van een oproep (systeem in de ruststand) worden geconfigureerd.
  • Seite 59 MT KIT 12 • DRUKKNOP PRIVACY / ARTS Selecteer de modus waarvan u de functie wilt • Met de privacyfuncie kan de oproep vanaf het entreepaneel of wijzigen met de drukknoppen en bevestig uw vanaf de intercom worden uitgeschakeld. keuze met •...
  • Seite 60 GROUP S.P.A. • Intercomoproep: • DRUKKNOPPEN 2 - 3 - 4 - 5 koppel de drukknop aan een binnentoestel. De drukknoppen 2, 3, 4 en 5 kunnen allemaal volgens INTERCOM X (zie punt 14 B). dezelfde procedure worden geprogrammeerd. Hieronder wordt de programmering van de drukknop 2 ALGEMEEN INTERN: stuurt een oproep naar alle weergegeven.
  • Seite 61 MT KIT 12 ACTIVERING VAN DE EXTRA BEL ACTIVERING VAN DE HANDENVRIJFUNCTIE Als deze functie ingesteld is, wordt het geluid na de Als deze functie geactiveerd is, herhaalt de monitor ontvangst van een oproep automatisch na de ontvangst van een oproep de beltoon drie keer ingeschakeld Ga vanuit het installateursmenu (drukknop 1) naar Ga vanuit het installateursmenu naar het menu...
  • Seite 62: Informatie Weergeven

    GROUP S.P.A. CONFIGURATIE VAN DE OPROEPTIJDEN INFORMATIE WEERGEVEN In dit menu kan het volgende worden gewijzigd: • Wachttijd antwoord: maximale tijd, waarna de communicatie Ga vanuit het installateursmenu (drukknop 1) naar het wordt beëindigd als er niet wordt geantwoord menu “Speciale instellingen” met •...
  • Seite 63 MT KIT 12 Wijzig de waarde met de drukknoppen Bevestig uw keuze met Druk op de drukknop om de wijzigingen af te sluiten en op te slaan. Schakel het installateursmenu na de configuratie uit. MENU NETWERK INSTELLEN Ga vanuit het installateursmenu (drukknop 1) naar het menu “Monitor configureren”...
  • Seite 64: Einstellung Der Menüsprache

    GROUP S.P.A. EINSTELLUNG DER MENÜSPRACHE BESCHREIBUNG DES INSTALLATIONSMENÜS Beim ersten Aufruf des Menüs (Taste 1) werden Sie aufgefordert, die gewünschte Sprache einzustellen. Die Sprache wählen Sie mit Titel des aktuell geöffneten Menüs. Titel des gewählten Menüs. Zum Verlassen des Menüs drücken Sie Menüsymbole.
  • Seite 65: Konfiguration Des Modem-Passworts

    MT KIT 12 KONFIGURATION DES MODEM-PASSWORTS Geben Sie das Passwort der an die betreffende Wohnung angeschlossenen Brücke (Punkt 14C) ein; ändern Sie dazu die ausgewählte Nummer mit den Rufen Sie im Installationsmenü (Taste 1) mit den Tasten Tasten . Um zur nächsten oder vorausgehenden das Menü...
  • Seite 66: Störungsanzeigen Und Mögliche Abhilfen

    GROUP S.P.A. STÖRUNGSANZEIGEN UND MÖGLICHE ABHILFEN KONFIGURATION DER TASTEN Das Set enthält 2 Relais (Relais 1 und Relais 2) für jede angeschlossene Türstation. Die Betriebsart kann während einer Sprechverbindung bzw. ohne eine Sprechverbindung (Anlage in Standby) konfiguriert werden. Mit allen zur Betätigung der Relais konfigurierten Tasten können maximal 2 Relais* gleichzeitig eingeschaltet werden.
  • Seite 67 MT KIT 12 • TASTE PRIVACY / ARZTRUF Wählen Sie den Modus, für den Sie die Funktion • Die Funktion Privacy ermöglicht die Stummschaltung des Rufs ändern möchten, mit den Tasten und bestätigen von der Türstation oder einer internen Hauskommunikation. Sie die Auswahl mit •...
  • Seite 68 GROUP S.P.A. • Intercom: • TASTEN 2 - 3 - 4 - 5 Der Taste eine Innensprechstelle zuweisen. Die Tasten 2, 3, 4 und 5 werden alle nach INTERCOM X (siehe Punkt 14 B). demselben Verfahren programmiert. Im Folgenden ist die Programmierung von Taste 2 beschrieben. ALLGEMEINER RUF INTERN: Sendet einen Ruf an alle Monitore in derselben Wohnung.
  • Seite 69: Aktivierung Der Ruftonwiederholung

    MT KIT 12 AKTIVIERUNG DER RUFTONWIEDERHOLUNG AKTIVIERUNG DER ANTWORTAUTOMATIK Mit dieser Funktion wird die Sprechverbindung Wenn diese Funktion aktiviert ist, wiederholt der Mo- automatisch nach dem Eingang des Rufs aktiviert. nitor bei Eingang eines Rufs dreimal den Rufton. Rufen Sie im Installationsmenü (Taste 1) mit den Rufen Sie im Installationsmenü...
  • Seite 70: Aufrufen Der Informationen

    GROUP S.P.A. KONFIGURATION DER RUFZEITEN AUFRUFEN DER INFORMATIONEN In diesem Menü können Sie folgende Einstellungen ändern: • Wartezeit Antwort: Höchstdauer, nach der die Rufen Sie im Installationsmenü (Taste 1) mit den Tasten Gesprächsverbindung wegen Ausbleiben der Antwort endet. das Menü “Spezialeinstellungen” auf. •...
  • Seite 71: Reset Der Konfiguration

    MT KIT 12 Ändern Sie den Wert mit den Tasten Bestätigen Sie die Auswahl mit Taste drücken, um die Änderungen zu speichern und das Menü zu verlassen. Deaktivieren Sie nach der Konfiguration das Installationsmenü. EINSTELLMENÜ DES NETZTYPS RESET DER KONFIGURATION Rufen Sie im Installationsmenü...
  • Seite 72 GROUP S.P.A. PROGRAMACIÓN DEL IDIOMA DE LOS MENÚS DESCRIPCIÓN DEL MENÚ INSTALADOR Cuando se accede al menú por primera vez (tecla 1),se solicita que se elija el idioma. Seleccionar el idioma deseado con las teclas Título del menú actualmente abierto. Título del menú...
  • Seite 73 MT KIT 12 CONFIGURACIÓN DE LA CONTRASEÑA DEL MÓDEM Introducir la contraseña del puente conectado a la vivienda deseada (punto 14C) modificando el número seleccionado con las teclas . Para Desde el menú Instalador (tecla 1), acceder al menú pasar al número siguiente o precedente, pulsar las “Configura monitor”...
  • Seite 74 GROUP S.P.A. SEÑALIZACIÓN DE ANOMALÍAS CONFIGURACIÓN DE LAS TECLAS Y SOLUCIONES El kit dispone de 2 relés (relé 1 y relé 2) para cada unidad externa conectada. Es posible configurar el funcionamiento cuando no hay ninguna llamada en curso (instalación en reposo) o durante una llamada.
  • Seite 75 MT KIT 12 • TECLA PRIVACIDAD / DOCTOR Seleccionar el modo cuya función se desea • La función Privacidad permite excluir la llamada desde la unidad modificar con las teclas y confirmarlo pulsando externa o la intercomunicante. la tecla • La función Doctor permite accionar automáticamente el abrepuertas (relé...
  • Seite 76 GROUP S.P.A. • Intercomunicante: • TECLAS 2 - 3 - 4 - 5 asociar la tecla a una unidad interna. Las teclas 2, 3, 4 y 5 se pueden programar de la INTERCOM X (véase punto 14 B). misma manera. A continuación, se describe cómo programar la tecla 2.
  • Seite 77 MT KIT 12 ACTIVACIÓN DE LA REPETICIÓN DEL TIMBRE ACTIVACIÓN DE LA RESPUESTA AUTOMÁTICA Si esta función está activada, el audio se activa Si esta función está activada, el timbre se repite tres automáticamente cuando se produce una llamada. veces cuando se produce una llamada. Desde el menú...
  • Seite 78 GROUP S.P.A. CONFIGURACIÓN DE LOS TIEMPOS DE LLAMADA VISUALIZA INFORMACIONES En este menú es posible modificar: • Tiempo espera respuesta: tiempo máximo de espera de una Desde el menú Instalador (tecla 1), acceder al menú respuesta cuya superación implica la interrupción de la “Programaciones especiales”...
  • Seite 79 MT KIT 12 Modificar el valor con las teclas Confirmar la selección pulsando la tecla Pulsar la tecla para salir y guardar las modificaciones. Si las operaciones de configuración han terminado, inhabilitar el menú Instalador. MENÚ PROGRAMA TIPO DE RED REAJUSTE CONFIGURACIÓN Desde el menú...
  • Seite 80 GROUP S.P.A. CONFIGURAÇÃO DO IDIOMA DO MENU DESCRIÇÃO DO MENU INSTALADOR No primeiro acesso ao menu (botão 1), é solicitada ao utilizador a configuração do idioma de utilização. Seleccionar o idioma desejado com Título do menu actualmente aberto. Título do menu seleccionado. premir para sair do menu e confirmar a escolha Ícone do menu.
  • Seite 81 MT KIT 12 CONFIGURAÇÃO DA PASSWORD DO MODEM Introduzir a password da ponte ligada à unidade habitacional que interessa (ponto 14C) modificando o número seleccionado com os botões . Para Do menu instalador (botão 1) aceder ao menu passar ao número seguinte ou anterior, utilizar os “Configura monitor”...
  • Seite 82 GROUP S.P.A. INDICAÇÃO DE ANOMALIAS E POSSÍVEIS CONFIGURAÇÃO BOTÕES SOLUÇÕES O kit dispõe de 2 relés (relé 1 e relé 2) para cada ponto externo ligado. É possível configurar o funcionamento durante ou em ausência de chamadas (aparelho em repouso). Com cada botão configurado para o comando dos relés, é...
  • Seite 83 MT KIT 12 • BOTÃO PRIVACIDADE/MÉDICO Seleccionar o modo para o qual se pretende • A função Privacidade permite excluir as chamadas do ponto modificar a função com os botões e confirmar a externo ou intercomunicante. escolha premindo • A função Médico permite activar automaticamente a abertura de porta (relé...
  • Seite 84 GROUP S.P.A. • Intercomunicante: • BOTÕES 2 - 3 - 4 - 5 associar o botão a um ponto interno. Os botões 2, 3, 4 e 5 podem todos ser programados INTERCOM X (consultar ponto 14 B). através o mesmo procedimento. A seguir é apresentada a programação do botão 2.
  • Seite 85 MT KIT 12 ACTIVAÇÃO DA REPETIÇÃO DA CAMPAINHA ACTIVAÇÃO DA RESPOSTA AUTOMÁTICA Com esta função configurada, o som é Com esta função activada o monitor repete a cam- automaticamente activado após a recepção de uma painha três vezes após a recepção de uma chamada. chamada.
  • Seite 86 GROUP S.P.A. PROGRAMA TEMPOS DE CHAMADA VISUALIZA INFORMAÇÕES No interior deste menu é possível modificar: • Tempo de espera de resposta: tempo máximo para além do Do menu instalador (botão 1) aceder ao menu qual a comunicação termina em ausência de resposta “Configurações especiais”...
  • Seite 87 MT KIT 12 Modificar o valor com os botões Confirmar a escolha premindo Premir o botão para sair e guardar as modificações. Quando concluídas as operações de configuração, desactivar o menu instalador. MENU CONFIGURAÇÃO DO TIPO DE REDE REPOR CONFIGURAÇÃO Do menu instalador (botão 1) aceder ao menu “Configura monitor”...
  • Seite 88: Schéma Pwk/01A : Câblage Kit Un Appartement Art. 8591

    GROUP S.P.A. PWK/01A Cablaggio kit monofamiliare Art. 8591. Verkabelung Einfamilienhaus-Set Art. 8591. Wiring for single-residence kit Art. 8591. Cableado del kit unifamiliar art. 8591. Câblage kit un appartement Art. 8591. Cablagem kit unifamiliar Art. 8591. Bekabeling kit eengezinswoningen art. 8591. Contatore Meter Compteur...
  • Seite 89: Schéma Pwk/05 : Câblage Kit Un Appartement Triphasé Art. 8591

    MT KIT 12 PWK/05 Cablaggio kit monofamiliare trifase Art. 8591. Verkabelung Einfamilienhaus-Set Drehstrom Art. 8591. Wiring for three-phase single-residence kit Art. 8591. Cableado del kit unifamiliar trifásico art. 8591. Câblage kit un appartement triphasé Art. 8591. Cablagem kit unifamiliar trifásica Art. 8591. Bekabeling eengezinswoning kit driefasen Art.
  • Seite 90: Schéma Pwk/02A : Câblage Kit Deux Appatements Art. 8592

    GROUP S.P.A. PWK/02A Cablaggio kit bifamiliare Art. 8592. Verkabelung Zweifamilienhaus-Set Art. 8592. Wiring for two-residence kit Art. 8592. Cableado del kit bifamiliar art. 8592. Câblage kit deux appartements Art. 8592. Cablagem kit bifamiliar Art. 8592. Bekabeling tweegezinswoning kit driefasen Art. 8592 Contatore Meter Compteur...
  • Seite 91: Schéma Pwk/06 : Câblage Kit Deux Appartements Triphasé Art. 8592

    MT KIT 12 PWK/06 Cablaggio kit bifamiliare trifase Art. 8592. Verkabelung Zweifamilienhaus-Set Drehstrom Art. 8592. Wiring for three-phase two-residence kit Art. 8592. Cableado del kit bifamiliar trifásico art. 8592. Câblage kit deux appartement triphasé Art. 8592. Cablagem kit bifamiliar trifásica Art. 8592. Bekabeling tweegezinswoning kit driefasen Art.
  • Seite 92: Schéma Pwk/02B : Câblage Kit Deux Appartements Art. 8592 Avec Compteur Pour Parties Communes

    GROUP S.P.A. PWK/02B Cablaggio kit bifamiliare Art. 8592 con contatore parti comuni. Wiring for two-residence kit Art. 8592 with shared parts meter. Câblage kit deux appartements Art. 8592 ave compteur parties communes. Bekabeling voor kit voor tweegezinswoningen art. 8592 met gemrrnschappelijke E-meter. Verkabelung Zweifamilienhaus-Set Art.
  • Seite 93: Schéma Pwk/01B : Câblage Kit Un Appartement Avec Alimentateur Supplémentaire Pour Plaque De Rue

    MT KIT 12 PWK/01B Cablaggio kit monofamiliare con alimentatore supplementare per posto esterno. Wiring for single-residence kit with additional external unit power supply. Câblage kit un appartement avec alimentateur supplémentaire pour plaque de rue. Bekabeling voor kit voor eengezinswoningen met extra voedingstransformator voor entreepaneel. Verkabelung Einfamilienhaus-Set mit Zusatz-Netzteil für Türstation.
  • Seite 94: Schéma Pwk/07 : Utilisation Répétiteur Passif Art. 1396 Entre La Plaque De Rue Et Le Pont Art. 1398

    GROUP S.P.A. PWK/07 Utilizzo repeater passivo Art. 1396 tra il posto esterno e il ponte Art. 1398. Use of the passive repeater Art. 1396 between the external unit and the bridge Art. 1398. Utilisation répétiteur passif Art. 1396 entre la plaque de rue et le pont Art. 1398. Gebruik van de passieve versterker art.
  • Seite 95: Schéma Pwk/03 : Câblage Kit Un Appartement Avec 2 Plaques De Rue

    MT KIT 12 PWK/03 Cablaggio kit monofamiliare con 2 posti esterni. Verkabelung Einfamilienhaus-Set mit 2 Außenstationen. Wiring for single-residence kit with 2 external units. Cableado del kit unifamiliar con 2 unidades externas. Câblage kit un appartement avec 2 plaques de rue. Kit unifamiliar com 2 pontos externos.
  • Seite 96: Schéma Pwk/04 : Câblage Kit Deux Appartements Avec 2 Plaques De Rue

    GROUP S.P.A. PWK/04 Cablaggio kit bifamiliare con 2 posti esterni. Verkabelung Zweifamilienhaus-Set mit 2 Türstationen Wiring fo Two-residence kit with 2 external units. Cableado del kit bifamiliar con 2 unidades externas. Câblage kit deux appartements avec 2 plaques de rue. Kit bifamiliar com cablagem com 2 pontos externos.
  • Seite 97: Variante Pw/Aaa : Connexion Relais Du Module Numéro De Rue (Relais 2)

    MT KIT 12 PW/AAA Variante collegamento relé del modulo numero civico (relé 2). Vedi punto 13 Variant with house number module relay connection (relay 2). See paragraph 13 Variante connexion relais du module numéro de rue (relais 2). Voir point 13 Aansluitvariant relais met huisnummermodule (relais 2).
  • Seite 98: Variante Pw/Aab : Connexion Relais Temporisé

    GROUP S.P.A. PW/AAB Variante collegamento relé temporizzato. Variante Anschluss eines Zeitschaltrelais. Variant with timed relay connection (Request to exit). Variante para la conexión de un relé temporizado Variante de ligação de relé com temporizador Variante connexion relais temporisé. Aansluitvariant tijdrelais. PW/AAC Variante contatto segnalazione porta aperta.
  • Seite 99: Variante Pour Emploi Réseau Rc Pour Filtre Gâche Sur Ontacts Du Relais 1 Ou Relais

    MT KIT 12 Variante per utilizzo rete RC per filtro serratura sui contatti del relé 1 o relé 2. Variant using RC network for door-release filter on relay 1 or relay 2 contacts. Variante pour emploi réseau RC pour filtre gâche sur contacts du relais 1 ou relais 2. Variant voor het gebruik van het RC-net ontstoorfilter op de contacten van het relais 1 of relais 2.
  • Seite 100 (+39) 0346750093 [ B ] [ E ] [ D ] [ F ] Comelit Group Belgium Comelit Group Germany GmbH Comelit Espana S.L. Comelit Immotec Z.3 Doornveld 170 Brusseler Allee 23- 41812 Erkelenz Josef Estivill 67/69 - 08027 Barcelona Siège:...

Inhaltsverzeichnis