Inhaltsverzeichnis
Werbung
Verfügbare Sprachen
Verfügbare Sprachen
Quicklinks
Manage your servers using one PS/2 console
Manage
and CAT5 cabling
User Manual
Benutzerhandbuch
Manual del usuario
OmniView
CAT5 KVM Switch
EN
Manage your servers using one
PS/2 console and CAT5 cabling
FR
Contrôlez vos serveurs à l'aide d'une
console PS/2 et d'un câblage CAT5
DE
Steuerung Ihrer Server über eine PS/2-
Konsole mit CAT5-Verkabelung
NL
Servers beheren met slechts één PS/2-
console en CAT5-kabels
ES
Gestione sus servidores mediante una
consola PS/2 y cableado CAT5
IT
IPer gestire i server utilizzando una
console PS/2 ed i cavi CAT5
Manuel de l'utilisateur
•
Handleiding
•
Manuale utente
•
SMB
®
F1DP104Aea
F1DP108Aea
F1DP116Aea
Werbung
Kapitel
Inhaltsverzeichnis
Fehlerbehebung

Verwandte Anleitungen für Belkin OmniView SMB CAT5


Inhaltszusammenfassung für Belkin OmniView SMB CAT5
- Seite 1 OmniView ® CAT5 KVM Switch Manage your servers using one PS/2 console Manage and CAT5 cabling Manage your servers using one PS/2 console and CAT5 cabling Contrôlez vos serveurs à l’aide d’une console PS/2 et d’un câblage CAT5 Steuerung Ihrer Server über eine PS/2- Konsole mit CAT5-Verkabelung Servers beheren met slechts één PS/2- console en CAT5-kabels...
- Seite 2 Belkin Tech Support Europe: 00 800 223 55 460 © 2005 Belkin Corporation. All rights reserved. All trade names are registered trademarks of respective manufacturers listed. Mac OS and Mac are trademarks of Apple Computer, Inc., registered in the U.S. and other countries.
-
Seite 3: Inhaltsverzeichnis
Table of Contents Table of Contents Introduction ................... 1 Package Contents ................. 1 Overview ....................2 Feature Overview ................. 2 Equipment Requirements .............. 4 System Requirements ..............6 Unit Display Diagrams ..............7 Specifications ................9 Installation ..................12 Pre-Configuration ................ 12 Mounting the SMB CAT5 KVM Switch ......... -
Seite 4: Introduction
Switch. Our diverse line of KVM solutions exemplifies the Belkin commitment to delivering high-quality, durable products at an affordable price. The OmniView SMB CAT5 KVM Switch is the only SMB KVM switch that provides easy and dependable multiplatform server control. Built to deliver... -
Seite 5: Overview
• CAT5 Technology Integrated CAT5 technology enables you to connect your KVM Switch to your servers up to 100 feet (30m) away using standard CAT5 cabling and Belkin’s compact Server Interface Modules. CAT5 cabling reduces wiring clutter, simplifies cable management, and allows for greater airflow in your racks, increasing the lifespan of your equipment. - Seite 6 SMB CAT5 KVM Switch. This enables your KVM Switch to maintain consistent compatibility with the latest devices and servers. Firmware upgrades are free for the life of your SMB CAT5 KVM Switch and can be downloaded from Belkin’s support website at www.belkin.com/support.
-
Seite 7: Equipment Requirements
Overview Equipment Requirements Server Interface Modules Connecting the SMB CAT5 KVM Switch to a server requires a custom Belkin OmniView SMB Server Interface Module and a standard CAT5 patch cable. OmniView SMB Server F1DP101A-AP Interface Modules: F1DP101AeaAP (PS/2 style) F1DP101AeaAU (USB style) F1DP101AeaAL (Legacy Sun ™... - Seite 8 Overview Cables Belkin highly recommends you use Belkin Category 5e, FastCAT5e, or Category 6 Patch Cables for your SMB CAT5 KVM Switch to help ensure the superior performance of your video. These cables offer the highest quality possible to ensure optimal data and A3L791-XX-YYY video transmission.
-
Seite 9: System Requirements
Overview System Requirements OS Platforms The SMB CAT5 KVM Switch is compatible with CPUs running on, but not limited to, the following OS platforms: • Windows , 95, 98, 2000, Me, XP, Server 2003 ® ® • Microsoft DOS 5.x and above ®... -
Seite 10: Unit Display Diagrams
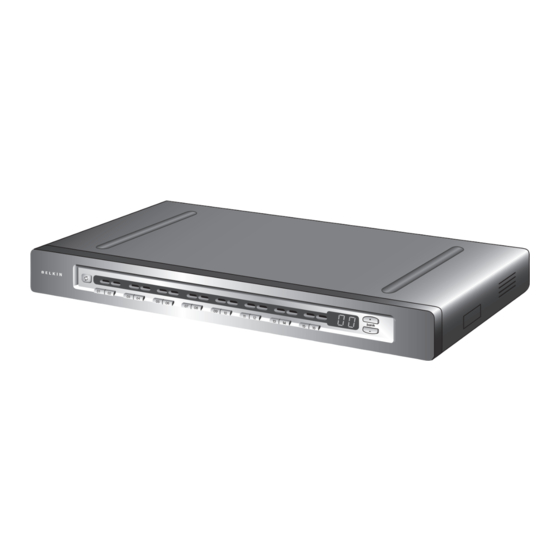
Overview Unit Display Diagrams Front View of the SMB CAT5 KVM Switch: AutoScan Button LED For Selected 7-Segment LED Port Identification For Selected BANK Identification Direct-Access Port Selector Manual BANK Scroll Buttons (F1DP116Aea shown) - Seite 11 Overview Unit Display Diagrams Back View of the SMB CAT5 KVM Switch: DC Power Jack Secondary Input Console VGA Monitor Port RJ45 CPU Ports DIP Switch Console PS/2 Mouse/Keyboard Ports Flash-Upgrade Port Primary Input/ Secondary Output (F1DP116Aea shown)
-
Seite 12: Specifications
Overview Specifications SMB CAT5 KVM Switch Part No.: F1DP104Aea, F1DP108Aea, F1DP116Aea Enclosure: Metal enclosure with high-impact plastic faceplate Power: 6-volt DC, 1-Amp power adapter with center-pin positive polarity Daisy-Chain: Maximum of 16 OmniView KVM Switches No. of Servers Supported: 4, 8, 16 respectively for 4-port, 8-port, 16-port models (256 servers max via daisy-chaining) Console Keyboard Emulation:... - Seite 13 Overview Dimensions: (F1DP104Aea) 11 x 1.75 x 6 in. (279mm x 44.5mm x 150mm) (F1DP108Aea) 17.25 x 1.75 x 7.5 in. (438mm x 44.5mm x 190mm) (F1DP116Aea) 17.25 x 3.5 x 7.5 in. (438mm x 89mm x 190mm) Weight: (F1DP104Aea) 5.3 lbs. (2.4kg.) (F1DP108Aea) 9.2 lbs.
- Seite 14 Overview SMB Server Interface Module, USB Part No.: F1DP101AeaAU Emulation: Keyboard and mouse signals Power: Via attached server; with keep-alive intelligence Keyboard/Mouse Connection: USB Type A Monitor Connection: HDDB15 male (VGA) Resolution Support: Up to 1600x1200@75Hz Max. Distance Supported: 100 ft. (30m) Weight: 0.25 lbs.
-
Seite 15: Installation
CAT5 UTP cable between the SMB CAT5 KVM Switch and the connected servers does not exceed 100 feet (30m). NOTE: The Belkin CAT5 Extender (F1D084) may be used to extend your console (keyboard, mouse, and monitor) by up to 500 feet (152m). -
Seite 16: Mounting The Smb Cat5 Kvm Switch
Installation Mounting the SMB CAT5 KVM Switch Bracket Installation (F1DP108Aea and F1DP116Aea) Eight- or 16-Port SMB CAT5 KVM Switches include adjustable mounting brackets ideal for installation in 19-inch racks. The mounting brackets feature three adjustment positions to allow you to set the SMB CAT5 KVM Switch’s face flush with the ends of the rails or to extend the SMB CAT5 KVM Switch past the front of the rails. - Seite 17 Installation Optional Bracket Installation (F1DP104Aea) The SMB 4-Port CAT5 KVM Switch can be installed into a 19-inch server rack using an optional OmniView Rack-Mount Kit (F1D005). Step 1 Attach the Rack-Mount Bracket to your SMB CAT5 KVM Switch using the Phillips screws provided.
-
Seite 18: Connecting The Console To The Smb Cat5 Kvm Switch
Installation Connecting the Console to the SMB CAT5 KVM Switch Step 1 Connect the VGA monitor cable to the HDDB15 female port on the back of the SMB CAT5 KVM Switch in the “Console” section. (Refer to diagram below.) Step 2 Connect the PS/2 keyboard cable to the keyboard port on the back of the SMB CAT5 KVM Switch in the “Console”... - Seite 19 Installation Step 3 Connect the PS/2 mouse cable to the mouse port on the back of the SMB CAT5 KVM Switch in the “Console” section. (Refer to diagram below.) Step 4 Attach the power adapter to the DC power jack labeled “6VDC, 1A” located on the rear panel of the SMB CAT5 KVM Switch.
-
Seite 20: Connecting Servers To The Smb Cat5 Kvm Switch
(PS/2 Connection): Step 1 Make sure your server is powered off. Step 2 Using the Belkin OmniView SMB Server Interface Module for PS/2 (F1DP101AeaAP), connect the VGA connector to the monitor port on your server. (Refer to diagram below.) Step 3 Connect the PS/2 mouse and then the keyboard connectors to the mouse and keyboard ports on the server. - Seite 21 Installation Step 4 Connect the SMB CAT5 KVM Switch to the Server Interface Module using the included Belkin CAT5e Patch Cable or other CAT5 cable. (Refer to diagram below.) Step 5 Power-up your server. Step 6 Repeat Steps 1 through 5 for each additional PS/2 server you wish...
- Seite 22 (USB Connection): Step 1 Make sure your server is powered on. Step 2 Using the Belkin OmniView SMB Server Interface Module for USB (F1DP101AeaAU), connect the VGA connector to the monitor port on your server. (Refer to diagram below.) Step 3 Connect the USB connector to an available USB port on the server.
- Seite 23 Step 4 Connect the SMB CAT5 KVM Switch to the Server Interface Module using the included Belkin CAT5e Patch Cable or other CAT5 cable. (Refer to diagram below.) Your server should recognize your Server Interface Module and automatically install the HID USB driver if necessary.
- Seite 24 Step 1 Make sure your server is powered off. Step 2 Using the Belkin OmniView SMB Server Interface Module for Legacy Sun (F1DP101AeaAL), connect the VGA connector to the monitor port on your server. (Refer to diagram below.) Step 3 Connect the miniDIN8 connector to the miniDIN8 keyboard port on the server.
- Seite 25 Installation Step 4 Connect the SMB CAT5 KVM Switch to the Server Interface Module using the included Belkin CAT5e Patch Cable or other CAT5 cable. (Refer to diagram below.) Step 5 Power-up your server. Step 6 Repeat Steps 1 through 4 for each additional Sun server you wish to connect.
-
Seite 26: Connecting Multiple Smb Cat5 Kvm Switches (Daisy-Chaining)
16 SMB CAT5 and PRO2 KVM Switches. NOTE: A Daisy-Chain Cable (F1D108-CBL) is required to daisy-chain each SMB CAT5 KVM Switch and is available through your Belkin reseller, or online at www.belkin.com (U.S. only). How to Assign a BANK Address All SMB CAT5 KVM Switches feature a “BANK DIP”... - Seite 27 Installation BANK DIP Switch Configuration Chart DIP SWITCH# BANK ADDRESS Down Down Down Down Down Down Down BANK 01 Secondary Down Down Down BANK 02 Secondary Down Down BANK 03 Secondary Down Down Down BANK 04 Secondary Down Down BANK 05 Secondary Down Down BANK 06 Secondary...
- Seite 28 Installation Example of Daisy-Chain Configuration Primary KVM Switch (BANK 00) Secondary KVM Switch (BANK 01) Secondary KVM Switch (BANK 02) Secondary KVM Switch (BANK 03)
-
Seite 29: Getting Started
Installation Getting Started: Step 1 Make sure that all servers and SMB CAT5 KVM Switches are powered off and that each SMB CAT5 KVM Switch has been assigned a unique BANK address. Step 2 Place all primary and secondary KVM switches in the desired location. Step 3 Connect the console monitor, keyboard, and mouse to the console ports of the primary switch (BANK 00). - Seite 30 Installation Connecting the Servers: Step 1 Connect all servers to the primary and secondary KVM switches. Refer to the “Connecting Servers to the SMB CAT5 KVM Switch” section on page 17 for instructions. Step 2 Make sure that the power adapter is connected to the primary KVM switch and that the KVM switch is powered on.
-
Seite 31: Powering Up The Systems
Installation Powering Up the Systems Verify that all servers connected to the SMB CAT5 KVM Switch are powered on. If any connected servers have not been powered on, it is okay to do so at this time (servers can be powered on simultaneously). The SMB CAT5 KVM Switch emulates both a mouse and keyboard on each port and allows your server to boot normally. -
Seite 32: Using Your Smb Cat5 Kvm Switch
Using Your SMB CAT5 KVM Switch Now that you have connected your console and servers to your SMB CAT5 KVM Switch, it is ready for use. Select connected servers by either the direct-access port selectors, located on the front panel of the SMB CAT5 KVM Switch, using the On-Screen Display, or by using hot key commands through the console keyboard. - Seite 33 Using Your SMB CAT5 KVM Switch Using Your SMB CAT5 KVM Switch With a daisy-chain switch configuration, you can switch between BANKs (KVM switches) by pressing “Scroll Lock”, “Scroll Lock”, “Page Up”, to switch to the previous BANK. Press “Scroll Lock”, “Scroll Lock”, “Page Down”, to switch to the next BANK.
-
Seite 34: Selecting A Server Using Direct-Access Port Selectors
Using Your SMB CAT5 KVM Switch Selecting a Server Using Direct-Access Port Selectors You can directly select which server you wish to control by pressing the direct- access port selector next to the corresponding port. The LED will illuminate to indicate the port is currently selected. -
Seite 35: Autoscan Mode
Using Your SMB CAT5 KVM Switch Using Your SMB CAT5 KVM Switch AutoScan Mode The AutoScan feature allows you to set your SMB CAT5 KVM Switch to scan and monitor the activities of all connected servers one by one. The SMB CAT5 KVM Switch remains on one server for a preset number of seconds, before switching to the next server. -
Seite 36: On-Screen Display
Using Your SMB CAT5 KVM Switch ON-SCREEN Display The On-Screen Display allows you to switch servers, assign names to your servers, enable and disable the AutoScan feature, set the desired scan time interval for AutoScan, enable the password security feature, and program hot keys. - Seite 37 Using Your SMB CAT5 KVM Switch Using Your SMB CAT5 KVM Switch OSD Menu Keyboard Commands Navigate to different servers in the same BANK (Page Up/Page Down) Select next or previous BANK (Insert) Highlight server name for editing (Enter) Switch servers (Tab) Open the “Function/Help”...
- Seite 38 Using Your SMB CAT5 KVM Switch Function/Help Page The “Function/Help” page allows you to set the time intervals for the AutoScan feature and OSD display time, enable the password security feature, and program hot keys. Function/Help Page Keyboard Commands (F4) Initiate AutoScan Navigate to the next field (Insert)
-
Seite 39: Admin Password
Using Your SMB CAT5 KVM Switch Using Your SMB CAT5 KVM Switch Security This feature allows you to enable an administrator password to prevent unauthorized users from accessing the OSD. To enable or disable the Security feature, use the arrow keys to navigate to the “Security” field and press the space bar. - Seite 40 Using Your SMB CAT5 KVM Switch Timeout This specifies the amount of time that can elapse before the administrator will be locked out of the KVM Switch (and connected servers) due to user inactivity. To regain access to the KVM Switch after Timeout, simply reenter the Admin Password in the login box.
-
Seite 41: Keyboard Hot Key Command Shortcuts
Using Your SMB CAT5 KVM Switch Using Your SMB CAT5 KVM Switch Keyboard Hot Key Command Shortcuts Below is a complete list of hot key commands that can be used for your SMB CAT5 KVM Switch: SL, SL, Up Arrow Switch to PREVIOUS ACTIVE port SL, SL, Switch to NEXT ACTIVE port... -
Seite 42: Sun Combo Keys
Using Your SMB CAT5 KVM Switch Sun Combo Keys The PS/2 keyboard connected to the SMB CAT5 KVM Switch does not support the Sun keypad to perform special functions in the Sun operating system environment. When a USB or Sun Server Interface Module is connected to a Sun server, the Server Interface Module emulates the Sun keys using a set of key combinations called Combo Keys. -
Seite 43: Updating Firmware
SMB CAT5 KVM Switch. To update your firmware, download the appropriate firmware file and utility from www.belkin.com/support/. The utility will guide you through the process of updating the firmware on your SMB CAT5 KVM Switch. WARNING! We strongly recommend that you update your firmware only if you are experiencing mouse and keyboard problems with your SMB CAT5 KVM Switch, as reconfiguring software may lead to unexpected operational problems. -
Seite 44: Frequently Asked Questions
The SMB CAT5 KVM Switch supports mice from Microsoft, Logitech ® Kensington , etc., and Belkin. Please contact Belkin Technical Support for ® compatibility issues you may experience. How does the SMB CAT5 KVM Switch allow the user to switch between ports? The SMB CAT5 KVM Switch supports three methods of port selection. - Seite 45 Frequently Asked Questions What is the maximum video resolution that the SMB CAT5 KVM Switch supports? The advanced video circuit in the SMB CAT5 KVM Switch supports a maximum resolution of up to 1600x1200@75Hz. Increasing the cable length from your SMB CAT5 KVM Switch to your servers will result in lower resolution support.
-
Seite 46: Troubleshooting
Troubleshooting My server does not boot when connected to the SMB CAT5 KVM Switch but works fine when I connect the keyboard, video, and mouse directly to the server. • Make sure that the keyboard and mouse cables are connected tightly between the Server Interface Module and the server. - Seite 47 Troubleshooting The server does not detect a keyboard and I get a keyboard error reported at boot–up. • Check that the keyboard cable on the Server Interface Module is completely connected to your server. Tighten any loose connections. • If you are using the keyboard software that was included with your keyboard, uninstall it and then reinstall the standard Microsoft keyboard driver.
- Seite 48 Troubleshooting When I switch from one port to another, mouse movement is completely erratic. • Make sure you do not have more than one mouse driver installed. Make sure that the driver is either for a standard PS/2 mouse or a Microsoft server- compatible PS/2 mouse.
-
Seite 49: Glossary
Glossary The following definitions are used throughout this User Manual: AutoScan: A mode of operation where the KVM switch scans from one port to another, on an ongoing basis, as configured by the user. BANK: The address of a daisy-chained KVM switch (00–15), set by the DIP switch. - Seite 50 Glossary HID: Human Interface Device, the USB device class that includes keyboards and mice. KVM: Literally “Keyboard Video Mouse”, this term refers to technology that allows two or more computers to be controlled by one keyboard, video monitor, and mouse; some switches that use KVM technology enable sharing of other peripherals such as audio speakers, microphones, and printers.
-
Seite 51: Information
Belkin Corporation warrants this product against defects in materials and workmanship for its warranty period. If a defect is discovered, Belkin will, at its option, repair or replace the product at no charge provided it is returned during the warranty period, with transportation charges prepaid, to the authorized Belkin dealer from whom you purchased the product. - Seite 52 Switch KVM CAT5 OmniView ® Contrôlez vos serveurs à l’aide d’une console Contrôlez PS/2 et d’un câblage CAT5 Manuel de l’utilisateur F1DP104Aea F1DP108Aea F1DP116Aea...
- Seite 53 Assistance Technique Belkin Europe : 00 800 223 55 460 © 2005 Belkin Corporation. Tous droits réservés. Toutes les raisons commerciales sont des marques déposées de leurs fabricants respectifs. Mac et Mac OS sont des marques de commerce de Apple Computer, Inc., enregistrées aux États-Unis et dans d’autres pays.
- Seite 54 Table des matières Table des matières Introduction ................... 1 Contenu de l’emballage .................1 Présentation ..................2 Présentation des fonctions ................2 Configuration requise ..................4 Configuration requise ..................6 Illustrations de l’unité ..................7 Spécifications ....................9 Installation ..................12 Préconfiguration ..................12 Montage du Switch KVM CAT5 SMB ............13 Branchement du Switch KVM CAT5 SMB ..........15 Branchement des serveurs au Switch KVM CAT5 SMB ......17 Connexion de plusieurs unités KVM CAT5 SMB...
-
Seite 55: Introduction
Les Switchs KVM CAT5 SMB peuvent être montés en série, ce qui vous permet de contrôler jusqu’à 256 serveurs PS/2, USB et Sun à partir d’une seule console PS/2. La mise en oeuvre de la technologie CAT5 Belkin et des Modules d’interface serveurs compacts simplifient l’installation, garantissant la plus haute stabilité... -
Seite 56: Présentation
La technologie CAT5 intégrée vous permet de brancher votre Switch KVM à vos serveurs situés jusqu’à 30 mètres de ceux-ci, grâce à un câblage CAT5 standard et les Modules d’interface serveur compacts de Belkin. Le câblage CAT5 diminue l’enchevêtrement des câbles, simplifie la gestion de ceux-ci et facilite la circulation de l’air dans les bâtis, prolongeant ainsi la longévité... - Seite 57 Les mises à niveau son gratuites pour toute la durée de vie de votre Switch KVM CAT5 SMB et peuvent être téléchargées du site de l’assistance technique Belkin à www.belkin.com/support.
-
Seite 58: Configuration Requise
Configuration requise Modules d’interface serveur Pour brancher le Switch KVM CAT5 SMB à un serveur, vous devez disposer d’un Module d’interface serveur OmniView SMB Belkin et un câble de raccordement CAT5 standard. F1DP101A-AP Modules d’interface serveur SMB OmniView® : F1DP101AeaAP (PS/2) F1DP101AeaAU (USB) F1DP101AeaAL (Système patrimonial... - Seite 59 Présentation Câbles Belkin recommande fortement l’utilisation des câbles de raccordement Catégorie 5e, FastCAT5e, ou Category 6 avec votre Switch KVM CAT5 SMB afin d’assurer une meilleure performance de votre vidéo. Ils offrent la plus grande qualité possible afin d’assurer une transmission A3L791-XX-YYY de données optimale.
-
Seite 60: Systèmes D'exploitation
Présentation Configuration requise Systèmes d’exploitation Le Switch KVM CAT5 SMB est compatible avec des unités centrales sous les plate-formes suivantes (liste non exhaustive) : • Windows , 95, 98, 2000, Me, XP, Server 2003 ® ® • Microsoft DOS 5.x et supérieur ®... -
Seite 61: Illustrations De L'unité
Présentation Illustrations de l’unité Face avant du Switch KVM CAT5 SMB : Témoin DELen 7 segments pour TÉMOIN Pour Bouton AutoScan l’identification du BANK sélectionné l’identification du port sélectionné Sélecteur de port à accès direct Boutons de défilement manuel des BANK (F1DP116Aea shown) - Seite 62 Présentation Illustrations de l’unité Face arrière du Switch KVM CAT5 SMB : Prise d’alimentation CC Entrée secondaire Port VGA de la Console Ports RJ45 des CPU Commutateur DIP Ports PS/2 souris/ clavier de la console Port de mise à niveau Flash Entrée principale/ sortie secondaire (F1DP116Aea montré)
- Seite 63 Présentation Caractéristiques techniques Switch KVM CAT5 SMB Référence : F1DP104Aea, F1DP108Aea, F1DP116Aea Boîtier : Boîtier métallique avec face plastique hautement résistante Alimentation : Adaptateur de courant 6 volts CC, 1 A avec polarité positive sur la broche centrale Configuration en série : Maximum de 16 Switchs KVM OmniView Nombre de serveurs pris en charge : 4, 8 et 16 respectivement pour...
- Seite 64 Présentation Dimensions : (F1DP104Aea) 279 mm x 44,5 mm x 150 mm (F1DP108Aea) 438 mm x 44,5 mm x 190 mm (F1DP116Aea) 438 mm x 89 mm x 190 mm Poids : (F1DP104Aea) 2,4 kg (F1DP108Aea) 4,2 kg (F1DP116Aea) 5,5 kg REMARQUE : Ces spécifications sont sujettes à...
- Seite 65 Présentation Module d’interface serveur OmniView SMB, USB Référence : F1DP101AeaAU Émulation : Signaux du clavier et de la souris Alimentation : Via le serveur branché, avec technologie d’entretien Connexion clavier/souris : USB, Type A Connexion moniteur : HDDB15 mâle (VGA) Résolutions prises en charge : Jusqu’à...
-
Seite 66: Installation
CAT5 UTP de plus de 30 mètres, entre votre Switch KVM CAT5 SMB et les serveurs branchés. REMARQUE : Le Module d’extension CAT5 Belkin (F1D084) peut servir à rallonger la portée de votre console (clavier, souris et moniteur de 152 mètres supplémentaires. -
Seite 67: Montage Du Switch Kvm Cat5 Smb
Installation Montage du Switch KVM CAT5 SMB Installation des supports (F1DP108Aea et F1DP116Aea) Les Switchs KVM SMB CAT5 à 8 ou 16 ports sont livrés avec des fixations de montage réglables qui conviennent parfaitement à une installation dans une baie de 19 pouces. Les supports de montage peuvent être ajustées selon trois positions, ce qui permet de placer la face du Switch de façon à... - Seite 68 Installation Installation des supports en option (F1DP104Aea) Le Switch KVM CAT5 SMB à 4 Ports peut être installé dans un bâti de serveur de 19 pouces à l’aide du Kit de montage en baie OmniView (F1D005). Étape 1 Placez la fixation sur le côté du votre Switch KVM CAT5 SMB à l’aide des vis cruciformes fournies.
-
Seite 69: Branchement Du Switch Kvm Cat5 Smb
Installation Branchement de la console au Switch KVM CAT5 SMB Étape 1 Branchez le câble de moniteur VGA au port HDDB15 femelle à l’arrière du Switch KVM CAT5 SMB, dans la section « Console ». (Reportez-vous à l’illustration ci-dessous.) Étape 2 Branchez le câble de clavier PS/2 au port clavier à... - Seite 70 Installation Étape 3 Branchez le câble de souris PS/2 au port souris à l’arrière du Switch KVM CAT5 SMB, dans la section « Console ». (Reportez-vous à l’illustration ci- dessous.) Étape 4 Branchez l’adaptateur de courant à la prise CC « 6VDC, 1A » à l’arrière du Switch KVM CAT5 SMB.
- Seite 71 Installation Branchement des serveurs à la Console avec Switch KVM CAT5 SMB (connexion PS/2) : Étape 1 Assurez-vous que votre serveur est éteint. Étape 2 À l’aide du Module d’interface serveur OmniView SMB pour PS/2 (F1DP101AeaAP), branchez le connecteur VGA au port moniteur sur votre serveur.
- Seite 72 Installation Étape 4 Branchez le Switch SMB CAT5 au Module d’interface serveur à l’aide du Câble de raccordement CAT5e Belkin ou tout autre câble CAT5. (Reportez- vous à l’illustration ci-dessous.) Étape 5 Allumez votre serveur. Étape 6 Répétez les étapes 1 à 5 pour chaque ordinateur PS/2 supplémentaire que...
- Seite 73 Installation Branchement des serveurs à la Console avec Switch KVM CAT5 SMB (connexion USB) : Étape 1 Assurez-vous que votre serveur est éteint. Étape 2 À l’aide du Module d’interface serveur OmniView SMB pour USB (F1DP101AeaAP), branchez le connecteur VGA au port moniteur sur votre serveur.
- Seite 74 Étape 4 Branchez le Switch SMB CAT5 au Module d’interface serveur à l’aide du Câble de raccordement CAT5e Belkin ou tout autre câble CAT5. (Reportez- vous à l’illustration ci-dessous.) Remarque:Votre serveur doit être en mesure de reconnaître votre Module d’interface serveur et installer le pilote HID USB automatiquement, si nécessaire.
- Seite 75 Installation Branchement des serveurs à la Console avec Switch KVM CAT5 SMB (serveur Sun avec connexion MiniDIN8) : Étape 1 Assurez-vous que votre serveur est éteint. Étape 2 À l’aide du Module d’interface serveur OmniView SMB pour système patrimonial Sun (F1DP101AeaAL), branchez le connecteur VGA au port moniteur sur votre serveur.
- Seite 76 Installation Étape 4 Branchez le Switch SMB CAT5 au Module d’interface serveur à l’aide du Câble de raccordement CAT5e Belkin ou tout autre câble CAT5. (Reportez- vous à l’illustration ci-dessous.) Étape 5 Allumez votre serveur. Étape 6 Répétez les étapes 1 à 4 pour chaque ordinateur USB supplémentaire que vous souhaitez connecter.
-
Seite 77: Connexion De Plusieurs Unités Kvm Cat5 Smb (Montage En Série)
00 » et est appelé le switch KVM « principal ». Les BANK 01 à 15 sont les switchs « secondaires ». REMARQUE : Votre Switch KVM CAT5 SMB offre une compatibilité descendante avec les switchs KVM OmniView PRO2 Belkin. Vous pouvez monter en série jusqu’à 16 Switchs CAT5 SMB et PRO2, peu importe la configuration. - Seite 78 Installation Diagramme de configuration du commutateur BANK DIP N° DU COMMUTATEUR DIP Adresse du BANK BANK 00 Principal (Par défaut) Haut BANK 01 Secondaire Haut BANK 02 Secondaire Haut Haut BANK 03 Secondaire Haut BANK 04 Secondaire Haut Haut BANK 05 Secondaire Haut Haut BANK 06 Secondaire...
- Seite 79 Installation Exemple de configuration en série Primary KVM Switch (BANK 00) Secondary KVM Switch (BANK 01) Secondary KVM Switch (BANK 02) Secondary KVM Switch (BANK 03)
-
Seite 80: Pour Commencer
Installation Pour commencer: Étape 1 Assurez-vous que tous les serveurs et Switchs KVM sont hors tension et que chaque Switch KVM s’est vu attribué une adresse BANK unique. Étape2 Placez tous les switchs KVM principaux et secondaires à l’endroit désiré. Étape3 Branchez le moniteur, le clavier et la souris de la console sur les ports console du switch principal (BANK 00). - Seite 81 Installation Branchement des serveurs : Étape 1 Branchez tous les serveurs aux Switchs principaux et secondaires. Consultez « Branchement des serveurs au Switch KVM CAT5 SMB » en page 17. Étape 2 Assurez-vous que l’adaptateur de courant est branché au switch KVM principal et que celui-ci est sous tension.
-
Seite 82: Mise En Route Des Systèmes
Installation Mise en route des systèmes Assurez-vous que tous les serveurs branchés au Switch KVM CAT5 SMB sont sous tension. Si un serveur branché n’est pas encore allumé, vous pouvez le faire maintenant (les serveurs peuvent être allumés simultanément). Le Switch KVM émule une souris et un clavier sur chaque port et permet l’amorçage normal de votre ordinateur. - Seite 83 Using Your SMB CAT5 KVM Switch Maintenant que votre console et vos ordinateurs sont connectés au Switch KVM, vous êtes prêt à l’utiliser. Sélectionnez les ordinateurs connectés grâce aux sélecteurs de port à accès direct situés sur la face avant du Switch KVM CAT5 SMB, à...
-
Seite 84: Utilisation De Votre Switch Kvm Cat5 Smb
Utilisation de votre Switch KVM CAT5 SMB Utilisation de votre Switch KVM CAT5 SMB Dans une configuration en série, vous pouvez changer de BANK en appuyant sur « Arrêt défil », « Arrêt défil », « Pg préc. » pour passer au BANK précédent. Appuyez sur «... -
Seite 85: Sélection D'un Bank À L'aide Des Boutons De Défilement
Utilisation de votre Switch KVM CAT5 SMB Sélection d’un serveur à l’aide des sélecteurs de port à accès direct Vous pouvez choisir directement le serveur à contrôler en appuyant sur le sélecteur de port à accès direct situé à côté du port correspondant. Le témoin DEL s’allume afin d’indiquer que le port est bien choisi. -
Seite 86: Mode Autoscan
Utilisation de votre Switch KVM CAT5 SMB Utilisation de votre Switch KVM CAT5 SMB Mode AutoScan La fonction AutoScan vous permet d’indiquer à la Console avec Switch KVM CAT5 SMB d’analyser et de surveiller les activités de tous les serveurs connectés, l’un après l’autre. -
Seite 87: Affichage À L'écran
Utilisation de votre Switch KVM CAT5 SMB AFFICHAGE à l’écran L’Affichage à l’écran vous permet de passer d’un Serveur à l’autre, de nommer vos serveurs, d’activer/désactiver la fonction d’analyse automatique, déterminer l’intervalle de la fonction AutoScan, activer la fonction de protection par mot de passe et programmer des raccourcis clavier. - Seite 88 Utilisation de votre Switch KVM CAT5 SMB Utilisation de votre Switch KVM CAT5 SMB Commandes au clavier du menu OSD Permet de naviguer entre les serveurs d’un même BANK. (PagePréc./PageSuiv.) Sélection du BANK suivant ou précédent (Inser) Surligner le nom du serveur pour modification (Entrée) Passer d’un serveur à...
- Seite 89 Utilisation de votre Switch KVM CAT5 SMB Page « Function/Help [Fonction/Aide] » La page « Function/Help [Fonction/Aide] » vous permet de déterminer l’intervalle de la fonction AutoScan et de l’affichage de l’OSD, d’activer la protection par mot de passe et de programmer les touches de raccourci. Commandes au clavier de la page Function/Help [Fonction/ Aide] (F4)
-
Seite 90: Security [Sécurité]
Utilisation de votre Switch KVM CAT5 SMB Utilisation de votre Switch KVM CAT5 SMB Security [Sécurité] Cette fonction vous permet d’activer l’utilisation d’un mot de passe administrateur pour empêcher l’accès à l’OSD par les utilisateurs non autorisés. Pour activer et désactiver cette fonction, utilisez les flèches pour naviguer vers le champ «... - Seite 91 Utilisation de votre Switch KVM CAT5 SMB Timeout [Temporisation] Ceci détermine le temps qui s’écoule avant que l’administrateur se voit bloquer l’accès au Switch KVM (et aux serveurs branchés) en raison de l’inactivité. Pour accéder de nouveau au Switch KVM après la temporisation, il suffit d’entrer le mot de passe administrateur dans le boîte de connexion.
-
Seite 92: Commandes Avec Raccourcis Clavier
Utilisation de votre Switch KVM CAT5 SMB Utilisation de votre Switch KVM CAT5 SMB Commandes avec raccourcis clavier Vous trouverez ci-dessous une liste des commandes de raccourci clavier pouvant être utilisées avec votre Switch KVM CAT5 SMB : AD, AD, flèche Haut Passer au port ACTIF PRÉCÉDENT AD, AD, flèche Bas Passer au port ACTIF SUIVANT... -
Seite 93: Touches Combo Sun
Utilisation de votre Switch KVM CAT5 SMB Touches combo Sun Le clavier PS/2 branché au Switch KVM CAT5 SMB ne prend pas en charge le pavé numérique Sun pour certaines fonctions dans l’environnement système Sun. Lorsqu’un Module d’interface serveur USB ou Sun est branché à un serveur Sun, le Module émule les touches Sun à... -
Seite 94: Mise À Jour Du Micrologiciel
Switch KVM. Pour mettre à niveau votre micrologiciel, téléchargez le fichier et utilitaire appropriés à www.belkin.com/support/. L’utilitaire vous guidera tout au long du processus de mise à niveau du micrologiciel de votre Switch KVM CAT5 SMB. -
Seite 95: Foire Aux Questions
Le Switch KVM CAT5 SMB prend en charge les souris Microsoft, Logitech ® Kensington , et Belkin. Veuillez contacter l’assistance technique de Belkin pour ® connaître les problèmes de compatibilité que vous risquez de rencontrer. Comment le Switch KVM CAT5 SMB permet-il à l’utilisateur de changer de port ? Le Switch KVM CAT5 SMB accepte trois méthodes de sélection du port. - Seite 96 Foire aux questions Quelle est la résolution vidéo maximum prise en charge par le Switch KVM CAT5 SMB ? Le circuit vidéo évolué du Switch KVM CAT5 SMB prend en charge une résolution maximum de 1600 x 1200 @ 75 Hz. Augmenter la longueur du câble entre votre Switch KVM CAT5 SMB et vos serveurs entraîne la prise en charge d’une résolution inférieure.
-
Seite 97: Dépannage
Dépannage Mon ordinateur ne démarre pas lorsqu’il est connecté au Switch KVM CAT5 SMB, mais fonctionne correctement lorsque je branche le clavier, le moniteur et la souris directement sur le serveur. • Assurez-vous que les câbles du clavier et de la souris sont biens en place entre le Module d’interface serveur et l’ordinateur. - Seite 98 Dépannage Le serveur ne détecte aucun clavier et j’obtiens une erreur de clavier au démarrage. • Assurez-vous que le câble clavier sur le Module d’interface serveur est bien branché au serveur. Si cela n’est pas le cas, resserrez-le. • Si vous utilisez le logiciel fourni avec votre clavier, désinstallez-le, puis réinstallez le pilote de clavier Microsoft standard.
- Seite 99 Dépannage Lorsque je change de port, le mouvement de la souris est complètement désordonné. • Vérifiez qu’un seul pilote de souris est installé. Assurez-vous que le pilote est prévu pour une souris PS/2 standard ou une souris PS/2 compatible Microsoft. •...
-
Seite 100: Glossaire
Glossaire Les définitions suivantes sont utilisées dans le manuel: AutoScan : Mode de fonctionnement où le Switch KVM analyse un port puis l’autre selon une base de progression définie par l’utilisateur. BANK : Adresse d’un KVM monté en série (00 à 15), défini par le commutateur DIP. - Seite 101 Glossaire HID : Human Interface Device, classe de périphériques USB comprenant les claviers et les souris. KVM : Littéralement « Keyboard Video Mouse », ce terme réfère à la technologie permettant à deux ordinateurs ou plus d’être contrôlés par un clavier, un moniteur et une souris.
-
Seite 102: Informations
Une preuve d’achat peut être exigée. La présente garantie est caduque si le produit a été endommagé par accident, abus, usage impropre ou mauvaise application, si le produit a été modifié sans autorisation écrite de Belkin, ou si un numéro de série Belkin a été supprimé ou rendu illisible. - Seite 103 OmniView SMB-CAT5 ® KVM-Switch Steuerung Ihrer Server über eine PS/2-Konsole Manage mit CAT5-Verkabelung Benutzerhandbuch F1DP104Aea F1DP108Aea F1DP116Aea...
- Seite 104 Belkin Technischer Support Europa: 00 800 223 55 460 © 2005 Belkin Corporation. Alle Rechte vorbehalten. Alle Produktnamen sind eingetragene Marken der angegebenen Hersteller. Mac OS und Mac sind Marken der Apple Computer, Inc., die in den USA und anderen Ländern eingetragen sind.
- Seite 105 Inhaltsverzeichnis Inhaltsverzeichnis Einleitung ....................1 Verpackungsinhalt ..................1 Übersicht ....................2 Merkmale .......................2 Erforderliches Zubehör ..................4 Systemvoraussetzungen ................6 Bestandteile ....................7 Technische Daten ..................9 Installation ..................12 Vorbereitung des Geräts ................12 Montage des SMB-CAT5 KVM-Switch ............13 Anschluss der Konsole an den SMB-CAT5 KVM-Switch15 Anschluss der Server an den SMB-CAT5 KVM-Switch .......17 Anschluss mehrerer SMB-CAT5 KVM-Switches (Kaskadierung) ....23 Hochfahren der Systeme ................28...
-
Seite 106: Einleitung
Wir danken Ihnen für Ihren Kauf des OmniView SMB-CAT5 KVM-Switch von Belkin. Wir freuen uns über Ihre Wahl und sind davon überzeigt, dass Sie schnell erkennen werden, warum Belkin die Nr. 1 ist, wenn es um KVM-Switches geht. Verpackungsinhalt... -
Seite 107: Übersicht
Ihrem KVM-Switch und Servern in einer Entfernung von bis zu 30 Metern, wenn Sie Kabel mit dem Standard CAT5 und kompakte Serverschnittste llenmodule von Belkin verwenden. Die CAT5-Verkabelung reduziert das Kabelgewirr, vereinfacht die Kabelführung und ermöglicht bessere Belüftung in den Racks, wodurch die Lebensdauer Ihrer Apparatur erhöht wird. Server- Schnittstellenmodule ermöglichen unterbrechungsfreien Serverbetrieb durch... -
Seite 108: Flash-Aktualisierung
Stand bringen. Dadurch bleibt der KVM-Switch mit Geräten und Servern kompatibel, die künftig auf den Markt kommen. Firmware- Aktualisierungen sind für die gesamte Lebensdauer des SMB-CAT5 KVM- Switch kostenlos als Download auf der Support Website von Belkin unter www.belkin.com/support erhältlich. -
Seite 109: Erforderliches Zubehör
Übersicht Erforderliches Zubehör Server-Schnittstellenmodule Für den Anschluss eines SMB-CAT5 KVM-Switch an einen Server brauchen Sie das entsprechende OmniView SMB- Server-Schnittstellenmodul von Belkin und ein Standard CAT5-Patchkabel. F1DP101A-AP OmniView® SMB-Server- Schnittstellenmodule: F1DP101AeaAP (PS/2) F1DP101AeaAU (USB) F1DP101AeaAL (Sun Altsystem ™ 8-pol. miniDIN) - Seite 110 Übersicht Kabel Belkin empfiehlt die Verwendung von CAT5, FastCAT5e oder CAT6- Patchkabeln von Belkin für Ihren SMB-CAT5 KVM-Switch, damit die beste Bildschirmqualität erzielt werden kann. Diese Kabel genügen höchsten Qualitätsansprüchen und sorgen für eine A3L791-XX-YYY optimale Daten- und Bildübertragung. A3L850-XX-YYY...
-
Seite 111: Systemvoraussetzungen
Übersicht Systemvoraussetzungen Betriebssysteme Der SMB-CAT5 KVM-Switch ist kompatibel mit CPUs, die mit folgenden Betriebssystemen betrieben werden, ist aber nicht auf diese beschränkt. • Windows , 95, 98, 2000, ME, XP, Server 2003 ® ® • Microsoft DOS 5.x und höher ®... -
Seite 112: Bestandteile
Übersicht Bestandteile Vorderseite Ansicht des SMB-CAT5 KVM-Switch: AutoScan-Taste LED zur Anzeige 7teilige LED zur Anzeige der ausgewählten der gewählten BANK Schnittstelle Direktwahlschalter Manuelle BANK- Auswahltasten (F1DP116Aea abgebildet) - Seite 113 Übersicht Bestandteile Rückseite Ansicht des SMB-CAT5 KVM-Switch: Netzteilanschluss Sekundäreingang Konsolen VGA- Grafikschnittstelle RJ45-CPU-Schnittstelle Konsolen- DIP-Schalter schnittstellen für PS/2-Maus/Tastatur Anschluss für Flash-Aktualisierung Primäreingang/Sekundärausgang (F1DP116Aea abgebildet)
-
Seite 114: Technische Daten
Übersicht Technische Daten SMB-CAT5 KVM-Switch Artikelnr.: F1DP104Aea, F1DP108Aea, F1DP116Aea Gehäuse: Metallgehäuse mit stoßfester Kunststofffrontplatte Stromversorgung: Netzteil (6 V; 1 A), Mittelkontakt positiv Kaskadierung: Maximal 16 OmniView KVM- Switches Anzahl unterstützter Server: 4, 8, 16 bei 4-, 8-, bzw. 16-Port- Ausführung (max. 256 Server über Kaskadierung) Konsolen-Tastaturemulation: PS/2... - Seite 115 Übersicht Abmessungen: (F1DP104Aea) 279 mm x 44,5 mm x 150 mm (F1DP108Aea) 438 mm x 44,5mm x 190 mm (F1DP116Aea) 438 mm x 89 mm x 190 mm Gewicht: (F1DP104Aea) 2,4 kg (F1DP108Aea) 4,2 kg (F1DP116Aea) 5,5 kg HINWEIS: Unangekündigte technische Änderungen jederzeit vorbehalten. SMB-Server-Schnittstellenmodul, PS/2 Artikelnr.: F1DP101AeaAP...
- Seite 116 Übersicht SMB-Server-Schnittstellenmodul, USB Artikelnr.: F1DP101AeaAU Emulation: Tastatur- und Maussignale Stromversorgung: Über angeschlossenen Server; mit Keep- alive-Funktion Tastatur-/Maus-Anschluss: USB Typ A Bildschirmanschluss: HDDB15-Stecker (VGA) Unterstützte Auflösung: Bis zu 1600 x 1200 / 75 Hz Maximaler Abstand: 30 m Gewicht: 0,11 kg Abmessungen des Geräts: 63,5 mm x 98,3 mm x 25,4 mm VGA-Kabellänge:...
-
Seite 117: Installation
Abständen kann sich die Bildqualität verschlechtern. Daher empfehlen wir für die Verbindung zwischen dem SMB-CAT5 KVM-Switch und den Servern CAT5-UTP-Kabel von höchstens 30 m. HINWEIS: Mit der CAT5-Erweiterung (F1D084) von Belkin kann eine Entfernung von bis zu 150 m zur Konsole (Tastatur, Maus und Bildschirm) überbrückt werden. -
Seite 118: Montage Des Smb-Cat5 Kvm-Switch
Installation Montage des SMB-CAT5 KVM-Switch Installation der Halterung (F1DP108Aea und F1DP116Aea) Die 8- oder 16-Port SMB-CAT5 KVM-Switches enthalten einstellbare Halterungen für den Einbau in ein 19-Zoll-Rack. Die Halterungen ermöglichen die Einstellung von drei Befestigungspositionen, so dass Sie die Vorderseite des SMB-CAT5 KVM-Switch so anbringen können, dass er entweder bündig zu den Schienen abschließt oder über die Vorderseite der Schienen herausragt. - Seite 119 Installation Halterungsinstallation (F1DP104Aea) (optional) Der SMB 4-Port CAT5-KVM-Switch kann wahlweise mit einem Omniview Kit für die Rackmontage (F1D005) in ein in ein 19-Zoll-Serverrack eingebaut werden. Schritt 1 Befestigen Sie die Montagehalterung mit den beigefügten Schrauben am SMB-CAT5 KVM-Switch. (Siehe Abbildung unten.) Schritt 2 Befestigen Sie den SMB-CAT5 KVM-Switch am Schienengestell.
-
Seite 120: Anschluss Der Konsole An Den Smb-Cat5 Kvm-Switch15
Installation Anschluss der Konsole an den SMB-CAT5 KVM- Switch Schritt 1 Schließen Sie das VGA-Bildschirmkabel an die HDDB15-Buchse im Konsolenteil (Console) an der Rückseite des SMB-CAT5 KVM-Switch an. (Siehe Abbildung unten.) Schritt 2 Verbinden Sie das PS/2-Tastaturkabel mit dem Tastaturanschluss im Bereich Konsole (Console) an der Rückseite des SMB-CAT5 KVM-Switch. - Seite 121 Installation Schritt 3 Verbinden Sie das PS/2-Mauskabel mit dem Mausanschluss im Bereich Konsole (Console) an der Rückseite des SMB-CAT5 KVM-Switch. (Siehe Abbildung unten.) Schritt 4 Schließen Sie das Netzteil an die Netzbuchse mit der Aufschrift „6VDC, 1A” an, die sich auf der Rückseite des SMB-CAT5 KVM-Switch befindet. Benutzen Sie nur das im Lieferumfang enthaltene Netzteil.
- Seite 122 Stellen Sie sicher, dass der Server abgeschaltet ist. Schritt 2 Verwenden Sie das OmniView SMB-Server-Schnittstellenmodul für PS/2 von Belkin (F1DP101AeaAP) und schließen Sie den VGA-Stecker an die Grafikschnittstelle an Ihrem Server an. (Siehe Abbildung unten.) Schritt 3 Schließen Sie den PS/2-Maus- und dann den Tastaturstecker an die Maus-...
- Seite 123 Installation Schritt 4 Verbinden Sie den SMB-CAT5 KVM-Switch mit dem enthaltenen CAT5e-Patchkabel von Belkin oder einem anderen CAT5-Kabel mit dem Server-Schnittstellenmodul. (Siehe Abbildung unten.) Schritt 5 Fahren Sie Ihren Server hoch. Schritt 6 Wiederholen Sie Schritt 1 bis 5 für jeden weiteren anzuschließenden PS/2-...
-
Seite 124: Anschluss Der Server An Den Smb-Cat5 Kvm-Switch
(USB-Verbindung): Schritt 1 Stellen Sie sicher, dass der Server abgeschaltet ist. Schritt 2 Verwenden Sie das OmniView SMB-Server-Schnittstellenmodul von Belkin für USB (F1DP101AeaAU) und schließen Sie den VGA-Stecker an die Grafikschnittstelle an Ihrem Server an. (Siehe Abbildung unten.) Schritt 3 Schließen Sie den USB-Stecker an eine freie USB-Schnittstelle am Server... - Seite 125 Installation Schritt 4 Verbinden Sie den SMB-CAT5 KVM-Switch mit dem enthaltenen CAT5e- Patchkabel von Belkin oder einem anderen CAT5-Kabel mit dem Server- Schnittstellenmodul. (Siehe Abbildung unten.) Ihr Server sollte automatisch Ihr Server-Schnittstellenmodul erkennen und automatisch den HID-USB-Treiber installieren, wenn das erforderlich ist.
- Seite 126 (Sun Server mit 8-pol. MiniDIN-Verbindung): Schritt 1 Stellen Sie sicher, dass der Server abgeschaltet ist. Schritt 2 Verwenden Sie das OmniView SMB-Server-Schnittstellenmodul von Belkin für Sun-Altsysteme (F1DP101AeaAL) und schließen Sie den VGA-Stecker an die Grafikschnittstelle an Ihrem Server an. (Siehe Abbildung unten.) Schritt 3 Schließen Sie den 8-pol.
- Seite 127 Installation Schritt 4 Verbinden Sie den SMB-CAT5 KVM-Switch mit dem enthaltenen CAT5e-Patchkabel von Belkin oder einem anderen CAT5-Kabel mit dem Server-Schnittstellenmodul. (Siehe Abbildung unten.) Schritt 5 Fahren Sie Ihren Server hoch. Schritt 6 Wiederholen Sie Schritt 1 bis 4 für jeden weiteren anzuschließenden Sun- Server.
-
Seite 128: Anschluss Mehrerer Smb-Cat5 Kvm-Switches (Kaskadierung)
KVM-Switch bezeichnet. Die BANKS 01 bis 15 werden als Sekundär-KVM- Switches bezeichnet. HINWEIS: Ihr SMB-CAT5 KVM-Switch ist rückwärtskompatibel zu OmniView PRO2 Masterswitches von Belkin. Sie können eine beliebige Kombination aus bis zu 16 SMB-CAT5 KVM-Switches und PRO2 Masterswitches kaskadieren. HINWEIS: Zur Kaskadierung von SMB-CAT5 KVM-Switches benötigen jeweils ein Kaskadierungskabel (F1D108-CBL). - Seite 129 Installation Konfiguration des BANK-DIP-Schalters DIP-Schalternr. BANKADRESSE Bank 00 Primär (Standard) Abwärts Abwärts Abwärts Abwärts Aufwärts Abwärts Abwärts Abwärts BANK 01 Sekundär Abwärts Aufwärts Abwärts Abwärts BANK 02 Sekundär Aufwärts Aufwärts Abwärts Abwärts BANK 03 Sekundär Abwärts Abwärts Aufwärts Abwärts BANK04 Sekundär Aufwärts Abwärts Aufwärts...
-
Seite 130: Beispiel Für Eine Kaskadierung
Installation Beispiel für eine Kaskadierung Primär-KVM-Switch (BANK 00) Sekundär-KVM-Switch (BANK 01) Sekundär-KVM-Switch (BANK 02) Sekundär-KVM-Switch (BANK 03) -
Seite 131: Erste Schritte
Installation Erste Schritte: Schritt 1 Stellen Sie sicher, dass alle Server und SMB-CAT5 KVM-Switches ausgeschaltet sind, und dass auf jedem SMB-CAT5 KVM-Switch eine eindeutige BANK Adresse eingestellt ist. Schritt 2 Stellen Sie alle Primär- und Sekundär-KVM-Switches am gewünschten Standort auf. Schritt 3 Verbinden Sie Konsolenbildschirm, -Tastatur und -Maus mit den Konsolenschnittstellen des Primär-Switch (BANK 00). - Seite 132 Installation Anschluss der Server: Schritt 1 Schließen Sie alle Servers an die Primär- und Sekundär-KVM-Switches an. Weitere Informationen finden Sie unter „Anschluss der Server an den SMB- CAT5 KVM-Switch” auf Seite 17. Schritt 2 Stellen Sie sicher, dass das Netzteil an den Primär-KVM-Switch angeschlossen ist, und dass der KVM-Switch eingeschaltet ist.
-
Seite 133: Hochfahren Der Systeme
Installation Hochfahren der Systeme Überprüfen Sie, ob alle Server, die mit dem SMB-CAT5 KVM-Switch verbunden sind, eingeschaltet sind. Sollte der ein oder andere angeschlossene Server noch nicht hochgefahren sein, können Sie dies jetzt tun (Die Server können gleichzeitig hochgefahren werden). Der SMB-CAT5 KVM-Switch emuliert an jeder Schnittstelle eine Tastatur und eine Maus und ermöglicht dem Server einen normalen Systemstart. -
Seite 134: Verwenden Des Smb-Cat5 Kvm-Switch
Verwenden des SMB-CAT5 KVM-Switch Sie haben die Konsole und die Server an den SMB-CAT5 KVM-Switch angeschlossen. Jetzt können Sie mit der Arbeit beginnen. Wählen Sie die angeschlossenen Server entweder über die Direktwahlschalter auf dem Bedienfeld des SMB-CAT5 KVM-Switch, über das Bildschirmmenü oder über die Tastenbefehle der Tastatur aus. - Seite 135 Verwenden des SMB-CAT5 KVM-Switch Verwenden des SMB-CAT5 KVM-Switch Bei einer Kaskadierung können Sie zwischen den BANKS umschalten, indem Sie die Tastenfolge „Rollen”, „Rollen”, „Bild auf” drücken. Dadurch gelangen Sie zur vorherigen BANK. Mit „Rollen, „Rollen” „Bild ab” schalten Sie zur nächsten BANK um.
-
Seite 136: Auswählen Eines Servers Über Direktwahlschalter
Verwenden des SMB-CAT5 KVM-Switch Auswählen eines Servers über Direktwahlschalter Sie können den gewünschten Server mit dem Direktwahlschalter neben der entsprechenden Schnittstelle direkt auswählen. Die LED leuchtet auf, um anzuzeigen, dass die Schnittstelle ausgewählt ist. Wenn Sie mehrere SMB- CAT5 KVM-Switches installieren und kaskadieren, können Sie mit den BANK- Auswahltasten auf dem Bedienfeld des KVM-Switches auf andere Server zugreifen, die an die Sekundär-KVM-Switches angeschlossen sind. -
Seite 137: Autoscan-Modus
Verwenden des SMB-CAT5 KVM-Switch Verwenden des SMB-CAT5 KVM-Switch AutoScan-Modus Mit der AutoScan-Funktion kann der SMB-CAT5 KVM-Switch die Aktivitäten aller angeschlossenen Server einzeln abfragen und überwachen. Der SMB-CAT5 KVM-Switch bleibt für eine voreingestellte Zeit an jeder Schnittstelle, bevor er zum nächsten Server weiterschaltet. Das Zeitintervall für die Überwachung des jeweiligen Servers kann über das Bildschirmmenü... -
Seite 138: Bildschirmmenü (Osd)
Verwenden des SMB-CAT5 KVM-Switch Bildschirmmenü (OSD) Über das Bildschirmmenü können Sie zwischen Servern umschalten, die Server mit Namen versehen, die AutoScan-Funktion aktivieren und deaktivieren, das gewünschte AutoScan-Intervall einstellen, den Kennwortschutz aktivieren und Tastaturbefehle einstellen. Um das Bildschirmmenü (OSD) zu öffnen, drücken Sie „Rollen”, „Rollen”, Leertaste. - Seite 139 Verwenden des SMB-CAT5 KVM-Switch Verwenden des SMB-CAT5 KVM-Switch Bildschirmmenü-Tastaturbefehle Schaltet zu anderen Servern an derselben BANK um (Bild auf / Bild ab) Schaltet zur nächsten oder vorherigen BANK um (Einfg) Markiert Servernamen zum Bearbeiten (Eingabetaste) Schaltet Server um (Tabulatortaste) Öffnet die Seite „Function/Help” (Funktion/Hilfe) (Esc) Beendet das Bildschirmmenü...
-
Seite 140: Funktion/Hilfe Seite
Verwenden des SMB-CAT5 KVM-Switch Funktion/Hilfe Seite Die „Funktion/Hilfe” Seite ermöglicht Ihnen die Einstellung der AutoScan- Intervalle und der Dauer der Bildschirmmenüanzeige, die Einstellung des Kennwortschutzes und die Programmierung der Tastaturbefehle. Tastaturbefehle der Funktion/Hilfe Seite (F4) Aktiviert AutoScan Navigiert zum nächsten Feld (Einfg) Markiert Feld zum Bearbeiten (Esc) -
Seite 141: Security (Sicherheit)
Verwenden des SMB-CAT5 KVM-Switch Verwenden des SMB-CAT5 KVM-Switch Security (Sicherheit) Diese Funktion gibt Ihnen die Möglichkeit, ein Administratorkennwort zu verwenden, um unbefugten Zugriff auf das Bildschirmmenü zu vermeiden. Mit Hilfe der Pfeiltasten können Sie die Sicherheits-Funktion aktivieren oder deaktivieren. Navigieren Sie zum Feld „Security” (Sicherheit) und drücken Sie die Leertaste. -
Seite 142: Monitor-Ddc2 Feature (Bildschirm-Ddc2-Funktion)
Verwenden des SMB-CAT5 KVM-Switch Timeout (Zeitlimit) Hier wird die Zeitspanne angezeigt, die vergehen kann, bis der Administrator vom KVM-Switch (und den angeschlossenen Servern) abgemeldet wird, wenn das Gerät nicht bedient wird. Um erneut auf den KVM-Switch zuzugreifen, wenn das Zeitlimit überschritten wurde, geben Sie das Administratorkennwort im Anmeldefeld ein. -
Seite 143: Tastaturbefehle
Verwenden des SMB-CAT5 KVM-Switch Verwenden des SMB-CAT5 KVM-Switch Tastaturbefehle In der Tabelle unten finden Sie eine komplette Liste mit Tastaturbefehlen, die Sie für Ihren SMB-CAT5 KVM-Switch verwenden können: SL, SL, Pfeil-nach- Zurückschalten zur VORHERIGEN AKTIVEN oben-Taste Schnittstelle SL, SL, Pfeil-nach- Weiterschalten zur NÄCHSTEN AKTIVEN unten-Taste Schnittstelle... -
Seite 144: Sun Combo-Tasten
Verwenden des SMB-CAT5 KVM-Switch Sun Combo-Tasten Die PS/2-Tastatur, die an den SMB-CAT5 KVM-Switch angeschlossen ist, unterstützt spezielle Funktionen des Sun-Betriebsystems, die durch die Sun- Tastatur aktiviert werden können, nicht. Wenn ein USB- oder Sun Server- Schnittstellenmodul mit einem Sun Server verbunden ist, emuliert das Server- Schnittstellenmodul die Sun-Tasten, indem es Tastenkombinationen benutzt, die als Combo-Tasten bezeichnet werden. -
Seite 145: Firmware Aktualisieren
Sie derzeit an Ihrem SMB-CAT5 KVM-Switch Probleme mit der Maus oder der Tastatur feststellen, da die Neukonfigurierung der Software zu unterwarteten Problemen im Gerätebetrieb führen kann. Bitte wenden Sie sich an den technischen Support von Belkin, wenn Sie Hilfe benötigen. Zur Aktualisierung der Firmware wird Folgendes vorausgesetzt: Ein separater Server mit dem Betriebssystem Windows 2000 oder XP. -
Seite 146: Häufig Gestellte Fragen
Kensington , usw. sowie Belkin. Sollte es zu Kompatibilitätsproblemen kommen, ® wenden Sie sich bitte an den technischen Support von Belkin. Wie kann ich mit dem SMB-CAT5 KVM-Switch zwischen den verschiedenen Schnittstellen umschalten? Sie können mit dem SMB-CAT5 KVM-Switch Schnittstellen auf drei verschiedene Arten auswählen: zum einen über spezielle Tastenbefehle mit der... - Seite 147 Häufig gestellte Fragen Welche Bildschirmauflösung wird vom SMB-CAT5 KVM-Switch maximal unterstützt? Das durchdachte Grafikmodul des SMB-CAT5 KVM-Switch ermöglicht Auflösungen bis zu 1600 x 1200 / 75 Hz. Bei der Verwendung von längeren Kabel zwischen SMB-CAT5 KVM-Switch und Servern kann nur eine niedrigere Auflösung unterstützt werden.
-
Seite 148: Fehlerbehebung
Fehlerbehebung Mein Server fährt nicht hoch, wenn er an den SMB-CAT5 KVM-Switch angeschlossen ist, funktioniert aber einwandfrei, wenn ich Tastatur, Bildschirm und Maus direkt an den Server anschließe. • Stellen Sie sicher, dass Tastatur- und Mauskabel korrekt am Server und am Server-Schnittstellenmodul angeschlossen sind. •... - Seite 149 Fehlerbehebung Der Server erkennt die Tastatur nicht und es wird beim Systemstart ein Tastaturfehler gemeldet. • Überprüfen Sie, ob das Tastaturkabel am Server-Schnittstellenmodul korrekt an den Server angeschlossen ist. Befestigen Sie lose Verbindungen. • Wenn Sie die Tastatursoftware verwenden, die Sie mit der Tastatur erhalten haben, deinstallieren Sie die Software.
- Seite 150 Fehlerbehebung Wenn ich zu einem anderen Anschluss umschalte, bewegt sich die Maus ruckartig und lässt sich nicht mehr ordentlich steuern. • Stellen Sie sicher, dass nur ein einziger Maustreiber installiert ist. Stellen Sie sicher, dass der Treiber entweder für eine Standard-PS/2- oder eine Microsoft-Server-kompatible PS/2-Maus geeignet ist.
-
Seite 151: Glossar
Glossar Für dieses Benutzerhandbuch gelten die folgenden Begriffsdefinitionen: AutoScan: Betriebsmodus, bei der der KVM-Switch die Schnittstellen ständig nacheinander abfragt, wie vom Benutzer vorgegeben. BANK: Die Adresse eines kaskadierten KVM-Switch (00 – 15), einzustellen mit dem DIP-Schalter. Konsole: Sie besteht aus einer Tastatur, einem Bildschirm und einer Maus, die an den KVM-Switch angeschlossen sind. - Seite 152 Glossar HID: Human Interface Device sind Eingabegeräte der USB-Geräteklasse, zu der Tastaturen und Mäuse gehören. KVM: Wörtlich „Keyboard Video Mouse” (Tastatur Bildschirm Maus), bezeichnet dieser Begriff eine Technologie, mit der einer oder viele Computer über eine Tastatur, einen Bildschirm und eine Maus gesteuert werden können; einige Switches, die mit KVM-Technologie arbeiten, ermöglichen auch die gemeinsame Nutzung anderer Peripheriegeräte wie Lautsprecher, Mikrofone oder Drucker.
-
Seite 153: Informationen
FCC-Erklärung Konformitätserklärung zur Einhaltung der FCC- Bestimmungen über elektromagnetische Kompatibilität Wir, Belkin Corporation, eine Gesellschaft mit Sitz in 501 West Walnut Street, Compton, CA 90220, USA, erklären hiermit in alleiniger Verantwortung, dass dieses Produkt mit der Artikelnr. F1DP104A, F1DP108A, F1DP116A, auf das sich diese Erklärung bezieht,... - Seite 154 Technische ondersteuning Europa: 00 800 223 55 460 © 2005 Belkin Corporation. Alle rechten voorbehouden. Alle handelsnamen zijn gedeponeerde handelsmerken van de betreffende rechthebbenden. Mac OS en Mac zijn handelsmerken van Apple Computer, Inc. die gedeponeerd zijn in de Verenigde Staten en in andere landen.
- Seite 155 OmniView CAT5 KVM-switch ® voor het MKB Servers beheren met slechts één PS/2-console Manage en CAT5-kabels Handleiding F1DP104Aea F1DP108Aea F1DP116Aea...
- Seite 156 Inhoud Inhoud Inleiding ......................1 Inhoud van de verpakking .............. 1 Overzicht .......................2 Productkenmerken ................ 2 Benodigde uitrusting ..............4 Systeemvereisten ................. 6 De switch in beeld gebracht ............7 Technische gegevens ..............9 Installatie ....................12 Voorconfigureren ................. 12 Montage van de CAT5 KVM-switch voor het MKB in een rek ..13 De console aansluiten op de CAT5 KVM-switch voor het MKB ..
-
Seite 157: Inleiding
KVM-switch is bijgesloten. Belkin dankt u hartelijk voor het kopen van de OmniView KVM-switch voor het MKB. Wij stellen uw vertrouwen in onze producten zeer op prijs. Ongetwijfeld ontdekt u al snel waarom Belkin wereldwijd het best verkochte merk op het gebied van KVM-switches is. -
Seite 158: Overzicht
• CAT5-technologie De geïntegreerde CAT5-technologie stelt u in staat met behulp van CAT5- kabels en de compacte server-interfacemodules van Belkin uw KVM-switch aan te sluiten op uw servers op maximaal 30 meter afstand. CAT5-kabels reduceren het aantal kabels dat in een computerruimte hoeft te worden aangelegd en maken een betere luchtstroom in de rekken mogelijk, waardoor de levensduur van de apparatuur toeneemt. -
Seite 159: Led Display
Via flash-upgrades kunt u de firmware van uw CAT5 KVM-switch bijwerken. Zo kunt u ervoor zorgen dat uw KVM-switch compatibel blijft met de nieuwste apparaten en servers. De firmware van uw CAT5 KVM-switch kan gedurende de levensduur van het product gratis worden gedownload van de support website van Belkin: www.belkin.com/support. -
Seite 160: Benodigde Uitrusting
Benodigde uitrusting Server-interfacemodules Bij het aansluiten van een CAT5 KVM- switch voor het MKB op een server heeft u een speciale OmniView server- interfacemodule van Belkin en een standaard CAT5-patchkabel nodig F1DP101A-AP OmniView server- interfacemodules voor het MKB: F1DP101AeaAP (PS/2-uitvoering) - Seite 161 Ten behoeve van uitstekende videokwaliteit, raden wij u ten zeerste aan gebruik te maken van de Category 5e, FastCAT5e of Category 6 patchkabels van Belkin voor uw CAT5- KVM-switch voor het MKB. Deze kabels bieden de hoogst mogelijke kwaliteit A3L791-XX-YYY...
-
Seite 162: Systeemvereisten
Overzicht Systeemvereisten OS-platformen De CAT5 KVM-switch voor het MKB is compatibel met CPU’s die gebruik maken van de volgende besturingssystemen*: • Windows , 95, 98, 2000, Me, XP, Server 2003 ® ® • Microsoft DOS 5.x en hoger ® • Red Hat Linux 8.x en hoger ®... -
Seite 163: De Switch In Beeld Gebracht
Overzicht De switch in beeld gebracht Voorzijde van de CAT5 KVM-switch voor het MKB: AutoScan-knop LED ter aanduiding van de geselecteerde poort Zevendelig LED-display ter aanduiding van de geselecteerde BANK Rechtstreekse-poortkeuzeknop Met de hand te bedienen BANK scroll-knoppen (F1DP116Aea afgebeeld) - Seite 164 Overzicht De switch in beeld gebracht Achterzijde van de CAT5 KVM-switch voor het MKB: Voedingsaansluiting Secundaire ingang VGA-monitorpoort voor console RJ45 CPU- poorten DIP-schakelaar PS/2-muis/ toetsenbordpoorten voor console Flash-upgrade-poort Primaire ingang/ Secundaire uitgang (F1DP116Aea afgebeeld)
-
Seite 165: Technische Gegevens
Overzicht Technische gegevens CAT5 KVM-switch voor het MKB Artikelnummer: F1DP104Aea, F1DP108Aea, F1DP116Aea Behuizing: Metalen behuizing met slagvast kunststof front Voeding: 6V/1A-voedingsadapter met positieve centrale pool Daisychain: Maximaal 16 OmniView KVM-switches Aantal ondersteunde servers: Respectievelijk 4, 8 en 16 voor de 4-, 8- en 16-poorts uitvoeringen (256 servers max. - Seite 166 Overzicht Afmetingen: (F1DP104Aea) 279 mm x 44,5 mm x 150 mm) (F1DP108Aea) 438 mm x 44,5 mm x 190 mm (F1DP116Aea) 438 mm x 89 mm x 190 mm) Gewicht: (F1DP104Aea) 2,4 kg (F1DP108Aea) 4,2 kg (F1DP116Aea) 5,5 kg OPMERKING: Er wordt een voorbehoud gemaakt voor wijzigingen in deze informatie zonder voorafgaande waarschuwing.
- Seite 167 Overzicht Server-interfacemodule voor het MKB, USB Artikelnummer: F1DP101AeaAU Emulatie: Toetsenbord- en muissignalen Voeding: Via aangesloten server; met keep- alive functie Toetsenbord/muis-aansluiting: USB type A Monitoraansluiting: HDDB15 male (VGA) Ondersteunde resolutie: Tot 1600x1200 bij 75 Hz Max. ondersteunde afstand: 30 m Gewicht: 0,11 kg Afmetingen:...
-
Seite 168: Installatie
CAT5 KVM-switch geen CAT5 UTP-kabels te gebruiken die langer zijn dan 30 meter. OPMERKING: De CAT5-extender (F1D084) van Belkin kan gebruikt worden om de afstand tot uw console (toetsenbord, muis en monitor) te vergroten tot 152 meter. - Seite 169 Installatie Montage van de CAT5 KVM-switch in een rek Beugelmontage (F1DP108Aea en F1DP116Aea) 8- en 16-poorts CAT5 KVM-switches voor het MKB worden geleverd met verstelbare montagebeugels die zich uitstekend lenen voor de installatie in 19-inch rekken. De montagebeugels kunnen in drie posities geplaatst worden en bieden u daarmee de mogelijkheid de frontplaat van de CAT5 KVM-switch gelijk met de raileinden te monteren of de CAT5 KVM-switch voorbij de kop van de rails te plaatsen.
- Seite 170 Installatie Beugelmontage - optioneel (F1DP104Aea) De 4-poorts CAT5 KVM-switch voor het MKB kunt u met behulp van de optionele OmniView rekmontageset (artikelnummer F1D005) monteren in een 19”-rek. Stap 1 Bevestig de montagebeugel met de meegeleverde kruiskopschroeven op de zijkant van de CAT5 KVM-switch. (zie onderstaande afbeelding). Stap 2 Monteer de CAT5 KVM-switch op de rail in het rek.
-
Seite 171: De Console Aansluiten Op De Cat5 Kvm-Switch Voor Het Mkb
Installatie De console aansluiten op de CAT5 KVM-switch voor het MKB Step 1 Sluit de VGA-monitorkabel aan op de female HDDB15-poort in het console-gedeelte aan de achterzijde van de CAT5 KVM-switch. (Zie onderstaande afbeelding.) Step 2 Sluit de PS/2-toetsenbordkabel aan op de toetsenbordaansluiting in het console-gedeelte aan de achterkant van de CAT5 KVM-switch. - Seite 172 Installatie Stap 3 Sluit de PS/2-muiskabel aan op de muisaansluiting in het console-gedeelte aan de achterkant van de CAT5 KVM-switch. (Zie onderstaande afbeelding.) Step 4 Sluit de voedingsadapter aan op de voedingsaansluiting die wordt aangeduid met “6VDC, 1A” , op het achterpaneel van de CAT5 KVM-switch. Maak uitsluitend gebruik van de voedingsadapter die met de unit is meegeleverd.
- Seite 173 Installatie Servers op de CAT5 KVM-switch aansluiten (PS/2-aansluiting): Stap 1 Zorg ervoor dat uw server is uitgeschakeld. Stap 2 Maak gebruik van de OmniView server-interfacemodule (PS/2-uitvoering, artikelnummer F1DP101AeaAP) en verbind de VGA-connector met de monitorpoort op uw server. (Zie onderstaande afbeelding.) Stap 3 Verbind de PS/2-muis- en -toetsenbordconnectors met de muis- en toetsenbordpoorten op de server.
- Seite 174 Installatie Step 4 Verbind de CAT5 KVM-switch met de server-interfacemodule door de meegeleverde CAT5e-patchkabel of een andere CAT5-kabel tussen deze apparaten aan te sluiten. (Zie onderstaande afbeelding.) Step 5 Zet uw server aan. Stap 6 Herhaal stap 1 t/m 5 voor elke extra PS/2-server die u aan wilt sluiten.
-
Seite 175: Servers Aansluiten Op De Cat5 Kvm-Switch Voor Het Mkb
Zorg ervoor dat uw server is ingeschakeld. Stap 2 Maak gebruik van de OmniView server-interfacemodule voor het MKB van Belkin (USB-uitvoering, artikelnummer F1DP101AeaAU) en verbind de VGA- connector met de monitorpoort op uw server. (Zie onderstaande afbeelding.) Stap 3 Verbind de USB-connector met een vrije USB-poort op de server. (Zie... - Seite 176 Installatie Stap 4 Verbind de CAT5 KVM-switch met de server-interfacemodule door de meegeleverde CAT5e-patchkabel of een andere CAT5-kabel tussen deze apparaten aan te sluiten. (Zie onderstaande afbeelding.) Uw server zou de server-interfacemodule moeten herkennen en indien nodig automatisch het HID USB-stuurprogramma moeten installeren.
- Seite 177 Zorg ervoor dat uw server is uitgeschakeld. Stap 2 Maak gebruik van de OmniView server-interfacemodule voor Legacy Sun van Belkin (artikelnummer F1DP101AeaAL) en verbind de VGA-connector met de monitorpoort op uw server. (Zie onderstaande afbeelding.) Stap 3 Verbind de miniDIN8-connector met de miniDIN8-toetsenbordpoort op de...
- Seite 178 Installatie Stap 4 Verbind de CAT5 KVM-switch met de server-interfacemodule door de meegeleverde CAT5e-patchkabel of een andere CAT5-kabel tussen deze apparaten aan te sluiten. (Zie onderstaande afbeelding.) Stap 5 Zet uw server aan. Stap 6 Herhaal stap 1 t/m 4 voor elke extra Sun-server die u aan wilt sluiten. OPMERKING: Als er een USB- of Sun-server-interfacemodule op een Sun- server is aangesloten, emuleert de server-interfacemodule de Sun-toetsen met behulp van toetsencombinaties genaamd Combo Keys (combinatietoetsen).
- Seite 179 “primaire” KVM-switch. De BANKEN 01 tot en met 15 zijn “Secondary” (Secundaire) KVM-switches. OPMERKING: Uw CAT5 KVM-switch voor het MKB is backward-compatible met OmniView PRO2 KVM-switches van Belkin. U kunt combinaties van CAT5 KVM-switches en PRO2 KVM-switches in een daisychain schakelen.. OPMERKING: Een daisychainkabel (F1D108-CBL) is vereist voor...
- Seite 180 Installatie Configuratietabel voor BANK DIP-schakelaar DIP-schakelaar nr. BANK-ADRES Bank 00 primair (standaard) Omlaag Omlaag Omlaag Omlaag Omhoog Omlaag Omlaag Omlaag BANK 01 secundair Omlaag Omhoog Omlaag Omlaag BANK 02 secundair Omhoog Omhoog Omlaag Omlaag BANK 03 secundair Omlaag Omlaag Omhoog Omlaag BANK 04 secundair Omhoog...
- Seite 181 Installatie Voorbeeld van een daisychainconfiguratie Primary KVM Switch (BANK 00) Secondary KVM Switch (BANK 01) Secondary KVM Switch (BANK 02) Secondary KVM Switch (BANK 03)
- Seite 182 Installatie Voorbereiding: Stap 1 Controleer of alle CAT5 KVM-switches zijn uitgeschakeld en zorg ervoor dat elk van de KVM-switches een uniek BANK-adres toegewezen heeft gekregen. Stap 2 Zet alle primaire en secundaire KVM-switches op de gewenste plaats. Stap 3 Sluit de monitor, het toetsenbord en de muis aan op de consolepoorten van de primaire switch (BANK 00).
- Seite 183 Installatie Servers aansluiten: Stap 1 Alle servers aansluiten op de primaire en secundaire KVM-switches. Raadpleeg het hoofdstuk “Servers op de CAT5 KVM-switch voor het MKB aansluiten” op pagina 17 voor meer informatie. Stap 2 Zorg ervoor dat de voedingsadapter is verbonden met de primaire KVM-switch en dat de KVM-switch gevoed wordt.
-
Seite 184: Systemen Inschakelen
Installatie De systemen inschakelen Controleer of alle servers die op de CAT5 KVM-switch zijn aangesloten, ingeschakeld zijn. Als er aangesloten servers zijn die niet zijn ingeschakeld, mag u deze op dit moment inschakelen (servers mogen tegelijkertijd worden ingeschakeld). De CAT5 KVM-switch emuleert op elke poort zowel een muis als een toetsenbord en stelt uw server in staat normaal op te starten. -
Seite 185: Een Server Of Een Bank Selecteren Met Behulp Van Sneltoetscommando's
Using Your SMB CAT5 KVM Switch Nadat u de console en servers op uw CAT5 KVM-switch hebt aangesloten, is deze klaar voor gebruik. U kunt nu de aangesloten servers op drie manieren selecteren: met de rechtstreekse-poortkeuzeknoppen aan de voorzijde van de CAT5 KVM-switch, met het On-Screen Display (beeldschermmenu) of met sneltoetscommando’s via het toetsenbord van de console. - Seite 186 Gebruik maken van uw CAT5 KVM-switch voor het MKB Gebruik maken van uw CAT5 KVM-switch voor het MKB Bij daisychainconfiguraties kunt u naar de vorige BANK overschakelen met behulp van de toetsencombinatie “ScrollLock”, “ScrollLock”, “PageUp”. U schakelt naar de volgende BANK over met de toetscombinatie “ScrollLock”, “ScrollLock”, “PageDown”.
-
Seite 187: Een Server Selecteren Met Behulp Van De Rechtstreekse-Poortkeuzeknoppen
Gebruik maken van uw CAT5 KVM-switch voor het MKB Een server selecteren met behulp van de rechtstreekse-poortkeuzeknoppen U kunt meteen de gewenste server selecteren door op de rechtstreekse- poortkeuzeknop naast de betreffende poort te drukken. De bijbehorende LED gaat branden ten teken dat de poort is geselecteerd. Bij de installatie van meerdere CAT5 KVM-switches voor het MKB die in een daisychain geschakeld zijn, kunt u gebruik maken van de BANK-scrolltoetsen aan de onderzijde van de primaire switch om toegang te krijgen tot andere servers die zijn aangesloten op... -
Seite 188: Autoscan-Modus
Gebruik maken van uw CAT5 KVM-switch voor het MKB Gebruik maken van uw CAT5 KVM-switch voor het MKB AutoScan-modus Met de AutoScan-functie kunt u ervoor zorgen dat de CAT5 KVM-switch voor het MKB de activiteiten van alle aangesloten servers afzonderlijk scant en in de gaten houdt. -
Seite 189: On-Screen Display
Gebruik maken van uw CAT5 KVM-switch voor het MKB ON-SCREEN Display Het On-Screen Display stelt u in staat te schakelen tussen servers, namen aan uw servers toe te kennen, de AutoScan-functie te activeren of te de-activeren, het gewenste scantijd-interval te bepalen, de wachtwoordbeveiligingsfunctie te activeren en sneltoetsen te programmeren. - Seite 190 Gebruik maken van uw CAT5 KVM-switch voor het MKB Gebruik maken van uw CAT5 KVM-switch voor het MKB OSD-menu toetsenbordcommando’s Naar verschillende servers in dezelfde BANK navigeren. (Page Up/Page Down) Selecteer volgende of vorige BANK (Insert) Servernaam selecteren voor het aanbrengen van wijzigingen (Enter) Van server wisselen...
- Seite 191 Gebruik maken van uw CAT5 KVM-switch voor het MKB Function/Help-pagina De “Function/Help” (Functie/Help) pagina stelt u in staat tijdintervals voor de AutoScan-functie en de OSD-displaytijd in te stellen, de wachtwoordbeveiligings- functie te activeren en de sneltoetsen te programmeren. Toetsenbordcommando’s Function/Help-pagina (F4) AutoScan starten Naar het volgende veld navigeren...
- Seite 192 Gebruik maken van uw CAT5 KVM-switch voor het MKB Gebruik maken van uw CAT5 KVM-switch voor het MKB Beveiliging Deze functie stelt u in staat een beheerderwachtwoord te activeren en zo onbevoegde gebruikers de toegang tot het OSD te ontzeggen. Voor het activeren of de-activeren van de beveiligingsfunctie, dient u gebruik te maken van de pijltoetsen om naar het “Security”...
- Seite 193 Gebruik maken van uw CAT5 KVM-switch voor het MKB Timeout De Timeout-instelling geeft de maximale periode van inactiviteit weer. Nadat deze periode verstreken is zal de beheerder opnieuw moeten inloggen op de KVM-switch (en de aangesloten servers) door het beheerderwachtwoord opnieuw in het login-veld in te voeren.
-
Seite 194: Toetsenbord-Snelkoppelingen
Gebruik maken van uw CAT5 KVM-switch voor het MKB Gebruik maken van uw CAT5 KVM-switch voor het MKB Toetsenbord-snelkoppelingen Onderstaande tabel geeft een overzicht van de sneltoetscommando’s die gebruikt kunnen worden voor de CAT5 KVM-switch. SL, SL, Pijl omhoog Overschakelen naar VORIGE ACTIEVE poort SL, SL, Pijl omlaag Overschakelen naar de VOLGENDE ACTIEVE poort SL, SL, Page Up... -
Seite 195: Sun Combinatietoetsen
Gebruik maken van uw CAT5 KVM-switch voor het MKB Sun-combinatietoetsen Het PS/2-toetsenbord dat op de CAT5 KVM-switch is laat niet toe dat via het numerieke Sun-toetsenblok speciale commando’s in de Sun-besturingssystee momgeving worden uitgevoerd. Als er een USB- of Sun-server-interfacemodule op een Sun-server is aangesloten, emuleert de server-interfacemodule de Sun-toetsen met behulp van toetsencombinaties genaamd Combo Keys (combinatietoetsen). -
Seite 196: Firmware Bijwerken
Reconfiguratie van software kan namelijk leiden tot onverwachte besturingsproblemen. Als u vragen heeft, neem dan contact op met de afdeling Technische Ondersteuning van Belkin. Voor het bijwerken van de firmware hebt u het volgende nodig: Een aparte server die draait onder Windows 2000 of XP. -
Seite 197: Veelgestelde Vragen
De CAT5 KVM-switch ondersteunt o.a. muizen van Microsoft, Logitech ® Kensington en Belkin. Als u vragen hebt over compatibiliteit, kunt u contact ® opnemen met de afdeling Technische Ondersteuning van Belkin. Welke mogelijkheden heeft de gebruiker van de CAT5 KVM-switch om naar andere poorten over te schakelen? De CAT5 KVM-switch ondersteunt drie manieren van poortkeuze. - Seite 198 Veelgestelde vragen Wat is de hoogste videoresolutie die de CAT5 KVM-switch voor het MKB ondersteunt? De geavanceerde videoverwerkingseenheid in de CAT5 KVM-switch ondersteunt een maximale resolutie van 1600x1200 bij 75 Hz. Bij een grotere kabellengte en afstand tussen de CAT5 KVM-switch en uw servers zal een lagere maximale resolutie ondersteund worden.
-
Seite 199: Problemen Oplossen
Problemen oplossen Mijn server start niet op wanneer deze is aangesloten op de CAT5 KVM- switch maar functioneert feilloos als ik het toetsenbord, de monitor en de muis rechtstreeks op de server aansluit. • Controleer of de toetsenbord- en muiskabels stevig tussen de server en de server-interfacemodule zijn aangesloten. - Seite 200 Problemen oplossen Bij het opstarten ziet de server geen toetsenbord en krijg ik de melding dat er een toetsenbordfout is opgetreden. • Controleer of de toetsenbordkabel op de juiste wijze is verbonden tussen de server en de server-interfacemodule. Zet eventuele losse verbindingen vast. •...
- Seite 201 Problemen oplossen Als ik van de ene poort naar de andere overschakel, zijn de muisbewegingen volledig oncontroleerbaar. • Zorg ervoor dat er niet meer dan één muis-stuurprogramma op uw computer is geïnstalleerd. Zorg ervoor dat het stuurprogramma geschikt is voor een standaard PS/2-muis of een Microsoft server-compatible PS/2-muis.
-
Seite 202: Verklarende Woordenlijst
Verklarende woordenlijst De volgende definities worden in deze handleiding gebruikt: AutoScan: Een modus waarbij de KVM-switch continu de ene poort na de andere scant, zoals door de gebruiker geconfigureerd. BANK: Het adres van de KVM-switch die is opgenomen in een daisychain (00–15), ingesteld via de DIP-schakelaar. - Seite 203 Verklarende woordenlijst HID: Human Interface Device, de klasse van USB-apparaten waartoe ook toetsenborden en muizen behoren. KVM: Deze term, letterlijk “Keyboard Video Mouse”, verwijst naar een technologie die het mogelijk maakt twee of meer computers (of servers) met één toetsenbord, monitor en muis te besturen. Sommige switches die KVM- technologie gebruiken maken ook het delen van andere randapparatuur als luidsprekers, microfoons en printers mogelijk.
-
Seite 204: Informatie
Belkin naar eigen keuze het product repareren of kosteloos vervangen, op voorwaarde dat het product tijdens de garantieperiode, met vooruitbetaalde vervoerskosten, wordt geretourneerd aan de officiële Belkin dealer bij wie het product is gekocht. Overlegging van het aankoopbewijs kan noodzakelijk zijn. Deze garantie is niet van toepassing als het product is beschadigd als gevolg van een ongeluk, misbruik, verkeerd gebruik of een verkeerde toepassing;... - Seite 205 Asistencia técnica de Belkin Europa: 00 800 223 55 460 © 2005 Belkin Corporation. Todos los derechos reservados. Todos los nombres comerciales son marcas registradas de los respectivos fabricantes enumerados. Mac OS y Apple son marcas registradas de Apple Computer, Inc., registrado en EE.UU. y otros países.
- Seite 206 Conmutador KVM CAT5 PME OmniView ® Gestione sus servidores mediante una Gestión consola PS/2 y cableado CAT5 Manual del usuario F1DP104Aea F1DP108Aea F1DP116Aea...
- Seite 207 Índice de contenidos Índice de contenidos Introducción ..................1 Contenido del paquete ..................1 Generalidades ..................2 Esquema general de características ..............2 Requisitos del equipo ..................4 Requisitos del sistema ..................6 Diagramas de los indicadores de la unidad ..........7 Especificaciones ...................9 Instalación ..................12 Configuración previa ...................12 Montaje del conmutador KVM CAT5 PME ..........13 Conexión de la consola al conmutador KVM CAT5 PME ......15...
-
Seite 208: Introducción
Gracias por la adquisición del conmutador KVM CAT5 PME OmniView de la Serie SOHO con audio de Belkin. Sabemos valorar su negocio y estamos convencidos de que pronto podrá apreciar por usted mismo por qué Belkin es el líder mundial en ventas de conmutadores KVM. -
Seite 209: Generalidades
Generalidades Esquema general de características • Tecnología CAT5 La tecnología CAT5 integrada le permite conectar su conmutador KVM a sus servidores, ubicados a una distancia de hasta 30 metros, mediante el cableado CAT5 estándar y los compactos módulos de interfaz de servidores. Los cables CAT5 reducen el volumen de cableado, simplifican la gestión de cables y permiten permite un mayor flujo de aire en sus bastidores, alargando de esta manera la vida útil de sus equipos. - Seite 210 Las actualizaciones de firmware son gratuitas durante toda la vida útil del conmutador KVM CAT5 PME y se pueden descargar de la página de asistencia de Belkin en www.belkin.com/support.
-
Seite 211: Requisitos Del Equipo
Generalidades Requisitos del equipo Módulos de interfaz de servidores Para conectar el conmutador KVM CAT5 PME a un servidor se necesita un módulo de interfaz de servidores PME y un cable de red CAT5 estándar. F1DP101A-AP Módulos de interfaz de servidores PME OmniView: F1DP101AeaAP (tipo PS/2) F1DP101AeaAU (tipo USB) - Seite 212 Belkin recomienda encarecidamente la utilización de los cables de red Categoría 5e, FastCAT5e o Categoría 6 de Belkin. De esta manera se asegura un rendimiento de vídeo superior de su conmutador KVM CAT5 PME. Estos cables ofrecen la más alta calidad y A3L791-XX-YYY aseguran una transmisión óptima de...
-
Seite 213: Requisitos Del Sistema
Generalidades Requisitos del sistema Sistemas operativos y plataformas El conmutador KVM CAT5 PME es compatible, pero no exclusivamente, con CPUs que utilizan las siguientes plataformas: • Windows , 95, 98, 2000, Me, XP, Server 2003 ® ® • Microsoft DOS 5.x y superior ®... -
Seite 214: Diagramas De Los Indicadores De La Unidad
Generalidades Diagramas de los indicadores de la unidad Vista frontal del conmutador KVM CAT5 PME: Botón AutoScan LED para LED de 7 segmentos identificación del Para identificación del puerto seleccionado BANK seleccionado Selectores de puerto de Botones para selección acceso directo manual de BANK (se muestra F1DP116Aea) - Seite 215 Generalidades Diagramas de los indicadores de la unidad Vista posterior del conmutador KVM CAT5 PME: Toma de alimentación CC Entrada secundaria Puerto para el monitor VGA de la consola Puertos RJ45 para el CPU Interruptor DIP Puertos de consola para ratón/ teclado PS/2 Puerto para actualización por flash Entrada primaria / Salida secundaria...
-
Seite 216: Especificaciones
Generalidades Especificaciones Conmutador KVM CAT5 PME OmniView Nº de artículo: F1DP104Aea, F1DP108Aea, F1DP116Aea Carcasa: Carcasa de metal con placa de cubierta de plástico de gran resistencia a impactos Alimentación: Adaptador de alimentación 6V CC, 1A con clavija centrada de polaridad positiva Encadenamiento en margarita: Máximo de 16 conmutadores KVM OmniView... - Seite 217 Generalidades Dimensiones: (F1DP104Aea) 279 mm x 44,5 mm x 150 mm (F1DP108Aea) 438 mm x 44,5 mm x 190 mm (F1DP116Aea) 438 mm x 89 mm x 190 mm Peso: (F1DP104Aea) 2,4 kg (F1DP108Aea) 4,2 kg (F1DP116Aea) 5,5 kg NOTA: Las especificaciones pueden ser objeto de modificación sin previo aviso. Módulo de interfaz de servidores PME OmniView, PS/2 Nº...
- Seite 218 Generalidades Módulo de interfaz de servidores PME, USB Nº de artículo: F1DP101AeaAU Emulación: Emula señales de ratón y teclado Alimentación: A través del servidor conectado, con modo de funcionamiento inteligente Conexión de teclado/ratón: USB, Tipo A Conexión de monitor: HDDB15 macho (VGA) Resolución válida: Hasta 1600x1200@75Hz Máx.
-
Seite 219: Instalación
Las señales VGA se transmiten con la mejor calidad a una distancia de hasta 30 metros. Cuando se supera esta longitud, aumenta la posibilidad de degradación de la imagen. Por esta razón, Belkin recomienda que la longitud del cable UTP CAT5 que conecta el conmutador KVM CAT5 PME a los servidores no supere los 30 metros. -
Seite 220: Montaje Del Conmutador Kvm Cat5 Pme
Installation Montaje del conmutador KVM CAT5 PME Instalación de los engarces (F1DP108Aea y F1DP116Aea) Los conmutadores KVM CAT5 PME de 8 ó 16 puertos incluyen engarces para montaje en bastidor apropiados para la instalación en bastidores de 19 pulgadas. Los engarces posibilitan tres posiciones diferentes que le permitirán colocar el conmutador KVM CAT5 PME a la altura de los rieles que desee. - Seite 221 Instalación Instalación opcional de los engarces (F1DP104Aea) El conmutador KVM CAT5 PME de 4 puertos se puede instalar en un bastidor para servidores de 19 pulgadas. Para ello, deberá utilizar un kit de montaje en bastidor OmniView (Nº de artículo F1D005). Paso 1 Coloque los engarces a ambos lados del conmutador KVM CAT5 PME.
-
Seite 222: Conexión De La Consola Al Conmutador Kvm Cat5 Pme
Installation Conexión de la consola al conmutador KVM CAT5 Paso 1 Conecte el cable VGA del monitor al puerto HDDB15 hembra ubicado en la parte posterior del conmutador KVM CAT5 PME, en la sección “Consola”. (Utilice de referencia el siguiente diagrama.) Paso 2 Conecte el cable del teclado PS/2 al puerto para teclado ubicado en la parte posterior del conmutador KVM CAT5 PME, en la sección “Consola”. - Seite 223 Instalación Paso 3 Conecte el cable del ratón PS/2 al puerto para ratón ubicado en la parte posterior del conmutador KVM CAT5 PME, en la sección “Consola”. (Utilice de referencia el siguiente diagrama.) Paso 4 Conecte el adaptador de alimentación a la toma de alimentación CC que lleva la etiqueta “6VDC, 1A”...
- Seite 224 Paso 1 Verifique que su servidor esté encendido. Paso 2 Utilice el módulo de interfaz de servidores PME OmniView de Belkin para PS/2 (F1DP101AeaAP) para conectar el conector VGA al puerto para monitor del servidor. (Utilice de referencia el siguiente diagrama.) Paso 3 Conecte los conectores del ratón PS/2 y luego del teclado a los puertos...
- Seite 225 Instalación Paso 4 Conecte el conmutador KVM CAT5 PME al Módulo de interfaz de servidores utilizando el cable de red CAT5e de Belkin incluido u otro cable CAT5. (Utilice de referencia el siguiente diagrama.) Paso 5 Encienda el servidor. Paso 6 Repita los pasos 1 a 5 para cada servidor PS/2 adicional que desee conectar.
- Seite 226 Paso 1 Verifique que su servidor esté encendido. Paso 2 Utililce el módulo de interfaz de servidores PME OmniView de Belkin para USB (F1DP101AeaAU) para conectar el conector VGA al puerto para monitor del servidor. (Utilice de referencia el siguiente diagrama.) Paso 3 Conecte el conector USB a uno de los puertos USB disponibles del servidor.
- Seite 227 Paso 4 Conecte el conmutador KVM CAT5 PME al Módulo de interfaz de servidores utilizando el cable de red CAT5e de Belkin incluido u otro cable CAT5. (Utilice de referencia el siguiente diagrama.) Atención: su servidor deberá reconocer el Módulo de interfaz de servidores e instalar automáticamente el driver HID USB si se requiere.
-
Seite 228: Conexión De Los Servidores Al Conmutador Kvm Cat5 Pme
Verifique que su servidor esté apagado. Paso 2 Utililce el módulo de interfaz de servidores PME OmniView de Belkin para Legacy Sun (F1DP101AeaAL) para conectar el conector VGA al puerto para monitor del servidor. (Utilice de referencia el siguiente diagrama.) - Seite 229 Instalación Paso 4 Conecte el conmutador KVM CAT5 PME al Módulo de interfaz de servidores utilizando el cable de red CAT5e de Belkin incluido u otro cable CAT5. (Utilice de referencia el siguiente diagrama.) Paso 5 Encienda el servidor. Paso 6 Repita los pasos 1 a 4 para cada servidor Sun adicional que desee conectar.
-
Seite 230: Conexión De Múltiples Conmutadores Kvm Cat5 Pme (En Cadena Margarita)
KVM “secundarios”. NOTA: Su conmutador KVM CAT5 PME es compatible con los conmutadores de la versión previa OmniView PRO2 de Belkin. Puede conectar en una misma cadena margarita hasta 16 conmutadores KVM PME CAT5 y PRO2. NOTA: Se requiere un cable para encadenamiento margarita (F1D108-CBL) para cada conmutador KVM CAT5 PME que utilice. - Seite 231 Instalación Tabla de configuración de interruptores BANK DIP Nº DE INTERRUPTOR DIP DIRECCIÓN DE BANCO Abajo Abajo Abajo Abajo Bank 00 Primario (Conf. de fábrica) Arriba Abajo Abajo Abajo BANK 01 Secundario Abajo Arriba Abajo Abajo BANK 02 Secundario Arriba Arriba Abajo Abajo...
- Seite 232 Installation Ejemplo de configuración encadenada en margarita Conmutador KVM primario (BANK 00) Conmutador KVM secundario (BANK 01) Conmutador KVM secundario (BANK 02) Conmutador KVM secundario (BANK 03)
- Seite 233 Instalación Comienzo: Paso 1 Asegúrese de que todos los servidores y conmutadores KVM CAT5 PME estén apagados y que a cada uno de los conmutadores KVM CAT5 PME se le haya asignado una dirección BANK única. Paso 2 Coloque los conmutadores KVM primarios y secundarios en el lugar deseado.
- Seite 234 Installation Conexión de los servidores: Paso 1 Conecte todos los servidores a los conmutadores KVM primarios y secundarios. Consulte la sección “Conexión de los servidores al conmutador KVM CAT5 PME” que se encuentra en la página 17. Paso 2 Asegúrese de que el adaptador de alimentación esté conectado al conmutador KVM primario y que el conmutador KVM esté...
-
Seite 235: Encendido De Los Sistemas
Instalación Encendido de los sistemas Verifique que todos los servidores que están conectados al conmutador KVM CAT5 PME estén encendidos. Si todavía no están encendidos todos los servidores conectados, hágalo ahora (los servidores pueden encenderse al mismo tiempo). El conmutador KVM CAT5 PME emula un ratón y un teclado en cada puerto y permitirá... -
Seite 236: Cómo Utilizar El Conmutador Kvm Cat5 Pme
Cómo utilizar el conmutador KVM CAT5 PME Ahora que ya ha conectado su consola y servidores al conmutador KVM CAT5 PME, éste estará listo para ser utilizado. Seleccione los servidores conectados mediante los selectores de puerto de acceso directo situados en el panel frontal del conmutador KVM CAT5 PME, mediante el menú... - Seite 237 Cómo utilizar el conmutador KVM CAT5 PME Cómo utilizar el conmutador KVM CAT5 PME Si utiliza una configuración de encadenamiento margarita, puede cambiar entre los BANKs (conmutadores KVM) presionando “Bloq Despl”, “Bloq Despl”, “Av Pág” para cambiar al BANK anterior. Presione “Bloq Despl”, “Bloq Despl”, “Re Pág”...
-
Seite 238: Selección De Un Bank Mediante Los Botones De Desplazamiento
Cómo utilizar el conmutador KVM CAT5 PME Selección de un servidor utilizando los selectores de puertos de acceso directo Puede seleccionar directamente el servidor que desea controlar mediante el correspondiente selector de acceso directo que se encuentra al lado del puerto apropiado. -
Seite 239: Búsqueda Automática (Modo Autoscan)
Cómo utilizar el conmutador KVM CAT5 PME Cómo utilizar el conmutador KVM CAT5 PME Modo AutoScan La función AutoScan (Búsqueda automática) le permite configurar su conmutador KVM CAT5 PME para rastrear y controlar las actividades de todos los servidores conectados, uno por uno. El conmutador KVM CAT5 PME permanece en cada servidor durante un número predeterminado de segundos, luego pasa al siguiente servidor. -
Seite 240: Menú En Pantalla (Osd)
Cómo utilizar el conmutador KVM CAT5 PME MENÚ en pantalla (OSD) El menú en pantalla le permite cambiar entre servidores, asignar nombres a los servidores, activar y desactivar la función AutoScan, establecer el intervalo deseado para la búsqueda automática, activar la función de seguridad mediante contraseña y programar las teclas de acceso rápido. - Seite 241 Cómo utilizar el conmutador KVM CAT5 PME Cómo utilizar el conmutador KVM CAT5 PME Comandos de teclado para el menú OSD Navegación a los diferentes servidores en el mismo BANK (Re Pág/Av Pág) Seleccionar el BANK siguiente o anterior. (Insert) Marcar el nombre del servidor para modificarlo (Intro) Cambiar servidor...
- Seite 242 Cómo utilizar el conmutador KVM CAT5 PME Página de Función/Ayuda La página de “Función/Ayuda” le permite establecer los intervalos de tiempo para las funciones de búsqueda automática y menú en pantalla, activar la función de seguridad mediante contraseña y programar las teclas de acceso rápido.
-
Seite 243: Seguridad
Cómo utilizar el conmutador KVM CAT5 PME Cómo utilizar el conmutador KVM CAT5 PME Seguridad Con esta función puede establecer una contraseña de administrador que evitará el acceso de usuarios no autorizados al menú en pantalla. Para activar la función de Seguridad, utilice las teclas de flechas para navegar al campo “Scan”... - Seite 244 Cómo utilizar el conmutador KVM CAT5 PME Timeout (Límite de tiempo) Esto especifica la cantidad de tiempo que podrá transcurrir hasta que se interrumpa el acceso del administrador al conmutador KVM (y todos los servidores conectados) debido a inactividad del usuario. Para recuperar el acceso al conmutador KVM después del límite de tiempo, vuelva a introducir la contraseña de administrador en el recuadro de acceso.
- Seite 245 Cómo utilizar el conmutador KVM CAT5 PME Cómo utilizar el conmutador KVM CAT5 PME Comandos de acceso rápido del teclado A continuación, encontrará una lista completa de los comandos de teclado de acceso rápido que puede utilizar con el conmutador KVM CAT5 PME. Bloq Despl, Bloq Cambiar al puerto ACTIVO PREVIO Despl, Flecha Arriba...
-
Seite 246: Teclas Combo Sun
Cómo utilizar el conmutador KVM CAT5 PME Teclas Combo Sun El teclado PS/2 que está conectado al conmutador KVM CAT5 PME no soporta el teclado Sun en sus funciones especiales del entorno de sistema operativo Sun. Cuando un módulo de interfaz de servidores USB o Sun se conecta a un servidor Sun, el módulo de interfaz de servidores emula las teclas de Sun utilizando una serie de combinaciones de teclas denominadas teclas Combo. -
Seite 247: Actualización Del Firmware
Conmutador KVM CAT5 PME. Para actualizar el firmware, descargue el archivo de firmware apropiado de www.belkin.com/support/. La utilidad le guiará a través del proceso de actualización de firmware para su conmutador KVM CAT5 PME. ¡ATENCIÓN! Recomendamos encarecidamente que actualice su firmware únicamente si tiene dificultades con su ratón o teclado al utilizar el conmutador... - Seite 248 El conmutador KVM CAT5 PME soporta ratones de Microsoft, Logitech ® Kensington , etc., y Belkin. Póngase en contacto con el servicio de asistencia ® técnica de Belkin para consultar cualquier duda sobre la compatibilidad. ¿De qué forma permite el conmutador KVM CAT5 PME al usuario cambiar entre puertos? El conmutador KVM CAT5 PME soporta tres métodos de selección de puerto.
-
Seite 249: Preguntas Frecuentes
Preguntas frecuentes ¿Cuál es la máxima resolución de vídeo que soporta el conmutador KVM CAT5 PME? El circuito avanzado de vídeo del conmutador KVM CAT5 PME soporta una resolución máxima de 1600x1200@75Hz. Al aumentar la longitud del cable que conecta su conmutador KVM CAT5 PME con sus servidores, disminuirá la resolución de vídeo. -
Seite 250: Solución De Problemas
Solución de problemas Mi servidor no arranca cuando está conectado al conmutador KVM CAT5 PME, pero funciona bien cuando conecto el teclado, el monitor y el ratón directamente al servidor. • Asegúrese de que los cables de teclado y ratón se encuentren perfectamente conectados entre el módulo de interfaz de servidores y el servidor. - Seite 251 Solución de problemas El servidor no detecta su teclado y se obtiene un error de teclado durante el arranque. • Verifique que el cable de teclado del módulo de interfaz de servidores esté conectado por completo al servidor. Apriete las conexiones flojas. •...
- Seite 252 Solución de problemas Cuando conmuto de un puerto a otro, el movimiento del ratón es completamente errático. • Asegúrese de que no tiene instalado más de un driver de ratón. Asegúrese de que el driver sea bien para un ratón PS/2 estándar o bien para un ratón PS/2 compatible con Microsoft.
-
Seite 253: Glosario
Glosario Las siguientes definiciones son empleadas en todo el manual del usuario: AutoScan: Un modo de funcionamiento en el que el conmutador KVM rastrea de un puerto a otro, de forma constante, como ha sido configurado por el usuario. BANK (BANCO): La dirección de un KVM encadenado en margarita (00–15, establecido por el interruptor DIP). - Seite 254 Glosario HID: ”Human Interface Device” (Dispositivo de interfaz humana), la clase de dispositivos USB que incluye teclados y ratones. KVM: Literalmente, KVM (Keyboard Video Mouse) es un término que se refiere a la tecnología que permite controlar dos o más ordenadores desde un teclado, un monitor de vídeo y un ratón.
-
Seite 255: Información
Belkin; o si alguno de los números de serie de Belkin ha sido eliminado o deteriorado. -
Seite 256: Manuale Utente
Switch KVM CAT5 per PMI OmniView ® Per gestire i server utilizzando una console Gestione PS/2 ed i cavi CAT5 Manuale utente F1DP104Aea F1DP108Aea F1DP116Aea... - Seite 257 Assistenza Tecnica Belkin Europa: 00 800 223 55 460 © 2005 Belkin Corporation. Tutti i diritti riservati. Tutti i nomi commerciali sono marchi registrati dai rispettivi produttori elencati. Mac OS e Mac sono marchi della Apple Computer, Inc., registrati negli USA e in altri Paesi.
- Seite 258 Indice Indice Introduzione ....................1 Contenuto della confezione ................1 Descrizione generale ..................2 Descrizione generale delle caratteristiche .............2 Requisiti dell’attrezzatura ................4 Requisiti del sistema ..................6 Diagrammi di visualizzazione dell’unità ............7 Specifiche .....................9 Installazione ....................12 Configurazione preliminare ................12 Montaggio dello switch Switch KVM CAT5 per PMI ........13 Collegamento della console allo switch Switch KVM CAT5 per PMI ...15 Collegamento dei server allo Switch KVM CAT5 per PMI ......17 Collegamento di diversi Switch KVM CAT5 per PMI (in collegamento a...
-
Seite 259: Introduzione
Vi ringraziamo per aver scelto di acquistare lo Switch KVM CAT5 per PMI Belkin. Noi sappiamo quanto sia importante il vostro lavoro e siamo certi che ben presto vedrete da soli per quale motivo Belkin è il marchio più venduto al mondo di switch KVM. -
Seite 260: Descrizione Generale
30 metri, utilizzando i cavi standard CAT5 e i compatti moduli di interfaccia server Belkin. Con i cavi CAT5 si riduce l’ingombro dei cavi, si semplifica la loro gestione ed è possibile contare su un maggiore flusso di aria nei rack, prolungando la durata delle apparecchiature. - Seite 261 KVM si manterrà sempre compatibile con i più recenti dispositivi e server. Gli aggiornamenti del firmware sono disponibili gratuitamente per tutta la durata dello switch KVM CAT5 per PMI e si possono scaricare dal sito di assistenza Belkin www.belkin.com/support.
-
Seite 262: Requisiti Dell'attrezzatura
Requisiti dell’attrezzatura Moduli di interfaccia server Il collegamento ad uno switch KVM CAT5 per PMI richiede un Modulo di Interfaccia Server per PMI OmniView Belkin specifico ed un cavo patch CAT5 standard. Moduli di interfaccia server F1DP101A-AP per PMI OmniView:... - Seite 263 Descrizione generale Cavi Per avere il massimo delle prestazioni del vostro video, con lo switch KVM CAT5 per PMI Belkin consiglia di utilizzare cavi Belkin di Categoria 5e, FastCAT5e, oppure cavi patch di Categoria 6. Questi cavi offrono la massima qualità...
-
Seite 264: Requisiti Del Sistema
Descrizione generale Requisiti del sistema Piattaforme OS: Lo switch KVM CAT5 per PMI è compatibile con le CPU collegate, tra le altre, alle seguenti piattaforme OS: • Windows , 95, 98, 2000, Me, XP, Server 2003 ® ® • Microsoft DOS 5.x e superiore ®... -
Seite 265: Diagrammi Di Visualizzazione Dell'unità
Descrizione generale Diagrammi di visualizzazione dell’unità Vista anteriore dello switch KVM CAT5 per PMI: Pulsante LED per identificare LED a 7 SEGMENTI per AutoScan la porta selezionata identificare il BANCO selezionato Selettore di porte ad accesso Pulsanti di scorrimento diretto manualeBANCO (F1DP116Aea shown) - Seite 266 Descrizione generale Diagrammi di visualizzazione dell’unità Vista posteriore dello switch KVM CAT5 per PMI: Jack di alimentazione CC Ingresso secondario Porta monitor console VGA Porte CPU RJ45 SWITCH DIP Porte console mouse/tastiera PS/2 Porta di aggiornamento flash Ingresso primario/ Uscita secondaria (nell’immagine F1DP116Aea)
-
Seite 267: Specifiche
Descrizione generale Specifiche Switch KWM CAT5 per PMI Codice prodotto: F1DP104Aea, F1DP108Aea, F1DP116Aea Alloggiamento: Alloggiamento in metallo con pannello frontale in plastica resistente agli urti Alimentazione: Adattatore di corrente da 6V CC, 1A con polarità positiva al contatto centrale Collegamento in cascata: per un massimo di 16 switch KVM OmniView Nº... - Seite 268 Descrizione generale Dimensioni: (F1DP104Aea) 279 mm x 44,5 mm x 150 mm (F1DP108Aea) 438 mm x 44,5 mm x 190 mm (F1DP116Aea) 438 mm x 89 mm x 190 mm Peso: (F1DP104Aea) 2,4 kg (F1DP108Aea) 4,2 kg (F1DP116Aea) 5,5 kg NOTA: le specifiche sono soggette a variazioni senza obbligo di preavviso.
- Seite 269 Descrizione generale Modulo di Interfaccia Server per PMI, USB Codice prodotto: F1DP101AeaAU Emulazione: segnali di tastiera e mouse Alimentazione: tramite server collegato, con connessione keepalive Collegamento tastiera/mouse: USB, Tipo A Connessione monitor: HDDB15 maschio (VGA) Risoluzione supportata: fino a 1600x1200@75Hz Distanza massima supportata: 30 m Peso:...
-
Seite 270: Installazione
I segnali VGA si trasmettono in maniera eccellente fino a 30 metri di distanza. Superata questa distanza, le probabilità di un peggioramento della qualità video aumentano. Per questo motivo, Belkin consiglia che la lunghezza del cavo CAT5 UTP tra lo switch KVM SMB CAT5 e i server collegati non superi i 30 metri. -
Seite 271: Montaggio Dello Switch Switch Kvm Cat5 Per Pmi
Installazione Montaggio dello switch KVM CAT5 per PMI Installazione delle staffe (F1DP108Aea e F1DP116Aea) Gli switch KVM a 8 o 16 porte comprendono staffe regolabili ideali per il montaggio su rack da 19 pollici. Le staffe di montaggio prevedono tre posizioni di regolazione per consentire una collocazione dello switch KVM CAT5 per PMI tale da portarlo a livello con le estremità... - Seite 272 Installazione Installazione delle staffe opzionali (F1DP104Aea) Lo Switch KVM CAT5 per PMI a 4 porte si può installare su un rack per server da 19 pollici utilizzando il kit opzionale montaggio su rack OmniView (F1D005). Fase 1 Fissare la staffa per il montaggio su rack allo Switch KVM CAT5 per PMI utilizzando le viti Phillips fornite (Vedere lo schema in basso).
-
Seite 273: Collegamento Della Console Allo Switch Switch Kvm Cat5 Per Pmi
Installazione Collegamento della console allo Switch KVM CAT5 per Fase 1 Collegare il cavo del monitor VGA alla presa femmina HDDB15 sul retro dello Switch KVM CAT5 per PMI marcata “Console” (Vedere lo schema in basso). Fase 2 Collegare il cavo PS/2 della tastiera alla porta della tastiera sul retro dello Switch KVM CAT5 per PMI marcata “Console”... - Seite 274 Installazione Fase 3 Collegare il cavo PS/2 del mouse alla porta del mouse sul retro dello Switch KVM CAT5 per PMI marcata “Console” (Vedere lo schema in basso). Fase 4 Collegare l’adattatore di corrente alla presa di alimentazione CC marcata “6VDC, 1A”...
-
Seite 275: Collegamento Dei Server Allo Switch Kvm Cat5 Per Pmi
Fase 1 Accertarsi che il server sia spento. Fase 2 Utilizzando il modulo di interfaccia server Belkin OmniView per PMI per PS/2 (F1DP101AeaAP), collegare il connettore VGA alla presa per il monitor prevista sul server (Vedere lo schema in basso). - Seite 276 Installazione Fase 4 Collegare lo Switch KVM CAT5 per PMI al modulo di interfaccia server utilizzando il cavo patch CAT5e fornito o un altro cavo CAT5. (Vedere lo schema in basso). Fase 5 Avviare il server. Fase 6 Ripetere i passaggi da 1 a 5 per ogni server PS/2 supplementare che si desidera collegare.
- Seite 277 Fase 1 Accertarsi che il server sia acceso. Fase 2 Utilizzando il modulo di interfaccia server Belkin OmniView per PMI per USB (F1DP101AeaAU), collegare il connettore VGA alla presa per il monitor prevista sul server. (Vedere lo schema in basso.) Fase 3 Collegare il connettore USB ad una porta USB disponibile del server.
- Seite 278 Installazione Fase 4 Collegare lo Switch KVM CAT5 per PMI al modulo di interfaccia server utilizzando il cavo patch CAT5e fornito o un altro cavo CAT5. (Vedere lo schema in basso.) Il server dovrebbe riconoscere automaticamente il modulo di interfaccia server ed installare eventuali driver HID USB necessari. Fase 5 Ripetere i passaggi da 1 a 4 per ogni server USB supplementare che si desidera collegare.
- Seite 279 Fase 1 Accertarsi che il server sia spento. Fase 2 Utilizzando il modulo di interfaccia server Belkin OmniView per PMI per Legacy Sun (F1DP101AeaAL), collegare il connettore VGA alla presa per il monitor prevista sul server. (Vedere lo schema in basso.)
- Seite 280 Installazione Fase 4 Collegare lo Switch KVM CAT5 per PMI al modulo di interfaccia server utilizzando il cavo patch CAT5e fornito o un altro cavo CAT5. (Vedere lo schema in basso.) Fase 5 Avviare il server. Fase 6 Ripetere i passaggi da 1 a 4 per ogni server Sun supplementare che si desidera collegare.
-
Seite 281: Collegamento Di Diversi Switch Kvm Cat5 Per Pmi (In Collegamento A Cascata)
“secondari”. NOTA: lo Switch KVM CAT5 per PMI è compatibile con le versioni precedenti degli switch KVM OmniView PRO2 Belkin. Si può realizzare un collegamento in cascata con qualsiasi combinazione che comprenda al massimo 16 Switch KVM CAT5 per PMI e PRO2. - Seite 282 Installazione Schema di configurazione dello switch BANK DIP N. DIP SWITCH INDIRIZZO BANCO Banco 00 primario (predefinito) Giù Giù Giù Giù Giù Giù Giù BANCO 01 Secondario Giù Giù Giù BANCO 02 Secondario Giù Giù BANCO 03 Secondario Giù Giù Giù...
-
Seite 283: Esempio Di Configurazione In Cascata
Installazione Esempio di configurazione in cascata Primary KVM Switch (BANK 00) Secondary KVM Switch (BANK 01) Secondary KVM Switch (BANK 02) Secondary KVM Switch (BANK 03) -
Seite 284: Operazioni Preliminari
Installazione Operazioni preliminari: Fase 1 Accertarsi che tutti i server e gli Switch KVM CAT5 per PMI siano spenti e che ad ogni Switch KVM CAT5 per PMI sia stato assegnato un unico indirizzo BANCO. Fase 2 Collocare tutti gli switch KVM primari o secondari nella posizione desiderata. Fase 3 Collegare la console monitor, tastiera e mouse alle porte della console dello switch primario (BANCO 00). - Seite 285 Installazione Collegamento dei server: Fase 1 Collegare tutti i server agli switch KVM primari o secondari. Vedere la sezione “Collegamento della console allo switch KVM CAT5 per PMI” a pagina 17 per istruzioni in merito. Fase 2 Accertarsi che l’adattatore di corrente sia collegato allo switch KVM primario e che lo switch KVM sia acceso.
-
Seite 286: Avviamento Dei Sistemi
Installazione Avviamento dei sistemi Accertarsi che tutti i server collegati allo switch KVM CAT5 per PMI siano accesi. Eventuali server collegati non ancora accesi, si possono accendere anche adesso (i server si possono accendere contemporaneamente). Lo switch KVM CAT5 per PMI emula un mouse e una tastiera per ciascuna porta e consente al server di eseguire un’inizializzazione normale. -
Seite 287: Utilizzo Dello Switch Kvm Cat5 Per Pmi
Utilizzo dello switch Switch KVM CAT5 per PMI A questo punto la console ed i server sono collegati allo switch KVM CAT5 per PMI e sono pronti ad essere utilizzati. I server collegati possono essere selezionati mediante i selettori di porta ad accesso diretto previsti sul pannello anteriore dello switch KVM CAT5 per PMI, utilizzando l’On-Screen Display oppure attraverso i tasti di scelta rapida della tastiera della console. - Seite 288 Utilizzo dello switch Switch KVM CAT5 per PMI Utilizzo dello switch Switch KVM CAT5 per PMI Nel caso gli switch siano configurati in struttura daisy-chain, si può passare da un BANCO all’altro (switch KVM) premendo “Scroll Lock”, “Scroll Lock”, “Page Up”...
-
Seite 289: Selezione Di Un Server Utilizzando I Selettori Di Porta Ad Accesso Diretto
Utilizzo dello Switch KVM CAT5 per PMI Selezione di un server utilizzando i selettori di porta ad accesso diretto Si può selezionare direttamente quale server controllare premendo il selettore ad accesso diretto della porta accanto alla rispettiva porta. Il LED si illuminerà per indicare la porta attualmente selezionata. -
Seite 290: Modalità Di Scansione Automatica
Utilizzo dello switch Switch KVM CAT5 per PMI Utilizzo dello switch Switch KVM CAT5 per PMI Modalità Autoscan La funzione AutoScan consente di impostare lo switch KVM CAT5 per PMI in modo tale da poter eseguire la scansione ed il controllo delle attività di tutti i computer collegati, uno per uno. -
Seite 291: On-Screen Display
Utilizzo dello Switch KVM CAT5 per PMI ON-SCREEN Display Il menu delle funzioni On-Screen Display consente di cambiare server, assegnare nuovi nomi ai propri server, attivare e disattivare la funzione AutoScan, impostare l’intervallo di scansione desiderato per l’AutoScan, attivare la funzione di protezione password e programmare i tasti di selezione rapida. - Seite 292 Utilizzo dello switch Switch KVM CAT5 per PMI Utilizzo dello switch Switch KVM CAT5 per PMI Comandi della tastiera per il menu OSD Spostarsi tra server diversi nello stesso BANCO (Pagina Su/Pagina Giù) Selezionare il BANCO successivo o precedente (Insert) Evidenziare il nome del server da modificare (Invio) Alternare tra i server...
- Seite 293 Utilizzo dello Switch KVM CAT5 per PMI Pagina Function/Help (Funzione/Guida) La pagina “Function/Help” (Funzione/Guida) consente di impostare gli intervalli di tempo per la funzione AutoScan e l’intervallo di visualizzazione OSD, attivare la funzione di protezione tramite password e programmare i tasti di selezione rapida.
- Seite 294 Utilizzo dello switch Switch KVM CAT5 per PMI Utilizzo dello switch Switch KVM CAT5 per PMI Security Questa funzione consente di abilitare una password amministrazione per impedire ad eventuali utenti non autorizzati da accedere al menu OSD. Per attivare e disattivare la funzione Protezione, utilizzare i tasti freccia per passare al campo “Security”...
- Seite 295 Utilizzo dello Switch KVM CAT5 per PMI Timeout Serve a specificare l’intervallo di tempo che può trascorrere prima che l’amministratore venga escluso dallo switch KVM (e collegato ai server) per mancato utilizzo da parte dell’utente. Per poter accedere nuovamente allo switch KVM dopo l’intervallo scaduto, è...
-
Seite 296: Tasti Di Selezione Rapida Della Tastiera
Utilizzo dello switch Switch KVM CAT5 per PMI Utilizzo dello switch Switch KVM CAT5 per PMI Tasti di selezione rapida della tastiera Di seguito è riportato un elenco completo dei comandi di selezione rapida utilizzabili con lo switch KVM CAT5 per PMI: SL, SL, Freccia Su Per commutare alla porta ATTIVA PRECEDENTE SL, SL, Freccia... -
Seite 297: Combinazioni Di Tasti Sun
Utilizzo dello Switch KVM CAT5 per PMI Combinazioni di tasti Sun La tastiera PS/2 collegata allo switch KVM CAT5 per PMI non supporta la tastiera Sun per l’esecuzione di alcune specifiche funzioni previste nel sistema operativo Sun. Quando un modulo di interfaccia server USB o Sun è collegato ad un server Sun, il modulo di interfaccia server emula i tasti Sun utilizzando una serie di combinazioni chiamate Tasti Combo. -
Seite 298: Aggiornamento Del Firmware
SMB CAT5. Per eseguire l’aggiornamento del firmware, scaricare il rispettivo file e la utility dal sito www.belkin.com/support/. La utility vi guiderà attraverso il processo di aggiornamento del firmware sullo Switch KVM CAT5 per PMI. ATTENZIONE! Si consiglia vivamente di aggiornare il proprio firmware soltanto... -
Seite 299: Domande Frequenti
Lo Switch KVM CAT5 per PMI supporta i mouse Microsoft, Logitech ® Kensington , ecc., e Belkin. Contattare l’Assistenza Tecnica Belkin per eventuali ® problemi di compatibilità che si dovessero riscontrare. Come avviene la commutazione tra le porte mediante lo Switch KVM CAT5... - Seite 300 Domande frequenti Qual è la risoluzione video massima supportabile dallo Switch KVM CAT5 per PMI ? Il circuito video avanzato dello Switch KVM CAT5 per PMI supporta una risoluzione massima di 1600x1200 a 75Hz. Aumentando la lunghezza del cavo dallo Switch KVM CAT5 per PMI ai server si viene a creare una minore risoluzione.
-
Seite 301: Rilevazione E Risoluzione Delle Anomalie
Rilevazione e risoluzione delle anomalie Il mio server non si avvia quando collegato allo Switch KVM CAT5 per PMI ma funziona bene se collego la tastiera, il video ed il mouse direttamente al server. • Accertarsi che i cavi di tastiera e mouse siano collegati a fondo tra il modulo di interfaccia server ed il server. - Seite 302 Rilevazione e risoluzione delle anomalie Il server non rileva una tastiera e in fase di avvio ricevo un messaggio di errore tastiera. • Accertarsi che il cavo della tastiera sul modulo di interfaccia server sia completamente collegato al server. Serrare eventuali collegamenti lenti. •...
- Seite 303 Rilevazione e risoluzione delle anomalie Quando passo da una porta all’altra, il movimento del mouse risulta assolutamente confuso. • Accertarsi che non siano installati più di un driver del mouse. Accertarsi che il driver sia adatto ad un mouse standard PS/2 o ad un mouse compatibile con i server Microsoft PS/2.
-
Seite 304: Glossario
Glossario In questo Manuale Utente vengono utilizzate le seguenti definizioni: AutoScan:Una modalità di funzionamento in cui lo switch KVM esegue una ricerca da una porta all’altra, in maniera continua, secondo la configurazione dell’utente. BANCO: L’indirizzo di uno switch KVM collegato in cascata (da 0 a 15, impostato dal commutatore tipo DIP switch). - Seite 305 Glossario HID:Human Interface Device, un dispositivo USB che comprende tastiere e mouse. KVM: Letteralmente “Keyboard Video Mouse” (tastiera, video, mouse), questo termine fa riferimento alla tecnologia che consente di controllare due o più computer tramite una tastiera, un monitor video ed un mouse. Alcuni switch basati sulla tecnologia KVM consentono la condivisione di altre periferiche, quali altoparlanti, microfoni e stampanti.
-
Seite 306: Informazioni
Questa garanzia non sarà valida nel caso il prodotto sia stato danneggiato accidentalmente, per abuso, uso non corretto o non conforme, qualora sia stato modificato senza il permesso scritto di Belkin, o nel caso in cui il numero di serie Belkin fosse stato cancellato o reso illeggibile.