Herunterladen Inhalt Inhalt Diese Seite drucken
Tally T2240/9 Bedienungsanleitung

Tally T2240/9 Bedienungsanleitung

Matrixdrucker
Vorschau ausblenden Andere Handbücher für T2240/9:
Inhaltsverzeichnis

Werbung

Verfügbare Sprachen
  • DE

Verfügbare Sprachen

  • DEUTSCH, seite 27
Operator's Manual
Bedienungsanleitung
Manuel d'utilisation
Istruzioni per l'uso
Instrucciones de servicio
Matrix Printer
Matrixdrucker
Imprimante matricielle
Stampante a Matrice
Impresora matricial
T2240/9
T2240/24
T2340/9
T2340/24

Werbung

Inhaltsverzeichnis
loading

Inhaltszusammenfassung für Tally T2240/9

  • Seite 1 T2240/9 T2240/24 Operator’s Manual Matrix Printer Bedienungsanleitung Matrixdrucker T2340/9 Manuel d’utilisation Imprimante matricielle Istruzioni per l’uso Stampante a Matrice T2340/24 Instrucciones de servicio Impresora matricial...
  • Seite 2 Important Information This device fulfils the European standards requirements by complying with the Directive of the Commission This equipment generates and uses radio frequency energy and if not dated May 3, 1989 (89/336/EEC) relating to electromagnetic compatibility and the Directive dated February 19, installed and used properly, that is, in accordance with the manufacturer’s 1973 (73/23/EEC) relating to low-voltage electrical equipment.
  • Seite 3: Inhaltsverzeichnis

    Quick start-up Table of contents Operator’s Manual Introduction QUICK START-UP Symbols used in this manual Important safety instructions Using the online documentation Troubleshooting The printer at a glance Installation Unpacking the printer Positioning your printer Connecting the printer Switching the printer on and off Control panel Online mode Offline mode...
  • Seite 4: Introduction

    Introduction Quick start-up Introduction This Operator’s Manual is intended as a quick introduction into working with the printer and is to enable also unexperienced users to handle the device properly. It describes the most important Ah ha! functions of the printer and contains the essential information for your everyday work with the printer.
  • Seite 5: The Printer At A Glance

    Quick start-up The printer at a glance The printer at a The following figures show the name of each printer part, and the table on the following page glance shows the functions of each part. Paper Extension Trays Paper Tray Access Cover Operation Panel Left Paper Guide...
  • Seite 6: Quick Start-Up

    The printer at a glance Quick start-up Name Functions Operation Panel It indicates the printer status, and is used to change various settings. Paper Tray It is used as a paper support for cut sheet paper already printed when the option “F-Eject”...
  • Seite 7: Installation

    Quick start-up Installation Installation Unpacking the printer Please open the printer package and check that all the following items are included. If any item is missing or damaged, please contact the store where Unpacking Instructions Operator’s Manual the product was purchased. Printer Remove the transport protection elements as described in the unpacking instructions.
  • Seite 8: Connecting The Printer

    Installation Quick start-up Connecting the printer Make sure that the unit is set to the correct voltage (i.e. 230 V for Europe, 120 V for the USA). Refer to the type plate beside Type Plate the power inlet on the rear side of the printer. If this is not the case, contact your dealer.
  • Seite 9: Control Panel

    Quick start-up Control panel Control panel You can control printer operation using the control panel and the keys. The first line of the display informs you about whether the printer is in Online or in Offline mode and about the paper path selected (Trac.1 or Single).
  • Seite 10: Installing The Ribbon Cassette

    Installing the ribbon cassette Quick start-up Installing the Remove any paper loaded into the printer. ribbon cassette Before opening the cover, make sure that the printer is switched off. STOP Set the Paper Thickness Adjustment Lever to the “8” position. Paper Thickness Adjustment Lever Pull the Latch Levers near the right and left ends on the Access...
  • Seite 11 Quick start-up Installing the ribbon cassette Align the part “A” on the left side of the Ink-ribbon Cartridge Part “A” (left side) Ribbon Feed Knob to the two hooks of the printer, push the cartridge all the way until it clicks. If there is resistance, push it while turning the Ribbon Feed Knob.
  • Seite 12: Loading Paper

    Loading paper Quick start-up When the Ink-ribbon Cartridge setting is complete, attach the Access Access Cover. Cover Set the Paper Thickness Adjustment Lever in accordance with the thickness of the paper to be used. Refer to page 18 (Setting the print head gap).
  • Seite 13 Quick start-up Loading paper Set the Paper Type Selection Lever to Cut Sheet Paper mode. Make sure that the printer is in Single Sheet mode. For how to select Single Sheet mode refer to page 14 (Paper path quick selection). Cut Sheet Insert Guide Paper Type...
  • Seite 14: Printer In Fanfold Paper Mode

    Loading paper Quick start-up Printer in fanfold paper mode Set the Paper Thickness Adjustment Lever according to the type Front Cover of paper to be used. Refer to page 18 (Setting the print head gap). Set the Paper Type Selection Lever to Continuous Form Feed Paper mode.
  • Seite 15 Quick start-up Loading paper With the printing side of the paper facing up, fit the feeding holes on the left edge of the paper over the Left Tractor pins and close the Paper Flap. Fit the feeding holes on the right edge of the paper over the Right Tractor pins, and close the Paper Flap.
  • Seite 16: Changing The Paper Type

    Changing the paper type Quick start-up Changing the You can change the paper type (the paper path) either using the paper path quick selection feature paper type or via the Setup menu. Paper path quick First cut the fed-out portion of a Continuous Form Feed Paper at the perforated line. To do this, selection proceed as follows.
  • Seite 17: Paper Transport

    Quick start-up Paper transport Press the Online key to make the printer ready for operation. Online Online Single Setup Paper transport Loaded paper (fanfold paper/single sheets) can be transported in the printer in different ways. Make sure that the printer is in Offline status; press the Online key, if Online...
  • Seite 18: Settings (I)

    Settings (I) Quick start-up Settings (I) Setting the tear If the tear position of the paper is not aligned with the tear edge of the printer, you can adjust it. position Press the Setup key. The printer changes to Setup mode. Online Offline Trac.1...
  • Seite 19 Quick start-up Settings (I) Press the Adjust key. Online Adjust Paperway Menu Char Setup Press the key. Online Tear Setup The bottom edge of the currently valid first printing line A of the paper is transported to the tear edge B. The factory setting for the first printing position is 12/72".
  • Seite 20: Settings (Ii)

    Settings (II) Quick start-up Settings (II) Setting the print The printer has been provided with a Paper Thickness Adjustment Lever for adjusting the print head gap head gap To obtain optimum print quality, the gap between the Print Head and the Platen needs to be adjusted according to the thickness Paper Thickness of the paper to be used.
  • Seite 21: Changing Paper In Setup Mode

    Quick start-up Settings (II) Changing paper in Setup mode From fanfold paper When fanfold paper was in use and you want to change over to single sheet mode, proceed as to single sheet mode described below. You do not need to remove the fanfold paper. Cut the fed-out portion of the Continuous Form Feed Paper at the perforated line.
  • Seite 22: From Single Sheet To Fanfold Paper Mode

    Settings (II) Quick start-up Set the Paper Type Selection Lever to Cut Sheet Paper mode. Online Turn paperlever Setup In the display appears… Stand the Paper Tray up and pull up the Paper Extension Trays (see page 10). Online Load paper from Place a sheet of paper aligned to the Left Paper Guide, and adjust the Right Paper Single Guide to the right edge of the paper.
  • Seite 23: Selecting A Font

    Quick start-up Settings (II) Confirm the setting by pressing the key. An acoustic signal acknowledges the Online Tractor1 input. Exit Setup The display toggles between… Online Offline Trac.1 Park LF/FF Setup and… Shift the Paper Type Selection Lever to the position needed. Online Turn paperlever The printer is now ready for printing fanfold paper.
  • Seite 24: Setting The Character Pitch

    Settings (II) Quick start-up The selection made will not be retained after printer power-off. For information on how to se- STOP lect a font permanently, refer to online documentation on the CD-ROM, chapter 1 (Menu description table). Setting the You can use the key to set the character pitch in Setup mode.
  • Seite 25: Specifications

    Quick start-up Specifications Specifications Printer specifications Printing method serial printing with 9-pin matrix print head serial printing with 24-pin matrix print head Print width narrow printer 80 characters at 10 cpi narrow printer 80 characters at 10 cpi wide printer 136 characters at 10 cpi wide printer 136 characters at 10 cpi...
  • Seite 26: Accessories

    Accessories Quick start-up For more information on printer specifications and paper specifications, refer to the online documentation on the CD-ROM. Accessories Ribbon cassettes Narrow printer: Part No. 044 829 Wide printer: Part No. 044 830 Demo page The demo page contains information on the firmware version, serial number, needle check, fonts, font attributes and bar codes/LCP.
  • Seite 27 Der schnelle Einstieg Inhaltsverzeichnis Bedienungsanleitung DER SCHNELLE Einführung Zu den verwendeten Symbolen EINSTIEG Wichtige Sicherheitshinweise Arbeiten mit der Online-Dokumentation Auf einen Blick Installation Drucker auspacken Drucker aufstellen Drucker anschließen Drucker ein- und ausschalten Bedienfeld Online-Modus Offline-Modus Setup-Modus Farbbandkassette auswechseln Papier einlegen Einzelblattpapier Drucker im Endlospapierbetrieb Papierart wechseln...
  • Seite 28: Einführung

    Einführung Der schnelle Einstieg Einführung Diese Bedienungsanleitung dient dem schnellen Einstieg in das Arbeiten mit dem Drucker und soll auch dem ungeübten Benutzer den Umgang mit dem Gerät ermöglichen. Sie beschreibt die Ah ha! wichtigsten Funktionen des Druckers und enthält unerläßliche Informationen für die alltägliche Arbeit mit dem Gerät.
  • Seite 29: Auf Einen Blick

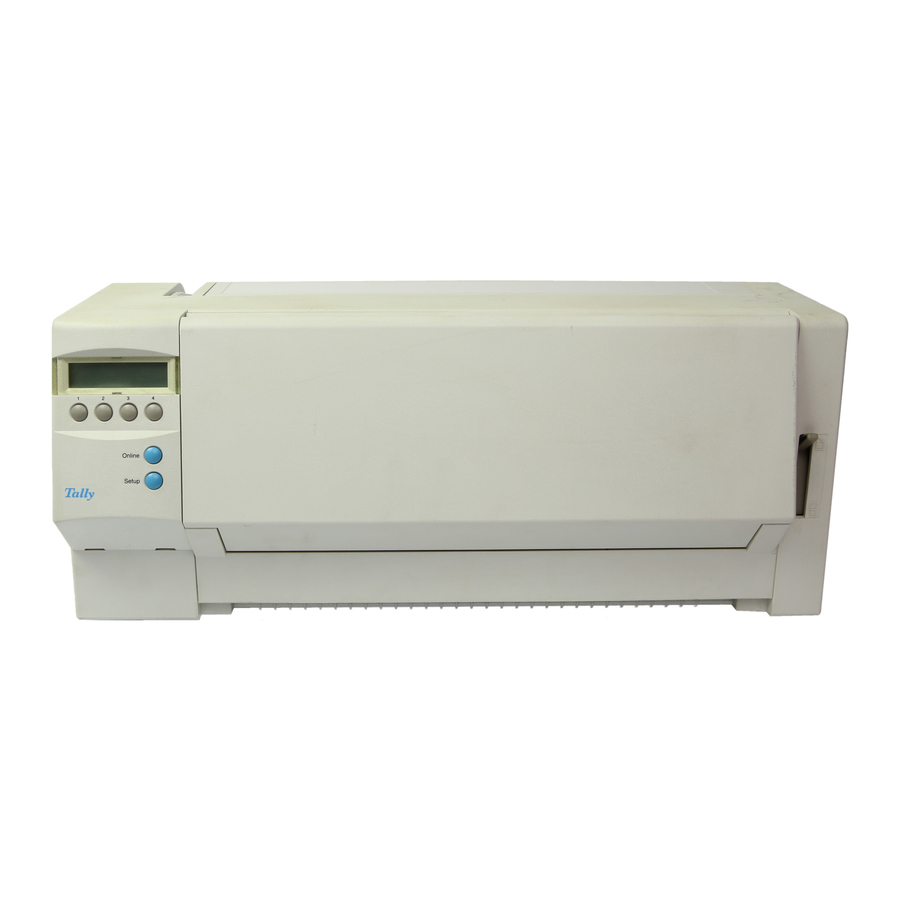
    Der schnelle Einstieg Auf einen Blick Auf einen Blick In den folgenden Abbildungen sind alle Druckerteile aufgeführt, die sich daran anschließende Tabelle listet die Funktionen dieser Teile auf. Papierstützen Papierablage Bedienfeld Obere Abdeckung Linker Randsteller Handrad Netzschalter Einzelblatteinzug Optionenbuchse Rechter Randsteller Frontklappe Papierwahlhebel Papierabreißkante...
  • Seite 30 Auf einen Blick Der schnelle Einstieg Bezeichnung Funktion Bedienfeld Zeigt den Druckerstatus an; wird verwendet, um zahlreiche Einstellungen vorzunehmen. Papierablage Wird als Papierablage für schon bedruckte Einzelblätter verwendet, wenn der Parameter „F-Eject“ in den Menüeinstellungen auf AUS gesetzt ist. Papierstützen Dienen zur Verlängerung der Papierablage.
  • Seite 31: Installation

    Der schnelle Einstieg Installation Installation Drucker auspacken Öffnen Sie bitte den Druckerkarton und überprüfen Sie, ob die folgenden Teile enthalten sind. Informieren Sie im Fall von Transportschäden oder fehlendem Auspackhinweise Bedienungsanleitung Zubehör bitte Ihren Händler. Drucker Entfernen Sie die Transportsicherungen wie in den Auspack- hinweisen beschrieben Bewahren Sie den Karton und das Verpackungsmaterial an einem sicheren Platz für den Fall auf, daß...
  • Seite 32: Drucker Anschließen

    Installation Der schnelle Einstieg Drucker anschließen Stellen Sie sicher, daß das Gerät auf die richtige Spannung eingestellt ist (z.B. 230 V in Europa, 120 V in den USA). Siehe Typenschild dazu das Typenschild neben dem Netzanschluß auf der Rück- seite des Druckers. Benachrichten Sie Ihren Händler, wenn dies nicht der Fall ist.
  • Seite 33: Bedienfeld

    Der schnelle Einstieg Bedienfeld Bedienfeld Über das Bedienfeld und seine Tasten steuern Sie die Arbeit mit dem Drucker. Die obere Zeile der Anzeige gibt Aufschluß darüber, ob der Drucker sich im Online- oder im Offline-Modus befindet und welcher Papierweg (Trac.1 oder Einzel) gewählt ist. Online-Modus Nach dem Einschalten geht der Drucker automatisch in den Online-Modus.
  • Seite 34: Farbbandkassette Auswechseln

    Farbbandkassette auswechseln Der schnelle Einstieg Farbbandkassette Alles Papier aus dem Drucker entfernen. auswechseln Stellen Sie vor dem Öffnen der Abdeckung sicher, daß der Drucker ausgeschaltet ist. STOP Den Papierdickenhebel in die Position „8“ bringen. Papierdickenhebel Die Rasthebel der oberen Abdeckung, die auf der rechten und Obere Abdeckung Rasthebel linken Seite angebracht sind, in Richtung Druckervorderseite...
  • Seite 35 Der schnelle Einstieg Farbbandkassette auswechseln Schieben Sie die beiden Führungen „A“ auf der linken Seite der Führungen „A“ (linke Seite) Farbbandspannknopf Farbbandkassette über die Nasen am Drucker und legen Sie die Kassette ein; drücken Sie vorsichtig auf die Kassette bis sie einrastet.
  • Seite 36: Papier Einlegen

    Papier einlegen Der schnelle Einstieg Nachdem das Einsetzen der Farbbandkassette abgeschlossen Obere ist, die obere Abdeckung wieder anbringen. Abdeckung Den Papierdickenhebel entsprechend der Dicke des verwende- ten Papiers einstellen. Einzelheiten dazu siehe Seite 18 (Druck- kopfabstand einstellen). Papier einlegen Bitte verwenden Sie nur Papier, das für diesen Drucker geeignet ist. Nähere Informationen fin- den Sie in der Online CD-ROM, Anhang C (Technische Daten).
  • Seite 37 Der schnelle Einstieg Papier einlegen Den Papierwahlhebel auf Einzelblattbetrieb stellen. Sicherstellen, daß der Drucker sich im Einzelblattbetrieb befin- det. Einzelheiten, wie dieser gewählt werden kann, finden sich auf Seite 14 (Schnellumschaltung Papierweg). Einzelblatteinzug Papierwahlhebel Richten Sie den linken Randsteller auf die gewünschte Position des Druckbeginns aus.
  • Seite 38: Drucker Im Endlospapierbetrieb

    Papier einlegen Der schnelle Einstieg Drucker im Endlospapierbetrieb Den Papierdickenhebel entsprechend der Dicke des verwende- Frontklappe ten Papiers einstellen. Einzelheiten dazu siehe Seite 18 (Druck- kopfabstand einstellen). Den Papierwahlhebel auf Endlospapierbetrieb einstellen. Die Frontklappe hochschwenken und einrasten lassen. Die Rasterstellung sichert gegen ungewolltes Zufallen der Klappe.
  • Seite 39 Der schnelle Einstieg Papier einlegen Das Papier mit der zu bedruckenden Seite nach oben in den linken Traktor einlegen. Dazu die Transportlöcher am linken Rand des Papiers über die Stifte auf dem Traktor legen und anschließend die Traktorklappe schließen. Die Transportlöcher am rechten Rand über die Stifte auf dem rechten Traktor legen und die Traktorklappe schließen.
  • Seite 40: Papierart Wechseln

    Papierart wechseln Der schnelle Einstieg Papierart Der Wechsel der Papierart (des Papierwegs) kann entweder über die Papierweg-Schnellumschal- wechseln tung erfolgen oder im Menü Setup veranlaßt werden. Schnellumschaltung Ein ausgegebenes Endlospapier zuerst an der Papierabreißkante abreißen. Dazu wie folgt vorge- Papierweg hen.
  • Seite 41: Papiertransport

    Der schnelle Einstieg Papiertransport Taste Online drücken, um den Drucker betriebsbereit zu machen. Online Online Einzel Setup Papiertransport Eingelegtes Papier (Endlospapier/Einzelblatt) kann auf unterschiedliche Weise im Drucker transportiert werden. Sicherstellen, daß sich der Drucker im Betriebszustand Offline befindet; gege- Online Offline Trac.1 benenfalls Taste Online drücken.
  • Seite 42: Einstellungen (I)

    Einstellungen (I) Der schnelle Einstieg Einstellungen (I) Abreißposition Stimmt die Abreißposition des Papiers nicht mit der Abreißkante des Druckers überein, kann sie einstellen eingestellt werden. Taste Setup drücken. Der Drucker geht in den Setup-Modus. Online Offline Trac.1 Park LF/FF Setup Taste Adjust drücken.
  • Seite 43 Der schnelle Einstieg Einstellungen (I) Taste Adjust drücken. Online Adjust Pap.Weg Menü Char Setup Taste TOF drücken. Online Tear Setup Das Papier wird so weit vortransportiert, bis die Unterkante der ersten Druckzeile A auf Höhe der Abreißkante B liegt. Werkseitig ist die erste Druckposition auf 12/72" eingestellt. Durch Drücken der Taste <...
  • Seite 44: Einstellungen (Ii)

    Einstellungen (II) Der schnelle Einstieg Einstellungen (II) Druckkopfabstand Der Drucker ist mit einem Papierdickenhebel ausgestattet, der zum Einstellen des Druckkopfab- einstellen stands dient. Um eine optimale Druckqualität zu erzielen, muß der Abstand zwischen Druckkopf und Gegenlager entsprechend der Dicke Papierdickenhebel des verwendeten Papiers eingestellt werden.
  • Seite 45: Papierwechsel Im Setup-Modus

    Der schnelle Einstieg Einstellungen (II) Papierwechsel im Setup-Modus Von Endlospapier- in Der Drucker hat bisher Endlospapier verarbeitet und soll jetzt auf Einzelblattbetrieb umgestellt Einzelblattbetrieb werden. Das Endlospapier muß nicht entfernt werden. Das ausgegebene Endlospapier an der Papierabreißkante abreißen. Dazu vorgehen Online Online Trac.1...
  • Seite 46: Von Einzelblatt- In Endlospapierbetrieb

    Einstellungen (II) Der schnelle Einstieg Den Papierwahlhebel auf Einzelblattbetrieb einstellen. Online Drehe Pap.Hebel Setup In der Anzeige erscheint… Die Papierablage in Pfeilrichtung nach oben klappen. Die Papierablage festhalten Online Papier laden aus und die Papierstützen herausziehen (siehe Seite 10). Einzel Ein Einzelblatt am linken Randsteller ausrichten und den rechten Randsteller Setup entsprechend der verwendeten Papierbreite einstellen.
  • Seite 47: Schriftart Wählen

    Der schnelle Einstieg Einstellungen (II) Durch Drücken von Taste Setze bestätigen. Ein akustisches Signal bestätigt die Online Traktor1 Eingabe. Setze Exit Setup Die Anzeige wechsel zwischen… Online Offline Trac.1 Park LF/FF Setup und… Den Papierwahlhebel in die entsprechende Stellung bringen Online Drehe Pap.Hebel...
  • Seite 48: Zeichendichte Einstellen

    Einstellungen (II) Der schnelle Einstieg Die getroffene Auswahl bleibt nach dem Ausschalten des Druckers nicht erhalten. Einzel- STOP heiten über die dauerhafte Auswahl von Schriftarten siehe Online CD-ROM, Kapitel 1 (Menübeschreibungstabelle). Zeichendichte Mit der Taste CPI kann im Setup-Modus die Anzahl der Zeichen, die pro Zoll ausgedruckt einstellen werden, eingestellt werden.
  • Seite 49: Technische Daten

    Der schnelle Einstieg Technische Daten Technische Daten ➤ Druckerspezifikationen Druckprinzip seriell mit 9-Nadel Druckkopf seriell mit 24-Nadel Druckkopf Druckbreite schmaler Drucker 80 Zeichen bei 10 cpi schmaler Drucker 80 Zeichen bei 10 cpi breiter Drucker 136 Zeichen bei 10 cpi breiter Drucker 136 Zeichen bei 10 cpi Druckgeschwindigkeit...
  • Seite 50: Zubehör

    Zubehör Der schnelle Einstieg Weitere Informationen zu Papierspezifikationen finden Sie in der Online-Dokumentation auf CD-ROM. Zubehör Farbbandkassetten, schwarz schmaler Drucker: Teile-Nr. 044 829 breiter Drucker: Teile-Nr. 044 830 Demo-Seite Die Demo-Seite enthält Informationen über Firmwareversion, Seriennummer, Nadel- prüfung, Fonts, Fontattribute und Barcodes/LCP. Halten Sie die Taste 4 während des Einschaltens des Druckers gedrückt, um die Demo-Seite auszudrucken.
  • Seite 51 Initiation rapide Tables des matières Manuel d’utilisation Introduction Symboles utilisés INITIATION RAPIDE Consignes importantes de sécurité Utilisation de la documentation Online Vue d’ensemble Installation Déballage de l’imprimante Mise en place de l’imprimante Connexion del’imprimante Mise sous tension et hors tension de l’imprimante 6 Panneau de commande Mode Online Mode Offline...
  • Seite 52: Introduction

    Introduction Initiation rapide Introduction Ce manuel d’utilisation est une initiation rapide sur la manière d’utiliser l’imprimante et permet également aux utilisateurs inexpérimentés de se servir de l’imprimante. Il décrit les fonctions Ah ha! principales de l’imprimante et contient des informations indispensables à connaître pour le travail quotidien avec l’imprimante.
  • Seite 53: Vue D'ensemble

    Initiation rapide Vue d’ensemble Vue d’ensemble Aux figures suivantes sont indiqués tous les éléments de l’imprimante; le tableau qui suit liste les fonctions de ces éléments. Supports de papier Magasin de papier Capot supérieur Panneau de commande Margeur de Molette gauche Interrupteur secteur Alimentation feuille à...
  • Seite 54 Vue d’ensemble Initiation rapide Désignation Fonction Panneau de Indique l’état de l’imprimante; est utilisé pour procéder à de nombreux commande réglages. Magasin de papier Sert de magasin à papier pour les feuilles déjà imprimées quand le paramètre “F-Eject” est inactif dans les réglages du menu. Supports de papier Servent à...
  • Seite 55: Installation

    Initiation rapide Installation Installation Déballage de Ouvrez le carton de l’imprimante et vérifiez que les articles suivants s’y trouvent bien. l’imprimante Si des articles manquent ou sont endommagés, n’hésitez pas à Consignes de déballage Manuel d’utilisation contacter le magasin où le produit a été acheté. Imprimante Enlever les protections pour le transport comme décrit dans les consignes de déballage.
  • Seite 56: Connexion Del'imprimante

    Installation Initiation rapide Connexion del’imprimante S’assurer que l’imprimante est réglée à la tension appropriée (p. Plaque signalétique ex. 230 V pour l’Europe, 110 V pour les USA). Voir la plaque signalétique près de la prise d’alimentation à l’arrière de l’im- primante.
  • Seite 57: Panneau De Commande

    Initiation rapide Panneau de commande Panneau de Le fonctionnement de l’imprimante peut être contrôlé avec le panneau de commande et les touches. commande La première ligne sur l’afficheur indique si l’imprimante est Online ou Offline et la fonction papier sélectionnée Trac.1 ou Insert. Mode Online Quand l’imprimante est mise sous tension, elle sélectionne automatiquement le mode Online.
  • Seite 58: Remplacement De La Cartouche Du Ruban Encreur

    Remplacement de la cartouche du ruban encreur Initiation rapide Remplacement de Enlever tout le papier papier de l’imprimante. la cartouche du ruban encreur Avant d’ouvrir le capot, assurez-vous que l’imprimante est hors tension. STOP Amener le levier d’épaisseur du papier en position “8”. Levier d’épaisseur du papier Tirer les leviers de verrouillage du capot supérieur se trouvant...
  • Seite 59 Initiation rapide Remplacement de la cartouche du ruban encreur Poussez les deux guides “A” sur le côté gauche de la cartouche Molette de tension du ruban encreur Guides “A” (côté gauche) de ruban encreur sur les ergots de l’imprimante et introduisez la cartouche;...
  • Seite 60: Chargement Du Papier

    Chargement du papier Initiation rapide Après mise en place de la cartouche de ruban encreur, replacez Capot le capot supérieur. supérieur Réglez le levier d’épaisseur du papier selon l’épaisseur du papier utilisé. Pour plus de détails à ce propos, voir la page 18 (Réglage de l’écart de la tête d’impression).
  • Seite 61 Initiation rapide Chargement du papier Réglez le levier de sélection du papier sur mode feuille à feuille. Assurez-vous que l’imprimante est en mode feuille à feuille. Pour plus amples informations sur la manière de sélectionner ce mode, voir la page 14 (Sélection rapide de la fonction papier). Alimentation feuille à...
  • Seite 62: Imprimante En Mode De Papier Continu

    Chargement du papier Initiation rapide Imprimante en mode de papier continu Réglez le levier d’épaisseur du papier selon l’épaisseur du Capot papier utilisé. Pour plus de détails à ce propos, voir la page 18 frontal (Réglage de l’écart de la tête d’impression). Réglez le levier de sélection du papier sur le mode continu.
  • Seite 63 Initiation rapide Chargement du papier Chargez le papier avec le côté à imprimer vers le haut sur le tracteur de gauche. Pour ce faire, placez les trous de transport de la bordure de gauche du papier sur les ergots du tracteur et fermez ensuite le volet.
  • Seite 64: Changement De Type De Papier

    Changement de type de papier Initiation rapide Changement de On peut changer de type de papier (fonction papier) soit avec la sélection rapide du papier, soit type de papier via le menu Setup. Sélection rapide de Déchirez tout d’abord un papier à alimentation continue éjecté à l’arête de séparation. Pour ce la fonction papier faire, procédez comme suit.
  • Seite 65: Transport Du Papier

    Initiation rapide Transport du papier Appuyer sur la touche Online pour mettre l’imprimante en état d’attente, prête à Online Online Insert utiliser. Load Setup Transport du Le papier chargé (papier en continu/pages simples) peut être transporté de différentes façons dans papier l’imprimante.
  • Seite 66: Réglages (I)

    Réglages (I) Initiation rapide Réglages (I) Réglage de la position Quand la position de séparation n’est pas alignée sur l’arête de séparation, on peut la régler. de séparation Appuyer sur la touche Setup. L’imprimante passe en mode Setup. Online Offline Trac.1 Park LF/FF...
  • Seite 67 Initiation rapide Réglages (I) Appuyer sur la touche Ajuster. Online Ajuster Chem-Pap Menu Char Setup Appuyer sur la touche TOF. Online Tear Setup Le papier est transporté jusqu’à ce que l’arête inférieure de la première ligne d’impression A se trouve à la hauteur de l’arête de séparation B.
  • Seite 68: Réglages (Ii)

    Réglages (II) Initiation rapide Réglages (II) Réglage de l’écart de L’imprimante est équipée d’un levier d’épaisseur de papier servant à régler l’écart de la tête la tête d’impression d’impression. Pour obtenir une qualité d’impression optimale, l’écart entre la tête d’impression et le contre-appui doit être réglé selon l’épais- Levier d’épaisseur seur du papier utilisé.
  • Seite 69 Initiation rapide Réglages (II) Changement du papier en mode Setup Du mode papier en Quand on a utilisé jusqu’ici du papier en continu et qu’on veut passer en mode page seule, continu au mode page procéder comme suit. seule Il n’est pas nécessaire d’enlever le papier en continu. Déchirez le papier à...
  • Seite 70 Réglages (II) Initiation rapide Réglez le levier de sélection du papier su le mode feuille à feuille. Online Levier Choix Pap Vous voyez apparaître à l’écran… Setup Rabattez le bac à papier vers le haut dans le sens de la flèche. Tenez le bac à papier Online Appel Papier du et sortez les supports de papier (voir page 10).
  • Seite 71: Sélection D'une Police De Caractères

    Initiation rapide Réglages (II) Confirmer le réglage en appuyant sur la touche Valid. Un signal acoustique Online Tract 1 confirme l’entrée. Valid Quit Setup L’écran alterne entre… Online Offline Trac.1 Park LF/FF Setup et… Amenez le levier de choix du papier dans la position correspondante. Online Levier Choix Pap L’imprimante est maintenant prête pour l’impression sur papier en continu.
  • Seite 72: Réglage De L'espacement Des Caractères

    Réglages (II) Initiation rapide Appuyer sur la touche Setup. L’imprimante revient dans son état initial. Online Police On peut également appuyer sur la touche Online. L’imprimante passe directement en mode Online. Setup La sélection n’est pas conservée après arrêt de l’imprimante. Pour des informations sur la ma- STOP nière de sélectionner une police de caractères permanente, voir la Online CD-ROM, chapitre 1 (Table d’explication des menus).
  • Seite 73: Spécifications

    Initiation rapide Spécifications Spécifications ➤ Données techniques de l’imprimante Méthode d’impression série avec tête matricielle à 9 aiguilles série avec tête matricielle à 24 aiguilles Largeur d’impression version étroites 80 caractères pour 10 cpi version étroites 80 caractères pour 10 cpi version larges 136 caractères pour 10 cpi version larges...
  • Seite 74: Accessoires

    Accessoires Initiation rapide Pour d’autres informations concernant les spécifications du papier, consulter la documentation Online sur CD-ROM. Accessoires Cassettes ruban, noir version étroites: Pièce No. 044 829 version larges: Pièce No. 044 830 Page de La page de démonstration contient des informations sur la version du firmware, le numéro de série, le contrôle des aiguilles, les fontes, les attributs des fontes et les codes à...
  • Seite 75 Per cominciare subito Indice Indice Manuale Utente Introduzione GUIDA ALL’ Simboli utilizzati Norme di sicurezza importanti AVVIAMENTO RAPIDO Lavoro con la documentazione on-line Ricerca guasti Vista d’insieme della stampante Installazione Apertura dell’imballo Posizionamento della stampante Collegamento della stampante Accensione/spegnimento della stampante Pannello di controllo Modo Online Modo Offline...
  • Seite 76: Introduzione

    Introduzione Per cominciare subito Introduzione Le presenti istruzioni per l’uso consentono di cominciare subito a utilizzare la stampante, anche agli utenti senza esperienza. Queste istruzioni descrivono le principali funzioni della stampante Ah ha! e contengono informazioni essenziali per il lavoro quotidiano con la stessa. Una descrizione dettagliata della stampante e delle sue caratteristiche, unitamente ad altre informazioni dettagliate, è...
  • Seite 77: Vista D'insieme Della Stampante

    Per cominciare subito Vista d’insieme della stampante Vista d’insieme Nelle seguenti figure sono riportate tutte le parti della stampante, mentre la tabella alla pagina della stampante seguente ne elenca le funzioni. Vassoi di prolunga carta Supporto carta Pannello di Coperchio superiore controllo Guida carta sinistra Manopola...
  • Seite 78 Vista d’insieme della stampante Per cominciare subito Nome del Funzione componente Pannello di controllo Indica lo stato della stampante e consente di eseguire numerose impostazioni. Supporto carta Ha la funzione di raccogliere i fogli singoli già stampati quando il parametro “F-Eject” nelle impostazioni di menu è impostato su OFF. Vassoi di prolunga Consentono di prolungare il supporto carta.
  • Seite 79: Installazione

    Per cominciare subito Installazione Installazione Apertura dell’imballo Aprire il cartone contenente la stampante e controllare che siano presenti tutte le seguenti parti. Istruzioni di rimozione Se si riscontrano danni dovuti al trasporto o in caso di accessori Istruzioni per l’uso dell’imballaggio mancanti, contattare immediatamente il rivenditore.
  • Seite 80: Collegamento Della Stampante

    Installazione Per cominciare subito Collegamento della stampante Verificare che la stampante sia impostata per una tensione Targhetta di identificazione corretta (cioè 230 V per l’Europa, e 120 V per gli USA). Vedere a questo proposito la targhetta identificativa posta vicino alla presa di alimentazione sul retro della stampante.
  • Seite 81: Pannello Di Controllo

    Per cominciare subito Pannello di controllo Pannello di Il funzionamento dellastampantepuò essere controllato con il pannello di controllo e con gli appositi tasti. controllo La prima riga del display mostra se la stampante è nel modo Online o Offline, oltre che il percorso carta selezionato (Trac.1 o Foglio).
  • Seite 82: Sostituzione Della Cartuccia Nastro

    Sostituzione della cartuccia nastro Per cominciare subito Sostituzione della Rimuovere la carta dalla stampante. cartuccia nastro Prima di aprire il coperchio, accertarsi che la stampante sia spenta. STOP Portare la levetta di regolazione spessore carta nella posizione “8”. Levetta di regolazione spessore carta Tirare le levette di blocco del coperchio superiore, sui lati...
  • Seite 83 Per cominciare subito Sostituzione della cartuccia nastro Fare scorrere le due guide “A” sul lato sinistro della cartuccia Manopola di tensionamento Guide “A” (lato sinistro) nastro oltre le linguette presenti sulla stampante e inserire la del nastro cartuccia. Spingerla con cura fino a che non si innesta. Se si avverte resistenza, ruotare la manopola di tensionamento del nastro mentre si esercita pressione.
  • Seite 84: Caricamento Della Carta

    Caricamento della carta Per cominciare subito Una volta terminato il caricamento della cartuccia nastro, riap- Coperchio plicare il coperchio superiore. superiore Impostare la levetta di regolazione spessore carta in funzione della grammatura della carta utilizzata. Per i dettagli sulla carta, vedere a pagina 18, Impostazione della distanza della testina di stampa.
  • Seite 85 Per cominciare subito Caricamento della carta Impostare la levetta di selezione carta nel modo fogli singoli. Accertarsi che la stampante sia nel modo fogli singoli. Per i dettagli sulla selezione, vedere pagina 14, Selezione rapida del percorso carta. Guida di inseri- mento fogli sin- Levetta di goli...
  • Seite 86: Carta A Moduli Continui

    Caricamento della carta Per cominciare subito Carta a moduli continui Impostare la levetta di selezione spessore carta in funzione della Coperchio grammatura della carta utilizzata. Per ulteriori dettagli, vedere frontale pagina 18, Impostazione della distanza della testina di stampa. Impostare la levetta di selezione carta nel modo moduli conti- nui.
  • Seite 87 Per cominciare subito Caricamento della carta Con il lato di stampa rivolto verso l’alto, inserire la carta nel blocchetto di trascinamento sinistro facendo coincidere i fori di trascinamento sul bordo sinistro della carta con i perni del blocchetto di trascinamento, quindi chiudere il pressacarta. Fare coincidere i fori di trascinamento sul bordo destro della carta con i perni del blocchetto di trascinamento destro e chiu- dere il pressacarta.
  • Seite 88: Cambio Del Tipo Di Carta

    Cambio del tipo di carta Per cominciare subito Cambio del tipo di Si può cambiare il tipo di carta (il percorso carta) utilizzando la funzione di selezione rapida del carta percorso carta oppure il menu Setup. Selezione rapida del Strappare innanzitutto l’eventuale carta a moduli continui fuoriuscita dalla stampante in corri- percorso carta spondenza del bordo di strappo carta, procedendo come segue.
  • Seite 89: Trasporto Carta

    Per cominciare subito Trasporto carta Premere il tasto Online per predisporre la stampante per il funzionamento. Online Online Foglio Load Setup Trasporto carta La carta caricata nella stampante (moduli continui/fogli singoli) può essere trasportata all’interno della macchina in vari modi. Verificare che la stampante sia nello stato Offline;...
  • Seite 90: Impostazioni (I)

    Impostazioni (I) Per cominciare subito Impostazioni (I) Impostazione della Se la posizione di strappo della carta non è allineata con il bordo di strappo della stampante, la posizione di strappo si può regolare. Premere il tasto Setup. La stampante si commuta nel modo Setup. Online Offline Trac.1...
  • Seite 91 Per cominciare subito Impostazioni (I) Premere il tasto Regolaz. Online Regolaz Dir.Cart Menu Char Setup Premere il tasto TOF. Online Stp. Setup La carta viene fatta avanzare finché il bordo inferiore della prima riga di stampa non si posiziona in corrispondenza del bordo di strappo B.
  • Seite 92: Impostazioni (Ii)

    Impostazioni (II) Per cominciare subito Impostazioni (II) Impostazione della La stampante è dotata di una levetta di regolazione spessore carta che consente di impostare la distanza della testina distanza della testina di stampa. di stampa Per ottenere la massima qualità di stampa, occorre regolare la distanza tra la testina e il supporto esterno in funzione dello Levetta di spessore (grammatura) della carta utilizzata.
  • Seite 93: Cambio Della Carta Nel Modo Setup

    Per cominciare subito Impostazioni (II) Cambio della carta nel modo Setup Da moduli continui iu Per passare dalla carta a moduli continui alla stampa su fogli singoli, procedere come descritto fogli singoli qui di seguito. Non occorre rimuovere dalla stampante la carta a moduli continui. Strappare il modulo di carta continua fuoriuscito dalla stampante in corrisponden- Online Online...
  • Seite 94: Dai Fogli Singoli Ai Moduli Continui

    Impostazioni (II) Per cominciare subito Impostare la levetta di selezione carta nel modo fogli singoli. Online Gira leva Carta Setup Sul display compare il messaggio… Ribaltare il supporto carta in direzione della freccia. Tenere fermo il supporto e Online Carica carta del staccarne i vassoi di prolunga (vedere pagina 10).
  • Seite 95: Selezione Di Un Font

    Per cominciare subito Impostazioni (II) Confermare l’impostazione premendo il tasto OK. Il comando viene confermato Online Trattor1 dall’emissione di un segnale acustico. Esci Setup Il display visualizza alternativamente... Online Offline Trac.1 Park LF/FF Setup e… Portare la levetta di selezione carta nella posizione corrispondente. Online Gira leva Carta A questo punto, la stampante è...
  • Seite 96: Impostazione Del Passo Dei Caratteri

    Impostazioni (II) Per cominciare subito La selezione effettuata non viene conservata in memoria se si spegne la stampante. Per le in- STOP formazioni relative alla procedura di selezione permanente di un font, vedere la documenta- zione on-line su CD-ROM, Capitolo 1 (Descrizione Tabella-Menu).
  • Seite 97: Specifiche Tecniche

    Per cominciare subito Specifiche tecniche Specifiche tecniche ➤ Stampante Tipo di stampa seriale con testina di stampa a 9 aghi seriale con testina di stampa a 24 aghi Larghezza di stampa stretto 80 caratteri con 10 cpi stretto 80 caratteri con 10 cpi largo 136 caratteri con 10 cpi largo...
  • Seite 98: Accessori

    Accessori Per cominciare subito Per maggiori informazioni sulle specifiche della carta, si rimanda alla documentazione on- line su CD-ROM. Accessori Cartucce nastro, nero stampante modello stretto: Unit no.044 829 stampante modello largo: Unit no.044 830 Pagina Demo La pagina Demo contiene informazioni relative alla versione del firmware, al numero di se- rie, al controllo degli aghi, ai font, agli attributi dei font e ai codici a barre/LCP.
  • Seite 99 Instrucciones de servicio Contenido Instrucciones de servicio Introducción INTRODUCCION Símbolos convencionales Instrucciones de seguridad importantes RAPIDA Utilizar la documentación en línea Detección de errores Vista de conjunto Instalación Desembalar la impresora Colocar la impresora Conectar la impresora Encender y apagar la impresora Panel de mando Modo Online Modo Offline...
  • Seite 100: Introduccion

    Introducción Instrucciones de servicio Introducción Las presentes instrucciones de servicio sirven como introducción rápida al uso de la impresora y para poner en condiciones de manejar el equipo incluso al usuario inexperimentado. Comprenden Ah ha! una descripción de las funciones esenciales de la impresora e incluyen las informaciones indispensables para el trabajo diario con el equipo.
  • Seite 101: Vista De Conjunto

    Instrucciones de servicio Vista de conjunto Vista de conjunto Se muestran todas las piezas de la impresora en las figuras siguientes, y las funciones de dichas piezas se listan en la tabla a continuación. Soportes de papel Bandeja de salida Panel de mando Tapa superior Guía lateral...
  • Seite 102 Vista de conjunto Instrucciones de servicio Denominación Función Panel de mando Indica el estado de la impresora. Se lo utiliza para poner muchos de los ajustes de la impresora. Bandeja de salida Se la utiliza para la salida de hojas sueltas impresas si el parámetro ”F-Eject”...
  • Seite 103: Instalación

    Instrucciones de servicio Instalación Instalación Desembalar la Abra el embalaje y compruebe que están contenidos los artículos siguientes: impresora En caso de daños de transporte o falta de accesorios, informe a Instrucciones de desembalaje Instrucciones de servicio su agente de ventas. Impresora Quite los elementos protectores de transporte como se describe en las instrucciones de desembalaje.
  • Seite 104: Conectar La Impresora

    Instalación Instrucciones de servicio Conectar la impresora Asegúrese de que el equipo ha sido ajustado para la tensión Rótulo correcta de la red (p. ej. 230 V en Europa, 120 V en los EE. UU.). Véase el rótulo al lado del enchufe de alimentación eléctrica en la parte trasera de la impresora.
  • Seite 105: Panel De Mando

    Instrucciones de servicio Panel de mando Panel de mando A través del panel de mando y los pulsadores correspondientes se controlan las operaciones. La línea de arriba del visualizador indica si la impresora está en modo Online (en línea) o en modo Offline (fuera de línea) y el origen de papel seleccionado (Trac.1 o Sueltas ).
  • Seite 106: Recambiar La Cinta

    Recambiar la cinta Instrucciones de servicio Recambiar la cinta Quite todo el papel de la impresora. Asegúrese de que la impresora esté apagada antes de abrir la tapa. STOP Ponga la palanca de espesor de papel a la posición ”8”. Palanca de espesor de papel Tire las palancas de trinquete de la tapa superior, a la derecha e...
  • Seite 107 Instrucciones de servicio Recambiar la cinta Deslice las dos guías ”A”, provistas a la izquierda del cartucho Guías ”A” (lado izquierdo) Botón tensor de la cinta de cinta, por las protrusiones en la impresora e inserte el cartucho; presione el cartucho hacia abajo con cuidado hasta que se engatille.
  • Seite 108: Cargar Papel

    Cargar papel Instrucciones de servicio Una vez cumplido la inserción del cartucho de cinta, reinstale Tapa la tapa superior. superior Ajuste la palanca de espesor de papel al espesor del papel utilizado. Para más detalles, véase página 18 (Ajustar la distan- cia de cabeza).
  • Seite 109 Instrucciones de servicio Cargar papel Ponga la palanca de selección de papel a la posición para hojas sueltas. Asegúrese de que la impresora esté en modo de hojas sueltas. Para más informaciones sobre la selección de este modo, véase página 14 (Selección rápida del origen de papel). Alimentador de hojas sueltas Palanca de...
  • Seite 110: Papel Continuo

    Cargar papel Instrucciones de servicio Papel continuo Ajuste la palanca de espesor de papel al espesor del papel Tapa frontal utilizado. Para más detalles, véase página 18 (Ajustar la distan- cia de cabeza). Ponga la palanca de selección de papel a la posición para papel continuo.
  • Seite 111 Instrucciones de servicio Cargar papel Coloque el papel en el tractor izquierdo con la cara a imprimir hacia arriba. Para ello, posicione los agujeros de transporte del borde izquierdo del papel sobre los pernos del tractor y cierre la abrazadera. Posicione los agujeros de transporte del borde derecho del papel sobre los pernos del tractor derecho y cierre la abrazadera.
  • Seite 112: Cambiar El Tipo De Papel

    Cambiar el tipo de papel Instrucciones de servicio Cambiar el tipo de Puede cambiarse el tipo de papel (el origen de papel) o por la función de selección rápida del papel origen de papel o mediante el menú Setup. Selección rápida del Si ha salido ya una hoja de papel continuo, córtela por medio de la hoja de corte.
  • Seite 113: Transporte De Papel

    Instrucciones de servicio Transporte de papel Presione el pulsador Online para poner la impresora al estado listo para el servicio. Online Online Sueltas Setup Transporte de El papel colocado (papel continuo/hojas sueltas) puede transportarse de varias maneras en la papel impresora.
  • Seite 114: Ajustes (I)

    Ajustes (I) Instrucciones de servicio Ajustes (I) Ajustar la posición Si la posición de corte del papel no coincide con la hoja de corte de la impresora, puede ajustarla. de corte Presione el pulsador Setup. La impresora cambia al modo Setup. Online Offline Trac.1...
  • Seite 115 Instrucciones de servicio Ajustes (I) Presione el pulsador Ajustar. Online Ajustar Papelway Menue Char Setup Presione el pulsador TOF. Online Tirar Setup Se avanza el papel hasta que el borde inferior de la primera línea de impresión A esté alineado con la hoja de corte B. Se ha ajustado la primera posición de impresión a 12/ 72"...
  • Seite 116: Ajustes (Ii)

    Ajustes (II) Instrucciones de servicio Ajustes (II) Ajustar la distancia La impresora está provista de una palanca de espesor de papel, la cual sirve para ajustar la distancia de cabeza de la cabeza de impresión. Para obtener una calidad óptima de impresión, hay que ajustar la distancia entre la cabeza de impresión y el contrasoporte de Palanca de acuerdo con el espesor del papel utilizado.
  • Seite 117: Cambiar El Papel En El Modo Setup

    Instrucciones de servicio Ajustes (II) Cambiar el papel en el modo Setup Cambiar de papel La impresora ha sido procesando papel continuo y se intenta cambiarla al modo de hojas sueltas. continuo a sueltas No es necesario quitar el papel continuo. Corte el papel continuo salido por medio de la hoja de corte.
  • Seite 118: Cambiar De Sueltas A Papel Continuo

    Ajustes (II) Instrucciones de servicio Ponga la palanca de selección de papel a la posición para hojas sueltas. Online Girar Pa.Palanca Setup Aparece en el visualizador… Abra la bandeja de salida levantándola en el sentido de la flecha. Detenga la Online Carga Papel bandeja de salida y retire los soportes de papel (véase página 10).
  • Seite 119: Seleccionar La Fuente

    Instrucciones de servicio Ajustes (II) Confirme la entrada presionando el pulsador Set. Una señal acústica acusa recibo Online Tractor1 de la entrada. Salir Setup El visualizador alterna entre… Online Offline Trac.1 Park LF/FF Setup y… Ponga la palanca de selección de papel a la posición apropiada. Online Girar Pa.Palanca Ahora la impresora puede procesar el papel continuo.
  • Seite 120: Ajustar La Densidad

    Ajustes (II) Instrucciones de servicio La selección realizada no permanece después de desconectar la impresora. Para informacio- STOP nes detalladas sobre la selección permanente de fuentes, véase el disco CD-ROM en línea, capítulo 1 (Tabla de descripción del menú). Ajustar la densidad Con el pulsador CPP se puede ajustar en el modo Setup el número de caracteres por pulgada para la impresión.
  • Seite 121: Datos Técnicos

    Instrucciones de servicio Datos técnicos Datos técnicos ➤ Especificaciones de la impresora Tecnología de impresión En serie con cabeza de impresión de 9 agujas En serie con cabeza de impresión de 24 agujas Anchura de impresión Impresora estrecha 80 caratteri en modo 10 cpp Impresora estrecha 80 caratteri en modo 10 cpp Impresora ancha...
  • Seite 122: Accesorios

    Accesorios Instrucciones de servicio Para más informaciones sobre las especificaciones del papel, véase la documentación en línea en el disco CD-ROM. Accesorios Cartuchos de cinta, negro Impresora estrecha: Nº de pedido 044 829 Impresora ancha: Nº de pedido 044 830 Hoja de La hoja de demostración contiene información sobre la versión del firmware, número de serie, comprobación de agujas, tipos de letra, atributos de tipos de letra y códigos de barras/LCP.
  • Seite 123 “All rights reserved. Translations, reprinting or copying by any means of this manual complete or in part or in any different form requires our explicit approval. We reserve the right to make changes to this manual without notice. All care has been taken to ensure accuracy of information contained in this manual. However, we cannot accept responsibility for any errors or damages resulting from errors or inaccuracies of information herein.”...
  • Seite 124 Fax: +7 095 956 55 41 SINGAPORE http://www.Tally.com http://www.Tally.ru Tally AMT Printers Pte. Ltd 63 Hillview Avenue #08-22, Lam Soon Industrial Building Singapore 669569 Phone: +65 6760 8833 Fax: +65 6760 1066 http://www.Tally.com.sg 379 761a © January 2003 Tally Computerdrucker GmbH...

Diese Anleitung auch für:

T2240/24T2340/9T2340/24

Inhaltsverzeichnis