ZOSI Z18.5.T.1 Anleitung
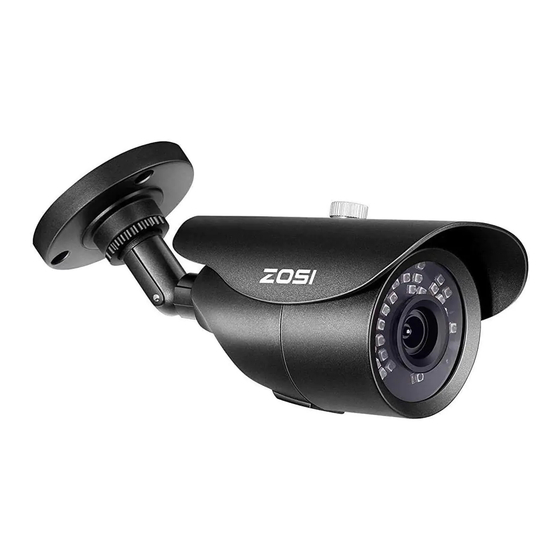
Security camera day/night
Vorschau ausblenden
Andere Handbücher für Z18.5.T.1:
- Anleitung (47 Seiten) ,
- Bedienungsanleitung (58 Seiten)
Inhaltsverzeichnis
Werbung
Verfügbare Sprachen
Verfügbare Sprachen
Quicklinks
Werbung
Inhaltsverzeichnis

Verwandte Anleitungen für ZOSI Z18.5.T.1


Inhaltszusammenfassung für ZOSI Z18.5.T.1
- Seite 1 PROFESSIONAL SECURITY MADE EASY Security Camera Day/Night • Instruction Manual ---- 1 • Deutsche Anleitung ---- 8 • Mode d'emploi ---- 14 • Guía de Instalación ---- 20 • Дневной и ночной режимы --- 27 Z18.5.T.1 INSTRUCTION MANUAL...
- Seite 2 Statement Thank you for purchasing this product. ZOSI is committed to providing our customers with a high quality, reliable security solution. ZOSI cannot assume responsibility for any consequences resulting from the use thereof. Before Installation This product may require cabling. It is strongly suggested to test all products and parts before installation and cabling.
-
Seite 3: Mounting The Camera
Mounting the Camera The camera can be mounted onto a fl at, vertical surface using screws. The surface must have suffi cient strength to hold the camera. Materials such as hardwood, brick or masonry are good options, You can mount the camera onto a metal surface, but you’ll need to supply your own mounting hardware. - Seite 4 Model 1 Rotate the camera by loosening the screw (using screw driver). Adjust the elbow joint by loosening the screw. wrench The neck of the stand attached to the mounting base, rotate the stand by loosening the radial joint locking ring. Once in position , tighten the ring again.
- Seite 5 Model 2 wrench Rotate the camera by loosening the screw (using screw driver). Adjust the elbow joint by loosening the screw. The neck of the stand attached to the mounting base, rotate the stand by loosening the radial joint locking ring. Once in position , tighten the ring again.
- Seite 6 Model 4 loosen the screw on each side to adjust this joint ,this enables the camera left or right. loosen the screw and adjust to the position you want (up or down). loosen the screw on each side, to rotate the camera left or right.
- Seite 7 Positioning the Cables Power Power Splitter Adapter Cable Video Connector Video & Power Cable Please note, model shown is for illustration purposes only. Power Connector For 2 & 4 camera packs: Connect the extension cable's DC socket to the multiple sockets on the power splitter.Then, plug the single end of the power splitter to the DC Power...
-
Seite 8: Troubleshooting
Troubleshooting Q: Video Loss appears where the image from my camera should be displaying on my DVR? A: 1.Check the extension cable (power and video) is securely connected to the camera. 2.Check the video output from the camera is securely connected to a video input channel on the DVR. 3.Check the power from the camera is securely connected to a power supply Q: When I view an image from the camera at night I only see a bright spot and no image? A: A reflection can be caused in night vision mode if the camera is looking through a window. - Seite 9 Erklärung Vielen Dank, dass Sie sich für eine ZOSI Überwachungskamera entschieden haben. ZOSI engagiert sich, den Kunden Qualitätsprodukte und zuverlässige Sicherheitslösungen zu bieten. ZOSI übernimmt keine Verantwortung für die Folgen, welche aus der Nutzung resultieren. Vor der Installation Dieses Produkt ist Verkabelung erforderlich. Es wird dringend empfohlen, alle Produkte und Teile vor dem Einbau und der Verkabelung zu testen.
-
Seite 10: Installation
Installation Modell 1 Lösen Sie die Schraube (mit einem Schraubendreher) um die Kamera zu adjustieren. Lösen Sie die Schraube, um die Halterung zu adjustieren. Drehen Sie den Ring zu der Platte, um beste wrench Position für die Kamera zu bestimmen. Dann schrauben Sie den Ring fest. - Seite 11 Modell 2 wrench Lösen Sie die Schraube (mit einem Schraubendreher) um die Kamera zu adjustieren. Lösen Sie die Schraube, um die Halterung zu adjustieren. Drehen Sie den Ring zu der Platte, um beste Position für die Kamera zu bestimmen. Dann schrauben Sie den Ring fest.
- Seite 12 Modell 4 Lösen Sie die Schrauben auf jeder Seite um den Ring zu adjustieren. Das kann die Kamera nach rechts oder links umdrehen Lösen Sie die Schrauben und adjustieren Sie die Richtung an die gewünschte Stelle. Lösen Sie die Schrauben auf jeder Seite, um die Kamera nach rechts oder links zu drehen.
- Seite 13 Kameraanschluss Netzteil Stromverteiler Kabel Videoanschluss Video Strom Kabel Hinweis: Der angezeigte Modell ist nur zur Illustration. Stromanschluss Für 2&4 Kamera Set Verbinden Sie den DC Stromanschluss des Verlängerungskabels mit einem der Stromanschlüsse von dem Stromverteiler Kabel und schließen Sie das andere Ende Netzteil des Verteilers an das Netzteil an.
- Seite 14 Q: Es zeigt „Video Verlust“ auf dem Bildschirm wenn die Kamera mit dem DVR angeschlossen wird? A: 1. Überprüfen Sie ob das Strom Video Verlängerungskabel richtig mit der Kamera verbunden wird. 2. Überprüfen Sie ob der Videoausgang der Kamera richtig mit dem Videoeingang des DVRs verbunden wird. 3.
- Seite 15 Déclaration Merci pour d’avoir choisi ZOSI pour l’achat de votre caméra de surveillance. ZOSI s’engage à fournir à nos clients une solution de sécurité fiable et de haute qualité. ZOSI ne peut pas assumer la responsabilité de toutes les conséquences résultant de ce manuel.
- Seite 16 Mise en place de la Caméra Modèle 1 Tourner la caméra en desserrant la vis avec le tournevis. Régler l'articulation du coude en desserrant la vis. Le col du support fixé à la base de montage, faire tourner le support en desserrant la bague wrench de blocage du joint radial.
- Seite 17 Modèle 2 wrench Tourner la caméra en desserrant la vis avec le tournevis. Régler l'articulation du coude en desserrant la vis. Le col du support fixé à la base de montage, faire tourner le support en desserrant la bague de blocage du joint radial. Une fois en position, resserrer la bague.
- Seite 18 Modèle 4 Desserrer la vis de chaque côté pour ajuster cet joint, cela permet à la caméra de tourner à gauche ou à droite. Desserrer la vis et ajuster la caméra à la position que vous voulez en haut ou en bas. Desserrer la vis de chaque côté, tourner la caméra vers la gauche ou vers la droite.
-
Seite 19: Branchement Des Câbles
Branchement des Câbles Alimentation Câble Splitter Connecteur Vidéo Câble de Rallonge Connecteur de Power Alimentation... - Seite 20 Q: La perte vidéo s'affiche lorsque l'image de la caméra doit s'afficher sur mon DVR? A: 1. Vérifiez que le câble d'extension (power et vidéo) est bien connecté à la caméra. 2. Vérifiez que la sortie vidéo de la caméra est bien connectée à un canal d'entrée vidéo sur le DVR. 3.
- Seite 21 Declaración Gracias por elegir este producto para su sistema de seguridad. ZOSI promete ofrecer a nuestros clientes una solución viable y de alta calidad. ZOSI no va asumir las consecuencias resultantes de este manual. Antes de la instalación Se recomienda encarecidamente examinar o probar todas las partes antes de la instalación en caso de desconectar el cableado.
-
Seite 22: Instalar La Cámara
Instalar la cámara La cámara se puede montar sobre una superficie plana y vertical utilizando tornillos. Los materiales tales como madera dura, ladrillo o mampostería son buenas opciones para la instalación. Colocar los cables 1. Cuando coloca los cables, intente evitar flexiones en ángulos agudos. - Seite 23 Modèle 1 Gire la cámara aflojando el tornillo con el destornillador. Ajuste la articulación del codo aflojando el tornillo. El cuello del soporte está unido a la base de Llave montaje, gire el soporte aflojando el anillo de bloqueo. Una vez en posición, vuelva a apretar el anillo.
- Seite 24 Modèle 2 Llave Gire la cámara aflojando el tornillo con el destornillador. Ajuste la articulación del codo aflojando el tornillo. El cuello del soporte está unido a la base de montaje, gire el soporte aflojando el anillo de bloqueo. Una vez en posición, vuelva a apretar el anillo.
- Seite 25 Modèle 4 Afloje el tornillo de cada lado para ajustar la articulación de la cámara. Eso permite que la cámara gira hacia la izquierda o la derecha. Afloje el tornillo para ajustar la posición de la cámara según su preferencia. Afloje los tornillos de cada lado para girar la cámara a la izquierda o a la derecha.
- Seite 26 Colocar los cables Alimentador Cable divisor C o n e c t o r de video Cable de video & alimentación Nota: el modelo presentado es sólo un ejemplar. Conector de alimentación Para 2-4 cámaras: Necesita usar el cable divisor para conectar las cámaras al puerto de la entrada del video.
-
Seite 27: Preguntas Frecuentes
Preguntas frecuentes Q: Se muestra "Pérdida de vídeo" en la pantalla cuando la cámara está conectada con el DVR ? A: 1. Compruebe si el cable de conexión está conectado correctamente con la cámara. 2. Compruebe si la cámara está conectada correctamente al puerto de video del DVR 3. - Seite 28 Предисловие Поздравляем с приобретением камеры ZOSI. камерами для любой цели, покупатель обязан Это камера может работать в любых условиях ознакомится с соответствующими законами и освещенности, как днем (если объектив камеры правилами, которые запрещают или ограничивают не направлен на яркое солнце) до темноты.
- Seite 29 Выбор места расположения камеры Чтобы получили оптимальное изображение из вашей камеры, ее место расположения крайне важно. Рассчитайте дистанцию между местами установки камер для обеспечения максимально возможного покрытия. Найдите подходящие места (например: под карнизом крыши, это хороший выбор), где камеру сложно будет обнаружить или вывести из строя, постарайтесь чтобы в дневное время прямые солнечные...
-
Seite 30: Установка Камеры
Установка камеры Камера может быть установлена на плоскую вертикальную поверхность с помощью винтов. Поверхность должна быть достаточно прочной для удержания камеры (например деревянная, кирпичная или бетонная поверхность). Вы можете установить камеру на и на металлической поверхности, но в комплект оборудования не входят элементы монтажа для таких поверхностей). Обратите... - Seite 31 Установка камеры Модель 1 Ослабьте винтовое соединение, чтобы вращать камеру (воспользуйтесь отверткой) Вращайте винты, чтобы отрегулировать угол наклона камеры. кружить Присоедините основание к монтажной базе, ослабьте стопорное кольцо чтобы вращать камеру Как только установили завершена, снова затяните кольцо.
- Seite 32 Установка камеры Модель 2 Ослабьте винтовое соединение, чтобы вращать камеру (воспользуйтесь отверткой). кружить Вращайте винты, чтобы отрегулировать угол наклона камеры. Присоедините основание к монтажной базе, ослабьте стопорное кольцо чтобы вращать камеру Как только установили завершена, снова затяните кольцо.
- Seite 33 Установка камеры Модель 3 Регулируйте угол наклона камеры. Присоедините основание к монтажной базе, кружить ослабьте стопорное кольцо чтобы вращать камеру Как только установили завершена, снова затяните кольцо.
- Seite 34 Установка камеры Модель 4 Отпускайте винты на каждой стороне, чтобы отрегулировать угол, перемещайте камеру влево или вправо для выбора оптимального угла обзора. Отпускайте винты и регулируйте положение камеры вертикально и горизонтально для выбора оптимального угла обзора. Отпускайте винты на каждой стороне, чтобы вращать...
- Seite 35 Монтаж кабелей Блок Кабель-разветвитель питания (1-в-4) Разъем видео Видеокабель и Кабель питания Обратите внимание на то, что показанная на рисунке модель используется только для иллюстрации. Разъем блока питания Для 2 или 4 камер используйте кабель- разветвитель: Подключите кабель-разветвитель (1-в-4) к кабелю видео и блоку питания, потом подключите...
-
Seite 36: Устранение Неполадок
Устранение неполадок Q: Что делать если на экране появилось “потеря сигнала” или “потеря видео”? A: 1. Проверьте кабели видео и блока питания, правильно ли они подключен к камерам. 2. Проверьте выход видео камеры, правильно ли он подключен ко входу в видео-канал. 3. - Seite 37 Ограниченная Гарантия и Условия ZOSI дает гарантию на технологии и материалы этих товаров сроком на один год от даты приобретения. Вам необходимо предоставить квитанцию покупки в качестве доказательства при обращении за гарантией. Любой товар, в котором обнаружены дефекты в течение указанного периода, будет...
- Seite 38 All rights reserved. No part of this publication may be reproduced by any means without written permission from ZOSI. The information in this publication is believed to be accurate in all respects. ZOSI cannot assume responsibility for any consequences resulting from the use thereof. The information contained herein is subject to change without notice.