Herunterladen Inhalt Inhalt Diese Seite drucken
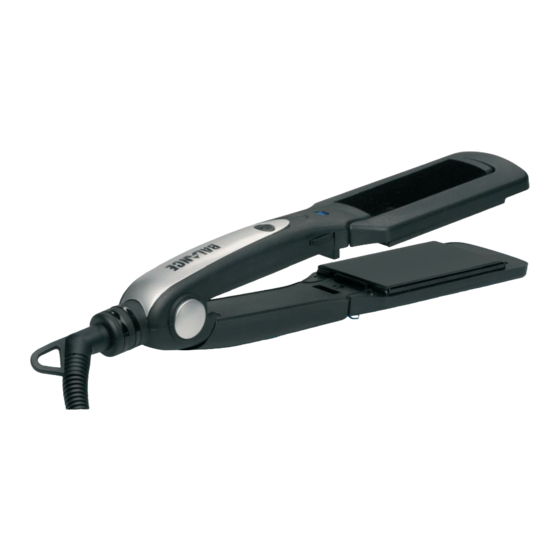
Balance KH 5525 Bedienungsanleitung
Vorschau ausblenden Andere Handbücher für KH 5525:
Inhaltsverzeichnis

Werbung

Verfügbare Sprachen

Verfügbare Sprachen

KH 5525
ALISADOR DE PELO
Manual de instrucciones
PIASTRA PER CAPELLI
Istruzioni per l'uso
HAIR STRAIGHTENER
Instruction Manual
HAARGLÄTTER
Bedienungsanleitung
KOMPERNASS GMBH · BURGSTRASSE 21 · D-44867 BOCHUM
www.kompernass.com
ID-Nr.: KH5525-07/07-V3

Werbung

Inhaltsverzeichnis
loading

Inhaltszusammenfassung für Balance KH 5525

  • Seite 1 KH 5525 ALISADOR DE PELO Manual de instrucciones PIASTRA PER CAPELLI Istruzioni per l'uso HAIR STRAIGHTENER Instruction Manual HAARGLÄTTER Bedienungsanleitung KOMPERNASS GMBH · BURGSTRASSE 21 · D-44867 BOCHUM www.kompernass.com ID-Nr.: KH5525-07/07-V3...
  • Seite 2 KH 5525...
  • Seite 3: Inhaltsverzeichnis

    Índice Página Indicaciones de seguridad Uso conforme al previsto Volumen de suministro Descripción de aparatos Emplazar/instalar el soporte combinado Emplazar Montaje mural Antes del alisado Cambio de las placas cerámicas Seleccionar las placas cerámicas adecuadas Retirar las placas cerámicas Colocar las placas cerámicas Tiempos de calentado Manejo Preparación...
  • Seite 4: Indicaciones De Seguridad

    Alisador de pelo • En caso de resultar dañada la clavija o el cable KH5525 de red, encargue su cambio a un técnico cualifi- cado o al servicio de asistencia técnica para evitar peligros innecesarios. • No doble o aplaste el cable de red y colóquelo de modo que nadie lo pueda pisar o tropiece Indicaciones de con él.
  • Seite 5: Uso Conforme Al Previsto

    ¡Existe peligro de lesiones/peligro de descarga eléctrica si se • Plancha para el pelo KH 5525 perforan estos conductores! • Soporte combinado • 2 placas cerámicas estrechas Marque los agujeros de perforación en la pared.
  • Seite 6: Antes Del Alisado

    Antes del alisado Colocar las placas cerámicas Introduzca la placa cerámica selecciona- • El pelo debe estar limpio, seco y libre de productos da con la parte abierta hacia delante en la de peinado. plancha para el pelo a través de los raíles de •...
  • Seite 7: Alisar El Cabello

    Almacenamiento Introduzca la clavija de red en una base de enchufe. Pulse el interruptor de conexión/desconexión ¡Atención! hasta que el piloto se encienda. Nunca enrolle el cable con la clavija de red Ajuste la temperatura deseada con el regula- alrededor del aparato. dor giratorio •...
  • Seite 8: Limpieza

    Evacuación Si ha introducido las placas cerámicas anchas No tire el aparato la basura doméstica bajo ninguna circunstancia. Evacue el aparato en un centro de evacuación auto- rizado a través de las instalaciones de evacuación comunitarias. Tenga en cuenta las normativas actuales en vigor.
  • Seite 9: Garantía Y Asistencia Técnica

    Garantía y asistencia técnica En este aparato dispone de 3 años de garantía des- de la fecha de compra. El aparato ha sido produci- do con mucho esmero y comprobado a conciencia antes de la entrega. Guarde el ticket de caja como justificante de compra.
  • Seite 10 - 8 -...
  • Seite 11 Indice Pagina Indicazioni di sicurezza Uso conforme Fornitura Descrizione dell'apparecchio Installazione/montaggio del supporto combinato Installazione Montaggio a parete Prima dell'uso Sostituzione delle piastre in ceramica Selezione delle piastre in ceramica corrette Rimozione delle piastre in ceramica Inserimento delle piastre in ceramica Tempi di riscaldamento Funzionamento Preparazione...
  • Seite 12: Indicazioni Di Sicurezza

    Piastra per capelli • Fare sostituire il cavo di rete o la spina di rete KH5525 danneggiati solo da personale specializzato qualificato o dal centro di assistenza competente, per evitare pericoli. • Non piegare o schiacciare il cavo e collocarlo in modo tale che non costituisca intralcio o inciampo.
  • Seite 13: Uso Conforme

    Montaggio a parete Fornitura Pericolo! • Piastra stiracapelli KH 5525 Accertarsi che non si trovino linee di corrente, • Supporto combinato tubi del gas o dell'acqua o altre tubazioni nel punto della parete in cui si desidera montare •...
  • Seite 14: Prima Dell'uso

    Prima dell'uso Rimozione delle piastre in ceramica Staccare la spina dalla presa di corrente. • I capelli devono essere asciutti, puliti ed esenti Afferrare la piastra di ceramica lateral- da prodotti cosmetici. mente dall'estremità superiore. Sfilarla dalla • Prima di effettuare l'acconciatura, pettinare accu- guida.
  • Seite 15: Funzionamento

    Funzionamento Dopo aver stirato tutte le ciocche di capelli, preme- re l'interruttore On/Off , fino allo spegnimen- to della spia di controllo Preparazione Staccare la spina dalla presa di corrente. Avviso: Conservazione L e piastre di ceramica devono essere esenti dallo sporco. Pulirle, se necessario, prima dell'uso (v.
  • Seite 16: Pulizia

    Pulizia Se sono state inserite le piastre di ceramica larghe Prima della pulizia, fare raffreddare l'apparecchio a sufficienza. Attenzione! staccare la spina dalla presa di corrente. Pericolo di scossa elettrica! • Pulire l'alloggiamento e le piastre in ceramica con un panno morbido leggermente inumidito. •...
  • Seite 17: Dati Tecnici

    Dati tecnici Importatore Tensione di rete: 220 - 240 V ~ 50 Hz KOMPERNASS GMBH Assorbimento BURGSTRASSE 21 nominale, mass.: 165 W D-44867 BOCHUM Classe di protezione: II / www.kompernass.com Garanzia e assistenza L'apparecchio è garantito per 3 anni dalla data di acquisto.
  • Seite 18 - 16 -...
  • Seite 19 Index Page Safety instructions Intended Use Items supplied Appliance description Placing/Fixing the combination mounting Setup Wall mounting Before straightening Changing the ceramic plates Selecting the correct ceramic plates Removing the ceramic plates Fitting the ceramic plates Heating-up times Operation Preparation Straightening hair Storage Cleaning...
  • Seite 20: Safety Instructions

    Hair Straightener • To avoid risks, arrange for defective power cables KH5525 and/or plugs to be replaced immediately by qualified technicians or our Customer Service Department. • Do not pinch or squeeze the power cord and lay it in such a way that no one can tread on or Safety instructions trip over it.
  • Seite 21: Intended Use

    Place the combination mounting on a level, dry and heat resistent surface. Items supplied Wall mounting • Hair Straightener KH 5525 Danger! • Combination mounting Ensure that there are no electric cables, gas • 2 narrow ceramic plates and water pipelines or other facilities located underneath the position at which you might •...
  • Seite 22: Before Straightening

    Before straightening Fitting the ceramic plates Slide the selected ceramic plate with the • The hair should be clean, dry and free of styling open side at the front in the guide rail on the products. hair straightener until it audibly engages. •...
  • Seite 23: Operation

    Operation Storage Attention! Preparation NEVER wrap the power cable with plug around the appliance. Note: Attention! The ceramic plates must be free of conta- mination. If necessary, clean them before taking ALWAYS remove the power plug from the them into use (see chapter „Cleaning“). wall socket when the appliance is not in use and is being stored in the combination moun- ting...
  • Seite 24: Cleaning

    Disposal If the wide ceramic plates are assembled: Do not dispose of the appliance in your normal domestic waste. Dispose of the appliance through an approved disposal centre or at your community waste facility. Observe the currently applicable regulations. In case of doubt, please contact your waste disposal centre.
  • Seite 25: Warranty And Service

    Warranty and Service This appliance is guaranteed for 3 years from the date of purchase. It has been carefully produced and meticulously checked before delivery. Please keep your receipt as proof of purchase. Contact your service centre by telephone in case of ques- tions pertaining to the warranty.
  • Seite 26 - 24 -...
  • Seite 27 Inhaltsverzeichnis Seite Sicherheitshinweise Bestimmungsgemäßer Gebrauch Lieferumfang Gerätebeschreibung Aufstellen/Montieren der Kombihalterung Aufstellen Wandmontage Vor dem Glätten Wechseln der Keramikplatten Wahl der richtigen Keramikplatten Abnehmen der Keramikplatten Aufsetzen der Keramikplatten Aufheizzeiten Bedienen Vorbereitung Haare glätten Aufbewahren Reinigen Entsorgen Technische Daten Garantie und Service Importeur Lesen Sie die Bedienungsanleitung vor der ersten Verwendung aufmerksam durch und heben Sie diese für den späteren Ge- brauch auf.
  • Seite 28: Sicherheitshinweise

    Haarglätter KH5525 • Lassen Sie beschädigte Netzkabel und Netz- stecker von qualifiziertem Fachpersonal oder dem Kundenservice austauschen, um Gefährdun- gen zu vermeiden. • Knicken oder quetschen Sie das Netzkabel nicht Sicherheitshinweise und verlegen Sie es so, dass niemand darauf tre- ten oder darüber stolpern kann.
  • Seite 29: Bestimmungsgemäßer Gebrauch

    Lieferumfang terung an der Wand montieren wollen. Es besteht Verletzungsgefahr/Gefahr eines elek- trischen Schlages, wenn Sie diese Leitungen • Haarglätter KH 5525 anbohren! • Kombihalterung • 2 schmale Keramikplatten Markieren Sie die Bohrlöcher an der Wand. • 2 breite Keramikplatten Halten Sie dafür die Kombihalterung...
  • Seite 30: Vor Dem Glätten

    Vor dem Glätten Aufsetzen der Keramikplatten Schieben Sie die ausgewählte Keramikplatte • Das Haar sollte sauber, trocken und frei von mit der offenen Seite voran in die Stylingprodukten sein. Führungsschiene am Haarglätter, bis sie hörbar • Kämmen Sie das Haar vor dem Glätten gründ- einrastet.
  • Seite 31: Haare Glätten

    Aufbewahren Stellen Sie die gewünschte Temperatur am Drehregler ein: • Temperatur ab Stufe 1: Achtung! feines Haar Wickeln Sie das Netzkabel mit Netzstecker • Temperatur ab Stufe 10: nie um das Gerät. mittelkräftiges Haar • Temperatur ab Stufe 20: Achtung! kräftiges oder schwer zu glättendes Haar Ziehen Sie immer den Netzstecker e aus der Netzsteckdose wenn Sie das Gerät nicht be-...
  • Seite 32: Reinigen

    Wenn Sie die breiten Keramikplatten aufgesteckt Hinweis: haben: Benutzen Sie das Gerät erst wieder, wenn es vollständig getrocknet ist. Entsorgen Werfen Sie das Gerät keinesfalls in den normalen Hausmüll. Entsorgen Sie das Gerät über einen zugelassenen Entsorgungsbetrieb oder über Ihre kommunale Ent- sorgungs-einrichtung.
  • Seite 33: Garantie Und Service

    Garantie und Service Sie erhalten auf dieses Gerät 3 Jahre Garantie ab Kaufdatum. Das Gerät wurde sorgfältig produziert und vor Anlieferung gewissenhaft geprüft. Bitte be- wahren Sie den Kassenbon als Nachweis für den Kauf auf. Bitte setzen Sie sich im Garantiefall mit Ih- rer Servicestelle telefonisch in Verbindung.
  • Seite 34 - 32 -...

Inhaltsverzeichnis