Herunterladen Inhalt Inhalt Diese Seite drucken

Werbung

Verfügbare Sprachen
  • DE

Verfügbare Sprachen

  • DEUTSCH, seite 6
Drive
enclosure
user
manual
Model 130196
English
DEutsch
Español
FRançais
polsKi
italiano
MAN-130196-UM-ML-0310-01

Werbung

Inhaltsverzeichnis
loading

Inhaltszusammenfassung für Manhattan 130196

  • Seite 1 Drive enclosure user manual Model 130196 English DEutsch Español FRançais polsKi italiano MAN-130196-UM-ML-0310-01...
  • Seite 2: Hardwareinstallation

    Drive Enclosure • User Manual English thank you for purchasing this Manhattan Drive Enclosure, Model 130196. ® • Supports data transfer rates to 5 Gbps; large-capacity drives to 750 GB • Windows and Macintosh compatible • Plug and Play and hot swappable • Package contents: Drive Enclosure, USB cable, software CD, user manual hardware installation 1. set the lock/unlock switch on the end panel to the unlock position. 2. Slide the cover of the Drive Enclosure off the base (as shown in the sample device at right). 3. carefully place your hard drive in the...
  • Seite 3: Driver Installation

    driver installation Once the enclosure is connected to your PC, your system will automatically detect the new hardware and complete the setup, confirmed when “USB Mass storage Device” displays in the Device Manager folder. software installation These steps are for the installation of the convenient One-Touch Backup software. NOTE: This software doesn’t support Mac operating systems. Some images are modified to fit the manual format, and your software version may be slightly different than the one shown here. 1. Insert the included software CD into your PC and open the folder “PCCLONEEX_LITE_2_01_31_JMICRON. ” Double-click “Setup. ” 2. When the Welcome screen displays, click “Install” to continue. 3. When the license and warranty agreement displays, read it and click “Agree” to continue. NOTE: Most screens present the...
  • Seite 4 4. When the Setup will install to: screen displays, click “Install”; or click “Browse” to re-direct the file to a location other than the one listed. 5. When the Install Complete screen displays, click “OK. ” one-touch backup function These steps show how to use the convenient One-Touch Backup feature. 1. Once the software installation is complete, a PCCloneEX icon will display on the desktop. Double- click the icon to display the Quick Launch screen. 2. Press the One-Touch Backup button (refer to Hardware Installation) to display the Please select file(s) screen, then click “OK. ” English...
  • Seite 5 3. Select the file(s) you want to back up from the list in the left-side window, then press the backup button again. 4. When the Files Backup screen displays, click “Start” and the system will begin to back up the selected files. 5. When the “Backup Finished” message displays, click “OK. ” 6. The backed-up file(s) should now appear in the right-side window. English...
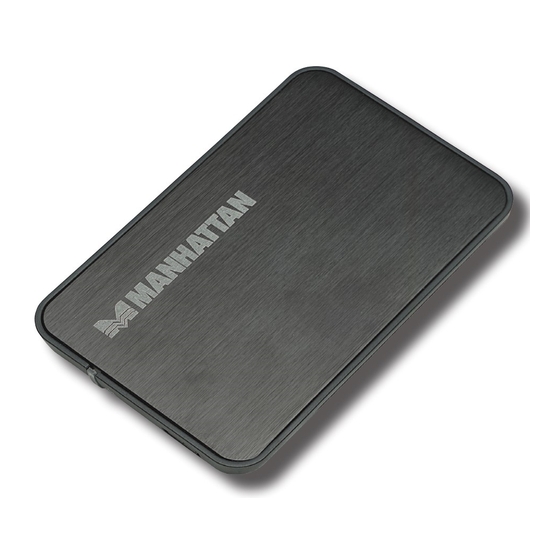
  • Seite 6 Laufwerksgehäuse • Handbuch Deutsch Vielen Dank für den Kauf des Manhattan Laufwerksgehäuse, Modell 130196. ® • Unterstützt Datenübertragungsraten bis zu 5 Gbit/s; große Festplatten bis zu 750 GB • Windows- und MAC-kompatibel; Plug & Play; Hot-Swap-fähig • Lieferumfang: Laufwerksgehäuse, USB-Kabel, software CD, handbuch hardware-installation 1. Bringen Sie den Verriegelungsschalter in die “Entriegelt”- position. 2. Trennen Sie die Abdeckung von der Basis des Laufwerksgehäuses (wie rechts abgebildet). 3. Setzen Sie Ihre Festplatte in das Laufwerksgehäuse ein, so dass der 22-pol. SATA-Stecker in der entsprechenden Buchse einrastet. 4. Bringen Sie die Abdeckung des Gehäuses wieder an. 5. Schließen Sie das Gehäuse über das beiliegende USB-Kabel an Ihren Computer an. 6. Bringen Sie den Verriegelungsschalter in die “Verriegelt”-Position. Die...
  • Seite 7: Treiberinstallation

    treiber-installation Sobald das Laufwerk an Ihren PC angeschlossen ist, erkennt Ihr System die neue Hardware automatisch und führt die Installation durch. Anschließend befindet sich der Eintrag “USB-Massenspeicher” in der Gerätemanager-Liste. software-installation Diese Schritte sind für die Installation der praktischen “One-Touch Backup”- Software notwendig. HINWEIS: Die “One-Touch Copy”-Eigenschaft wird auf Mac-Systemen nicht unterstützt. Einige Abb. wurden an das Format dieses Handbuchs angepasst und Ihre Softwareversion kann leicht abweichen. 1. Legen Sie die beiliegende Software-CD ein, und doppelklicken Sie im Ordner “ PCCLONEEX_LITE_2_01_31_JMICRON” auf “Setup”. 2. Der installationsassistent wird gestartet, klicken Sie auf “Install”. 3. Der Lizenzvertrag und die Garantierichtlinien werden eingeblendet. Lesen Sie diese und klicken sie auf “Agree”. HINWEIS: Klicken Sie auf “Back”, um zu einem vorherigen schritt zurückzukehren oder auf “Quit”, um die Installation abzubrechen.
  • Seite 8 4. installieren sie das Programm im Standardverzeichnis oder wählen Sie nach einem Klick auf “Browse” ein beliebiges Verzeichnis aus. 5. Ist die Installation abgeschlossen, klicken Sie auf “OK. ” “one-touch backup”-funktion Diese Schritte zeigen, wie Sie das “One-Touch Backup”-Feature verwenden. 1. Sobald die Softwareinstallation abgeschlossen ist, erscheint ein “PCCloneEX”-Icon auf dem Desktop. Doppelklicken sie darauf, um den Schnellstart zu zu aktivieren. 2. Drücken Sie den “ One-Touch Backup”-Knopf (siehe Hardwareinstallation) um die Dateiauswahl aufzurufen, dann klicken Sie auf “OK. ” DEutsch...
  • Seite 9 3. Wählen Sie die zu archivierenden Dateien in der liste auf der linken seite aus, dann drücken sie den “ Backup”-Knopf erneut. 4. Im “Files Backup”-Fenster, klicken Sie auf “Start”, worauf das System die ausgewählten Dateien archiviert. 5. Ist die Installation abgeschlossen, klicken Sie auf “OK. ” 6. Die archivierten Dateien sollten nun im Fenster auf der rechten seite erscheinen. DEutsch...
  • Seite 10: Instalación De Hardware

    Gabinete para Disco Duro • Manual del usuario Español Gracias por comprar el Gabinete para Disco Duro MANHATTAN , Modelo 130196. ® • Soporta tasas de transferencia de datos hasta 5 Gbps; discos con capacidades de hasta 750 GB • Compatible con Windows y Macintosh; “Plug and Play”; “Hot Swappable” • Contenido del paquete: Gabinete para Disco Duro, Cable USB, CD con software, manual del usuario instalación de hardware 1. Ajuste el switch cerrado/abierto a la pocisión de abierto. 2. Abra la tapa el gabinete de la base como se muestra a la derecha). 3. Coloque con cuidadosu Disco Duro en la base del gabinete para una conexión solida utilice el conector sata de 22-pines. 4. Deslice la tapa de nuevo a su lugar.
  • Seite 11 instalacion del driver Una vez que el gabinete esta conectado a la Pc, el sistema detectara automaticamente el nuevo hardware y completara la instalación, confirme que en el administrador de dispositivos se muestre “USB Mass Storage Device”. instalacion del software Estos son los pasos para la instalación del software copia de un solo toque. NOTA: La característica de copia con un solo toque no es soportada en sistemas Mac. Algunas imágenes son modificadas y su versión de software puede ser ligeramente diferente a la que se muestra aquí. 1. Inserte el CD de software en su PC y abra la carpeta “PCCLONEEX_LITE_2_ 01_31_JMICRON. ” Haga Doble-clic “Setup. ” 2. Cuando se muestre la pantalla de bienvenida, haga clic en “Install” para continuar. 3. Cuando se muestre el acuerdo de licencia y garantia, lealo y hagaclic “Agree” para continuar.
  • Seite 12 4. Cuando el programa se instala en la pantalla se muestra, clic “Install”; ó clic “Browse” para cambiar la ruta del archivo a una ubicacion diferente. 5. Cuando se muestre la pantalla instalación completa, haga clic en “Aceptar”. copia de seguridad de un toque Estos son los pasos que muestran como utilizar la Copia de un toque. 1. Una vez que se finalizo la instalación de software, un icono de PCCloneEX se mostrara en el escritorio. Haga doble-clic para mostrar la pantalla de inicio rápido. 2. Presione el boton Copia de Seguridad de un toque (ver instalación de Hardware)
  • Seite 13 3. seleccione los archivos que desea respaldar de la lista de la ventana izquierda Presione el boton backup otra vez. 4. Cuando se muestre la pantalla ”Files Backup”, haga clic en “Start” y el sistema iniciara la copia de seguridad de los archivos selecionados. 5. Cuando se muestre la pantalla “Backup Finished”, haga clic “OK” para terminar. 6. la copia de seguridad deberia aparecer en el lado derecho de la ventana. Español...
  • Seite 14: Installation Du Matériel

    Boîtier pour lecteur de disque • Manuel de l’utilisateur Français Merci d’avoir acheté le Manhattan Boîtier pour lecteur de disque, modèle 130196. ® • Prise en charge de débits de transfert jusqu’à 5 Gbits/s; de lecteurs d’une capacité allant jusqu’à 750 Go • Compatible Windows et Macintosh; Plug-and-Play; démontable à chaud • Contenu du pack: Boîtier pour lecteur de disque, Câble USB, CD de logiciel, manuel utilisateur installation du matériel 1. Mettez le verrouillage sur le panneau dans la position “déverrouillé”. 2. Enlevez le couvercle de la base du Boîtier (voir sur l’image à droite). 3. Placez votre disque dur dans la base du Boîtier jusqu’à le connecteur SATA à 22 broches est encliqueté.
  • Seite 15: Installation Du Pilote

    installation du pilote Dès que le Boîtier est connecté à votre ordinateur, votre système identifie et installe le pilote automatiquement. Après que l’installation soit complète, l’entrée “Appareil USB de mémoire de masse” apparaît dans la liste du Gestionnaire du périphérique. installation du logiciel Les étapes suivantes sont nécessaires pour l’installation du logiciel pratique “One-Touch Backup”. NOTE: Cette fonction (copie en une touche) non prise en charge par les systèmes Mac. Quelques images sont adaptées au format de ce manuel et la version de votre logiciel peut diverger. 1. Insérez le CD fourni dans votre ordinateur et ouvrez le dossier “PCCLONEEX_LITE_2_01_31_JMICRON. ” Double-cliquez sur “Setup”. 2. Dès que l’assistant d’installation apparaît, cliquez sur “Install”. 3. Dès que les directives de licence et garantie apparaissent, lisez-les et cliquez sur “Agree”. NOTE: Cliquez sur “Back” afin de...
  • Seite 16 4. Installez le programme au répertoire par défaut ou cliquez sur “Browse” afin de l’installer à un répertoire à votre choix. 5. Dès que l’installation est complète, cliquez sur “OK”. fonction “one-touch backup” Les étapes suivantes illustrent la caractéristique “One-Touch Backup”. 1. Dès que l’installation du du logiciel est complète le symbole de PCCloneEX apparaît sur le bureau. Double-cliquez-le afin d’activer l’écran du démarrage rapide. 2. Pressez le bouton “One-Touch Backup” (voir installation du matériel) afin d’ouvrir l’écran cf. à droite, puis cliquez sur “ OK. ” FRançais...
  • Seite 17 3. Choisissez les fichiers que vous voudriez sauvegarder de la liste à gauche, après puis pressez le bouton “Backup” encore une fois. 4. Dès que l’écran “Files Backup” apparaît, cliquez sur “Start” et le système commence à sauvegarder les fichiers choisis. 5. Dès que l’écran “Backup Finished” apparaît, cliquez sur “OK. ” 6. Maintenant les fichiers sauvegardés apparaissent dans la fenêtre à droite. FRançais...
  • Seite 18 Obudowa do dysków • Instrukcja Użytkownika Polski Dziękujemy za zakup Obudowy do dysków MANHATTAN , Model 130196. ® • Obsługa transferu do 5 Gb/s oraz dysków o dużej pojemności do 750 GB • Współpraca z systemami Windows i Macintosh; Plug and Play, hot-swapp • Zawartość opakowania: obudowa do dysków, kabel USB, CD z oprogramowaniem, instrukcja użytkownika montaŻ dYsku twardego 1. Zwolnij mechanizm zabezpieczający umieszczony na bocznym panelu obudowy, ustawiając go w pozycji „odblokowane” (otwarta kłódka). 2. Zsuń pokrywę ochronną (tak jak pokazano na obrazku). 3. Ostrożnie umieść twardy dysk w kieszeni, upewniając się, że 22-pinowe złącze SATA jest podpięte prawidłowo. 4. Zasuń ponownie pokrywę ochronną. 5. Zamknij mechanizm zabezpieczający, ustawiając go w pozycji „ zablokowane” (zamknięta kłódka). 6. Podłącz obudowę do komputera kablem USB (w komplecie). Dioda zasilania/aktywności na obudowie...
  • Seite 19: Instalacja Oprogramowania

    instalacJa sterowników Po podłączeniu obudowy do komputera system automatycznie wykryje urządzenie i zainstaluje odpowiednie sterowniki. Poprawność instalacji można sprawdzić w panelu „ Menadżer urządzeń” – obudowa pojawi się na liście jako „Urządzenie magazynujące USB”. instalacJa oprogramowania Poniższe wskazówki dotyczą instalacji oprogramowania umożliwiającego wykonywanie zapasowych kopii wybranych danych za pomocą jednego przycisku umieszczonego na obudowie. UWAGA: Funkcja wykonywania kopii zapasowych nie jest wspierana przez systemy Mac. Wielkość zamieszczonych dalej obrazków została zmodyfikowana na potrzeby instrukcji, a widoczna na nich wersja oprogramowania może się nieznacznie różnić od tej dostarczonej z produktem. 1. Umieść CD z oprogramowaniem w napędzie CD/DVD komputera, a następnie znajdź na płycie folder o nazwie „ PCCLONEEX_LITE_2_01_31_JMICRON”. Otwórz go i kliknij dwukrotnie na ikonę „ Setup”, aby rozpocząć instalację. 2. Kiedy pokaże się okno instalatora, kliknij przycisk „install”. 3. Kliknij „ Agree”, aby zaakceptować warunki licencyjne. Aby cofnąć się...
  • Seite 20 4. Wybierz folder instalacji programu klikając „ Browse” i wskazując wybraną lokalizację, bądź pozostaw domyślną ścieżkę (zalecane). Następnie kliknij „ Install”. 5. Aby zakończyć proces instalacji, kliknij „oK”. funkcJa wYkonYwania kopii ZapasoweJ Poniżej opisano procedurę wykonywania kopii zapasowej danych za pomocą przycisku na obudowie i zainstalowanego oprogramowania. 1. Po zainstalowaniu oprogramowania, na pulpicie systemu Windows powinna pojawić się ikona „PCCloneEX”. Kliknij dwukrotnie lewym klawiszem myszy na ikonę, aby uruchomić aplikację. 2. Wciśnij przycisk do wykonywania kopii zapasowej znajdujący się na obudowie do dysków.
  • Seite 21 3. Wybierz foldery, które chcesz skopiować z listy w lewym oknie aplikacji. Ponownie wciśnij przycisk do wykonywania kopii zapasowej. 4. Pojawi się okno „ Files Backup”. Kliknij „ Start”, aby rozpocząć kopiowanie. 5. Gdy kopiowanie plików zostanie zakończone, kliknij „oK”. 6. Skopiowane pliki powinny pojawić się na liście w prawym oknie aplikacji. polsKi...
  • Seite 22: Installazione Dell'hardware

    Alloggiamento esterno per HDD • Manuale d’istruzione Italiano Grazie per aver acquistato questo alloggiamento per hard disk MANHATTAN®, Modello 130196. • Supporta trasferimento dati a 5 Gbps; capacità dei dischi 750 GB • Compatibile con Windows e Macintosh; Plug and Play e hot swappable • Contenuto della confezione: Alloggiamento esterno per HDD, Cavo USB, CD con software, manuale d’istruzione installaZione dell’hardware 1. Posizionare il tasto presente nel retro del box nella posizione di sblocco. 2. Far scivolare il coperchio del box sulla base (come mostrato nell’esempio a destra). 3. Posizionare con prudenza il disco fisso nella base del box così da creare una connessione solida con il connettore SATA 22-pin. 4. Richiudere il box facendo nuovamente scivolare il coperchio sulla base.
  • Seite 23: Installazione Del Software

    installaZione dei driver Appena il box viene connesso al PC, il sistema automaticamente rileva il nuovo hardware e completa il settaggio, confermando quando l “USB Mass Storage Device” appare nella cartella di gestione delle periferiche. installaZione del software Questi passaggi sono per l’installazione del software per attivare la funzione One-Touch Backup. NOTA: Questo software non supporta i sistemi operativi Mac. Alcune immagini sono state modificate per adeguarle al format del manuale e la vostra versione del software potrebbe essere leggermente diversa rispetto quella mostrata qui. 1. Inserire il CD incluso contente il software nel PC e aprire la cartella “PCCLONEEX_LITE_2_01_31_JMICRON. ” Cliccare due volte su “Setup. ” 2. Quando appare sullo schermo il messaggio di benvenuto, cliccare“Install” per continuare. 3. Quando appaiono le Informazioni relative alla licenza e alla garanzia,...
  • Seite 24 4. Quando il Setup verrà installato a: percorso visualizzato sullo schermo, cliccare “Install”; o cliccare “Browse” per re-indirizzare il file in un’altra locazione diversa da quella elencata. 5. Sullo schermo si visualizzerà quando l’installazione è terminate, quindi cliccare “OK. ” funZione one-touch backup Questi passaggi mostrano come utilizzare la funzione One-Touch Backup che risulta particolarmente comoda. 1. Appena l’installazione del software è completa, un’ immagine PCCloneEX verrà visualizzata sullo schermo della desktop. cliccare due volte sull’icona per visualizzare la schermata del Quick Launch. 2. Premere il tasto One-Touch Backup (far riferimento all’installazione dell’ Hardware) per visualizzare sullo schermo l’icona Please select file(s), quindi cliccare “OK.
  • Seite 25 3. Selezionare il/i file di cui si desidera fare una copia di salvataggio dalla lista della finestra a sinistra, quindi premere nuovamente il tasto di backup. 4. Quando appare sullo schermo Files Backup, cliccare “Start” e il sistema inizierà a fare una copia di salvataggio dei file selezionati. 5. Quando compare sullo schermo il messaggio “Backup Finished”, cliccare “OK. ” 6. Il /I file salvati dovrebbero ora apparire nella finestra sul lato destro. ITALIANO...
  • Seite 26 For warranty information, go to www.manhattan-products.com/warranty. english — Garantieinformationen finden Sie hier unter www.manhattan-products.com/warranty. deutsch — Si desea obtener información sobre la garantía, visite esPAñOl — www.manhattan-products.com/warranty. Pour consulter les informations sur la garantie, rendezvous à l’adresse FRAnçAis — www.manhattan-products.com/warranty. Informacje dotyczące gwarancji znajdują się na stronie POlski — www.manhattan-products.com/warranty. Per informazioni sulla garanzia, accedere a www.manhattan-products.com/warranty. itAliAnO — en MéXicO: Poliza de Garantia MANHATTAN — Datos del importador y responsable ante el consumidor • IC Intracom México, S.A. de C.V. Av. Interceptor Poniente # 73, Col. Parque Industrial La Joya, Cuautitlan • Izcalli, Estado de México, C.P. 54730, México. Tel. (55)1500-4500 La presente garantía cubre los siguientes productos contra cualquier defecto de fabricación en sus materiales y mano de obra. A. Garantizamos los productos de limpieza, aire comprimido y consumibles, por 60 dias a partir de la fecha de entrega, o por el tiempo en que se agote totalmente su contenido por su propia función de uso, lo que suceda primero. B. Garantizamos los productos con partes moviles por 3 años. C. Garantizamos los demas productos por 5 años (productos sin partes moviles), bajo las siguientes condiciones: 1. Todos los productos a que se refiere esta garantía, ampara su cambio físico, sin ningún cargo para...
  • Seite 27 FEDERAL COMMUNICATIONS COMMISSION REGULATORY STATEMENT Fcc class B This equipment has been tested and found to comply with the limits for a Class B digital device, pursuant to Part 15 of Federal Communications Commission (FCC) Rules. These limits are designed to provide reasonable protection against harmful interference in a residential installation. This equipment generates, uses and can radiate radio frequency energy, and if not installed and used in accordance with the instructions may cause harmful interference to radio communications. However, there is no guarantee that interference will not occur in a particular installation. If this equipment does cause harmful interference to radio or television reception, which can be determined by turning the equipment off and on, the user is encouraged to try to correct the interference by one or more of the following measures:...
  • Seite 28 WASTE ELECTRICAL & ELECTRONIC EQUIPMENT Disposal of Electric and Electronic Equipment (applicable in the European Union and other European countries with separate collection systems) english This symbol on the product or its packaging indicates that this product shall not be treated as household waste. Instead, it should be taken to an applicable collection point for the recycling of electrical and electronic equipment. By ensuring this product is disposed of correctly, you will help prevent potential negative consequences to the environment and human health, which could otherwise be caused by inappropriate waste handling of this product. If your equipment contains easily removable batteries or accumulators, dispose of these separately according to your local requirements. The recycling of materials will help to conserve natural resources. For more detailed information about recycling of this product, contact your local city office, your household waste disposal service or the shop where you purchased this product. In countries outside of the EU: If you wish to discard this product, contact your local authorities and ask for the correct manner of disposal. deutsch Dieses auf dem Produkt oder der Verpackung angebrachte Symbol zeigt an, dass dieses Produkt nicht mit dem Hausmüll entsorgt werden darf. In Übereinstimmung mit der Richtlinie 2002/96/EG des Europäischen...
  • Seite 32 MANHATTAN® offers a complete line of PC Components, Peripherals, Cables and Accessories. Ask your local computer dealer for more information or visit www.manhattan-products.com. All products mentioned are trademarks or registered trademarks of their respective owners. MANHATTAN® bietet ein vollständiges Sortiment an PC-Komponenten, Peripherie, Kabel und Zubehör. Weitere Informationen erhalten Sie von Ihrem Händler oder auf www.manhattan-products.com. Alle genannten Produkt- oder Firmennamen sind eingetragene Marken oder Marken der jeweiligen Firmen. MANHATTAN® ofrece una línea completa Componentes para PC, Periféricos, Cables y Accesorios. Consulte a su distribuidor local para más información ó visitenos www.manhattan-products.com. Todos los productos mencionados son marcas comerciales o marcas registradas de sus respectivos propietarios. Manhattan® offre un assortiment complet de composants de PC, des périphériques, des câbles et des accessoires www.manhattan-products.com. Tous les produits mentionnés sont des marques commerciales ou des marques déposées de leurs propriétaires respectifs. MANHATTAN® offre una linea completa di componenti per PC, periferiche, cavi e accessori. Chiedi maggiori informazioni al tuo rivenditore di computer o visita il sito www.manhattan-products.com. Tutti i prodotti sopracitati sono marchi di fabbrica o marchi registrati depositati dai proprietari. Copyright © MANHATTAN...

Inhaltsverzeichnis