Herunterladen Inhalt Inhalt Diese Seite drucken
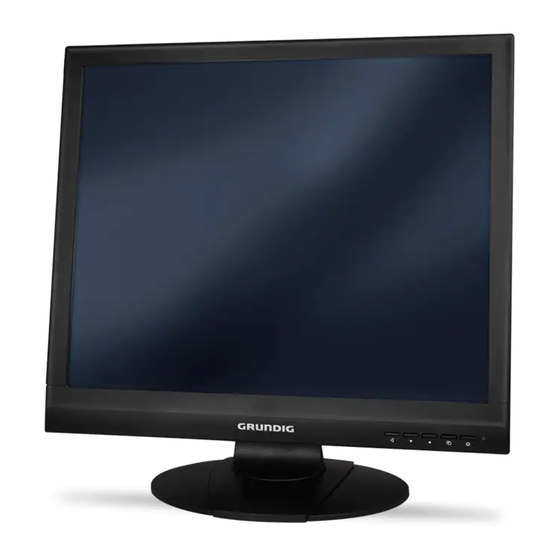
Grundig GML-1912M Bedienungsanleitung
Vorschau ausblenden Andere Handbücher für GML-1912M:

Werbung

Verfügbare Sprachen
  • DE

Verfügbare Sprachen

  • DEUTSCH, seite 1
Owner's Manual
Monitors
GML-1912M
48 cm (19") LCD/TFT Monitor LED Backlight
GML-1912M.161.1.19.05.2015

Werbung

Inhaltsverzeichnis
loading

Inhaltszusammenfassung für Grundig GML-1912M

  • Seite 1 Owner's Manual Monitors GML-1912M 48 cm (19") LCD/TFT Monitor LED Backlight GML-1912M.161.1.19.05.2015...
  • Seite 3 Bedienungsanleitung Monitore GML-1912M 48 cm (19") LCD/TFT-Monitor mit LED- Hintergrundbeleuchtung GML-1912M.161.1.19.05.2015 © ASP AG...
  • Seite 5: Inhaltsverzeichnis

    Inhalt: 1. Wichtige Sicherheitshinweise 2. Installation 3. Packungsinhalt 4. Rückansicht mit Anschlüssen 5. Ein- und Ausschalten des Monitors 6. OSD-Bedientasten 7. Einstellungen im Bildschirmmenü 1. PC (VGA/HDMI) & BILD (BNC) 2. AUDIO 3. OSD 4. GEOMETRIE (VGA/HDMI) & FUNKTION (BNC) 8.
  • Seite 6: Installation

    Das Kunststoffgehäuse des LED-Monitors und die LED-Scheibe können mit einem weichen, fusselfreien Tuch gereinigt werden. Verwenden Sie niemals Scheuerpads oder andere Reinigungsmittel mit rauhen Oberflächen, um Ihren LED-Monitor zu säubern! A. Ein leicht angefeuchtetes Tuch kann verwendet werden, um das Display von Fingerabdrücken oder Flecken zu befreien.
  • Seite 7: Packungsinhalt

    Gerät mit UL/TÜV-geprüften Computern verwendet werden, die für eine Stromstärke von 100-240 V AC, 50/60 Hz, 2,0 A (Minimum) ausgewiesen sind. Beachten Sie die Monitor-Spezifikationen. Dieser GRUNDIG Monitor verfügt über eine Auflösung von 1280 x 1024 und arbeitet sowohl mit PAL- als auch mit NTSC-Signal- Modus.
  • Seite 8: Ein- Und Ausschalten Des Monitors

    AUDIO OUT / AUDIO IN: Nutzen Sie den 3,5mm-Klinkenstecker für die Übertragung von Audiosignalen für den VGA-Bildmodus. AV1-OUT: Hier können Sie das durchgeschliffene Signal des BNC-Eingangs abgreifen und weiteren Geräten zur Verfügung stellen. Ist kein Kabel angeschlossen setzt der Monitor automatisch einen 75Ω-Widerstand. AV1-IN: Verbinden Sie hier eine Videoquelle mit Koaxialkabel (mit Composite Video Signal) mit dem BNC-Anschluss.
  • Seite 9: Osd-Bedientasten

    6. OSD-Bedientasten - Drücken Sie die Taste "MENU", um das Menü sichtbar zu machen. - Drücken Sie "/\ / \/", um zwischen den Menüs zu wechseln. - Nachdem Sie ein Menü ausgewählt haben, drücken Sie "MENU", um einen Menüpunkt auszusuchen. Drücken Sie "/\ / \/", um die Einstellungen dieses Menüpunkts anzupassen.
  • Seite 10 Farbton: Hiermit können Sie den Farbton des Bildes einstellen. Drücken Sie /\ oder \/, um den Parameter anzupassen. Sättigung: Hiermit können Sie die Farbsättigung des Bildes einstellen. Drücken Sie /\ oder \/, um den Parameter anzupassen. Farbtemp.: Drücken Sie /\ oder \/, um die Farbtöne ("Kühl, Warm, Normal") anzupassen. Wenn Sie im VGA- oder HDMI-Modus /\ oder \/ drücken, um <Farbtemperatur>...
  • Seite 11 Sound Modus: Wählen Sie hier zwischen den verschiedenen Sound-Modi aus (Standard, Benutzer, Musik, Spielfilm). Drücken Sie /\ oder \/, um den Parameter anzupassen. 7.3. OSD Sleep Timer: Wählen Sie die Zeitdauer aus, die verwendet werden soll, bevor der Monitor in den Ruhemodus schaltet, wenn kein Signal von dem von Ihnen ausgewählten Ausgang ausgeht.
  • Seite 12: Geometrie (Vga/Hdmi) & Funktion (Bnc)

    7.4. GEOMETRIE (VGA/HDMI) & FUNKTION (BNC) VGA / HDMI -Modus: BNC-Modus: H-Position: Verschieben Sie die Display-Anzeige nach links oder rechts. Drücken Sie /\ oder \/, um den Parameter anzupassen. V-Position: Bewegen Sie die Display-Anzeige nach oben oder unten. Drücken Sie /\ oder \/, um den Parameter anzupassen.
  • Seite 13: Audio

    8. Häufig gestellte Fragen Die "Power"-Taste reagiert nicht: - Prüfen Sie das Netzkabel, um sicherzustellen, dass es fest mit dem Monitor und der Steckdose verbunden ist. - Stellen Sie sicher, dass Strom aus der Steckdose kommt. Verwenden Sie ein anderes Gerät, um den Strom zu überprüfen.
  • Seite 14 Technische Daten GML-1912M LCD-Bildschirmgröße 48cm-Diagonale AM-TFT mit LED-Hintergrundbeleuchtung Anzahl Bildpunkte 1280(H) x 1024(V) Pixel-Raster 0,294 mm(H) x 0,294 mm(V) Auflösung 1280 x 1024 Pixel Seitenverhältnis 5 : 4 Videonorm PAL/NTSC Videoeingänge 2 Kanäle Composite BNC, 1 Kanal VGA, 1 HDMI Videoausgänge...
  • Seite 15 Abmessungen Deutsch...
  • Seite 16: Eg-Konformitätserklärung

    EG-Konformitätserklärung GML-1912M 48 cm (19") LCD/TFT-Monitor mit LED-Hintergrundbeleuchtung Es wird hiermit bestätigt, dass die Produkte in der serienmäßigen Ausführung folgenden einschlägigen Bestimmungen entsprechen: EG-EMV Richtlinie 2004/108/EG Low Voltage Directive 2006/95/EC Angewendete harmonisierte Normen und technische Spezifikationen: EN 55022: 2010/AC:2011 / EN 61000-3-2: 2006+A2: 2009 / EN 61000-3-3: 2008 / EN...
  • Seite 17 Owner's Manual Monitors GML-1912M 48 cm (19") LCD/TFT Monitor LED Backlight GML-1912M.161.1.19.05.2015 © ASP AG...
  • Seite 19 Content: 1. Important Safety Instructions 2. Installation 3. Package Contents 4. Rear View with Connections 5. Turning the Monitor Off/On 6. OSD Control Keys 7. OSD Menu Configurations 1. PC (VGA/HDMI) & PICTURE (BNC) 2. AUDIO 3. OSD 4. GEOMETRY (VGA/HDMI) & FUNCTION (BNC) 8.
  • Seite 20: Installation

    Do NOT use cleaning fluids based on alcohol, methylated spirit or ammonia. The glass plate has a hard surface coating to prevent scratches. However, the use of strong chemical cleaning agents may damage this coating. Use only a mild soap or detergent and water or specially formulated cleaners made for cleaning glass panels.
  • Seite 21: Package Contents

    100-240 V AC, 50/60 Hz, 2.0 A (minimum). Check the monitor specification carefully. This GRUNDIG monitor has a 1280 x 1024 resolution and works with both PAL and NTSC signal modes. This GRUNDIG monitor is for 24/7 security purposes; therefore, the environmental specifications such as the operating temperature and the voltage needed have to be maintained at all times.
  • Seite 22: Turning The Monitor Off/On

    5. Turning the Monitor Off/On PLEASE NOTE: After pressing the “Power” button, it will take approximately 6 sec. until the monitor is ready and the display is visible. These are the various power states of the LED monitor represented by the different LED colours on the POWER button: BLUE: On Blue light flashing: No signal input...
  • Seite 23 Contrast: This is used to set the brightness of the screen. Press /\ or \/ to adjust the parameter. Brightness: This is used to adjust the image contrast. Press /\ or \/ to adjust the parameter. Hue: This is used to adjust the image hue. Press /\ or \/ to adjust the parameter. Saturation: This is used to adjust the image saturation.
  • Seite 24 Sound Mode: Select between various sound modes (Standard, User, Music, Movie). Press /\ or \/ to adjust the parameter. 7.3. OSD Sleep Timer: Select the time duration that will be used before the monitor will go into sleep mode, if there is no signal on the source you have selected.
  • Seite 25: Frequently Asked Questions

    7.4. GEOMETRY (VGA/HDMI) & FUNCTION (BNC) VGA / HDMI Mode: BNC Mode: H-Position: Move the display picture to the left or right. Press /\ or \/ to adjust the parameter. V Position: Move the display picture up or down. Press /\ or \/ to adjust the parameter. Phase: Press /\ or \/ to adjust the parameter.
  • Seite 26 No image on the screen: - Ensure that the DB-15 signal cable is properly connected to the display card/computer. - Check the DB-15 signal cable connector on both ends for bent or pushed-in pins. - The display card should be properly seated in its card slot. - Ensure that the computer's power switch is ON.
  • Seite 27 Specifications GML-1912M LCD Panel size 19" Diagonal AM-TFT LED Backlight Pixels - Total 1280(H) x 1024(V) Pixel Pitch 0.294 mm(H) x 0.294 mm(V) Resolution 1280 x 1024 pixel, 650(H) TV Lines Aspect Ratio 5 : 4 Video Standard PAL/NTSC Video Inputs...
  • Seite 28 Dimensions English...
  • Seite 29: Ec Declaration Of Conformity

    EC Declaration of Conformity GML-1912M 48 cm (19") LCD/TFT Monitor LED Backlight It is hereby certified that the products meet the standards in the following relevant provisions: EC EMC Directive 2004/108/EC Low Voltage Directive 2006/95/EC Applied harmonised standards and technical specifications:...
  • Seite 31 Manuel d'utilisation Ecrans & Moniteurs GML-1912M Moniteur LCD 48 cm (19") à rétro-éclairage LED GML-1912M.161.1.21.05.2015 © ASP AG...
  • Seite 33 Teneur: 1. Consignes de sécurité importantes 2. Installation 3. Contenu de l'emballage 4. Vue arrière avec connectique 5. Mettre le moniteur sous / hors tension 6. Touches de contrôle de l´OSD (affichage à l'écran) 7. Configurations du menu OSD 1. PC (VGA/HDMI) & IMAGE (BNC) 2.
  • Seite 34: Installation

    Le boîtier en plastique du moniteur DEL et le panneau DEL peuvent être nettoyés avec un chiffon doux, non pelucheux. Ne jamais utiliser de grattoirs ou d'autres objets nettoyants avec des surfaces abrasives pour nettoyer votre moniteur DEL! A. Un chiffon légèrement humide peut être utilisé pour effacer les empreintes de doigts ou les bavures.
  • Seite 35: Contenu De L'emballage

    Vérifier attentivement les spécifications du moniteur. Ce moniteur GRUNDIG est équipé d'une résolution de 1280 x 1024 et fonctionne avec les modes de signal PAL et NTSC. Ce moniteur GRUNDIG est conçu pour un usage sécurisé 24/24H et 7/7J, par conséquent les spécifications environnementales telles que la température de fonctionnement et la tension nécessaire doivent être respectées à...
  • Seite 36: Mettre Le Moniteur Sous / Hors Tension

    AV1-OUT: Ici, vous retirez le signal de l'entrée BNC et vous l'utilisez avec d'autres dispositifs. Si aucun câble n'est branché, le moniteur fixe une résistance automatique de 75 Ω. AV1-IN: Brancher une source vidéo avec un câble coaxial (avec un signal vidéo composite) sur le connecteur BNC.
  • Seite 37: Configurations Du Menu Osd

    7. Configurations du menu OSD 7.1. PC (VGA/HDMI) & IMAGE (BNC) Mode VGA / HDMI: Mode BNC: Contraste: Cette fonction sert à régler la contraste de l'écran. Appuyez sur /\ ou \/ pour régler ce paramètre. Luminosité: Cette fonction sert à régler le luminosité de l'image. Appuyez sur /\ ou \/ pour régler ce paramètre.
  • Seite 38 Mode image: Appuyez sur /\ ou \/ pour sélectionner le mode Image ("User, Standard, Movie, Vivid"="Utilisateur, Standard, Film, Vif"). Appuyez sur /\ ou \/ pour régler ce paramètre. 7.2. SONORE Basse: Augmenter ou diminuer le niveau des basses de la sortie audio. Appuyez sur /\ ou \/ pour régler ce paramètre.
  • Seite 39 Position V: Déplacez le menu OSD vers le haut ou le bas. Appuyez sur /\ ou \/ pour régler ce paramètre. Duration: Sélectionnez le délai pendant lequel l'OSD restera actif sans action de l'utilisateur. L'OSD disparaît après le temps sélectionné. Transparence: Sélectionnez le niveau de transparence de l'OSD.
  • Seite 40: Foire Aux Questions

    Noise Reduction: Sélectionnez le niveau de réduction de bruit numérique pour améliorer la qualité de l'image. DLC: Appuyez sur /\ ou \/ pour régler ce paramètre. 8. Foire aux questions La touche Power ne répond pas: - Vérifiez le câble d'alimentation s'il est correctement branché sur le moniteur et sur la prise électrique.
  • Seite 41 Spécifications GML-1912M Ecran Diagonale de 19" (48cm), matrice active et rétro-éclairage LED Pixels - Total 1280(H) x 1024(V) Taille du Pitch 0,294 mm(H) x 0,294 mm(V) Définition 1280 x 1024 pixels, 650(H) Lignes TV Format image 5 : 4 Standard vidéo PAL/NTSC Entrée(s) vidéo...
  • Seite 42 Dimensions Français...
  • Seite 43: Déclaration De Conformité Ce

    Déclaration de conformité CE GML-1912M Moniteur LCD 48 cm (19") à rétro-éclairage LED Pour les produits est certifié qu'il satisfait à la norme dans les dispositions pertinentes suivantes: CE Directive CEM 2004/108/CE Low Voltage Directive 2006/95/EC Normes harmonisées et spécifications techniques:...
  • Seite 45 Podręcznik użytkownika Monitory GML-1912M Monitor 48 cm (19") LCD/TFT z podświetleniem LED GML-1912M.161.1.21.05.2015 © ASP AG...
  • Seite 47 Zawartość: 1. Instrukcje bezpieczeństwa 2. Instalacja 3. Zawartość opakowania 4. Widok od tyłu z podłączeniami 5. Włączenie / wyłączenie monitora 6. Klawisze sterowania menu OSD 7. Konfiguracje menu OSD 1. PC (VGA/HDMI) & FUNKCJE (BNC) 2. AUDIO 3. OSD 4. GEOMETRIA (VGA/HDMI) & FUNCTION (BNC) 8.
  • Seite 48: Instalacja

    NIE używać płynów czyszczących opartych na alkoholu, spirytusie metylowym lub amoniaku. Szklana płyta ma twardą powierzchnię z pokryciem odpornym na zadrapania. Użycie agresywnych środków chemicznych, może uszkodzić pokrycie. Stosować tylko łagodny roztwór mydła lub wodę z detergentem albo specjalne środki czyszczenia ze składem specjalnym do czyszczenia szklanych paneli.
  • Seite 49: Zawartość Opakowania

    (minimum). Sprawdzić dane techniczne monitora. Ten monitor GRUNDIG ma rozdzielczość 1280 x 1024 i pracuje z sygnałami standardu PAL i NTSC. Ten monitor GRUNDIG spełnia wymagania 24/7 bezpieczeństwa nieprzerwanej pracy całodobowej, dlatego wymagania środowiskowe, takie jak temperatura pracy i napięcie muszą być spełnione przez cały czas.
  • Seite 50: Włączenie / Wyłączenie Monitora

    HDMI (High Definition Multimedia Input - Wejście multimedialne wysokiej rozdzielczości): Można tu podłączyć monitor kablem HDMI (kabel nie jest częścią dostawy). UWAGA: HDMI obejmuje nie tylko transfer obrazu ale może też transmitować audio. 5. Włączenie / wyłączenie monitora ROSZĘ PAMIĘTAĆ: Po naciśnięciu przycisku “Power”...
  • Seite 51: Konfiguracje Menu Osd

    7. Konfiguracje menu OSD 7.1. PC (VGA/HDMI) & FUNKCJE (BNC) Tryb VGA / HDMI: Tryb BNC: Kontrast: Ta funkcja jest używana do regulacji jaskrawości obrazu kamery. Nacisnąć /\ lub \/, by skorygować parametr. Jaskrawość: Ta funkcja jest używana do regulacji kontrastu obrazu kamery. Nacisnąć /\ lub \/, by skorygować...
  • Seite 52 Funkcje głosu: Nacisnąć /\ lub \/, by wybrać tryb obrazu ("User, Standard, Movie, Vivid"="Użytkow.(=użytkownika), Standard, Film, Żywy). Nacisnąć /\ lub \/, by skorygować parametr. 7.2. AUDIO Bass: Zwiększenie lub zmniejszenie poziomu basów wyjścia audio. Nacisnąć /\ lub \/, by skorygować parametr. Treble: Zwiększenie lub zmniejszenie poziomu tonów wysokich wyjścia audio.
  • Seite 53 Pozycja H: Pozycja H przesuwa OSD na lewo lub prawo. Nacisnąć /\ lub \/, by skorygować parametr. Pozycja V: Pozycja V przesuwa OSD do góry lub do dołu. Nacisnąć /\ lub \/, by skorygować parametr. Duration: Wybierz czas, w którym OSD pozostanie aktywne, w przypadku braku aktywności użytkownika.
  • Seite 54: Często Zadawane Pytania

    Auto Adjust (=Korekta automatyczna): W trybie VGA/HDMI możliwe jest wybranie tej pozycji dla wykonania automatycznych korekcji obrazu. Noise Reduction: Ustawienie mocy cyfrowej redukcji szumów w celu poprawy jakości obrazu. DLC: Nacisnąć /\ lub \/, by skorygować parametr. 8. Często zadawane pytania Przycisk włączenia nie reaguje: - Sprawdzić...
  • Seite 55 Specyfikacji GML-1912M Wielkość panelu LCD Przekątna 19 ” AM-TFT Podświetlenie LED Całkowita ilość pikseli 1280(H) x 1024(V) Rozmiar plamki 0.294 mm(H) x 0.294 mm(V) Rozdzielczość 1280 x 1024 pixel, 650(H) TV Linii Proporcje boków 5 : 4 Standard Wideo PAL/NTSC 2x BNC, 1x VGA, Wejścia wideo...
  • Seite 56 Wymiary Polski...
  • Seite 57: Deklaracja Zgodności

    DEKLARACJA ZGODNOŚCI GML-1912M Monitor 48 cm (19") LCD/TFT z podświetleniem LED Niniejszym zaświadcza się, że produkty spełniają wymagania zawarte w następujących przepisach właściwych: EMC 2004/108/EC LVD 2006/95/EC Wykorzystane zostały następujące normy zharmonizowane: EN 55022: 2010/AC:2011 / EN 61000-3-2: 2006+A2: 2009 / EN 61000-3-3: 2008 / EN...
  • Seite 59 Kullanım Kılavuzu Monitörler GML-1912M 48 cm (19") LCD/TFT Monitör, LED Arka ışıklı GML-1912M.161.1.21.05.2015 © ASP AG...
  • Seite 61 Içerik: 1. Önemli Güvenlik Talimatları 2. Kurulum 3. Paket İçeriği 4. Bağlantılarla Arkadan Görünüş 5. Monitör Aç/Kapat 6. Ekran Menüsü kontrolleri 7. OSD (Ekran Üstü Kumanda) Menü Yapılandırmaları 1. PC (VGA/HDMI) & GÖRÜNTÜ (BNC) 2. AUDIO 3. OSD 4. GEOMETRY (VGA/HDMI) & FUNCTION (BNC) 8.
  • Seite 62: Kurulum

    Alkol, mavi ispirto veya amonyak tabanlı temizleme sıvıları kullanmayın. Cam levha, çiziklerin önlenmesi için sert bir yüzey kaplamasına sahiptir. Ancak, güçlü kimyasal temizlik maddelerinin kullanılması bu kaplamaya zarar verebilir. Sadece yumuşak bir sabun veya deterjan ve su veya cam levhaların temizliği için özel olarak formüle edilmiş temizlik maddeleri kullanın.
  • Seite 63: Paket İçeriği

    100-240 V AC, 50/60 Hz, 2.0 A (minimum) duy değerli UL/TUV onaylı bilgisayarlar ile kullanılacaktır. Monitör şartnamesini dikkatli bir şekilde kontrol edin. Bu GRUNDIG monitör 1280 x 1024 çözünürlüğe sahiptir ve hem PAL hem NTSC sinyal modları ile çalışır. Bu GRUNDIG monitör 24/7 güvenlik sağlamak amacı...
  • Seite 64: Monitör Aç/Kapat

    5. Monitör Aç/Kapat LÜTFEN DİKKAT: “Güç” düğmesine bastıktan sonra monitörün hazır olması ve ekranın görülebilmesi yaklaşık 6 saniye alacaktır. Bu, GÜÇ düğmesi üzerindeki farklı LED renkleri tarafından temsil edilen LED monitörünün çeşitli güç durumlarıdır. Mavi: Açıldı Yanıp sönen mavi ışık: Herhangi bir giriş sinyali yok Boşluk: Güç...
  • Seite 65 Kontrast: Bu ekranın parlaklığını ayarlamak için kullanılır. Parametreyi ayarlamak için /\ veya \/’ya basın. Parlaklık: Bu görüntü kontrastını ayarlamak için kullanılır. Parametreyi ayarlamak için /\ veya \/’ya basın. Hue (Ton): Bu görüntü tonunu ayarlamak için kullanılır. Parametreyi ayarlamak için /\ veya \/’ya basın.
  • Seite 66 7.2. AUDIO Bass: Ses çıkışının bas seviyesini artırın ya da azaltın. Parametreyi ayarlamak için /\ veya \/’ya basın. Treble: Ses çıkışının tiz seviyesini artırın ya da azaltın. Parametreyi ayarlamak için /\ veya \/’ya basın. Balans: Ses çıkışının balansını soldan sağa doğru artırın ya da azaltın. Parametreyi ayarlamak için /\ veya \/’ya basın.
  • Seite 67: Osd

    V Durumu: OSD resmini yukarı veya aşağı hareket ettirin. Parametreyi ayarlamak için /\ veya \/’ya basın. Duration: Herhangi bir kullanıcı girişi olmadığı durumda, OSD görüntüsünün ekranda kalacağı süreyi girin. OSD görüntüsü seçilen süre sonunda ekrandan kaybolacaktır. Saydamlık: OSD görüntüsünün saydamlık seviyesini seçin. Varsay Restore: Tüm ayarlar fabrika varsayılan ayarlarına geri döner.
  • Seite 68: Sıkça Sorulan Sorular

    Noise Reduction: Görüntü kalitesini yükseltmek için dijital gürültü bastırma fonksiyonunun şiddetini seçin. DLC: Parametreyi ayarlamak için /\ veya \/’ya basın. 8. Sıkça Sorulan Sorular Güç düğmesi yanıt vermiyor: - Monitör gövdesine ve ayrıca elektrik çıkışına tam olarak takıldığından emin olmak için güç...
  • Seite 69 Özellikler GML-1912M LCD Panel Büyüklüğü 19" Diyagonal AM-TFT LED Arka ışık Pikseller - Toplam 1280(H) x 1024(V) Piksel Aralığı 0.294 mm(H) x 0.294 mm(V) Çözünürlük 1280 x 1024 piksel, 650(H) TV Satırı Boyut Oranı 5 : 4 Video Standardı PAL/NTSC 2 CH Composite BNC, 1 CH VGA, Video Girişleri...
  • Seite 70 Boyutlar Turkish...
  • Seite 71 EC Uyumluluk Beyanı GML-1912M 48 cm (19") LCD/TFT Monitör, LED Arka ışıklı İşbu belge ile ürünlerin aşağıdaki ilgili hükümlerde belirtilen standardlara uygun olduğu onaylanmaktadır: EC EMC Yönergesi 2004/108/EC Alçak Gerilim Yönergesi 2006/95/EC Uygulanan uyumlu standardlar ve teknik özellikler: EN 55022: 2010/AC:2011 / EN 61000-3-2: 2006+A2: 2009 / EN 61000-3-3: 2008 / EN...

Inhaltsverzeichnis