Inhaltsverzeichnis
Werbung
Werbung
Inhaltsverzeichnis

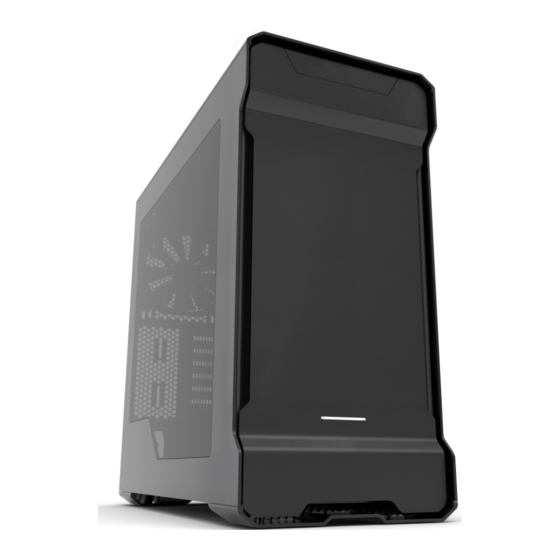
Inhaltszusammenfassung für Phanteks enthoo evolve atx
- Seite 1 USER’S MANUAL AT X...
- Seite 3 Caution Please take a moment to carefully go through the installation guide. Phanteks will not take responsibility for any damages incurred due to incorrect installation and incorrect usage of this product. Thank you.
-
Seite 4: Inhaltsverzeichnis
TABLE OF CONTENTS SPECIFICATIONS ..........................................EXPLODED VIEW ..........................................ACCESSORIES & BRACKETS ......................................I/O PORTS ............................................. CONNECTIONS ........................................... PANEL REMOVAL ..........................................MOTHERBOARD INSTALLATION ....................................POWER SUPPLY INSTALLATION ..................................... FILTERS REMOVAL ..........................................10. FANS COMPATIBILITY ........................................11. RADIATOR BRACKET INSTALLATION ..................................12. HARD DRIVE INSTALLATION ......................................13. -
Seite 5: Specifications
1. SPECIFICATIONS CASE SPECIFICATIONS PH-F140SP (included) Dimension 230 mm x 495 mm x 510 mm (W x H x D) Speed (rpm) 1200 ±250 rpm Max Airflow 9.25 in x 19.5 in x 20.1 in 82.1 CFM Form Factor Full Tower Mid Tower Static Pressure 1.33mm H2O... -
Seite 6: Exploded View
2. EXPLODED VIEW 1. Chassis 2. Top Panel 3. SSD Bracket 4. PH-F140SP 5. Right Side Panel 6. Front Panel 7. HDD Tray 8. Hard Drive Cage 9. Front Mesh cover 10. Window Left Side Panel 11. Mid-plate Bracket 12. Rear Dust Filters 13. - Seite 7 1. Châssis 1. Telaio 1. Chassi 2. Filtres de poussière inférieurs 2. Filtri antipolvere inferiori 2. Painel Superior 3. Support SSD 3. Staffa SSD 3. Suporte do SSD 4. PH-F140SP 4. PH-F140SP 4. PH-F140SP 5. Panneau latéral droit 5. Pannello laterale destro 5.
-
Seite 8: Accessories & Brackets
3. ACCESSORIES & BRACKETS... -
Seite 9: I/O Ports
4. I/O PORTS 1. USB 3.0 1. USB 3.0 1. USB 3.0 1. USB 3.0 2. Microphone 2. Micrófono 2. Microphone 2. Microfoon 3. Headphone 3. Cascos 3. Casque 3. Hoofdtelefoon 4. Reset 4. Resetear 4. Réinitialisation de l’alimentation 4. Power Reset 5. -
Seite 10: Connections
5. CONNECTIONS AUDIO PANEL USB 3.0 Power LED + Reset SW MIC2 L IntA P2_D+ AGND Power LED - IntA P2_D- MIC2 R IntA P1_D+ AVCC IntA P1_D- FRO-R MIC2_JD IntA P2_SSTX+ F_IO_SEN Power SW H.D.D LED IntA P2_SSTX- IntA P1_SSTX+ LINE2_JD FRO-L IntA P1_SSTX-... -
Seite 11: Panel Removal
6. PANEL REMOVAL 1. Pull from the front and fully swing the panel out. 2. Push up to remove from the hinge and remove. 1. Tirez depuis l'avant et faites tourner le panneau complètement pour le sortir. 2. Poussez vers le haut pour le retirer de l'articulation et l'enlever. 1. - Seite 12 6. PANEL REMOVAL For the front panel, place your hands on the area shown and pull outward. Pour le panneau avant, placez vos mains sur la zone affichée, et tirez vers l’ e xtérieur. Positionieren Sie auch bei der Frontblende Ihre Hände an der angezeigten Stelle und ziehen Sie sie dann nach außen.
-
Seite 13: Motherboard Installation
7. MOTHERBOARD INSTALLATION Standoff screws are pre-installed. Install the motherboard with the provided M3 screws. Installez la carte mère avec les vis M3 fournies Les vis du support sont préinstallées. Abstandhalterschrauben sind vorinstalliert. Installieren Sie das Motherboard mit den mitgelieferten M3-Schrauben. Le viti dei distanziatori sono installate precedentemente. -
Seite 14: Power Supply Installation
8. POWER SUPPLY INSTALLATION REAR VIEW (4x) Use the provided screws to secure the PSU in place. Utilisez les vis fournies pour fixer le bloc d’alimentation en place. Befestigen Sie das Netzteil mit den mitgelieferten Schrauben. Utilizzare le viti fornite per fissare la PSU in sito. Use os parafusos para fixar a Unidade de Proteção e de Comutação. -
Seite 15: Filters Removal
9. FILTERS REMOVAL To clean the dust filters, run slow moving water through the filters. Dry filters before reinstalling. Pour nettoyer les filtres à poussière, faites couler de l’ e au sur les filtres. Séchez les filtres avant de réinstaller. Reinigen Sie die Staubfilter, indem Sie sie unter langsam fließendem Wasser abspülen. -
Seite 16: Fans Compatibility
10. FAN COMPATIBILITY FAN COMPATIBILITY TABLE 140mm 120mm Front Rear... -
Seite 17: Radiator Bracket Installation
11. RADIATOR BRACKET INSTALLATION Locate the 5 screws (silver colored screws) and remove. Localize os 5 parafusos (parafusos de cor prata) e remova. Finden Sie die 5 Schrauben (silberfarbene Schrauben) und entfernen Sie sie. Individuare le 5 viti (viti col argento) e rimuoverle. Localize os 5 parafusos (parafusos de cor prata) e remova. - Seite 18 11. RADIATOR BRACKET INSTALLATION *For radiator and fans installation, please check compatibility table. To install, align the bracket and slide in. Use the 4x silver screw to lock in place. BRACKET COMPATIBILITY TABLE Para instalar, alinhe o suporte e deslize. Use os 5x parafusos prateados para travar no lugar. Radiator Fans Richten Sie die Halterung für die Installation aus und schieben Sie sie hinein.
-
Seite 19: Hard Drive Installation
12. HARD DRIVE INSTALLATION 3.5” INSTALLATION 2.5” INSTALLATION Place hard drive into tray and push in the arms to lock. Placez le disque dur dans le logement et poussez les bras pour le verrouiller. Align the SSD onto the mounting holes and screw in. Bringen Sie die Festplatten im Fach an und drücken die Arme zum Verriegeln hinein. - Seite 20 12. HARD DRIVE INSTALLATION Step 1. Remove the HDD cover by removing the m3 Screw Step 2: Align the HDD bracket to the slot and drop in. Step 3: Screw in from the back with thumb screws to lock the bracket in place. Passo 1: Retire a tampa do HDD retirando o parafuso m3 Passo 2: Alinhe o suporte do HDD ao slot e solte-o.
-
Seite 21: Hard Drive Cage
13. HARD DRIVE CAGE HDD BRACKET REMOVAL To remove, unscrew the 4x screws on the midplate and the 4x screws on the bottom of the case. Para remover, solte os 4x parafusos na placa do meio e os 4x parafusos na parte inferior do gabinete. Zur Abnahme lösen Sie die 4 Schrauben an der mittleren Platte und die 4 Schrauben an der Unterseite des Gehäuses. -
Seite 22: Drop-N-Lock Ssd Bracket
14. DROP-N-LOCK SSD BRACKET SSD INSTALLATION Slide in the SSD and screw in from the side to lock in place. Faites coulisser le disque SSD et vissez-le depuis le côté pour le verrouiller dans son emplacement. Schieben Sie die SSD ein und fixieren Sie diese seitlich mit Schrauben. Far scorre l’unità... -
Seite 23: Watercooling Installation
15. WATERCOOLING INSTALLATION WATERCOOLING RADIATOR COMPATIBILITY 120mm, 140mm 240mm, 280mm 360mm *Radiator Bracket required 140mm 120mm 120mm, 140mm 240mm, 280mm 360mm *Midplate bracket needs to be removed... - Seite 24 15. WATERCOOLING INSTALLATION 120 MM FORM FACTOR RADIATORS *Caution: Supported Radiator size and thickness varies depending on your setup. Radiator Size Front Rear *Avertissement : Les tailles de radiateur et les épaisseurs supportées varient en fonction de votre Taille de radiateur Avant Arrière Dessus...
- Seite 25 15. WATERCOOLING INSTALLATION PUMP INSTALLATION Location 2 (Pump bracket required) Location 1 rubber dampers Pump bracket with universal mounting allows for multiple pumps to be installed. Support de pompe avec montage universel permettant d’installer plusieurs pompes. Pumpenhalterung mit Universalmontage ermöglicht die Installation mehrerer Pumpen. La staffa della pompa con collegamento universale permette di installare varie pompe.
-
Seite 26: Pwm Hub Installation
30W in total. Important Note: Please visit our website for multi-language instructions regarding PWM Hub at www.phanteks.com. 1 motherboard connector can only read 1 RPM signal. Therefore, the motherboard will only read the RPM signal from 1 device connected to Fan 1. The RPM form all other devices will be regulated according to FAN 1. - Seite 27 Verbindung mit 4-pol. CPU-Lüfteranschluss (CPU_Fan) Raccordement des 4 broches au CPU_VENTILATEUR Für einen vollen PWM-Funktionsumfang ist es für den PWM-Hub von Phanteks erforderlich, dass der 4-pol. Stecker Pour une fonctionnalité MLI complète, le concentrateur MLI de Phanteks nécessite de raccorder le con- mit dem CPU-Lüfteranschluss (“CPU_Fan”) am Motherboard verbunden wird, denn alle Motherboard-Hersteller...
- Seite 28 Collegamento del connettore a 4 pin al connettore CPU_FAN Para uma total funcionalidade PWM, o cubo PWM da Phanteks requer que os usuários conectem o conector Per la completa funzionalità PWM, l’hub PWM Phanteks richiede il collegamento del connettore a 4 pin de 4-pin ao conector do "CPU_Fan"...
-
Seite 29: Upgrade Options
17. UPGRADE OPTIONS SSD Bracket - PH-SDBKT HDD Bracket - PH-HDDKT HDD Bracket - PH-HDDKT_02 All accessories can be purchased at www.phanteksusa.com... -
Seite 30: Services And Support
18. SERVICES AND SUPPORT If you have any questions or concerns, please visit Phanteks’ website for technical support. We consider customer support, satisfaction and feedback an essential element of our overall marketing effort. Please feel free to contact our support team. Thank you! Contact Us at: www.phanteks.com...