Inhaltsverzeichnis
Werbung
Verfügbare Sprachen
Verfügbare Sprachen
Quicklinks
Werbung
Kapitel
Inhaltsverzeichnis
Fehlerbehebung

Verwandte Anleitungen für Audio Vox VME 9315 BTA


Inhaltszusammenfassung für Audio Vox VME 9315 BTA
- Seite 1 VME 9315 BTA...
-
Seite 2: Inhaltsverzeichnis
Danke, dass Sie sich für ein Produkt von Audiovox entschieden haben. Wir hoffen, Ihnen die Funktion des Geräts mit den in dieser Bedienungsanleitung beschriebenen Anweisungen einfach und verständlich erklären zu können. Bitte nehmen Sie sich einige Minuten Zeit um sich mit der Bedienungs- anleitung zubefassen. -
Seite 3: Vorbereitung
VORBEREITUNG Wir gratulieren Ihnen zu dem Kauf des mobilen Audiovox VME 9315BTA-Multimedia-Receivers. Sie sollten diese Anleitung vollständig lesen, bevor Sie mit der Montage des Geräts beginnen. Wir empfehlen, die Montage des Audiovox VME 9315BTA-Receivers von einem zuverlässigen Fach- händler vornehmen zu lassen. Technische Merkmale •... -
Seite 4: Achtung
ACHTUNG Schließen Sie das Gerät nur an eine Stromquelle mit 12 Volt an und stellen Sie dabei eine ordnungsgemäße Erdung sicher. ACHTUNG Montieren Sie das Gerät nicht an einem Ort, an dem die Sicherheit beim Fahren durch die Bedienung und die Verwendung des Geräts beeinträchtigt werden könnte. -
Seite 5: Montage
MONTAGE 1. Vorbereiten der Montage Drücken Sie auf die Metallklammern auf beiden Seiten, und nehmen Sie das Radio aus dem Einbaugehäuse. 2. Montieren Sie das Einbaugehäuse. a. Montieren Sie gegebenenfalls einen Adapter. b. Montieren Sie das Einbaugehäuse in den Adapter oder das Armaturenbrett. Verwenden Sie dazu nur die mitge- lieferten Schrauben. - Seite 6 Abschließen der Montage Nachdem Sie alle Kabel angeschlossen haben, schalten Sie das Gerät ein, um sicherzustellen, dass es betriebsbereit ist. Beachten Sie dabei, dass die Zündung eingeschaltet sein muss. Kann das Gerät nicht eingeschaltet werden, überprüfen Sie die Verkabelung, bis Sie den Fehler gefunden haben. So- bald das Gerät betriebsbereit ist, schalten Sie die Zündung aus und montieren das Chassis.
- Seite 7 Schaltschema WICHTIG: Eine falsche Verschaltung kann das Radio beschädigen. Folgen Sie dem Schalt- schema genau oder lassen Sie das Radio von einem erfahrenem Fachmann installieren.
-
Seite 8: Bedienelemente Und Anzeigen
BEDIENELEMENTE UND ANZEIGEN Bedienung der Schalter 1. Öffnen/Schließen Drücken Sie diese Taste, um den automatischen Ausfahr-Mechanismus zu aktivieren, und stellen Sie die gewünschte Position des TFT-Monitors ein. Drücken Sie erneut auf diese Taste, um den TFT-Monitor wieder einzufahren. 2. BAND/PIC Bei eingefahrenem Monitor wird durch die Taste der Sendersuchlauf Richtung niedrigerer Frequenzen gestartet. -
Seite 10: Fernbedienung
FERNBEDIENUNG Die Fernbedienung des VME 9315BTA-Receivers dient zum Steuern des Grundgerätes. - Seite 11 Die Fernbedienung des VME 9315 BTA dient zum Steuern des Grundgerätes. Name Ref. TUNER CD/MP3 iPod Hauptmenü der Während des VCD- MENU Disk öffnen Betriebs die PBC- Wiedergabesteueru ng ein-/ausschalten Titelmenü der Disk Die ersten 10 TITLE öffnen Sekunden jedes...
-
Seite 12: Verwenden Des Tft-Monitors
VERWENDEN DES TFT-MONITORS Aus- und Einfahren des TFT-Monitors Ausfahren des TFT-Monitors Drücken Sie auf der Gerätevorderseite auf die Taste OPEN (1) oder auf der Fernbedienung auf die Taste (25), um den Mechanismus zum Ausfahren des Monitors in die Wiedergabeposition zu aktivieren. Einfahren des TFT-Monitors Drücken Sie auf der Gerätevorderseite auf die Taste OPEN (1) oder auf der Fernbedienung auf die Taste (25), um den Mechanismus zum Einfahren... -
Seite 13: Bedienungsanweisung
Handbremsensperre • Wenn das PRK SW-Kabel an den Bremsschalter angeschlossen ist, kann auf dem TFT-Monitor nur dann ein Video anzeigt werden, wenn die Handbremse gezogen wurde. • Diese Funktion wird allerdings deaktiviert, wenn die Videoquelle in den Modus CAMERA geschaltet wird. •... -
Seite 14: Zurücksetzen Des Systems
Zurücksetzen des Systems Um eine Systemstörung zu beheben oder einen nicht zulässigen Bedienvorgang zurückzusetzen, drücken Sie die Taste RESET (12) in der unteren linken Ecke des Geräts mit der Spitze eines Kugelschreibers. Durch das Zurücksetzen des Systems werden die Werkseinstellungen des Geräts wiederherge- stellt. - Seite 15 General Sub Menu Features...
-
Seite 16: Optionen Des Untermenüs Language
Optionen des Untermenüs LANGUAGE Wenn eine DVD mehrere Untertitel- oder Audiosprachen unterstützt, stehen alle verfügbaren Sprachen während der Wiedergabe zur Auswahl. Wird die ausgewählte Sprache nicht von der DVD unterstützt, wird die Standardsprache verwendet. Einstellung Optionen Funktion Language English Bildschirmanzeige erfolgt auf Englisch Deutsch Bildschirmanzeige erfolgt auf Deutsch Francais... -
Seite 17: Optionen Des Untermenüs Hardware
HINWEIS: Notieren Sie das Kennwort, und bewahren Sie es an einem sicheren Ort auf. Die Altersbeschränkung ist auf jeder Disk, der Hülle oder der zugehörigen Dokumentation vermerkt. Ist keine Altersangabe für die Disk verfügbar, wird die Kindersicherungsfunktion für diese Disk nicht unterstützt. Bei einigen Disks sind nur bestimmte Passagen der Disk zugriffsbeschränkt, der allgemeine Inhalt wird jedoch wiedergegeben. -
Seite 18: Bedienung Des Radios
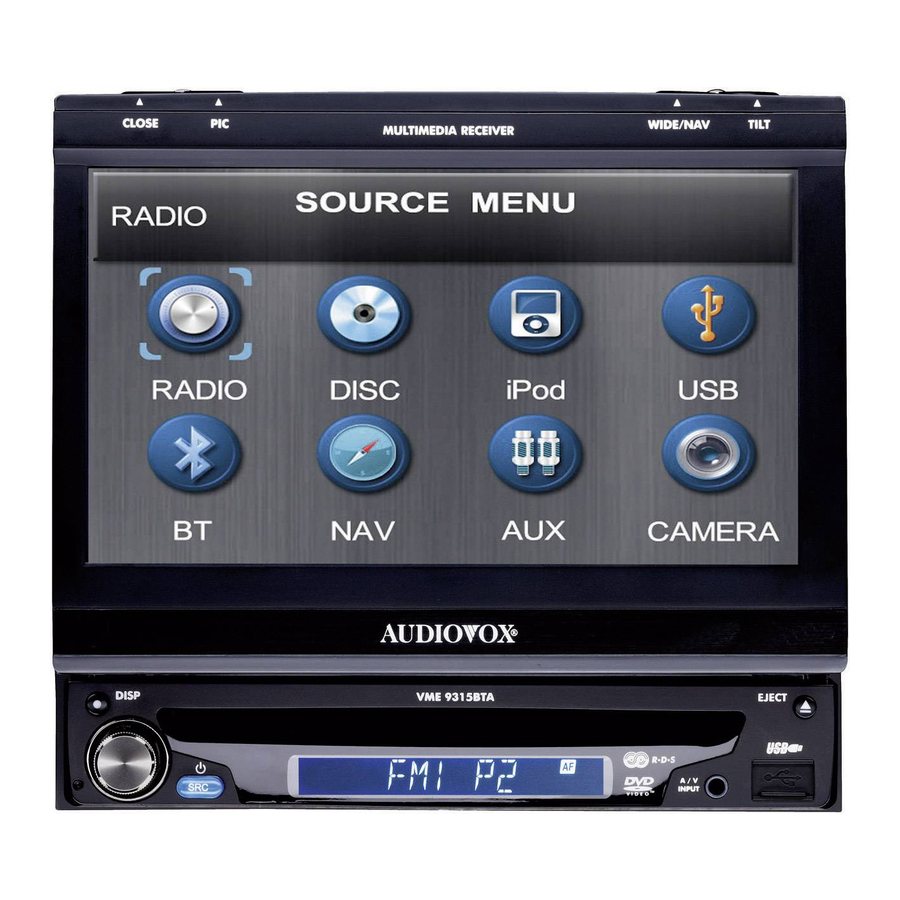
BEDIENUNG DES RADIOS 1. Anzeige des aktuell ausgewählten Radiobands 2. Anzeige der Radiofrequenz / des Sendernamens 3. Uhrzeit 4. Anzeige für Sendebetrieb in Stereo 5. Anzeige für starkes Signal lokal empfangbarer Sender 6. Gespeicherte Radiosender: Touchpunkt zum Aufrufen gespeicherter Sender 7. - Seite 19 Umstellen auf Radioquelle • Berühren Sie die obere linke Ecke des Bildschirms (den RADIO-Kreis), um das SOURCE MENU anzuzeigen. Berühren Sie RADIO. • Drücken Sie auf der Gerätevorderseite die Taste SRC (10) oder die entsprechende Taste auf der Fernbedienung (8), um auf die Quelle AM/FM (UKW/MW) oder RADIO umzuschalten.
-
Seite 20: Dvd/Vcd Video-Betrieb
Manuelles Speichern eines Senders 1. Stellen Sie den gewünschten Sender (Frequenz) manuell ein. 2. Drücken Sie die Taste MEM auf dem Bildschirm, und wählen Sie die gewünschte Festsendertaste (P1 – P6). 3. Der Sender wird unter der gewählten Nummer gespeichert. 4. - Seite 21 Zugreifen auf den DVD-Modus Um den DVD-Modus zu aktivieren, wenn bereits eine Disk eingelegt wurde, drücken Sie auf der Gerätevorderseite auf die Taste SRC (10) oder auf die entsprechende Taste der Fernbedienung (8), bis am unteren Rand des Monitors DISC angezeigt wird. Steuern der Wiedergabe Berühren Sie den Touchscreen, um auf die Steuerungen zuzugreifen.
-
Seite 22: Wechseln Zwischen Kapiteln
Öffnen des DVD-Menüs Drücken Sie auf der Fernbedienung auf die Taste MENU (1), um das DVD-Hauptmenü aufzurufen. Verwenden Sie die Tasten >>, <<, >>|, |<< um einen Titel aus dem Menü auszuwählen, oder berühren Sie den Titel auf dem Bildschirm. Drücken Sie auf der Fernbedienung auf die Taste TITLE (2), oder berühren Sie den Titel auf dem Bildschirm, um einen anderen Titel für die Wiedergabe auszuwählen. - Seite 23 Verwenden Sie die Taste , um Titel oder Kapitel auszuwählen oder die Zeit einzugeben. • Title (Titel): _/# • Chapter (Kapitel): _ _/## • Time (Zeit): _ _:_ _:_ _ Geben Sie den gewünschten Titel, das Kapitel/den Track oder die Zeit über den Zahlenblock auf dem Bildschirm ein, und drücken Sie ENTER. Um den Bildschirm ohne Treffen einer Auswahl zu verlassen, berühren Sie EXIT.
-
Seite 25: Dvd/Cd Video/Audio-Betrieb
DVD/CD AUDIO-BETRIEB Die Anweisungen für die Steuerung des TFT-Monitors und zum Einlegen/Auswerfen von Medien sind für DVDs und CDs gleich. Informationen zu diesen Themen finden Sie im Abschnitt zum DVD/Video-CD-Betrieb. Der VME 9315BTA-Receiver kann Musik oder Audio-Dateien von folgenden Diskmedien wiedergeben: •... -
Seite 26: Steuern Der Wiedergabe
Steuern der Wiedergabe Stoppen der Wiedergabe Berühren Sie auf dem Bildschirm die Taste , oder drücken Sie auf der Fernbedienung auf die Taste (20), um die Disk-Wiedergabe zu stoppen. Um die Wiedergabe fortzusetzen, berühren Sie die Taste auf dem Bildschirm. Anhalten der Wiedergabe Berühren Sie die Taste auf dem Bildschirm, um die Disk-Wiedergabe anzuhalten oder fortzusetzen. - Seite 27 Kompatibilität mit dem MP3-Format Die nachfolgend aufgeführten Dateinamenformate sind mit diesem Gerät kompatibel: • ISO 9660 – Dateiname: 12 Zeichen, Dateierweiterung: 3 Zeichen • ISO 9660 – Dateiname: 31 Zeichen, Dateierweiterung: 3 Zeichen • Joliet – 64 Zeichen Entspricht der Name des Ordners oder der Datei nicht dem ISO 9660-Dateisystemstandard, ist eine korrekte Anzeige oder Wiedergabe unter Umstän- den nicht möglich.
-
Seite 28: Mp3 , Divx Und Usb-Benutzeroberfläche
MP3 , DivX und USB-Benutzeroberfläche Im Folgenden sind die Bildschirmanzeigen und die Touchpunkte für die MP3-Wiedergabe aufgeführt Aktueller Track und Gesamtanzahl der Tracks im Stammordner der Disk Verstrichene Wiedergabezeit/Länge des Tracks Aktuelle Uhrzeit Tracktitel ID3-Informationen >/II : Touchpunkt zum Starten/Anhalten der Disk-Wiedergabe Touchpunkt zum Wechsel zwischen Seite 1 und 2 des Eingabefeldes >>|: Touchpunkt zum Wechseln zum nächsten Track |<<: Touchpunkt zum Wechseln zum vorherigen Track... -
Seite 29: Bedienungs Des Ipods
Bedienung des iPods Zugang zum iPod Menü HINWEIS: Vergewissern Sie sich, dass die neueste Firmware auf Ihrem Apple iPod installiert ist zur Optimierung der Verbindung Dieses Gerät ist geeignet zum Anschluss eines iPods. Sie können Ihren iPod über den Bildschirm steuern, um auf Wiedergabelisten, Interpreten, Al- bums, Lieder etc. - Seite 30 Steuern des iPod Drücken Sie den Touchpunkt MENU oder die folgenden Tasten der Fernbedienung, um zum iPod Hauptmenü zu gelangen. Menu Remote Control Music AUDIO Photos SUBTITLE Videos ANGLE Benutzen Sie den Touchscreen oder die Pfeiltasten auf der Fernbedienung zur Steuerung des iPod Menüs. Hinweis: Bei Fotowiedergabe erfolgt die Steuerung über den iPod / das iPhone selbst.
-
Seite 31: Informationen Zu Divx
Zifferneingabe zu verlassen. Zum Löschen der Eingabe drücke CLEAR. HINWEIS: Um das Video vom iPod auf den Bildschirm des VME 9315 BTA zu übertragen, müssen über das iPod-Menü für Videoeinstellungen folgende Optionen ausgewählt werden: TV Out = Ein, TV Signal = PAL, Widescreen = Ein. -
Seite 32: Fehlerbehebung
FEHLERBEHEBUNG Problem Ursache Lösung ALLGEMEINES Das Gerät lässt sich nicht einschalten Die Sicherung für das Radio ist durchgebrannt Setzen Sie eine neue Sicherung des richtigen Typs und mit der richtigen Amperezahl ein Die Sicherung für die Autobatterie ist Setzen Sie eine neue Sicherung des richtigen durchgebrannt Typs und mit der richtigen Amperezahl ein Unzulässiger Bedienvorgang... - Seite 33 RADIO Schwache Empfangssignale bei Die Autoantenne ist nicht vollständig Überprüfen Sie den Antennenanschluss der Sendersuche ausgefahren Die Autoantenne ist nicht korrekt Überprüfen Sie den Antennenanschluss angeschlossen Die Funktion LOCAL ist aktiviert Deaktivieren Sie die Funktion LOCAL Die Disk wird nicht wiedergegeben Die Disk ist verbogen oder verkratzt Verwenden Sie eine Disk in einwandfreiem Zustand...
-
Seite 34: Pflege Und Wartung
Pflege und Wartung Verwenden Sie zur Reinigung der Gerätevorderseite oder des Monitors ein sauberes Tuch und ein neutrales Reinigungsmittel. Ein raues Tuch und ein nicht neutrales Reinigungsmittel (zum Beispiel Alkohol) können die Konsole oder den Monitor verkratzen oder die Farbe lösen. Sprühen Sie keine flüssigen Reinigungsmittel oder Wasser auf das Gerät. - Seite 35 VME 9315BTA...
- Seite 36 Thank you for choosing a Audiovox product. We hope you will find the instructions in this owner’s manual clear and easy to follow. If you take a few minutes to look through it, you’ll learn how to use all the features of your new Audiovox VME 9315 BTA Mobile Multimedia Receiver for maximum enjoyment.
-
Seite 37: Preparation
PREPARATION Congratulations on your purchase of the Audiovox VME 9315BTA Mobile Multimedia Receiver. It’s a good idea to read all of the instructions before beginning the installation. We recommend having your Audiovox VME 9315BTA installed by a reputable installation shop. Features •... -
Seite 38: Optional Equipment
Optional Equipment • NAV101/NAV102 The VME 9315BTA is "navigation ready." Before accessing any navigation features, you must purchase and install the NAV module. All installation and operating instructions will be included with the NAV navigation module. Once the NAV is connected and operating properly, the NAV source mode will become active. -
Seite 39: Installation
INSTALLATION Pre-installation 1. Press the metal levers on both sides to remove the halfsleeve from the radio. 2. Install the half-sleeve. a. Install adapter if necessary (optional). b. Install half-sleeve into adapter or dashboard (use only the supplied screws). Do not force the sleeve into the opening or cause it to bend or bow. c. - Seite 40 NOTE: For proper operation of the CD/DVD player, the chassis must be mounted within 20° of horizontal. Make sure the unit is mounted within this limita- tion. 4. Attach one end of the perforated support strap (supplied) to the screw stud on the rear of the chassis using the hex nut provided. Fasten the other end of the perforated strap to a secure part of the dashboard either above or below the radio using the screw and hex nut provided.
-
Seite 42: Controls And Indicators
CONTROLS AND INDICATORS Button Operation 1. OPEN/CLOSE Press to activate the automatic mechanical system and move the TFT monitor into viewing position. Press again to close the TFT. 2. BAND/PIC When the monitor is retracted you can switch between FM 1/2/3 and AM1/2 by pressing the BAND button. When the monitor is extended the brightness and contrast settings can be adjusted by pressing the PIC button 3. -
Seite 44: Remote Control
REMOTE CONTROL... - Seite 45 Remote Control Functions Name Ref. TUNER CD/MP3 iPod Open Route Menu Turns on/off PBC MENU Disc when playing VCD Open Title Menu Plays first ten TITLE Disc seconds of each chapter / title Mute audio signal Mute audio signal Mute audio signal Mute audio signal Mute audio signal Mute audio signal...
-
Seite 46: Using The Tft Monitor
USING THE TFT MONITOR Open/Close TFT Monitor Open TFT Monitor Press the OPEN button (1) on the front panel or press the ( ) button (25) on the remote control to activate the mechanism that moves the display panel into the viewing position. Close TFT Monitor Press the OPEN button (1) on the front panel or press the ( ) button (25) on the remote control to load the display panel back into the compart-... -
Seite 47: Operating Instructions
Parking Brake Inhibit • When the “PRK SW” cable is connected to the brake switch, the display on the TFT monitor will display video only when the vehicle is applied. • Parking brake function is overridden when the video source is set to CAMERA. •... -
Seite 48: Setup Menu
System Reset To correct a system halt or other illegal operation, use the tip of a pen to press the reset button (12) located on the front bottom-right corner of the unit. After a system reset, the unit restores all factory default settings. NOTE: If the unit is reset while a DVD is playing, the DVD resumes play once the reset is complete. - Seite 50 Language Sub-menu Features If a DVD supports more than 1 Subtitle or Audio language, all the languages are available for selection during playback. If the selected language is not supported by the DVD, then the default language is used. Setting Options Function Language...
- Seite 51 To reset the password, access the “RATING” menu and enter the current password. Once the correct password is entered, you can access the “Password” field and enter a new one. NOTE: Record the password and keep it in a safe place for future reference. The rating for each disc is marked on the disc, disc packing, or documentation.
-
Seite 52: Tuner Operation
TUNER OPERATION Tuner TFT Display 1. Current radio band indicator 2. Radio frequency indicator 3. Clock 4. Stereo broadcasting indicator 5. Strong Local signal broadcasting indicator 6. Preset radio stations: Touch to recall preset stations 7. RDS Information: PS (Program Service), PTY (Program Type), RT (Radio Text) 8. - Seite 53 Switch to Radio Tuner source • Touch the top left corner of the screen (the RADIO circle) to view the SOURCE MENU. Touch “Radio”. • Press the SRC button (10) on the front panel or remote control (8) to switch to the AM/FM or RADIO source. Select FM/AM Band Touch the BAND button (15) on the screen, or press the BAND button on the unit (2) or remote control (30) to change between the following bands: FM1, FM2, FM3, AM1, and AM2...
- Seite 54 Recalling and Storing broadcaster using the presets and the Automatic Storing ( AS) Function: Recalling a Station 1. Select a band (if needed) 2. Touch an on-screen button (P1- P6) to select the corresponding stored station. Manual Storing of a Station 1.
-
Seite 55: Dvd/Vcd Video Operation
DVD/VCD VIDEO OPERATION NOTE: When properly installed, DVD video cannot be displayed on the main TFT screen unless the parking brake is applied. If you attempt to play a DVD while the vehicle is moving, the TFT screen displays “PARKING” with a blue background. Rear video screens, if applicable, will operate nor- mally. - Seite 56 Stopping Playback Touch the stop button ( ) on the screen or press the / BAND button (20) on the remote control to stop DVD play. Pausing Playback Touch the button ( /||) on the screen (or press the /||| button on the remote control) to suspend disc playback. Press the /|| button on the screen to resume disc playback.
- Seite 57 Accessing the DVD Menu Press the MENU button (1) on the remote control to recall the main DVD menu. Press the TITLE button (2) on the remote control or on screen to select a different title for playback. Press the >/|| button (18) on the remote control to confirm your selection and begin playback. You can also select a title using the touch screen. Moving Through Chapters Press the >>| button (19) on the remote control or the >>| button on screen to advance to the next chapter on the DVD.
- Seite 58 Touch Screen Direct Entry To select a chapter/track directly, touch the button on screen control to display the direct entry menu. • Title (Titel): _/# • Chapter (Kapitel): _ _/## • Time (Zeit): _ _:_ _:_ _ Enter the desired chapter/track using the on-screen number pad. Press the enter button (arrow) to tune to the selected station. To exit the screen without changing the station, touch Exit.
- Seite 59 Regional Coding:Both the DVD-Player and discs are coded by region. These region codes must match in order for the disc to play. If the codes do not match, the disc won’t play. This unit’s code is 2. DVD’s with other region codes cannot be played in this unit.
-
Seite 60: Dvd/Cd Audio Operation
DVD/CD AUDIO OPERATION Instructions for TFT control and Insert/Eject are the same for DVD and CD operation. Please see the DVD/Disc Video Operation section for informa- tion about these topics. The VME 9315BTA will play music or other audio files from the following disc media: •... - Seite 61 Controlling Playback Stopping Playback Touch the button on screen or press the /BAND button (20) on the remote control to stop disc play. To resume playback, touch the button on screen or press the >/|| button on the remote control (18). Pausing Playback Touch the button on screen to suspend or resume disc playback.
-
Seite 62: Mp3/Usb/Wma/Operation
MP3/USB/WMA-Operation Instructions for TFT control and Insert/Eject are the same for DVD and MP3 operation. Please see the DVD/Disc Video Operation section for infor- mation about these topics. MP3/WMA Media and File Requirements This player allows you to play back MP3 and WMA files recorded onto CD-R/RWs, DVD+R/RWs, and DVD-R/RWs. For CD-RW discs, please make sure it is formatted using the full method and not the quick method to prevent illegal disc operation. -
Seite 63: Bluetooth Operation
MP3 User Interface The on-screen indicators and touch key areas for MP3 playback are outlined below 1. Current track and total number of tracks on root of disc 2. Elapsed playing time, track length 3. Current time 4. Track titles 5. - Seite 64 iPod operation NOTE: Be sure your iPod has the latest Apple firmware installed to avoid connectivity issues. Accessing iPod Mode This unit is Made for iPod. You can control your iPod via touch screen to access Playlist, Artist, Album, Songs, etc. Supported models include, but are not limited to, the following: •...
-
Seite 65: Ipod
Controlling your iPod Touch the MENU button or press the following remote control buttons to access the main iPod menu. Menu Remote Control Music AUDIO Photos SUBTITLE Videos ANGLE Use the touchscreen or the directional keys on the remote control to navigate the iPod menus. Note: Use the controls of the iPod to select and to see photos. -
Seite 66: Information Divx
Search Playlist/Artist/Album/Song To search through Playlists, Artists, Albums and Songs, press the MENU button (1) on the remote control while in one of the following directories: Playlist, Artist, Album or Song. The selected directory will be accessed with the number of pages and files in that directory displayed at the top of the page. -
Seite 67: Troubleshooting
TROUBLESHOOTING Problem Cause Corrective Action GENERAL Unit will not power on Radio Fuse blown Install new fuse with correct rating Car battery fuse blown Install new fuse with correct rating Illegal operation Press the RESET button located in the bottom right corner of the front panel Remote control does not function Battery depleted Replace battery with new one... - Seite 68 Image blurred, distorted, or dark Disc is illegally copied Use original disc PCB cannot be used during VCD playback PCB is not available on the disc No repeat or searching while playing VCD PCB is on Turn PCB off Interruption occurred during playback Disc is dirty or scratched Clean disc or replace...
-
Seite 69: Care And Maintenance
Care and Maintenance 1. Use only a clean silicone cloth and neutral detergent to clean the front panel or monitor. A rough cloth and nonneutral detergent (such as alcohol) may result in scratching or discoloration. 2. Do not get water or cleaning fluids on the unit. 3. -
Seite 70: Specifications
SPECIFICATIONS DVD/CD Player Compatible Disc Media: DVD + / - R / RW (Single and Dual Layer) and CD-R / RW Compatible Media Formats: CD-DA, MP3, WMA, VCD, SVCD, AVI, MPEG1 / 2, XviD, DivX® and Kodak picture CD (JPEG). Signal to Noise Ratio: >95dBA Dynamic Range:... - Seite 71 VME 9315 BTA...
- Seite 72 Merci d’avoir opté pour un produit Audiovox. Nous espérons que les instructions de ce manuel seront claires et simples à suivre. Il suffit de quelques minutes pour apprendre comment utiliser toutes les fonctions de notre nouveau récepteur multimédia mobile Audiovox VME 9315TS et en apprécier toutes les options.
-
Seite 73: Préparation
PRÉPARATION Félicitations pour l’achat du récepteur multimédia mobile Audiovox VME 9315 BTA. Il n’est pas inutile de lire toutes les instructions avant de commencer l’installation. Nous recommandons que l’installation de l’Audiovox VME 9315 BTA soit effectuée par un installateur de bonne réputation. -
Seite 74: Équipement En Option
REMARQUE : si le VME 9315 BTA doit être installé dans une voiture équipée d’un ordinateur de bord ou de navigation, ne pas débrancher le câble de la batterie. Si le câble était débranché, tout ce qui se trouve sur la mémoire de l’ordinateur pourrait être perdu. Dans ces conditions, faire preuve de prudence durant l’installation pour éviter un court-circuit. -
Seite 75: Installation
INSTALLATION Avant l’installation 1. Presser sur les leviers de métal latéraux pour retirer le manchon de la radio. 2. Installer le manchon. a. Installer un adaptateur si nécessaire (en option). b. Installer le manchon dans l’adaptateur ou le tableau de bord (utiliser les vis fournies uniquement). Ne pas forcer sur le manchon pour l’introduire dans l’ouverture, sous peine de le déformer. - Seite 76 REMARQUE : Pour un fonctionnement correct du lecteur CD/DVD, le boîtier doit être monté selon un angle maximum de 20º par rapport à l’horizontale. S’assurer que le boîtier est monté dans cette limite. 4. Fixer une des bandes de support perforées (fournies) au goujon prisonnier à l’arrière du boîtier à l’aide de l’écrou fourni. Fixer l’autre extrémité de la bande perforée à...
-
Seite 78: Commandes Et Témoins
COMMANDES ET TÉMOINS Fonctionnement des boutons 1. OPEN/CLOSE Appuyer pour activer le mécanisme automatique et mettre le moniteur TFT en position. Appuyer de nouveau pour fermer le TFT. 2. BAND/PIC Lorsque le moniteur est rétracté, il est possible de basculer entre FM 1/2/3 et AM 1/2 en appuyant sur le bouton BAND. Lorsque le moniteur est déployé, les réglages de contraste et de brillance sont effectués en appuyant sur le bouton PIC. -
Seite 80: Télécommande
TÉLÉCOMMANDE REMARQUE : la télécommande peut différer légèrement de celle illustrée ici. Le schéma ci-dessus n’est donné qu’à titre indicatif. - Seite 81 Name Ref. TUNER CD/MP3 iPod MENU Entre dans le menu Eteint le PBC principal du disque lorsque vous jouez un VCD TITLE Entre dans le menu Joue les dix titire du premières secondes disque de chaque chapitre/ titre MUTE Bascule la sortie Bascule la sortie Bascule lasortie Bascule la sortie...
-
Seite 82: Utilisation Du Moniteur Tft
UTILISATION DU MONITEUR TFT Ouvrir/Fermer le moniteur TFT Ouvrir le moniteur TFT Appuyer sur le bouton OPEN (1) sur la façade ou appuyer sur la touche ( ) (25) de la télécommande pour activer le mécanisme qui déplace l’écran en position d’utilisation. Fermer le moniteur TFT Appuyer sur le bouton OPEN (1) sur la façade ou appuyer sur la touche ( ) (25) de la télécommande pour rétracter l’écran dans son logement. -
Seite 83: Instructions D'utilisation
Procédure de réglage des paramètres 1. Entrer en mode de paramétrage de qualité d’image : appuyer sur la touche PIC (24) de la télécommande ou sur le bouton BAND/PC (4) du moniteur. 2. Sélectionner l’élément à régler : Appuyer sur le bouton PIC (24) du panneau de commande pour sélectionner « BRIGHT » (brillance) ou « CONTRAST » (contraste). 3. -
Seite 84: Réinitialisation Du Système
Volume de mise en marche programmable Cette fonction permet à l’utilisateur de sélectionner un paramètre de volume de mise en marche indépendamment du réglage du volume avant l’arrêt. Pour programmer un niveau de volume à la mise en marche, tourner la commande le bouton encodeur rotatif (11) pour régler le volume à... -
Seite 85: Menu De Configuration
MENU DE CONFIGURATION Pour accéder aux paramètres du système, appuyer sur la touche SETUP (configuration) (31) de la télécommande ou sur le bouton de l’écran pour accéder au menu « SETUP ». Le sous-menu « RATING » s’affiche, mis en surbrillance en bleu. Accéder aux articles du menu Appuyer sur le nom d’un sous-menu pour le sélectionner (Language [Langue], Audio, RDS, etc.). -
Seite 86: Remarque : L'indication Am/Pm
Fonctions du sous-menu General Paramètres Options Fonction Clock Mode 12 Hour Affichage horloge 12 heures en mode AM (matin) et PM (après-midi) 24 Hour Affichage horloge 24 heures jusqu'à 23:59 Clock Adjust (HH:MM) L'horloge se trouve dans l'angle supérieur droit de l'écran et sur l'écran LCD au cours de certaines opérations. - Seite 87 Fonction du sous-menu Language (Langue) Si un DVD prend en charge plus d’une langue en mode Audio ou pour les sous-titres, toutes les langues peuvent être sélectionnées pour la lecture. Si la langue sélectionnée n’est pas prise en charge par le DVD, la langue par défaut sera alors utilisée. Paramètres Options Fonction...
- Seite 88 Fonction du sous-menu Rating (classification) Le système DVD comporte une fonction de contrôle parental intégrée pour éviter que des personnes non autorisées puissent voir le contenu du disque. Par défaut, ce système de classification est débloqué. Une fois configuré, le contrôle parental n’est débloqué qu’en saisissant le mot de passe approprié.
-
Seite 89: Utilisation De La Radio
UTILISATION DE LA RADIO Écran TFT radio 1. Indicateur de bande radio actuelle 2. Indicateur de fréquence radio 3. Horloge 4. Indicateur de diffusion stéréo 5. Indicateur de diffusion de signal local puissant 6. Stations de radio préréglées : appuyer pour sélectionner les stations préréglées 7. - Seite 90 Passer en source radio • Appuyer sur l’angle supérieur gauche de l’écran (cercle RADIO) pour afficher le menu SOURCE. Appuyer sur « Radio ». • Appuyer sur le bouton SRC de la façade (10) ou de la télécommande (8) pour passer sur AM/FM ou sur la source RADIO. Sélectionner la bande FM/AM Appuyer sur le bouton BAND de l’écran (15), ou de l’appareil (2) ou de la télécommande (30) pour sélectionner l’une des bandes suivantes : FM1, FM2, FM3, AM1 et AM2...
- Seite 91 Retrouver et mettre en mémoire une station de radio à l’aide des préréglages et de la fonction Automatic Storing (AS – mise en mémoire automatique) : Retrouver une station 1. Sélectionner une bande (le cas échéant). 2. Appuyer sur un bouton à l’écran (P1 à P6) pour sélectionner la station correspondante mise en mémoire. Mise en mémoire manuelle d’une station 1.
-
Seite 92: Utilisation Vidéo Dvd/Vcd
UTILISATION DE LA VIDÉO DVD/VCD REMARQUE : lorsqu’elle est correctement installée, la vidéo DVD ne peut pas être affichée sur l’écran principal TFT à moins que le frein à main ne soit enclenché. Si l’on essaie de regarder un DVD pendant que le véhicule se déplace, l’écran TFT affiche « PARKING » sur un fond bleu. L’écran de vidéo de recul fonctionne normalement (le cas échéant). - Seite 93 Arrêter la lecture Appuyer sur le bouton d’arrêt ( ) sur l’écran ou sur la touche / BAND (20) de la télécommande pour arrêter la lecture du DVD. Mettre la lecture en pause Appuyer sur le bouton de pause (>/||) à l’écran (ou sur la touche >/|| de la télécommande) pour interrompre la lecture du disque. Appuyer sur le bou- ton >/|| de l’écran pour reprendre la lecture du disque.
- Seite 94 Accéder au menu DVD Appuyer sur la touche MENU (1) de la télécommande pour afficher le menu DVD principal. Appuyer sur la touche TITLE (2) de la télécommande ou de l’écran pour sélectionner un titre différent à lire. Appuyer sur la touche >/|| (18) de la télécommande pour confirmer la sélection et commencer la lecture. Il est également possible de sélectionner un titre à...
-
Seite 95: Changer La Langue Des Sous-Titres
Entrée directe par l’écran tactile Pour sélectionner directement une piste/un chapitre, appuyer sur le bouton de l’écran pour afficher le menu d’entrée directe. • Title (Titre) : _/# • Chapter (chapitre) : _ _/## • Time (Heure) : _ _:_ _:_ _ Saisir le chapitre ou la piste souhaités à... -
Seite 96: Informations De Lecture
REMARQUE : au cours de la lecture d’un VCD, appuyer sur la touche AUDIO (5) de la télécommande pour choisir entre Left Channel (canal gau- che), Right Channel (canal droit) et Stereo. PBC (Commande de lecture interactive – VCD seulement) Pour les VCD avec fonction de lecture interactive, la commande PBC offre d’autres possibilités. - Seite 97 Symbole Signification Code régional : le lecteur DVD et les disques sont codés par région. Ces codes régionaux doivent con- corder pour que le disque puisse être lu. Si les codes ne correspondent pas, la lecture du disque est impos- sible.
-
Seite 98: Utilisation Audio Dvd/Cd
Les instructions de commande TFT et d’insertion/éjection sont les mêmes pour l’utilisation des DVD et des CD. Voir le chapitre sur l’utilisation de DVD/disques vidéo pour plus d’information à ce sujet. Le VME 9315 BTA peut lire la musique ou d’autres fichiers audio sur les supports suivants : •... - Seite 99 Commandes de lecture Arrêter la lecture Appuyer sur le bouton à l’écran ou sur la touche /BAND (20) de la télécommande pour arrêter la lecture du disque. Pour reprendre la lecture, appuyer sur le bouton à l’écran ou sur la touche >/|| (18) de la télécommande. Mettre la lecture en pause Appuyer sur le bouton pour interrompre puis reprendre la lecture du disque.
-
Seite 100: Utilisation Mp3/Usb/Wma
Le lecteur VME 9315 BTA 3 ne reconnaît que trois niveaux de dossiers et n’affiche pas les dossiers ne contenant que d’autres dossiers. Dans l’exemple ci-dessus, l’appareil affichera les dossiers 3, 4, 6 et 8 mais pas les dossiers 2 et 7 car ils ne contiennent aucune piste directement acces-... -
Seite 101: Commandes De Lecture
Interface utilisateur MP3 Les témoins de l’écran et les zones tactiles de lecture MP3 sont indiqués ci-desso 1. Piste en cours de lecture et nombre de pistes du disque 2. Durée de lecture écoulée, durée de la piste 3. Durée de lecture de la piste en cours 4. - Seite 102 UTILISATION DE LʼiPOD REMARQUE : Sʼassurer que le tout dernier micrologiciel Apple est installé sur lʼiPod pour éviter des problèmes de connectivité. Accès au mode iPod Cette unité est faite pour lʼiPod. Vous pouvez contrôler votre iPod à lʼaide de lʼécran tactile pour accéder aux listes de lecture, artistes, albums, morceaux, etc.
- Seite 103 Clear REMARQUE : pour transmettre la vidéo de votre iPod vers lʼécran du VME 9315 BTA vous devez configurer les options suivantes depuis le menu des paramètres vidéo iPod : TV Out = On, TV Signal = NTSC et Widescreen = On.
- Seite 104 Informations sur Divx Cet appareil est certifié conformément à DivX Home Theater Version 3.0. DivX® est un format de vidéo numérique, qui a été développé par DivX, Inc. et offre une expérience visuelle de grande qualité sur différentes pla- tes-formes, telles que les téléphones portables et les lecteurs de DVD. DivX®, DivX Certified ® et les logos correspondants sont des marques déposées de la société...
-
Seite 105: Dépannage
DÉPANNAGE Problème Cause Mesure corrective PROBLÈMES D’ORDRE GÉNÉRAL L’appareil ne s’allume pas Fusible de radio brûlé Installer un nouveau fusible du calibre approprié Fusible de batterie du véhicule brûlé Installer un nouveau fusible du calibre approprié Opération illégale Appuyer sur le bouton RESET dans l’angle inférieur droit de la façade La télécommande ne fonctionne pas Batterie déchargée Remplacer la batterie... - Seite 106 compatible avec l’appareil approprié Le disque est inséré à l’envers Insérer le disque avec l’étiquette sur le dessus Image floue, déformée ou foncée Le disque a été copié sans autorisation légale Utiliser un disque original La fonction PBC ne peut pas être La fonction PBC n’est pas disponible sur le utilisée au cours de la lecture de disque...
-
Seite 107: Entretien Et Maintenance
Entretien et maintenance 1. Utiliser seulement un tissu siliconé propre et un détergent neutre pour nettoyer la façade ou le moniteur. Un tissu rugueux et un détergent non neutre (comme l’alcool) peuvent les rayer ou les décolorer. 2. Ne pas utiliser d’eau ni de liquides de nettoyage sur l’appareil. 3. -
Seite 108: Caractéristiques Techniques
CARACTÉRISTIQUES TECHNIQUES Lecteur DVD/CD Disques compatibles : DVD + / - R/RW (à couche simple et double) et CD-R/RW Formats de médias compatibles : CD-DA, MP3, WMA, VCD, SVCD, AVI, MPEG1/2, XviD, DivX® et CD de photos Kodak (JPEG). Rapport signal/bruit : >95 dBA Gamme dynamique : >95 dB... - Seite 109 Wir gratulieren Ihnen! Durch Ihre kluge Wahl sind Sie Besitzer eines Audiovox Mobile Video-Produktes geworden. Audiovox Mo- bile Video-Produkte erfreuen sich aufgrund der hohen Qualität eines ausgezeichneten Rufes weltweit. Dieser hohe Qualitätsstandard ermög- licht es für Audiovox Mobile Video-Produkte 2 Jahre Garantie zu gewähren. Die Produkte werden während des gesamten Fertigungsvorganges laufend kontrolliert und geprüft.
-
Seite 110: Garantiekarte
ARANTIEKARTE ARRANTY Typ/ Type Serien-Nr./Serial-No. Name und Anschrift des Händlers /Stempel Name and address of the dealer/stamp Käufer/Customer Name/Name Straße/Street PLZ, Ort /City Land /Country Kaufdatum / buying date Nur gültig in Verbindung mit Ihrer Kaufquittung! No warranty without receipt! - Seite 111 Audiovox Audio Produkte GmbH Lise-Meitner-Str. 9 · 50259 Pulheim Tel.: +49 2234/807-0 · Fax: + 49 2234/807-399 www.audiovox-germany.de...