
Verwandte Anleitungen für Phonocar VM541

Inhaltszusammenfassung für Phonocar VM541
- Seite 1 PORTABLE SD & USB PLAYER VM541 Manuale Istruzioni Instructions manual Manuel d’instructions Montageanleitung Manual de instrucciones...
- Seite 3 PORTABLE SD & USB PLAYER VM541...
-
Seite 4: Inhaltsverzeichnis
INDICE Note di Installazione . . . . . . . . . . . . . . . . . . . . . . . . . . . . . . . . . . . . . . . . . . . . . . . Precauzione . -
Seite 5: Precauzione
PRECAUZIONI Formati supportati: Video Versioni Dettaglio Velocità di Formato Tipo di File Nome File Supportate Specifiche trasmissione MPEG1(VCD) VCD1 0 VCD1 1 VCD2 0 SVCD MPEG4 Xvid 00 .srt .sri 1 01 .1 02 .1 03 .1 10 .smi .txt Beta1 .1 10-beta2 .ssa .ass DIVX... -
Seite 6: Schema Cablaggi
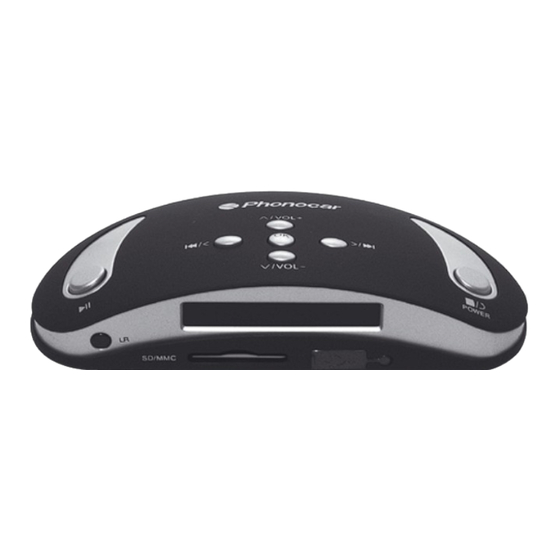
SCHEMA CABLAGGI Connnettere a presa accendisigari Uscita Video (Giallo) Uscita R-ch (Rosso) Uscita L-ch (Bianco) uscita RCA alimentazione DC DISPOSIZIONE PANNELLO DI CONTROLLO Aumento Volume + Traccia precedente/sinistra Invio (OK) Traccia suscessiva/destra Stop/Uscita Abbasso Volume/off Monitor LCD Presa USB Play, Pausa Entrata SD/MMC Trasmissione FM Sensore telecomando... -
Seite 7: Operazioni Base
OPERAZIONI BASE 1.Power ON/OFF Quando si utilizza questo prodotto,posizionare il tasto Power su ON.Nel caso di inu- tilizzo prolungato, mettere il tasto power in OFF. (Nota: Nel caso di problemi particolari spegnere e accendere l’unità). 2.Play, Pausa In modalità riproduzione, premere il tasto Pause per fermare la riproduzione. Mentre in modalità... -
Seite 8: Introduzione Al Diplay Lcd
INTRODUZIONE AL SCHERMO LCD 9.Tasmissione FM ON/OFF Se si necessita del segnale audio FM wireless, mettere il pulsante FM in ON. Se non si necessita di questo segnale, posizionare il bottone su OFF. 10.Schermo LCD * Visualizzazione Tipo di File . Durante la riproduzione di files video viene visualizzata la scritta MP4. - Seite 9 INFORMAZIONI SCHERMO LCD Premendo il tasto pausa, lo schermo visualizza PAUSE. Quando si seleziona l’uscita Audio appariranno sullo schermo: CH STR (canali stereo) oppure CHL (mono sinistra) CHR (mono destra). Quando si preme il tasto Menù, apparirà DIR su display. Premendo il tasto Clock, appare l’orario sullo schermo.
-
Seite 10: Funzioni Del Telecomando
FUNZIONI DEL TELECOMANDO ACCENSIONE ON/OFF FREQUENZA FM FOTO MUSICA FILM OROLOGIO NON DISPONIBILE NON DISPONIBILE AUDIO SILENZIA RIPETIZIONE SETTAGGIO ZOOM MENÚ VOLUME - VOLUME + NON DISPONIBILE SET UP NON DISPONIBILE NON DISPONIBILE MENÚ RIPRODUCI/PAUSA STOP TRACCIA PREC. / SUCC. AVANTI/INDIETRO... - Seite 11 FUNZIONI DEL TELECOMANDO Sostituzione della Batteria Quando l’autonomia della batteria del telecomando si riduce al minimo o è terminata occorre sostituirla con una nuova batteria CR2025. Accertarsi di montare la batteria con le giuste polarità . 1. Tirare fuori il supporto batteria premendo la leva 2.posizionare la batteria rotonda con il polo positivo (+) verso l’alto all’interno del supporto batteria 3.inserire il supporto batteria all’interno del telecomando...
-
Seite 12: Modalità Silenziosa
FUNZIONI DEL TELECOMANDO 1.Accensione ON/OFF Tasto ON/OFF del telecomando: in riproduzione premendo questo tasto si spegne il dispositivo. Quando il dispositivo è spento serve per accenderlo. 2.Tasto FM Premendo quento pulsante una prima volta si seleziona la frequenza FM 88.5. Tenendolo premuto si passa all’altra frequenza FM 107.2Mhz. - Seite 13 FUNZIONI DEL TELECOMANDO 10.Repeat Tasto ripetizione: premere questo tasto per passare a “Ripeti tutti”, al “Menù ripeti”, a “Ripeti una sola traccia” e ad “Annulla ripetizione”. 11.Settaggio Zoom Allarga l’immagine di due, tre, quattro volte e riduce la stessa di due, tre quattro volte.
- Seite 14 FUNZIONI DEL TELECOMANDO 2. Settaggio immagini Effetti: Frequenza: (frequenza nella visualizzazione immagini) Musica: Info JPEG: Modalità riproduzione: 2. Video setup Luminosità: Contrasto: Colore: Saturatione: Nitidezza:...
- Seite 15 FUNZIONI DEL TELECOMANDO 2. Settaggio Orologio Settaggio data Tempo Allarme Nota: in funzione quando il player è acceso . Accensione Spegnimento 17. Selezione Tempo Premere il tasto Goto: premendo questo tasto si programma un periodo di riproduzi- one desiderato, si sceglie il capitolo e il tempo di riproduzione. Premere Enter per riprodurre il periodo .
- Seite 16 FUNZIONI DEL TELECOMANDO 21.Play/Pausa In modalità riproduzione, premere il bottone Pausa per interrompere la riproduzione. Quando è in Pausa, premendo il tasto si riattiva la riproduzione. 22.Stop Se durante la riproduzione si preme questo tasto si blocca la riproduzione . Poi se si preme nuovamente si esce dalla modalità.
-
Seite 17: Installazione Unità
INSTALLAZIONE UNITÁ Esempio di montaggio 1 Connnettere a presa accendisigari Uscita Video (Giallo) Uscita R-ch (Rosso) Uscita L-ch (Bianco) Esempio di montaggio 2 Alimentazione auto: 12V Uscita Video (Giallo) Uscita R-ch (Rosso) Uscita L-ch (Bianco) Esempio di montaggio 3 Connettere all' alimentatore: 110V~220V Uscita Video (Giallo) Uscita R-ch (Rosso) Uscita L-ch (Bianco) -
Seite 18: Specifiche
SPECIFICHE Generali: Requisiti di potenza: DC9.5V---14.4V Dimensioni: 132x65x35 Peso: 0.1KG Sezione Video: Sistema Video: NTSC, PAL Uscita Video: 1.0Vp-p75ohms Risoluzione Orizzontale: 500 TVL Sezione Audio: Uscita Massima: 600Ω (2 channel 2 .0Vrms) Banda di frequenza: 20Hz20 KHz Rapporto segnale rumore: 85dB Separazione stereo: 80dB *Nota:Grazie ai continui miglioramenti del prodotto , alcune caratteristiche tecniche ed estetiche potranno variare. -
Seite 19: Guida Alla Risoluzione Di Problemi
GUIDA ALLA RISOLUZIONE DI PICCOLI PROBLEMI Problema Cause/Soluzioni Non si accende *Verificare se il fusibile è bruciato o no. Se così, cambiarlo con un fusibile uguale *Verificare il voltaggio dell’uscita. Se neces- sario cambiare l’alimentatore. Schermo disturbato o nessun immagine *Spegnere il dispositivo e riaccenderlo dopo 2 secondi Cattiva ricezione FM o disturbata... -
Seite 20: Notes On Istallation
INDEX Notes on istallation . . . . . . . . . . . . . . . . . . . . . . . . . . . . . . . . . . . . . . . . . . . . . . . . Precaution . -
Seite 21: Precaution
PRECAUTION Formats this unit support: Video Support Detailed Trasmitting File Type File Name Versions Specification Rate Format MPEG1(VCD) VCD1 0 VCD1 1 VCD2 0 SVCD MPEG4 Xvid 00 .srt .sri 1 01 .1 02 .1 03 .1 10 .smi .txt Beta1 .1 10-beta2 .ssa .ass DIVX... -
Seite 22: Wiring Diagram
WIRING DIAGRAM Connect to carlighter Uscita Video (Yellow) Uscita R-ch (Red) Uscita L-ch (White) RCA output DC power interface interface Car power interface CONTROL PANEL LAYOUT Volume Increase+/Upward Previous Track/Left Enter (OK) Next Track/Right Stop/Exit Volume Decrease off LCD Display USB Slot Play, Pause SD/MMC Slot... -
Seite 23: Basic Operation
BASIC OPERATION 1.Power ON/OFF When begin to use this unit, turn on the power button. Pls turn off the power if long time not using it . (Note: If any special problem occurs, pls turn off the unit and turning on will be OK). 2.Play, Pause In playing mode, press Button “Pause”... -
Seite 24: Lcd Display Introduction
LCD DISPLAY INTRODUCTION 9.FM transmitting ON/OFF If need the wireless FM transmit audio signal, open the FM Switch to ON. If no need wireless FM transmit the audio signal, close it by turn Off. 10.LCD Display * File type Display When play Video files, the LCD displays as MP4 If play MP3 audio files, LCD shows as MP3 If play pictures, LCD shows PHOTO MP3 is also on... - Seite 25 LCD DISPLAY INTRODUCTION When press pause, PAUSE appears on LCD When choose channel, CH STR or CHL, CHR will appear on LCD When press Menu butoon, DIR appears on LCD When press Clock button, current time will be displayed on LCD 11.USB slot USB2 .0 slot can support U pan and large capacity Hard disk player 12.SD/MMC slot...
-
Seite 26: Remote Control Operation
REMOTE CONTROL OPERATION POWER ON/OFF FM Transmitter Switch Photo MUSIC MOVIE CLOCK NOT AVAILABLE NOT AVAILABLE MUTE REPEAT ZOOM SETTING MENU VOLUME - VOLUME + NOT AVAILABLE SETUP NOT AVAILABLE NOT AVAILABLE MENU PLAY/PAUSE STOP PREVIOUSE/NEXT TRACK F.F/REW... - Seite 27 REMOTE CONTROL OPERATION Replacing the Battery When the operational range of the remote control becomes short or non functions while operating. Replace a new CR2025 battery. Make sure the battery polarity before replacement . 1 .Pull out the Battery Holder while pressing the Stopper . 2 .Put the button type battery (+) mark upward into the Battery Holder .
- Seite 28 REMOTE CONTROL OPERATION 1.Power ON/OPFF Remote control turn on/off: in playing mode, press this button to remote control turn off this unit . It is to turn on when it is closed mode . 2.FM switch Press this button first is current Frequency FM-88 .5 .Continuously press this button or hold it to switch to the other frequency point FM-107 .2MHz 3.Photos Digital Photo Frame button: press this button to enter into Digital Photo...
- Seite 29 REMOTE CONTROL OPERATION 10.Repeat Repeat button: press this button to switch repeat all, Repeat Menu, solo repeat and cancel repeat . 11.Zoom Setting Zoom button: Enlarge twice, treblely, fourfold and reduce twice, treblely, fourfold Press the direction buttons to move pictures and overturn photos 12.Menu Main menu: Press this button at any time to return back to main menu 13.Volume -...
- Seite 30 REMOTE CONTROL OPERATION 2. Picture setup Effect: Frequency: (frequency of displaying pictures) Music: JPEG Info: Play mode: 2. Video setup Brightness: Contrast: Hue: Saturation: Sharpness:...
- Seite 31 REMOTE CONTROL OPERATION 2. Clock setup Date setup Time setup Alarm clock setup Note: it work when the unit is on. Power on Power off 17. Time Select Press Goto button: active period play by pressing this button and choose Chapter,time period .Press button Enter to period play. 18.Number button Number buttons: (1-9) choose tracks by press any number button.
- Seite 32 REMOTE CONTROL OPERATION 21.Play/Pause In playing mode, press Button Pause to pause playing. While in Pause mode, press it to continue playing . 22.Stop Button During playing mode, press button once to stop playing. Then if press this button means exit this functions . Press and hold it for more than 2 seconds to turn off this unit .
-
Seite 33: Unit Installation
UNIT INSTALLATION Mounting Example 1 Connect to carignit Video output (yellow) R-ch output(Red) L-ch output(White) Mounting Example 2 Car power: 12V Uscita Video (yellow) Uscita R-ch (Red) Uscita L-ch (White) Mounting Example 3 Connect to power supply: 110V~220V Video output (yellow) R-ch output(Red) L-ch output(White) Power supplies not included please use 220V~110V➞12V 1A min. -
Seite 34: Specification
SPECIFICATION General: Power Requirements: DC9.5V---14.4V Size: about 132x65x35 Weight: About 0.1KG Video Section: Video system: NTSC, PAL Video output: 1.0Vp-p75ohms Horizontal Resolution: 500 TVL Audio Section: Maximum output: 600Ω (2 channel 2 .0Vrms) Frequency Range: 20Hz20 KHz S/N Ratio: 85dB Separation: 80dB * Note:Due to continuous product improvement,specifications and design will change without notice... -
Seite 35: Simple Troubleshooting Guide
SIMPLE TROUBLESHOOTING GUIDE Problem Cause/Solution No Power * Check if the fuse burnt or not. If so, change a suitable fuse * Check if there is normal voltage output. If need, change the suitable power adaptor LCD display in chaos or no display on screen * Turn off power first, reopen it in 2 seconds FM wireless bad effect or too noisy * Put this unit near the FM receiver, arrange the right FM frequency... -
Seite 36: Remarques Pour L'installation
INDICE Remarque sur installation . . . . . . . . . . . . . . . . . . . . . . . . . . . . . . . . . . . . . . . . . . . Précautions . -
Seite 37: Précautions
PRECAUTIONS Formats supportés: Video Versions Rapidité de Format Nom File Détails Type de File Supportées transmission MPEG1(VCD) VCD1 0 VCD1 1 VCD2 0 SVCD MPEG4 Xvid 00 .srt .sri 1 01 .1 02 .1 03 .1 10 .smi .txt Beta1 .1 10-beta2 .ssa .ass DIVX... -
Seite 38: Schéma Câblages
SCHéMA CâBLAGES Brancher à la prise allume-cigare Sortie Vidéo (Jaune) Sortie L-ch (Blanc) Sortie R-ch (Rouge) sortie RCA alimentation DC PANNEAU DE CONTRôLE Augmente Volume + Trace précédente/gauche Touche entrée (ok) Trace successive/droite Stop/Sortie Baisse Volume/off Ecran LCD Prise USB Play, Pause Entrée SD/MMC Transmission FM... -
Seite 39: Opérations Base
OPéRATIONS BASE 1.Puissance ON/OFF Quand on utilise cet appareil, positionner la touche Power sur ON. En cas d’inu¬tilisation prolongée, mettre la touche power sur OFF. NB : En cas de problèmes particuliers éteindre et rallumer l’appareil. 2.Play, Pause En mode lecture, appuyer sur la touche Pause pour arrêter la lecture, appuyer à nou- veau pour faire repartir la lecture. -
Seite 40: Introduction À L'écran Lcd
INTRODUCTION à L’éCRAN LCD 9.Tansmission FM ON/OFF Si vous cherchez le signal audio FM wireless, mettre la touche FM sur ON. Si vous n’avez pas besoin de ce signal, positionnez la touche sur OFF. 10.Ecran LCD * Visualisation Type de File . Durant la lecture de files vidéo il apparaît le mot MP4. - Seite 41 INTRODUCTION à L’éCRAN LCD Si on appuie sur la touche PAUSE, on pourra lire PAUSE sur l’écran. Quand on sélectionne la sortie Audio on pourra lire sur l’écran: CH STR (canaux stéréo) ou bien CHL (mono gauche) CHR (mono droite). Quand on appuie sur la touche Menu, on pourra lire DIR sur l’écran.
-
Seite 42: Fonctions De La Télécommande
FONCTIONS DE LA TéLéCOMMANDE ALLUMAGE ON/OFF FREQUENCE TRASMETTEUR FM PHOTO MUSIQUE FILM HORLOGE PAS DISPONIBLE PAS DISPONIBLE NO AUDIO REPETITION ZOOM SET-UP MENÚ VOLUME - VOLUME + PAS DISPONIBLE SET UP PAS DISPONIBLE PAS DISPONIBLE MENÚ REPRODUIT/PAUSE STOP PREC./ TRACE SUCC. AVANT/ ARRIERE... - Seite 43 FONCTIONS DE LA TéLéCOMMANDE Remplacement de la batterie Quand l’autonomie de la batterie de la télécommande se réduit au minimum ou est terminée, il faut la remplacer avec une nouvelle batterie CR2025. S’assurer que la batterie soit montée avec la bonne polarité. 1.
- Seite 44 FONCTIONS DE LA TéLéCOMMANDE 1.Allumage ON/OFF Touche ON/OFF de la télécommande: lors de la lecture, si on appuye sur cette tou- che, le dispositif s’éteint. Quand le dispositif est éteint, cette touche sert à allumer l’appareil. 2.Touche FM En appuyant une première fois sur cette touche on sélectionne la fréquence FM 88.5.
-
Seite 45: Menu Principal
FONCTIONS DE LA TéLéCOMMANDE 10.Repeat Touche répétition: appuyer sur cette touche pour passer à “Repeat all”, au “Menu Repeat”, au “Menu Répète une seule trace” et à “Annule répétition”. 11.Réglage Zoom Elargit l’image de 2,3,4 fois et la réduit de 2,3,4 fois. Appuyer sur les touches de di- rection pour faire bouger les images et voir les différents détails. - Seite 46 FONCTIONS DE LA TéLéCOMMANDE 2.réglage images Effets: Effets: Fréquence: (fréquence dans la visualisation images) Musique: Info JPEG: Modalité lecture: 2. Vidéo setup Luminosité: Contraste: Couleur: Saturation: Netteté:...
- Seite 47 FONCTIONS DE LA TéLéCOMMANDE 2. Réglage horloge Réglage date Temps Allarme NB: se met en fonction quand le player est allumé. Allumage Eteindre 17. Sélection Temps Appuyer sur la touche Goto pour programmer une période bien précise de lecture, il faut choisir le chapitre et le temps de lecture .
- Seite 48 FONCTIONS DE LA TéLéCOMMANDE 21.Play/Pause En mode lecture, appuyer sur la touche Pause pour interrompre la lecture, si on ap- puie à nouveau sur cette touche on active à nouveau la lecture. 22.Stop Si lors de la lecture, on appuie sur cette touche, la lecture se bloque, si on appuie à nouveau sur cette touche on sort de la modalité.
-
Seite 49: Installation Produit
INSTALLATION PRODUIT Esempio di montaggio 1 Brancher à la prise allume-cigare Sortie Vidéo (Jaune) Sortie L-ch (Blanc) Sortie R-ch (Rouge) Esempio di montaggio 2 Auto alimentation: 12V Sortie Vidéo (Jaune) Sortie L-ch (Blanc) Sortie R-ch (Rouge) Esempio di montaggio 3 Connexion a l'alimentateur : 110V~220V Sortie Vidéo (Jaune) Sortie L-ch (Blanc) -
Seite 50: Données Techniques
DONNéES TECHNIQUES Réglages génériques Puissance requise : DC9.5V---14.4V Dimensions: 132x65x35 Poids: 0.1KG Section Vidéo: Système Vidéo: NTSC, PAL Sortie Vidéo: 1.0Vp-p75ohms Résolution horizontale: 500 TVL Section Audio: Sortie max. : 600Ω (2 channel 2 .0Vrms) Bande de fréquence: 20Hz20 KHz Rapport signal bruit: 85dB Séparation stéréo: 80dB *NB: Grâce aux continuelles améliorations du produit, certaines caractéristiques... -
Seite 51: Guide Pour Résoudre Certains Problèmes
GUIDE POUR RéSOUDRE CERTAINS PROBLèMES Problema Cause/Soluzioni Ne s’allume pas *Vérifier si le fusible est brûlé ou pas, le changer avec un même fusible *Vérifier le voltage de la sortie. Si néces¬saire changer l’alimentateur. Ecran dérangé ou aucune image n’apparaît *Eteindre le dispositif et le rallumer après 2 secondes . -
Seite 52: Installations-Hinweise
INHALTSVERZEICHNIS Installations-Hinweise . . . . . . . . . . . . . . . . . . . . . . . . . . . . . . . . . . . . . . . . . . . . . . . 52 Vorsichtsmaßnahmen . -
Seite 53: Vorsichtsmaßnahmen
VORSICHTSMAßNAHMEN Mögliche Formate: Video Verträgliche Besondere Übermittlungs- OSD-Format Datei-Art Datei-Name Versionen Daten Geschwindigkeit MPEG1(VCD) VCD1 0 VCD1 1 VCD2 0 SVCD MPEG4 Xvid 00 .srt .sri 1 01 .1 02 .1 03 .1 10 .smi .txt Beta1 .1 10-beta2 .ssa .ass DIVX .sub .psb... -
Seite 54: Anschluss-Schema
ANSCHLUSS-SCHEMA An den Zigaretten-Anzünder anschließen Video-Ausgang (Gelb) Ausgang R-ch (Rot) Ausgang L-ch (Weiss) RCA-Ausgang DC-Stromversorgung BESCHREIBUNG DES BEDIENTEILS Lautstärke erhöhen + Vorherig/links Bestätigung (OK) Darauffolgend/rechts Stop/Ausgang Lautstärke reduzieren/off LCD-Monitor USB-Öffnung Play, Pausa SD/MMC-Öffnung FM-Sender Fernsteuerungs-Sensor ON/OFF Interface für DC-Stromversorgung Interface RCA-Ausgang... -
Seite 55: Hauptfunktionen
HAUPT-FUNKTIONEN 1.Power ON/OFF Bei Verwendung des Produktes, Power-Taste auf ON stellen. Bei längerer Nicht-Ver- wendung, Power-Taste auf OFF stellen. (Hinweis: bei etwaigen Schwierigkeiten, Gerät aus- und wieder einschalten) . 2.Play, Pause Um die Wiedergabe zu stoppen, Pause-Taste drücken. Um die Wiedergabe, nach einer Pause, wieder zu starten, nochmals Pause-Taste drücken. -
Seite 56: Vorstellung Des Lcd-Displays
VORSTELLUNG DES LCD-DISPLAYS 9. ON/OFF für FM-Sendungen Wird das FM-wireless Audio-Signal benötigt, FM-Taste auf ON stellen. Andernfalls, die FM-Taste auf OFF positionieren. 10.LCD-Bildschirm * Ausweisung der Datei-Art. Bei der Wiedergabe von Video-Dateien, erscheint die Aufschrift “MP4”. Bei der Wie- dergabe von Audio-Dateien, erscheint die Aufschrift “MP3”. Werden Fotos besich- tigt, zeigt das Display die Aufschriften “PHOTO”... -
Seite 57: Informationen Zum Lcd-Display
INFORMATIONEN ZUM LCD-DISPLAY Drückt man auf die Pause-Taste, erscheint “PAUSE” auf dem Display. Wird der Audio-Ausgang gewählt, erscheint auf dem Display: CH STR (Stereo- Kanäle) bzw. CHL (Mono links) oder CHR (Mono rechts). Drückt man auf die Menü-taste, erscheint auf dem Display “DIR”. Drückt man auf die Taste “Clock”, erscheint die Uhrzeit auf dem Display. -
Seite 58: Fernsteuerungs-Funktionen
FERNSTEUERUNGS-FUNKTIONEN EIN-AUSSCHALTEN ON/OFF SENDER-FREQUENZ FM FOTOS MUSIK FILME UHRZEIT NICHT VERFÜGBAR NICHT VERFÜGBAR AUDIO-STUMMSCHALT. WIEDERHOLUNG ZOOM-EINSTELLUNG MENÜ LAUTSTÄRKE – LAUTSTÄRKE+ NICHT VERFÜGBAR SET-UP NICHT VERFÜGBAR NICHT VERFÜGBAR MENÜ WIEDERGABE/PAUSE STOP DATEI VORHER / NACHHER VORWÄRTS / RÜCKWÄRTS... -
Seite 59: Batterieaustausch
FERNSTEUERUNGS-FUNKTIONEN Batterie-Austausch Sobald die Fernbedienungs-Batterie Anzeichen gibt, zu schwach oder ganz leer zu sein, muss sie mit einer neuen CR2025-Batterie ersetzt werden. Beim Einsetzten der Batterie, auf die richtige Verpolung achten. 1. Hebel drücken und Batterie-Halter herausziehen. 2.Rund-Batterie auf den Batterie-Halter setzen, mit Plus-Pol (+) nach oben gerichtet. 3 .Batterie-Halter wieder in die Fernbedienung einschieben . -
Seite 60: Stummschaltung
FERNSTEUERUNGS-FUNKTIONEN 1.Accensione ON/OFF ON/OFF-Taste der Fernbedienung: drückt man die Taste während der Wiedergabe, schaltet das Gerät aus. Dieselbe Taste gilt, umgekehrt, auch für das Einschalten. 2.FM-Taste Ein einmaliger Druck auf die Taste wählt die Frequenz FM 88 .5 an . Hält man die Taste gedrückt, kommt die Frequenz FM 107.2 Mhz. - Seite 61 FERNSTEUERUNGS-FUNKTIONEN 10.Repeat Wiederholungs-Taste: drücken, um folgende Wahlen zu treffen: “wiederhole alles”, “wiederhole Menü”, “wiederhole nur ein Stück”, “Wiederholung aufheben” 11. Zoom-Einstellung Bild vergrößern oder verkleinern, um jeweils zwei, drei, oder vier mal. Direktions-Tas- ten verwenden, um Bild zu verschieben und die gewünschten Details zu lokalisieren. 12.Haupt-Menü...
- Seite 62 FERNSTEUERUNGS-FUNKTIONEN 2. Bild-Einstellung Effekte: Frequenz: (Frequenz bei Foto- Besichtigung) Musik: Info JPEG: Wiederholungs- Modalität: 2. Video-Einstellung (Setup) Helligkeit: Kontrast: Farbe: Sättigung: Schärfe:...
- Seite 63 FERNSTEUERUNGS-FUNKTIONEN 2. Uhrzeit einstellen Einstellung Datum Uhrzeit Allarm Hinweis: nur bei eingeschaltetem Gerät Einschalten Ausschalten 17. Wahl des Wiedergabe-Zeitpunkts Taste Goto drücken: ein bestimmter Wiedergabe-Zeitpunkt wird programmiert, mit Wahl des Kapitels und der Uhrzeit . Enter drücken, um Eingaben zu bestätigen. 18.
- Seite 64 FERNSTEUERUNGS-FUNKTIONEN 21.Play/Pause Um die Wiedergabe zu unterbrechen, Pause-Taste drücken. Um die Wiedergabe, nach einer Pause, wieder aufzunehmen, nochmals Pause-Taste drücken. 22.Stopp Um die Wiedergabe zu stoppen, Stopp-Taste drücken. Ein nochmaliger Druck auf die Stopp-Taste bewirkt das Verlassen der Modalität . Hält man die Taste länger als 2 Sekunden gedrückt, schaltet das Gerät aus.
-
Seite 65: Installierung Des Geräts
INSTALLIERUNG DES GERÄTS Montage-Beispiel 1 An den Zigaretten-Anzünder anschließen. Video-Ausgang (Gelb) Ausgang R-ch (Rot) Ausgang L-ch (Weiss) Montage-Beispiel 2 Selbst-Versorgung: 12V Video-Ausgang (Gelb) Ausgang R-ch (Rot) Ausgang L-ch (Weiss) Montage-Beispiel 3 An Netzteil anschließen: 110V-220V Video-Ausgang (Gelb) Ausgang R-ch (Rot) Ausgang L-ch (Weiss) Netzteil NICHT im Lieferumfang enthalten: Netzteil 220V~110V ➞12V mindest. -
Seite 66: Technische Daten
TECHNISCHE DATEN Technische Daten: Leistungsanspruch: DC9.5V---14.4V Abmessungen: 132x65x35 Gewicht: 0.1KG Video-Teil: Video-System: NTSC, PAL Video-Ausgang: 1.0Vp-p 75ohm Auflösung waagerecht: 500 TVL Audio-Teil: Max. Ausgang: 600Ω (2 channel 2 .0Vrms) Frequenz-Band: 20Hz 20 KHz Klirrfaktor: 85dB Stereo-Trennung: 80dB *Hinweis: aufgrund kontinuierlicher Produkt-Verbesserungen, könnten sich die tech- nischen Daten bzw. -
Seite 67: Fehler-Suche
*Video-Formate kontrollieren und feststellen, ob Gerät diesen Formaten entspricht . Die Formate auf Seite 2 nachschlagen . Hinweis: sollten die o.g. Tipps nicht zur gewünschten Lösung führen, bitte Ihren Phonocar- Händler befragen. Gerät niemals öffnen und niemals versuchen, es selbst zu reparieren. -
Seite 68: Instalación
INDICE Instalación . . . . . . . . . . . . . . . . . . . . . . . . . . . . . . . . . . . . . . . . . . . . . . . . . . . . . Precaución . -
Seite 69: Precaución
PRECAUCION Formatos soportados: Video Tipo de Nombre Versiones Especifica- Velocidad de Formado Archivos Archivo Compatibles ciones trasmisión MPEG1(VCD) VCD1 0 VCD1 1 VCD2 0 SVCD MPEG4 Xvid 00 .srt .sri 1 01 .1 02 .1 03 .1 10 .smi .txt Beta1 .1 10-beta2 .ssa .ass DIVX... -
Seite 70: Esquema Cableados
ESQUEMA CABLEADOS Conectar al mechero Salida Video (Amarillo) Salida R-ch (Rojo) Salida L-ch (Blanco) Salida RCA Alimentacion DC DISPOSICIÓN PANEL DE CONTROL Aumento Volumen + Fragmento precedente/izquierda Invio (OK) Fragmento siguiente/derecha Stop/Salida Disminución Volumen/ apagado Monitor LCD Puerto USB Play, Pausa Ranura SD/MMC Transmision FM Sensor IR mando a distancia... -
Seite 71: Operación De Base
INSTALACION 1. Encendido/ Apagado ON/OFF Cuando se utiliza este producto, posicionar la tecla Power en ON. En el caso de no utilizarlo durante bastante tiempo, poner la tecla power en OFF. (Nota: En el caso de verificarse algún problema, apagar y volver a encender la unidad). 2.Play, Pausa En modo reproducción, presionar la tecla Pause para parar la reproducción. -
Seite 72: Introducción Al Display Lcd
INTRODUCION A LA PANTALLA LCD 9. Trasmisión FM ON/OFF Encendido/Apagado Si necesitamos de la señal de audio FM sin cable (wireless), poner la tecla en pos- ición ON. Si no necesitamos esta señal posicionar la tecla en OFF. 10. Pantalla LCD * Visualización Tipo de Archivos Durante la reproducción de archivos de video será... - Seite 73 INFORMACION PANTALLA LCD Presionando la tecla pausa, la pantalla visualiza PAUSE. Cuando se selecciona la salida Audio aparecerán en la pantalla: CH STR (canales estereo) o bien CHL (mono izquierda) CHR (mono derecha). Cuando se presiona la tecla Menú, aparecerá DIR en la pantalla. Presionando la tecla Clock, aparece la hora en la pantalla.
-
Seite 74: Funciones Del Mando A Distancia
FUNCION DEL MANDO A DISTANCIA ENCENDIDO/APAGADO ON/OFF FRECUENCIA EMISOR FM FOTO MUSICA PELICULA RELOJ NO DISPONIBLE NO DISPONIBLE MUTE REPETICION CONFIGURACION ZOOM MENÚ VOLUMEN - VOLUMEN + NO DISPONIBLE SET UP NO DISPONIBLE NO DISPONIBLE MENÚ REPRODUCIR/PAUSA STOP PREC./ CANCION SUCC. ADELANTE/ ATRÁS... - Seite 75 FUNCION DEL MANDO A DISTANCIA Sustitución de la Batería Cuando la autonomía de la batería del mando a distancia se reduce al mínimo o bien está acabada, necesita sustituirla con una nueva batería CR2025. Introducir la batería en su ubicación teniendo cuidado en la polaridad . 1.
- Seite 76 FUNCION DEL MANDO A DISTANCIA 1. Encendido ON/OFF Tecla ON/OFF del mando a distancia: en reproducción presionando esta tecla se apaga el dispositivo. Cuando el dispositivo está apagado sirve para encenderlo. 2. Tecla FM Presionando esta tecla la primera vez se selecciona la frecuencia FM de 88.5. Mhz Teniéndolo presionado se pasa a la siguiente frecuencia seleccionable, FM 107.2Mhz.
- Seite 77 FUNCION DEL MANDO A DISTANCIA 10.Repeat (Repetir) Tecla repetición: presionar esta tecla para pasar a “Repetir todos” al “Menú repe- tir”, a “Repetir una sola canción” y a “Cancela repetición”. 11. Configuración Zoom Ensanchar la imagen dos, tres, cuatro veces y la reduces con la misma proporción Presionar las teclas de dirección para mover las imágenes y visualizar los eventuales detalles .
- Seite 78 FUNCION DEL MANDO A DISTANCIA 2. Configuración imágenes Efectos: Frecuencia: (frecuencia en la visualización de imágenes) Música: Info. JPEG: Modo reproducción: 2. Video setup Brillo: Contraste: Color: Saturación: Nitidez:...
- Seite 79 FUNCION DEL MANDO A DISTANCIA 2. Configuración Reloj Configuración fecha Tiempo Alarma Nota: en función cuando el reproductor esta encendido. Encendido Apagado 17. Selección Tiempo Presionar la tecla Goto: presionando esta tecla se programa el tiempo de reproduc- ción deseado, se elige el capítulo y el tiempo de reproducción. Presionar Enter para reproducir el periodo 18.
- Seite 80 FUNCION DEL MANDO A DISTANCIA 21.Play/Pausa En modo reproducion, presionar la tecla Pausa para interrumpir la reproduccion. Cuando está en Pausa, presionando la tecla se reactiva la reproduccion. 22.Stop Si durante la reproduccion se presiona esta tecla se bloquea la reproduccion . En el caso de que se vuelva a presionar se sale del modo.
-
Seite 81: Instalación Unidad
INSTALACION UNIDÁD Ejemplo de montaje 1 Conectar al mechero Salida Video (Amarillo) Salida R-ch (Rojo) Salida L-ch (Blanco) Ejemplo de montaje 2 Alimentación coche 12V Salida Video (Amarillo) Salida R-ch (Rojo) Salida L-ch (Blanco) Ejemplo de montaje 3 Conexión al alimentador: 110V~220V Salida Video (Amarillo) Salida R-ch (Rojo) Salida L-ch (Blanco) -
Seite 82: Características
CARACTERISTICAS TECNICAS General: Alimentación: DC9.5V---14.4V Dimensión: 132x65x35 Peso: 0.1KG Sección Video: Sistema Video: NTSC, PAL Salida Video: 1.0Vp-p75ohms Resolución Horizontal: 500 TVL Sección Audio: Salida Máxima: 600 O (2 canales 2 0Vrms) Banda de frecuencia: 20Hz20 Khz. Relación señal ruido: 85dB Separación stereo: 80dB *Nota: Gracias a las continuas mejorías del producto, algunas características técni- cas y estéticas pueden sufrir cambios sin preaviso. -
Seite 83: Guía De Ayuda
2 de este manual los forma- tos compatibles . Nota: en el caso de que los métodos indicados no resuelven los problemas, contactar con el distribuidor más cercano de Phonocar. No abrir el dispositivo para intentar reparar uno mismo el reproductor . - Seite 84 S.p.A. - Via F.lli Cervi, 167/C 42100 Reggio Emilia (Italy) - Tel. ++39 0522 941621 - Fax ++39 0522 942452 www.phonocar.com - e-mail:info@phonocar.it FRANCE Vente et Assistance assurées par le Fabricant italien Tél/Fax N° Vert 0800.90.43.99 www.phonocar.fr • e-mail:info@phonocar.fr DEUTSCHLAND 71711 - MURR - Rudolf Diesel Strasse, 13 - Tel.