HELIX P SIX DSP Handbuch
Inhaltsverzeichnis
Verfügbare Sprachen
Verfügbare Sprachen
Quicklinks
Inhaltsverzeichnis

Inhaltszusammenfassung für HELIX P SIX DSP
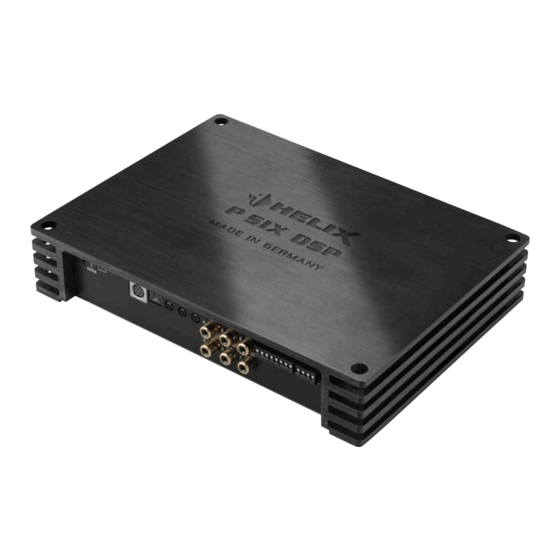
- Seite 1 P SIX DSP 6-Kanal Verstärker mit integriertem DSP 6-channel Amplifier with integrated DSP...
-
Seite 2: Allgemeine Hinweise
Wir gratulieren Ihnen zum Kauf dieser hochwer- hervorragende Verarbeitung und eine überzeu- tigen HELIX Digitalendstufe. gende Anwendung ausgereifter Technologien aus. Audiotec Fischer setzt mit der HELIX P SIX DSP Viel Freude an diesem Produkt wünscht Ihnen das neue Maßstäbe im Bereich der Verstärkertechnik. Team von Dabei profitieren Sie als Kunde direkt von unserer nahezu 30-jährigen Erfahrung in der Forschung und... -
Seite 3: Anschluss- Und Bedienelemente
Cinch-Eingänge zum Anschluss eines Vor- Control Input verstärkersignals Multifunktionsanschluss - dient zum An- Highlevel Input schluss einer Fernbedienung und weiterem Hochpegel-Lautsprechereingang zum An- HELIX Zubehör schluss von Werksradios oder Radios ohne Vorverstärkerausgänge 10 11 12 13 14 Output Channels A - D +12 V Lautsprecherausgänge A - D für den An-... - Seite 4 Die Status LED zeigt das aktuell ausgewählte Setup den Cinch-Eingang (Line Input) und 5 - 10 Volt für der HELIX P SIX DSP an. Leuchtet die LED grün, den Hochpegel-Eingang (Highlevel Input). Der Wer- ist Setup 1 geladen. Bei Setup 2 leuchtet die LED tebereich kann durch Umstecken eines Jumpers im orange.
-
Seite 5: Line Output
Fuse Ausgang, wenn Sie weitere Verstärker an die Line Sollten die Sicherungen im Inneren des Gerätes Outputs der P SIX DSP anschließen, da es anson- durch eine Fehlfunktion zerstört werden, wird die- sten zu Störgeräuschen kommen kann. Dieser Aus- ses durch das Aufleuchten der roten LED ange- gang aktiviert sich automatisch, sobald der Boot- zeigt. -
Seite 6: Einbau Und Installation
Lautsprecherkabel mit der Kfz-Masse (Fahrzeugka- nicht unterschreiten. rosserie). Dieses kann Ihren Verstärker zerstören. Einbau und Installation Die HELIX P SIX DSP wird wie nachfolgend be- rekte Polung! Wenn Sie einen oder mehrere schrieben an das Autoradio angeschlossen. Anschlüsse verpolen, kann dadurch die Funk- tion des Verstärkers beeinträchtigt werden. - Seite 7 Einstellungsbeispiele: Quelle Welcher Position Position Position Potis Eingang Jumper A Jumper B OEM-Radio 4-kanalig Highlevel A-D Beliebig Linksanschlag Bis 25 Watt Sinusleistung pro Kanal OEM-Radio mit Zusatzverstärker 4-kanalig Highlevel A-D Beliebig Linksanschlag Bis 100 Watt Sinusleistung pro Kanal OEM-Radio mit Zusatzverstärker 6-kanalig Highlevel A-F Linksanschlag Bis 100 Watt Sinusleistung pro Kanal...
- Seite 8 Posi- Wertebereich an den Verstärker angeschlossen werden. Die tion HELIX P SIX DSP ist werksseitig so konfiguriert, Cinch E – F: 170 mV – 340 mV dass automatisch auf den Digitaleingang umge- schaltet wird, wenn dort ein Audiosignal anliegt. Hinweis: Um die Position eines Jumpers zu Diese Funktion kann über die DSP PC-Tool...
- Seite 9 Der Wert der Sicherung errechnet sich aus der maximalen Stromaufnahme der gesamten Car-Hifi Anlage (P SIX DSP = max. 75 A). Ver- wenden Sie bei kurzen Leitungen (< 1m) einen Querschnitt von mindestens 16 mm². Bei län- geren Leitungen empfehlen wir einen Quer- schnitt von 25 mm²...
- Seite 10 Anschluss mit Hilfe des „Easy Plug Cables“ gegebenenfalls einen fahrzeugspezifischen Um die Installation der P SIX DSP an ein Werks- oder Nachrüstradio deutlich zu vereinfachen, kann die ISO-Adapter. Eine Liste aller Fahrzeuge und P SIX DSP auch mit Hilfe des optional erhältlichen der eventuell benötigten Adapter finden Sie auf...
-
Seite 11: Anschluss An Den Computer
DSP Kanäle separat eingestellt werden. puter anschließen. Verlängern Sie das Kabel auf keinen Fall mit einer passiven USB-Verlän- Bevor Sie die HELIX P SIX DSP das erste Mal an einen Computer anschließen, gehen Sie auf unse- gerung, weil eine einwandfreie Kommunikation... - Seite 12 HELIX Extension Card Slot (HEC Slot) Die HELIX P SIX DSP kann durch die Montage ei- Zur Montage einer HEC muss das Seitenblech der ner HELIX Extension Card (HEC) um weitere Funk- P SIX DSP demontiert und gegen das der HEC bei- tionen erweitert werden - beispielsweise um eine liegende Seitenblech ausgetauscht werden.
-
Seite 13: Spezielle Features Der Helix P Six Dsp
Eingangssignal anliegt. Sobald der „Power Save stärkern erfolgt beim Class Ultra D-Prinzip das Ab- Mode“ aktiv ist, werden die internen Verstärkerstu- fen der P SIX DSP sowie der „Rem Out“ abgeschal- greifen des Gegenkopplungssignals nicht vor dem LC-Ausgangsfilter sondern dahinter. Daraus erge- tet und damit die Stromaufnahme deutlich reduziert. -
Seite 14: Technische Daten
Behandlung entstanden Gerätes, können wir keine Haftung übernehmen. sind. Eine Rücksendung kann nur nach vorheriger Alle HELIX Produkte sind sowohl mit einer Absprache in der Originalverpackung, einer de- E-Kennzeichnung als auch einer CE-Kennzeich- taillierten Fehlerbeschreibung und einem gültigen nung versehen. - Seite 28 Audiotec Fischer GmbH Hünegräben 26 · D-57392 Schmallenberg Tel.: +49 2972 9788 0 · Fax: +49 2972 9788 88 E-mail: helix@audiotec-fischer.com · Internet: www.audiotec-fischer.com...