Inhaltsverzeichnis
Werbung
Verfügbare Sprachen
Verfügbare Sprachen
Quicklinks
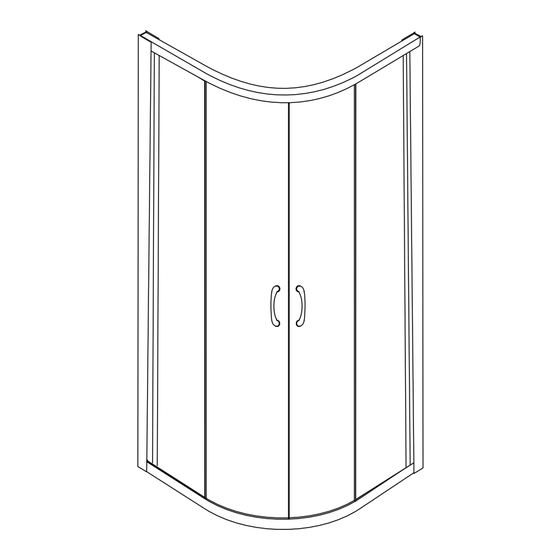
Runddusche „Summer" ohne Duschwanne
Aufbauanleitung
Duschwand
Installation Instrucions
Shower Wall
Instructions d'installation
Pare-douche
D: Nachdruck, auch auszugsweise, nicht gestattet! GB: Reproduction, even in extracts, is not permitted! F: Toute reproduction de ce mode d'emploi
même par extraits est interdite ! IT: È vietata la riproduzione, anche parziale. NL: Nadruk, ook slechts gedeeltelijk, niet toegestaan!
Anleitung, Nr.: 20160378 473958
473958-1001648
21442727-1026809
900 x 900 x 1850 mm
800 x 800 x 1850 mm
Istruzioni d'installazione
Paretina doccia
Montagehandleiding
Douchewand
Werbung
Inhaltsverzeichnis

Inhaltszusammenfassung für Hagebau Summer
- Seite 1 Runddusche „Summer“ ohne Duschwanne 473958-1001648 21442727-1026809 900 x 900 x 1850 mm 800 x 800 x 1850 mm Aufbauanleitung Istruzioni d‘installazione Duschwand Paretina doccia Installation Instrucions Montagehandleiding Shower Wall Douchewand Instructions d’installation Pare-douche D: Nachdruck, auch auszugsweise, nicht gestattet! GB: Reproduction, even in extracts, is not permitted! F: Toute reproduction de ce mode d’emploi même par extraits est interdite ! IT: È...
-
Seite 2: Sicherheitshinweise
WICHTIG, FÜR SPÄTERE BEZUGNAHME DIESES DOKUMENT AUFBEWAHREN! SORGFÄLTIG LESEN! Bestimmungsgemäßer Gebrauch Dieser Artikel ist eine vorgefertigte Einheit zum Duschen. Dieser Artikel ist nur zum Einsatz im privaten Bereich bestimmt. Sicherheitshinweise Erstickungs- / Verletzungsgefahr! Lassen Sie Kinder nicht mit der Verpackung spielen. Sie könnten an der Folie ersticken oder sich an der Umverpackung verletzen. -
Seite 3: Benötigte Werkzeuge
Benötigte Werkzeuge 3.2mm 3.2mm Aufgrund des hohen Gewichts dieses Produktes könnte der Aufbau zwei Personen erfordern. - 3 -... -
Seite 4: Verpackungsinhalt
Verpackungsinhalt [1] 2 x Laufleiste 1 x Schmieröl Schmieröl [2] 1 x Aufbauanleitung [3] 2 x Türgriffsatz [4] 4 x Glasklemme 4 x Schraube M3.5x10 [5] 4 x Rundkopfschraube M4x14 4 x Schraubenabdeckkappe [6] 2 x Klemmdichtung [7] 4 x Aufsteckprofil [8] 2 x Magnetdichtung [9] 2 x Wandstange 4 x Laufleistenverbindungsstück 4 x Schraube M4x25... -
Seite 5: Montagezeichnung
Montagezeichnung [17] [15] [18] [16] [10] [14] [11] [12] [13] [1] 8 x Wanddübel* [10] 2 x Magnetdichtung [2] 8 x Rundkopfschraube M4x35* [11] 2 x Türgriffsatz [3] 2 x Klemmdichtung [12] 4 x Laufrolle unten [4] 2 x Seitenscheibe [13] 1 x Laufleiste unten [5] 4 x Glasklemme [14] 4 x Rundkopfschraube M4x14... -
Seite 6: Aufbauschritte
Aufbauschritte Schritt 1 - Die Wanne (nicht enthalten) ist an senkrechten Wänden in einem 90 Grad Winkel auszurichten, mittels einer Wasserwaage. - Die Fugen sind mit Silikon auszuspritzen. Das Silikon ist entsprechend den eingesetzten Baumaterialien auszuwählen, beachten Sie die Aushärtezeiten. Schritt 2 Stecken Sie als Montagehilfe die Seitenteile und den unteren und oberen Bogen mit allen be- schriebenen Komponenten zusammen. -
Seite 7: Innenansicht
Innenansicht Schritt 3 Innenansicht Rundkopfschraube M4x14 Schritt 4 Innenansicht - 7 -... - Seite 8 Schritt 5 Magnet- dichtung Aufsteckprofil Seitenscheibe Türscheibe Stellen Sie sicher, dass die Wandprofile lotrecht sind. Richten Sie die Kabine mit einer Wasserwaage so aus, dass sie rechtwinklig und gerade ist. Die Rädchen sollten so angebracht sein, dass die Türen plan schließen und leichtgängig zu öffnen und zu schließen sind. Schritt 6 Stunden Vor der Erstbenutzung das Silikon 24 Stunden trocknen lassen.
-
Seite 9: Entsorgung
Entsorgung Sollte dieser Artikel einmal nicht mehr benutzt werden können, so ist jeder Verbraucher gesetzlich verpflichtet, Altgeräte getrennt vom Hausmüll zu entsorgen und z.B. bei einer Sammelstelle seiner Gemeinde / Stadtteils abzugeben. Unser Service Eine umgehende Fachberatung erhalten Sie von unserem Service-Team: - Deutschland: Telefon 01806-63 06 30, Festnetz 20ct/Anruf, Mobilfunk max. 60 ct/Anruf Montag –... - Seite 10 - 10 -...
- Seite 11 Circular Shower „Summer“ without Shower Basin 473958-1001648 21442727-1026809 900 x 900 x 1850 mm 800 x 800 x 1850 mm Aufbauanleitung Istruzioni d‘installazione Duschwand Paretina doccia Installation Instrucions Montagehandleiding Shower Wall Douchewand Instructions d’installation Pare-douche D: Nachdruck, auch auszugsweise, nicht gestattet! GB: Reproduction, even in extracts, is not permitted! F: Toute reproduction de ce mode d’emploi même par extraits est interdite ! IT: È...
- Seite 12 IMPORTANT: PLEASE KEEP THIS DOCUMENT FOR LATER REFERENCE! READ CAREFULLY! Indented use This product is a prefabricated unit for showering. This product is intended for use in private spheres only. Safety instructions Choking hazard / danger of injury! Do not let children play with the packaging. They could choke on the wrap or injure themselves with the packaging cover.
-
Seite 13: Tools Required
Tools required 3.2mm 3.2mm This product is heavy and may require two people to install. - 13 -... - Seite 14 Box contents [1] 2 x Horizontal rail 1 x Lube Schmieröl [2] 1 x Installation instruction [3] 2 x Handle set [4] 4 x Glass clamp 4 x Screw M3.5x10 [5] 4 x Round screw M4x14 4 x Screw cover cap [6] 2 x Deflector [7] 4 x Plug-in profile [8] 2 x Magnetic seal...
-
Seite 15: Assembly Drawing
Assembly drawing [17] [15] [18] [16] [10] [14] [11] [12] [13] [1] 8 x Wall plug* [10] 2 x Magnetic seal [2] 8 X Round screw M4x35* [11] 2 x Handle set [3] 2 x Deflector [12] 4 x Track roller bottom [4] 2 x Side glass panel [13] 1 x Horizontal rail bottom [5] 4 x Glass clamp... -
Seite 16: Installation Steps
Installation steps Step 1 - The tub (not included) is to be aligned with vertical walls in a 90 degree angle by means of a spirit level. - The joints are to be filled with silicone. The silicone is to be chosen respectively to the construction materials used - please respect cure times. Step 2 Put the side components and the upper and lower bend together with all components described as an assembly support. - Seite 17 Step 3 View from inside View from Round screw M4x14 inside Step 4 View form inside - 17 -...
- Seite 18 Step 5 Magnetic seal Plug-in profile Side glass panel Door glass panel Ensure wall profiles are plumb. Adjust stall to be square and level. Wheels should be adjusted to square the doors and ensure smooth running. Step 6 hours Allow 24 hours for silicone to dry before first use. - 18 -...
- Seite 19 Disposal Should the product no longer be serviceable, every consumer has a statutory obligation to dispose of old appliances separately from domestic waste and dispose of them e.g. at a local authority / district collection point. Our service You will receive prompt professional advice from our service team: - Germany: Telephone 01806-63 06 30, Land line 20ct/call, mobile telephone connection 60ct/ call max.
- Seite 20 - 20 -...
- Seite 21 Douche courbe « Summer (été) » sans receveur 473958-1001648 21442727-1026809 900 x 900 x 1850 mm 800 x 800 x 1850 mm Aufbauanleitung Istruzioni d‘installazione Duschwand Paretina doccia Installation Instrucions Montagehandleiding Shower Wall Douchewand Instructions d’installation Pare-douche D: Nachdruck, auch auszugsweise, nicht gestattet! GB: Reproduction, even in extracts, is not permitted! F: Toute reproduction de ce mode d’emploi même par extraits est interdite ! IT: È...
-
Seite 22: Instructions D'entretien
IMPORTANT, CONSERVER CE DOCUMENT POUR TOUTE RÉFÉRENCE ULTÉRIEURE ! À LIRE ATTENTIVEMENT ! Utilisation conforme à la destination Cet article est un ensemble de douche préfabriqué. Cet article n’est destiné qu’à un usage de type privé. Avis de sécurité Risque d’étouffement / de blessure ! Ne laissez pas les enfants jouer avec l’emballage car ils pourraient s’étouffer avec le film ou se blesser avec les matériaux d’emballage. -
Seite 23: Outils Nécessaires
Outils nécessaires 3.2mm 3.2mm En raison du poids important de ce produit, le montage peut nécessiter deux personnes. - 23 -... -
Seite 24: Contenu De L'emballage
Contenu de l’emballage [1] 2 x rails de coulissage 1 x huile lubrifiante Schmieröl [2] 1 x instruction de montage [3] 2 x set de poignées [4] 4 x mâchoires à verre 4 x vis M3.5x10 [5] 4 x vis à tête ronde M4x14 4 x rondelles de couverture des vis [6] 2 x joint de calage [7] 4 x profilés creux... - Seite 25 Dessin de montage [17] [15] [18] [16] [10] [14] [11] [12] [13] [1] 8 x chevilles murales* [10] 2 x joints magnétiques [2] 8 x vis à tête ronde M4x35* [11] 2 x sets de poignée de porte [3] 2 x joints de calage [12] 4 x galets de guidage bas [4] 2 x panneaux vitrés latéraux [13] 1 x rail de coulissage bas...
- Seite 26 Étapes de construction Étape 1 - Le receveur (non compris) doit être placé à un angle de 90 ° avec les murs verticaux à l’aide d’un niveau à bulle. - Les joints doivent être traités à la silicone. La silicone doit être choisie en fonction des matériaux de construction utilisés et le temps de durcissement doit être respecté.
- Seite 27 Vue intérieure Étape 3 vis à tête ronde M4x14 Vue intérieure Étape 4 Vue intérieure - 27 -...
- Seite 28 Étape 5 joint magnétique profilé creux panneau vitré latéral porte vitrée Assurez-vous que le profilé mural est d’aplomb. À l’aide d’un niveau à bulle, placez la cabine de ma- nière à ce qu’elle soit droite et à angle droit. Les galets doivent être montés de manière à ce que les portes se ferment de manière plane. Les portes doivent pouvoir être ouvertes et fermées sans effort. Étape 6 heures Laisser sécher la silicone 24 heures...
- Seite 29 Traitement des déchets Si cet article devient inutilisable, chaque utilisateur est légalement obligé de traiter les vieux appareils ménagers séparément des déchets domestiques, par exemple en les déposants dans un lieu de collecte de sa commune / de son quartier. Notre service Vous pourrez bénéficier immédiatement de conseils techniques en contactant notre équipe de services :...
- Seite 30 - 30 -...
- Seite 31 Doccia circolare “Summer” senza piatto doccia 473958-1001648 21442727-1026809 900 x 900 x 1850 mm 800 x 800 x 1850 mm Aufbauanleitung Istruzioni d‘installazione Duschwand Paretina doccia Installation Instrucions Montagehandleiding Shower Wall Douchewand Instructions d’installation Pare-douche D: Nachdruck, auch auszugsweise, nicht gestattet! GB: Reproduction, even in extracts, is not permitted! F: Toute reproduction de ce mode d’emploi même par extraits est interdite ! IT: È...
- Seite 32 IMPORTANTE, CONSERVARE IL PRESENTE DOCUMENTO PER UN FUTURO RIFERIMENTO! LEGGERE CON ATTENZIONE! Uso conforme Il presente articolo è un‘unità prefabbricata per la doccia. L‘articolo è destinato esclusivamente all‘uso privato. Avvisi di sicurezza Pericolo di soffocamento / lesioni! L‘imballaggio non è un giocattolo per bambini. Potrebbero soffocarsi con la pellicola o ferirsi con l‘involucro.
-
Seite 33: Attrezzi Necessari
Attrezzi necessari 3.2mm 3.2mm L‘elevato peso del prodotto potrebbe rendere necessario l‘aiuto di una seconda persona per il montaggio - 33 -... -
Seite 34: Contenuto Della Confezione
Contenuto della confezione [1] 2 x binari 1 x olio lubrificante Schmieröl [2] 1 x istruzioni di montaggio [3] 2 x kit di maniglie [4] 4 x fermavetri 4 x viti M3.5x10 [5] 4 x viti a testa tonda M4x14 4 x tappi per viti [6] 2 x guarnizioni a morsetto [7] 4 x profili di raccordo [8] 2 x guarnizioni magnetiche... -
Seite 35: Schema Di Montaggio
Schema di montaggio [17] [15] [18] [16] [10] [14] [11] [12] [13] [1] 8 x tasselli* [10] 2 x guarnizioni magnetiche [2] 8 x viti a testa tonda M4x35* [11] 2 x kit maniglie [3] 2 x guarnizioni a morsetto [12] 4 x carrucole di guida inferiori [4] 2 x vetri laterali [13] 1 x binario inferiore... -
Seite 36: Fasi Di Montaggio
Fasi di montaggio Fase 1 - Allineare il piatto doccia (non compresi) alle pareti verticali con un angolo di 90 gradi con l‘aiuto di una bolla - Coprire le giunture con del silicone. Scegliere il silicone in base ai materiali utilizzati; osservare i tempi di indurimento. - Seite 37 Fase 3 vista interna vite a testa tonda M4x14 vista interna Fase 4 vista interna - 37 -...
- Seite 38 Fase 5 guranizione magnetica profilo di raccordo vetro laterale vetro porta Accertarsi che i profili a muro siano a bolla. Allineare la cabina con l‘aiuto di una bolla per garantire che sia diritta e con gli angoli retti. Le rotelle dovrebbero essere montate in modo da assicurare che la porta chiuda perfettamente e si apra e chiuda senza fatica. Fase 6 Prima del primo utilizzo, lasciare asciugare il silicone per 24 ore.
- Seite 39 Smaltimento Qualora l‘articolo non dovesse più servire, ogni consumatore è obbligato per legge allo smaltimento separato delle vecchie apparecchiature consegnandole ad esempio all‘ecocentro del proprio comune / quartiere. Il nostro servizio Il nostro team di servizio vi offre una rapida consulenza specialistica: - Germania: telefono 01806-63 06 30, rete fissa 20ct/chiamata, telefonia mobile max. 60 ct/ chiamata lunedì...
- Seite 40 - 40 -...
- Seite 41 Ronde douche ‚Summer‘ zonder douchebak 473958-1001648 21442727-1026809 900 x 900 x 1850 mm 800 x 800 x 1850 mm Aufbauanleitung Istruzioni d‘installazione Duschwand Paretina doccia Installation Instrucions Montagehandleiding Shower Wall Douchewand Instructions d’installation Pare-douche D: Nachdruck, auch auszugsweise, nicht gestattet! GB: Reproduction, even in extracts, is not permitted! F: Toute reproduction de ce mode d’emploi même par extraits est interdite ! IT: È...
- Seite 42 BELANGRIJK, BEWAAR DIT DOCUMENT VOOR EVENTUELE TOEKOMSTIGE RAADPLEGING! ZORVULDIG LEZEN! Beoogd gebruik Dit artikel is een geprefabriceerde cabine om te douchen. Dit artikel is uitsluitend bedoeld voor privégebruik. Veiligheidsadvies Verstikkingsgevaar en risico op letsel! Laat uw kinderen nooit met de verpakking spelen. Ze zouden in het plastic kunnen stikken en zich aan de verpakking kunnen verwonden.
-
Seite 43: Benodigd Gereedschap
Benodigd gereedschap 3.2mm 3.2mm Vanwege het gewicht van dit product zijn er mogelijk twee personen nodig voor de montage. - 43 -... - Seite 44 Inhoud [1] 2 x Rails 1 x Smeerolie Schmieröl [2] 1 x Montagehandleiding [3] 2 x Deurklinkset [4] 4 x Glasklem 4 x Schroeven M3.5x10 [5] 4 x Schroeven ronde kop M4x14 4 x Schroefdop [6] 2 x Klemdichting [7] 4 x Insteekprofiel [8] 2 x Magnetische dichting [9] 2 x Wandstang 4 x Railkoppelstuk...
- Seite 45 Montagetekening [17] [15] [18] [16] [10] [14] [11] [12] [13] [1] 8 x Wandpluggen* 10] 2 x Magnetische dichting [2] 8 x Schroeven ronde kop M4x35* 11] 2 x Deurklinkset [3] 2 x Klemdichting 12] 4 x Roller onder [4] 2 x Zijglasplaat 13] 1 x Rails onder [5] 4 x Glasklem 14] 4 x Schroeven ronde kop M4x14...
- Seite 46 Montagestappen Stap 1 - De douchebak (niet inbegrepen) dient op loodrechte muren in een hoek van 90 graden met behulp van een waterpas te worden uitgelijnd. - De voegen dienen met siliconenkit te worden gedicht. Gebruik een siliconenkit die geschikt is voor de gebruikte bouwmaterialen en let op de uithardtijd.
- Seite 47 binnenaanzicht Stap 3 schroef met ronde kop M4x14 binnenaanzicht Stap 4 binnenaanzicht - 47 -...
- Seite 48 Stap 5 magnetische dichting insteekprofiel zijplaat deurplaat Zorg ervoor dat de wandprofielen loodrecht staan. Lijn de cabine zodanig uit met een waterpas dat deze rechte hoeken heeft en recht is. De wieltjes moeten zodanig zijn aangebracht dat de deuren volledig naadloos aanslui- ten en moeiteloos open en dicht gaan. Stap 6 De siliconenkit 24 uur laten drogen vóór het eerste gebruik.
- Seite 49 Afvalverwijdering Indien dit product niet meer gebruikt wordt, is elke consument wettelijk verplicht om dergelijke huisraad apart van het huisvuil te verwijderen en bijv. bij de gemeente/milieustraat in te leveren. Onze service Ons serviceteam staat u onmiddellijk vakkundig te woord: - Duitsland: Telefoon 01806-63 06 30, Vaste lijn20ct/gesprek, Mobiel max.