Inhaltsverzeichnis
Werbung
Verfügbare Sprachen
Verfügbare Sprachen
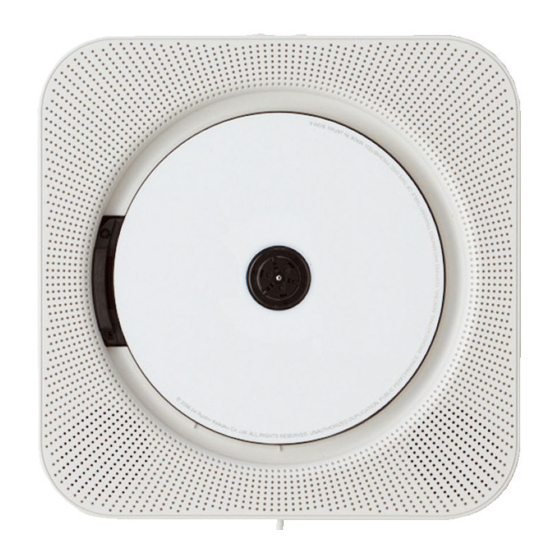
Wall-mounted CD Player
Model CPD-4
USER MANUAL
K Thank you for purchasing this product.
K Be sure to read this user manual before operating
the product and use it correctly.
K Store this manual in a safe place for future
reference.
Modèle CPD-4
MANUEL D'UTILISATION
K Merci d'avoir fait l'acquisition de ce produit.
K Lisez attentivement ce manuel avant d'utiliser le
produit afin d'en faire un usage correct.
K Conservez ce manuel dans un endroit sûr pour des
consultations futures.
Modelo CPD-4
MANUAL DE USUARIO
K Gracias por comprar este producto.
K Lea atentamente este manual para garantizar el
uso apropiado del producto.
K Guárdelo en un lugar seguro para futuras
consultas.
Modello CPD-4
MANUALE D'USO
K Grazie per aver scelto questo prodotto.
K Leggere attentamente le istruzioni prima di
utilizzare il prodotto. Si raccomanda di fare un uso
corretto del dispositivo.
K Conservare il manuale in un luogo sicuro per
possibili usi futuri
Model CPD-4
PODRĘCZNIK
UŻYTKOWNIKA
K Dziękujemy za zakup naszego produktu
K Prosimy o wcześniejsze zapoznanie się z niniejszą
instrukcją oraz właściwe użytkowanie.
K Niniejszą instrukcję należy zachować do
późniejszego użytku.
Modell CPD-4
BEDIENUNGSANLEITUNG
K Vielen Dank für den Kauf dieses Produkts.
K Lesen Sie vor Gebrauch des Gerätes die
Bedienungsanleitung und verwenden Sie es nach
Vorgabe.
K Bewahren Sie diese Bedienungsanleitung als
Referenz auf.
Modelo CPD-4
MANUAL DO UTILIZADOR
K Obrigado por ter comprado este produto.
K Leia por favor este manual do utilizador antes de
colocar o produto em funcionamento de modo a
ter a certeza de que o utiliza correctamente.
K Guarde este manual num lugar seguro para futuras
consultas.
D01204750A
Werbung
Kapitel
Inhaltsverzeichnis
Fehlerbehebung

Verwandte Anleitungen für Muji CPD-4

Inhaltszusammenfassung für Muji CPD-4
- Seite 1 Modello CPD-4 MANUALE D'USO K Grazie per aver scelto questo prodotto. K Leggere attentamente le istruzioni prima di utilizzare il prodotto. Si raccomanda di fare un uso corretto del dispositivo. Wall-mounted CD Player K Conservare il manuale in un luogo sicuro per...
-
Seite 2: Important Safety Instructions
two blades and a third grounding prong. The wide blade or the third prong are pro- vided for your safety. If the provided plug does not fit into your outlet, consult an electrician for replacement of the obsolete CAUTION: TO REDUCE THE RISK OF ELECTRIC outlet. - Seite 3 < < enough to the AC outlet so that you can eas- THIS PRODUCT, CONTACT MUJI LIMITED ily grasp the power cord plug at any time. FOR A SERVICE REFERRAL. DO NOT USE THE The appliance coupler is used as the dis- PRODUCT UNTIL IT HAS BEEN REPAIRED.
- Seite 4 Changes or modifications to this equipment not THIS DEVICE MAY NOT CAUSE HARMFUL INTERFERENCE, AND THIS DEVICE MUST ACCEPT ANY INTERFERENCE RECEIVED, expressly approved by MUJI LIMITED for compliance INCLUDING INTERFERENCE THAT MAY CAUSE UNDESIRED OPERATION. will void the user’s warranty.
-
Seite 5: Disposal Of Electrical And Electronic Equipment
For European Customers Disposal of electrical and electronic Disposal of batteries and/or accumulators equipment (a) Waste batteries and/or accumulators should be (a) All electrical and electronic equipment should be disposed of separately from the municipal waste disposed of separately from the municipal waste stream via collection facilities designated by the stream via collection facilities designated by the government or local authorities. -
Seite 6: Inhaltsverzeichnis
Contents Before Using the Unit What’s in the box Before Using the Unit ....... . .6 Discs . -
Seite 7: For Customers In The Uk
For customers in the UK Read this before operation Please change the AC adaptor plug to suit the mains < When a disc is inserted into the unit, do not tilt the socket where you will use the unit. unit. Doing so might cause a malfunction. <... -
Seite 8: Discs
If you use such discs in this unit, MUJI LIMITED and its subsidiaries < Use a soft oil-based felt-tipped pen to write infor- will not be responsible for any consequences or mation on the label side. -
Seite 9: Handling Precautions
Handling precautions Storage precautions < Always insert a disc with the label side up. Only < Discs should be returned to their cases after use to one side of a Compact Disc can be played. avoid dust and scratches that could cause the laser pickup to “skip”. -
Seite 10: Mp3/Wma Compatibility
Discs (Continued) MP3/WMA Compatibility Maintenance This unit can play MP3/WMA files recorded on a CD-R, CD-RW discs. < If a disc becomes dirty, wipe its surface radially from the center hole outward towards the outer < This unit can play back monaural and stereo MP3 edge with a soft, dry cloth. -
Seite 11: Identifying The Parts
Identifying the Parts Main unit Display Mode button (MODE) Volume button (−,+) Lens Skip button Back/forward button (.,/) Remote sensor Central hub Protective sheet (card) Speakers FM antenna DC Power cable Connection to the AC (play/stop) adaptor Remote control unit Skip button (back) (.) Skip button (forward) (/) Back button (m) -
Seite 12: Remote Control Unit
Remote Control Unit Installation Method Notes on using the remote control Attach the wall-fixing plate to the unit wall. < Even if the remote control is used within its effec- tive operation range (5 m/16'), the unit might not respond to the remote if there are any obstacles between them. -
Seite 13: Connecting The Ac Adaptor
Connecting the AC adaptor After connecting the power cord to the dedicated Attach the unit to the wall-fixing AC adaptor cord, plug the adaptor into an outlet. plate. Into a power socket Line the unit up with the wall-fixing plate and clip the Dedicated back of the unit on at the slots. -
Seite 14: Listening To A Disc
Listening to a Disc Insert the CD into the unit. Press the volume buttons (−,+) to adjust the volume. Fix the CD onto the central hub of the unit. VOL 05 The volume level is shown. Caution < The volume can be adjusted in a range between Fix the CD firmly into the unit until you hear 00 and 32. -
Seite 15: Selecting Tracks
Selecting tracks < During playback, press the repeat button (REPEAT) once to play back all tracks on the disc repeatedly To previous track from the first track. (“REPEAT” is shown on the display.) < To stop the repeat playback, press the repeat but- 02 00:05 ton (REPEAT) again. -
Seite 16: Listening To The Radio
Listening to the Radio Manual selection Press the Mode button (MODE). To tune in to a station the unit cannot tune in to The source changes to FM. automatically, press the skip button (.//) repeatedly to select the station you want to lis- ten to. -
Seite 17: Troubleshooting
Troubleshooting If the reception is poor If you a have problem with your system, read this page and try to solve the problem yourself before calling Extend the FM antenna or change its position to your dealer. improve the reception of a station. General No power. -
Seite 18: Cd-Player
Troubleshooting (Continued) CD player A microcomputer is used in this unit, it may some- times not operate correctly due to noise, etc. from Cannot insert the CD into the unit. around the unit. In this case, remove the plug of e Remove dust or obstacles from the central hub the AC adaptor from the power socket, wait for of the unit. -
Seite 19: Specifications
Specifications CD Player General Playable disc types ..CD/CD-R/CD-RW (8cm/12cm) Supply voltage/power Playable formats ....CD-DA, MP3/WMA file For Europe .....AC 220 V – 240 V, 50 Hz Pickup For Australia . - Seite 20 Pour les clients européens Table des matières L'élimination des équipements électriques et électroniques. Précautions avant utilisation ......21 (a) Tous les équipements électriques et électroniques doivent Disques .
-
Seite 21: Précautions Avant Utilisation
Précautions avant utilisation Qui a-t-il dans la boîte ? Lire avant utilisation Vérifier que tous les accessoires soient dans la boîte. < Quant un disque est inséré sur le lecteur, ne pas incliner le lecteur. Le faire peut causer des 1 télécommande dommages. -
Seite 22: Disques
Si vous utilisez de tels disques dans cette Ne jamais utiliser un stylo à bille ou à pointe dure, unité, MUJI et ses filiales ne seront pas respon- car cela pourrait causer des dommages à la face sables des conséquences, ni garantira la qualité de enregistrée. - Seite 23 Précautions pour la manipulation Précautions puor le stockage < Toujours insérer un disque avec l'étiquette vers le < Les disques doivent être remis dans leur boîtier haut. Un seul côté d'un disque compact peut être après usage pour éviter la poussière et les rayures joué.
-
Seite 24: Mp3/Wma Compatibilité
Disques (suite) MP3/WMA Compatibilité Maintenance Cet appareil peut lire les fichiers MP3/WMA enregistrés sur un CD-R, CD-RW. < Si un disque est sale, essuyez la surface radiale- ment à partir du centre vers le bord extérieur avec < Cet appareil peut lire les fichiers mono et stéréo un chiffon doux et sec. -
Seite 25: Identifier Les Parties
Identifier les parties Element principal Affichage Touche du Mode (MODE) Touche du Volume (−,+) Lentille Touche de saut Touche Précédent/ Suivant (.,/) Capteur à distance Moyeu central Feuille de protection (carton) Haut-parleurs Antenne FM Câble d'alimentation Connection à l'adapta- (play/stop) teur secteur Télécommande Touche de saut... -
Seite 26: Télécommande
Télécommande Méthode d'installation Remarques sur l'utilisation de la Fixez la plaque murale de fixation télécommande. au mur. < Même si la télécommande est utilisée dans sa plage de fonctionnement maximum (5 m), l'appa- reil peut ne pas répondre à la télécommande s'il y a des obstacles. -
Seite 27: Connecter L'adaptateur
Connecter l'adaptateur Après avoir raccordé le cordon d’alimentation Fixez le lecteur de CD à la plaque à l’adaptateur CA dédié, branchez l’adaptateur murale de fixation. dans une prise. Dans une prise de courant Aligner le lecteur CD à la plaque de fixation et le clip à l'arrière du lecteur CD. -
Seite 28: Ecouter Un Disque
Ecouter un disque Insérer un disque dans le lecteur. Appuyez sur les boutons de volume (−,+) pour régler le volume. Fixer le CD sur le moyeu central du lecteur CD. VOL 05 le niveau du volume apparaît. Prudence < Le volume peut être réglé dans une gamme entre Fixer solidement le CD dans le lecteur jusqu'à... - Seite 29 Sélection des pistes < Pendant la lecture, appuyez une fois sur la touche de répétition (REPEAT) pour reproduire toutes A la piste précédente les pistes du disque à partir de la première piste. “REPEAT” apparaît sur l'écran. < Pour arrêter la lecture répétée, appuyez sur la 02 00:05 touche de répétition (REPEAT).
-
Seite 30: Ecouter La Radio
Ecouter la radio Sélection manuelle Appuyez sur la touche Mode (MODE). Pour régler une station de l'appareil qui ne peut La source change sur FM. pas se régler automatiquement, appuyez sur la touche skip (.//) à plusieurs reprises pour sélectionner la station que vous souhaitez FM 87.5 écouter. -
Seite 31: Dépannage
Dépannage Si la réception est mauvaise Si vous avez un problème avec votre système, lisez cette page et essayer de résoudre le problème vous- Déployez l'antenne FM ou changer sa position pour même avant d'appeler votre revendeur. améliorer la réception d'une station. Général Pour éteindre l'appareil (mode Pas d'alimentation. - Seite 32 Dépannage (suite) lecteur CD Un micro-ordinateur est utilisé dans cet appareil, il peut parfois ne pas fonctionner correctement à Impossible d'insérer le CD dans le lecteur. cause du bruit, etc à travers l'unité. e Enlever la poussière ou les obstacles de la plate- Dans ce cas, retirez la fiche de l'adaptateur sec- forme centrale du lecteur.
-
Seite 33: Spécificités
Spécificités Lecteur CD Général Types de disques ..CD/CD-R/CD-RW (8cm/12cm) Tension d'alimentation Formats .....CD-DA, Fichier MP3/WMA Pour Europe . - Seite 34 Índice Para clientes europeos Eliminación de aparatos eléctricos y electrónicos (a) Todos los aparatos eléctricos y electrónicos deben des- Antes de utilizar el aparato ......35 echarse aparte de los residuos municipales a través de instalaciones de recogida designadas por el gobierno o las CD .
-
Seite 35: Antes De Utilizar El Aparato
Antes de utilizar el aparato Contenido de la caja Léalo antes de poner en marcha el aparato Compruebe que están todos los accesorios estándar suministrados. < No incline el aparato si tiene un CD dentro, ya que podría provocar un mal funcionamiento. Mando a distancia ×... - Seite 36 CD que no se ajusten al estándar. Si utiliza estos < Utilice un rotulador con base de aceite para escri- CD, MUJI LIMITED y sus filiales no se responsabiliza- bir la información en la parte de la etiqueta. No rán de las consecuencias ni garantizarán la calidad utilice nunca un bolígrafo o lápiz de punta dura, ya...
-
Seite 37: Precauciones De Manipulación
Precauciones de manipulación Precauciones de almacenamiento < Introduzca siempre el CD con la etiqueta hacia < Los CD deben volver a colocarse en la funda des- arriba. Sólo se puede reproducir una parte del CD. pués de utilizarlos para evitar que se rayen o se acumule el polvo, lo que haría saltar el lector láser. -
Seite 38: Compatibilidad Mp3/Wma
CD (continuación) Compatibilidad MP3/WMA Mantenimiento Este aparato puede reproducir archivos MP3/WMA grabados en CD-R, CD-RW. < Si un CD está sucio, límpielo radialmente desde el agujero del centro hacia el exterior con un paño < Este aparato puede reproducir archivos MP3 mono suave y seco. -
Seite 39: Identificación De Las Piezas
Identificación de las piezas Unidad principal Pantalla Botón Modo (MODE) Botón Volumen (−,+) Lente Botón Salto de pista Botón Retroceso/Avance (.,/) Sensor remoto Eje central del CD Hoja protectora (tarjeta) Altavoces Antena FM Cable CC Conexión al adaptador (play/stop) Mando a distancia Botón de salto de pista (avance) Botón de salto de pista (retro- ceso) (.) -
Seite 40: Mando A Distancia
Mando a distancia Instrucciones de instalación Notas sobre el uso del mando a Ajuste el soporte mural a la pared. distancia < Aunque utilice el mando a distancia dentro de su rango operativo (5 m), la unidad podría no respon- der si hay obstáculos entre ellos. -
Seite 41: Conexión Del Adaptador Ca
Conexión del adaptador CA Después de conectar el cable de alimentación Ajuste el reproductor de CD al al cable del adaptador CA dedicado, enchufe el soporte de la pared. adaptador en la toma. En una toma de corriente Inserte el reproductor de CD en el soporte de la pared Adaptador CA enganchando la parte posterior en las ranuras. -
Seite 42: Escuchar Un Cd
Escuchar un CD Inserte el CD en el reproductor. Pulse los botones de volumen (−,+) para ajustar el volumen. Ajuste el CD en el eje central del reproductor de VOL 05 Se muestra el nivel de volumen. < El volumen se puede ajustar en un rango entre Atención 00 y 32. - Seite 43 Selección de piezas < Durante la reproducción, pulse del botón de repe- tición (REPEAT) una vez para volver a reproducir Para reproducir la pieza anterior todas las piezas del CD desde el inicio. (En la panta- lla aparece “REPEAT”.) < Para detener la reproducción repetida, vuelva a 02 00:05 pulsar el botón de repetición (REPEAT).
-
Seite 44: Escuchar La Radio
Escuchar la radio Selección manual Pulse el botón Modo (MODE). Para sintonizar una emisora que el aparato no La fuente cambia a FM. pueda encontrar de forma automática, pulse el botón saltar (.//) repetidamente para seleccionar la emisora que quiere escuchar. FM 87.5 FM 87.5 La frecuencia... -
Seite 45: Solución De Problemas
Solución de problemas En caso de mala recepción Si tiene problemas con el aparato, lea esta página e intente solucionarlos antes de recurrir a su distribuidor. Extienda la antena FM o cambie su posición para mejorar la recepción de una emisora. General No hay corriente. - Seite 46 Solución de problemas (continuación) Reproductor de CD El aparato incorpora un microordenador y puede que a veces no funcione correctamente debido al No puedo insertar el CD en el reproductor. ruido, etc. de alrededor. En este caso, desenchufe e Quite el polvo o los obstáculos del eje central del el adaptador CA de la toma de corriente y espere aparato.
-
Seite 47: Especificaciones Técnicas
Especificaciones técnicas Reproductor de CD General Tipo de CD reproducibles Voltaje/Electricidad CD/CD-R/CD-RW (8 cm /12 cm) Para Europa ..... CA 220 – 240 V, 50 Hz Formatos reproducibles . - Seite 48 Per l'Europa Contenuto Smaltimento di apparecchiature elettriche ed elettroniche Prima di utilizzare il prodotto ......49 (a) Tutte le apparecchiature elettriche ed elettroniche devono essere smaltite separatamente dai rifiuti urbani mediante CD .
-
Seite 49: Prima Di Utilizzare Il Prodotto
Prima di utilizzare il prodotto Contenuto della scatola Leggere attentamente prima di utilizzare il prodotto. Controlla la presenza di tutti gli accessori. < Non inclinare il lettore una volta inserito il CD. Ciò Telecomando: 1 pz. potrebbe causare un malfunzionamento. Batteria (CR2025) per <... - Seite 50 In lettore. caso di utilizzo di CD non conformi, MUJI LIMITED non si riterrà responsabile di eventuali danni o < Usare un pennarello a base di olio con la punta malfunzionamenti al lettore e/o CD.
-
Seite 51: Precauzioni Per L'uso
Precauzioni per l'uso Precauzioni < Inserire il CD col lato etichetta rivolto verso l’alto. Si < Riporre i CD nella custodia dopo ogni utilizzo per ricorda che solo un lato del CD è registrato. evitare graffi o danneggiamenti. < La presenza di graffi o macchie sul lato registrato <... -
Seite 52: Compatibilità Mp3/Wma
CD (continua) Compatibilità MP3/WMA Manutenzione Questa unità può riprodurre files MP3/WMA registrati su un CD-R o CD-RW. < Se il CD è sporco, pulire con un panno asciutto e morbido dal centro verso l'esterno. < Questa unità può riprodurre files MP3 mono e stereo che sono nel formato AUDIO MPEG-1 con una frequenza di campionamento di 16 o 18 kHz e un bit rate di 320 kbps o meno. -
Seite 53: Identificazione Delle Parti
Identificazione delle parti Unità principale Display Pulsante Mode Pulsante Volume (−, +) Lente Pulsante Skip Pulsante avanti/indietro traccia (., /) Sensore telecomando Perno centrale Foglio di protezione (cartoncino) Altoparlanti Antenna FM Cavo di alimentazione (play/stop) Connessione con l'adattatore AC Telecomando Pulsante Skip (back) (.) Tasto Skip (/) Pulsante indietro (m) -
Seite 54: Telecomando
Telecomando Metodo d'installazione Note sull'utilizzo del telecomando Fissare la piastra alla parete. < Anche se il telecomando viene usato entro i 5 mt. (campo d’azione effettivo), il lettore potrebbe non rispondere ai comandi. Ciò perché potrebbero esserci ostacoli (per es. altre onde) tra il telecomando ed il lettore. -
Seite 55: Collegare L'adattatore
Collegare l'adattatore Collegare il cavo di alimentazione al cavo Collegare il lettore CD alla piastra. dell’apposito adattatore AC; inserire quindi l’adattatore in una presa di corrente. Far scorrere il lettore CD sulla piastra di fissaggio. < Assicurarsi che il lettore CD sia ben inserito. <... -
Seite 56: Ascolto Di Un Cd
Ascolto di un CD Inserimento di un CD nel lettore. Premere il pulsante del volume (−, +) per regolarlo. Fissare il CD nel lettore. VOL 05 Il livello del volume viene mostrato. Precauzioni < Il livello del volume può essere impostato da 00 a 32. - Seite 57 Selezionare le tracce < Premere il tasto Repeat durante la riproduzione, per attivare la ripetizione di tutti i brani contenuti Per la traccia precedente nel CD. "REPEAT" viene mostrato sul display. < Per interrompere la funzione "ripetizione brani", premere nuovamente il tasto REPEAT; sul display 02 00:05 apparirà...
-
Seite 58: Ascoltare La Radio
Ascoltare la Radio Selezione manuale Premere il pulsante Mode (MODE). Per selezionare la stazione desiderata premere il La frequenza passa sulla modalità FM. tasto skip (.//). FM 87.5 FM 87.5 FM viene mostrato sul display. < Premere per poco il tasto Skip (.//) La <... -
Seite 59: Risoluzione Dei Problemi
Risoluzione dei problemi Se la ricezione è bassa In caso di problemi con il sistema, leggete questa pagina e provate a risolvere il problema prima di Estendere l'antenna FM o cambiate la posizione per contattare il vostro rivenditore. migliorare la ricezione. Generale Non funziona. - Seite 60 Risoluzione dei problemi (continua) Lettore CD L'unità utilizza un microcomputer che potrebbe non funzionare correttamente a causa dei Impossibile inserire un CD nell'unità. rumori presenti nell'ambiente circostante. In e Rimuovere eventuali residui di polvere o ostacoli questo caso scollegare la spina dalla presa di dall'unità.
-
Seite 61: Specifiche
Specifiche Lettore CD Generale Tipi di CD riproducibili . . .CD/CD-R/CD-RW (8cm/12cm) Tensione alimentazione/potenza . . AC 220 . 240V, 50Hz Formati riproducibili ... .File CD-DA, MP3/WMA Dissipazione potenza ......12W Pickup Dimensioni massime esterne (unità... - Seite 62 Dla konsumentów w UE Spis treści Utylizacja sprzętu elektrycznego i elektronicznego Przed użytkowaniem urządzenia ....63 (a) Każdy sprzęt elektr yczny i elektroniczny powinien być...
-
Seite 63: Przed Użytkowaniem Urządzenia
Przed użytkowaniem urządzenia Co jest w pudełku Przeczytaj przed użytkowaniem Potwierdź akcesoria standardowe < Nie przechylaj urządzenia gdy dysk CD jest włożony. Takie postępowanie może doprowadzić Pilot × 1szt. do uszkodzenia urządzenia. Bateria (CR2025) do pilota × 1szt. < Upewnij się, że dysk CD jest wyjęty z urządzenia (Bateria została włożona do pilota pr zed pr zenoszeniem o dt war z ac z a, k tór y fabrycznie) -
Seite 64: Dyski
< Używaj mazaków do dysków z tuszem opartym Jeśli będziesz używać dysków tego typu w tym na oleju i miękką końcówką. Nigdy nie używaj urządzeniu MUJI LTD oraz podmioty podległe nie długopisów kulkowych lub innych z twardą biorą odpowiedzialności za możliwe konsekwencje końców k ą... - Seite 65 Ostrzeżenia w użytkowaniu Ostrzeżenia o przechowywaniu dysków < Dyski powinny być włożone z powrotem do ich opakowań po użytkowaniu aby chronić je przed < Zawsze wkładaj dyski etykietą na zewnątrz. Tylko kurzem i zadrapaniami, które mogą powodować jedna strona dysku CD może być odtwarzana. przeskakiwanie laserowego czytnika.
-
Seite 66: Konserwacja
Dysk (ciąg dalszy) Kompatybilnośc z MP3/WMA Konserwacja To urządzenie może odtwarzać pliki MP3/WMA nagrane na dyskach: < Jeśli dysk ulegnie zabrudzeniu należy wytrzeć jego CD-R powierzchnię ruchem okrężnym od środka do CD-RW zewnątrz miękką suchą ściereczką. < To urządzenie może odtwarzać w wersji mono i stereo pliki MP3, które są... -
Seite 67: Opis Części
Opis części Odtwarzacz CD Wyświetlacz Przycisk trybu (MODE) Przycisk głośności (−,+) Przycisk przeskakiwania Soczewka do innego utworu Przycisk do przodu/do tyłu(.,/) Czujnik pilota Rdzeń Pokrywa ochronna Głośniki Antena FM Kabel zasilający Podłączenie do adaptora (play/stop) Pilot Przycisk przeskakiwania (do Przycisk przeskakiwania przodu) (/) (do tyłu)(.) Przycisk przewijania do przodu... -
Seite 68: Pilot
Pilot Metoda instalacji Wskazówki użytkowania pilota Przytwierdź płytkę mocującą do < Pilot może nie działać prawidłowo nawet w swojej ściany. odległości operacyjnej (5m od odtwarzacza CD) jeśli pomiędzy nim a odtwarzaczem są jakieś przeszkody. < Pilot może nie działać jeśli światło słoneczne lub inne silne światło świeci bezpośrednio na czujnik. -
Seite 69: Podłączenie Adaptora Ac
Podłączenie adaptora AC Po podłączeniu kabla zasilającego do kabla od Przytwierdź odtwarzacz CD do Adaptora AC podłącz Adaptor do gniazdka. płytki mocującej do ściany. Do gniazdka zasilającego Spasuj odtwarzacz CD z płytką przymocowaną do ściany i wsuń odtwarzacz CD wpasowując jego Adaptor AC uchwyty. -
Seite 70: Słuchanie Muzyki
Słuchanie muzyki Włóż dysk CD do odtarzacza Użyj przycisków głośności (−,+) aby ustawić poziom głośności. Umieść dysk CD w samym centrum odtwarzacza. VOL 05 Poziom głośności jest pokazany na wyświetlaczu Uwaga < Głośność może być regulowana w skali od 00 do 32. - Seite 71 Wybór utworów < Podczas odtwarzania wciśnij przycisk powtórz (REPEAT) 1 raz aby odtwarzać w kółko wszystkie Do poprzedniego utworu utwory na dysku CD rozpoczynając od pierwszego utworu. (napis “REPEAT” ukaże się na wyświetlaczu.) < Aby zatrzymać odtwarzanie w kółko wszystkich 02 00:05 utworów przyciśnij przycisk powtórz “REPEAT”...
-
Seite 72: Słuchanie Radia
Słuchanie radia Wybór ręczny Wciśnij przycisk trybu (MODE). Aby wybrać stację, której odtwarzacz nie może Źródło zmienia się na FM odszukać automatycznie wciskaj wielokrotnie przycisk przeskocz do poprzedniego/następnego utworu (.//)aż znajdziesz właściwy kanał FM 87.5 i stację. FM 87.5 C z ę s to t l i w o ś ć jes pokazana po tym jak ukaże się... -
Seite 73: Rozwiązywanie Problemów
Rozwiązywanie problemów Jeśli masz problem przeczytaj tą stronę i spróbuj Jeśli jakość odbioru jest słaba rozwiązać problem samodzielnie zanim zadzwonisz Wyciągnij antenę FM lub zmień jej pozycję aby do swojego sprzedawcy. poprawić odbiór. Podstawowe Brak zasilania Aby wyłączyć odtwarzacz wciśnij e Podłącz wtyczkę... - Seite 74 Rozwiązywanie problemów (ciąg dalszy) Odtwarzacz CD To urządzenie wykorzystuje mikrokomputer i może nie działać prawidłowo z powodu hałasu Nie mogę włożyć dysku CD do odtwarzacza. itp. z zewnątrz. W takim przypadku wyjmij e Usuń kurz lub brud z centralnego rdzenia wtyczkę...
-
Seite 75: Specyfikacja
Specyfikacja Odtwarzacz CD Podstawowe Obsługiwane rodzaje dysków Napięcie zasilające ....AC 220V – 240V, 50Hz CD/CD-R/CD-RW (8cm/12cm) Rozproszenie mocy .......12W Obługiwane formaty plików . -
Seite 76: Für Die Europäischen Kunden
Für die europäischen Kunden Inhalt Entsorgung von Elektro-und Elektronikgeräten Erste Schritte ........77 (a) Alle Elektro-und Elektronikgeräte sind getrennt vom allgemeinen Hausmüll über dafür staatlich vorgesehene CDs . -
Seite 77: Erste Schritte
Erste Schritte Verpackungsinhalt prüfen Lesen Sie die folgenden Punkte vor dem Gebrauch durch Sollten Bestandteile fehlen oder beschädigt sein, tei- len Sie dies der Filiale, bei der Sie das Produkt gekauft < Kippen Sie niemals das Gerät , wenn sich eine CD haben, mit. -
Seite 78: Cds
CDs die auf dem Gerät abge- Zu den CD-R/CD-RW spielt werden können Dieses Gerät kann CD-R und CD-RW wiedergeben, die im Audio CD-Format oder im MP3/ WMA-Format CDs die das “COMPACT disc DIGITAL” Logo tragen. aufgenommen wurden. < CDs, welche in einem CD-Rekorder hergestellt werden, müssen vor der Widergabe fertiggestellt werden. -
Seite 79: Anwendung Der Cds
Anwendung der CDs Aufbewahrung von CDs < Bewahren Sie CD's in ihrer Hülle auf, wenn sie aus- < Die abzuspielende CD muss immer mit der be- ser Gebrauch sind. Dadurch vermeiden Sie Kratzer druckten Seite nach vorn eingelegt werden. auf der Oberfläche. <... -
Seite 80: Mp3/Wma Kompatibilität
CDs (Fortsetzung) MP3/WMA Kompatibilität Pflege Dieses Gerät kann MP3/WMA Dateien auf CD-R/CD- RW abspielen. < Wenn eine CD Schmutz aufweist, wischen Sie diese vorsichtig mit einem weichen Baumwolltuch < Das Gerät kann monophone und stereo MP3 von der Mitte nach aussen in kreisförmigen Dateien abspielen, welche im MPEG-1 Audio Layer Bewegungen ab. -
Seite 81: Identifizierung Der Einzelteile
Identifizierung der Einzelteile Hauptgerät Display Mode-Knopf (MODE) Lautstärke (−,+) Linse Skip - Knopf Vor/Zurück Knopf (.,/) Fernbedienungssensor Zentrum Schutzscheibe (Karte) Lautsprecher FM Antenne Stromkabel Anschluss zum (Play/Stop - Knopf) AC-Adapter Fernbedienung Skip-Knopf (Zurück) (.) Skip-Knopf (Vor) (/) Vor-Knopf (,) Zurück-Knopf (m) Stop-Knopf ( H ) Play/Pause Knopf (y/J) Wiederholungsknopf... -
Seite 82: Anwendung Der Fernbedienung
Anwendung der Fernbedienung Installationsmethode Hinweise zur Anwendung der Anbringen der Halterung an die Fernbedienung Wand. < Zum Bedienen, zeigen Sie die Spitze der Fernbe- dienung aus höchstens 5 m Entfernung auf das Gerät. < Stellen Sie keine Hindernisse zwischen das Gerät und die Fernbedienung. -
Seite 83: Anbringen Des Geräts An Die Halte
Anschluss an den AC-Adapter Stecken Sie, nachdem Sie das Netzkabel mit dem Anbringen des Geräts an die Halte- entsprechenden Netzadapterkabel verbunden rungsplatte. haben, den Adapter in die Steckdose. In die Steckdose Halten Sie das Gerät parallel zu der Halterungsplatte Zugehöriger und hängen das Rückteil des Geräts in die Einschub- Netzadapter fächer. -
Seite 84: Eine Cd Hören
Eine CD hören Einlegen der CD in das Gerät. Um die Lautstärke einzustellen, drücken Sie den Lautstärke-Knopf Drücken Sie die CD auf die zentrale Drehscheibe (−,+) . des Geräts. VOL 05 Das Lautstärke- Level wird angezeigt. Warnhinweise < Die Lautstärke kann innerhalb eines Bereichs zwischen 00 und 32 geregelt werden. -
Seite 85: Musikstück Auswählen
Musikstück auswählen < Während der Wiedergabe können Sie den Wiederholungsknopf (REPEAT) drücken, um alle Ein Musikstück zurück gehen Stücke vom ersten Titel an zu wiederholen. (Auf dem Display wird “REPEAT” angezeigt). < Die Wiederholung stoppt, indem der “REPEAT” 02 00:05 -Knopf erneut getätigt wird. -
Seite 86: Radio Hören
Radio hören Manuelle Einstellung Drücken Sie den Mode -Knopf Um einen Sender zu empfangen, der nicht au- (MODE). tomatisch gefunden werden kann, drücken Sie mehrmals den Skip-Knopf (.//) bis Sie Die Quelle verändert sich zu FM. Ihren Sender gefunden haben. FM 87.5 FM 87.5 Nachdem “FM”... -
Seite 87: Bei Schlechtem Empfang
Problembehebung Bei schlechtem Empfang Wenn Sie Probleme mit Ihrem Gerät haben, lesen Sie die folgende Seite durch, bevor Sie sich an Ihren Ist der Empfang des Radios schlecht, drehen Sie die Händler wenden. FM Antenne so, dass Sie einen besseren Empfang erhalten. -
Seite 88: Mp3/Wma Dateien
Problembehebung (Fortsetzung) CD Player Das Gerät beinhaltet einen Mikrorechner, der aufgrund von Lärm etc. in seiner Funktion gestört Ich kann die CD nicht in das Gerät einsetzen. werden kann. In diesem Fall bitte den AC Stecker e Entfernen Sie Schmutz oder Staub von der aus der Steckdose ziehen, eine Weile warten. -
Seite 89: Technische Daten
Technische Daten CD Player Allgemein Abspielbare CD-Typen . .CD/CD-R/CD-RW (8 cm/12 cm) Volt/Power -Zulauf ... . .AC 220 V – 240 V, 50 Hz Abspielbare Formate ..CD-DA, MP3/WMA Dateien Verlustleistung . - Seite 90 Índice Para clientes europeus Eliminação de equipamento eléctrico e electrónico (a) Todo o equipamento eléctrico e electrónico e respectivos Antes de Utilizar este Produto ..... . .91 resíduos devem ser deitados fora em pontos de recolha de CDs .
-
Seite 91: Antes De Utilizar Este Produto
Antes de Utilizar este Produto Conteúdos da Embalagem Leia esta secção antes de utilizar este produto Verifique os acessórios standard fornecidos. < Ao inserir um CD no dispositivo, não incline o Controlo remoto 1× disp ositivo. Se o fizer, p ode causar mau Pilha (CR2025) para o controlo funcionamento. -
Seite 92: Cds
< Use uma caneta de ponta de feltro macia e à neste dispositivo. Se utilizar esse tipo de CDs base de óleo para escrever informação no lado de neste dispositivo, a MUJI LIMITED e suas filiais não etiquetagem do CD. Nunca use uma esferográfica são responsáveis por quaisquer consequências ou uma caneta de ponta dura pois isso poderá... -
Seite 93: Precauções De Utilização
Precauções de utilização Precauções de armazenamento < Insira sempre um CD com o seu lado de < Depois de ter usado um CD, deve voltar a colocá- etiquetagem virado para fora. Apenas um lado de lo na respectiva caixa de modo a evitar que fique um CD pode ser reproduzido. -
Seite 94: Manutenção
CDs (continuação) Compatibilidade com MP3/WMA Manutenção Este dispositivo pode reproduzir ficheiros MP3/WMA gravados em discos CD-R e CD-RW. < Se um CD estiver sujo, limpe-o com um pano macio e seco, esfregando radialmente a sua < Este dispositivo pode reproduzir ficheiros super fície desde o seu furo central até... -
Seite 95: Identificação Dos Componentes
Identificação dos Componentes Unidade principal Display Botão de modo (MODE) Botão de volume (−,+) Botão de avançar/ Lente retroceder faixas Botão de avançar/ retroceder (,) Sensor do controlo remoto Eixo central Placa protectora (cartão) Altifalantes Cabo de ligação de CC Antena de FM (Corrente Contínua) (reproduzir/parar) -
Seite 96: Controlo Remoto
Controlo Remoto Instruções de Instalação Observações relativas à utilização do Fixe a placa de fixação à parede. controlo remoto < Mesmo se o controlo remoto for utilizado dentro do seu intervalo de distância de funcionamento efectivo (5 m), o dispositivo poderá não responder ao controlo remoto se existirem obstáculos entre este e a unidade principal. -
Seite 97: Ligar O Adaptador De Ca À Unidade Principal
Ligar o adaptador de CA à unidade principal Fixe o dispositivo de reprodução de CDs à placa de fixação à parede. Após conectar o cabo de alimentação ao cabo adaptador CA dedicado, ligue o adaptador a uma saída. Alinhe o reprodutor de CDs com a placa de fixação Inserir numa tomada eléctrica à... -
Seite 98: Ouvir Um Cd
Ouvir um CD Insira o CD no dispositivo de re pro- Prima os botões de volume (−,+) du ção de CDs. para ajustar o volume. Coloque o CD no eixo central do reprodutor de VOL 05 CDs. O nível de volume é... - Seite 99 Selecção de faixas < Durante a reprodução do CD, prima o botão de repetir (REPEAT) uma vez para voltar a reproduzir Ir para faixa anterior todas as faixas do CD começando pela primeira faixa. (Aparece “REPEAT” no display.) 02 00:05 <...
-
Seite 100: Ouvir Rádio
Ouvir Rádio Selecção manual Prima o botão de modo (MODE). Para sintonizar uma estação de rádio que O modo altera-se para FM. o disp osi t i vo nã o co ns e gu e sinto ni z ar automaticamente, prima o botão de avançar/ retroceder faixas (.//) repetidamente para FM 87.5 seleccionar a estação que pretende ouvir. -
Seite 101: Resolução De Problemas
Resolução de Problemas Se a recepção for fraca Se o dispositivo apresentar um problema, consulte esta secção e tente resolver esse problema antes de Estenda a antena de FM ou altere a sua posição de contactar o seu comerciante. modo a melhorar a recepção da estação. Geral Sem energia eléctrica Para desligar o dispositivo... - Seite 102 Resolução de Problemas (continuação) Reprodutor de CDs Este dispositivo usa um microcomputador que, por vezes, poderá não funcionar correctamente Não é possível inserir um CD na unidade principal. devido à presença de ruído, etc. próximo da e Limpe o pó e remova quaisquer obstáculos unidade principal.
-
Seite 103: Características Técnicas
Características Técnicas Reprodutor de CDs Geral Tipos de CDs reproduzidos Voltagem de abastecimento eléctrico CD/CD-R/CD-RW de 8cm e 12cm CA 220 – 240V, 50Hz Formatos reproduzidos ..CD-DA, ficheiros MP3/WMA Dissipação de energia ......12W Braço Dimensões máximas exteriores (Unidade principal) Braço óptico de não contacto/laser semicondutor... - Seite 104 RYOHIN KEIKAKU EUROPE LTD. 8-12 LEEKE STREET, LONDON WC1X 9HT www.muji.eu MUJI U.S.A. LIMITED 250 West 39th Street, Suite 605 New York, NY 10018 www.muji.us MUJI RETAIL (AUSTRALIA) PTY LTD Level 28, 303 Collins Street, Melbourne VIC 3000 www.muji.au...