Herunterladen Inhalt Inhalt Diese Seite drucken
Saitek Pro Flight Bedienungsanleitung

Saitek Pro Flight Bedienungsanleitung

Multi panel
Vorschau ausblenden Andere Handbücher für Pro Flight:

Werbung

Verfügbare Sprachen
  • DE

Verfügbare Sprachen

  • DEUTSCH, seite 17

Werbung

Inhaltsverzeichnis
loading

Inhaltszusammenfassung für Saitek Pro Flight

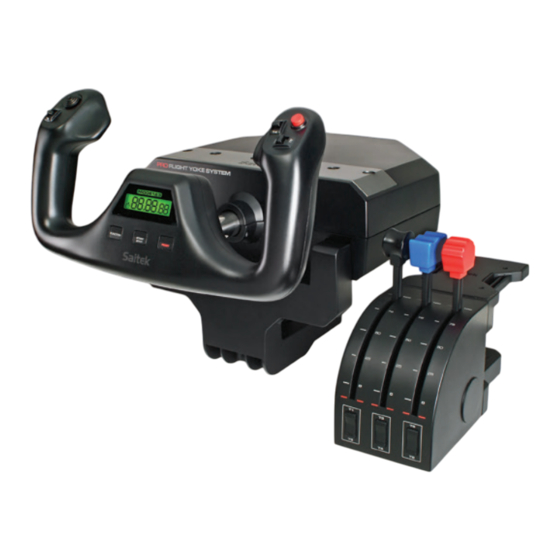
  • Seite 2 CLOSER TO REALITY WITH SAITEK’S PRO FLIGHT RANGE YOUR COMPLETE COCKPIT SOLUTION // DIGITAL LCD DISPLAY YOKE SYSTEM THROTTLE/PROP./MIXTURE CONTROLS AND QUADRANT PERFECT PARTNERS BACKLIT INFORMATION PANEL...
  • Seite 3: Inhaltsverzeichnis

    ENGLISH INTRODUCTION INSTALLATION USING THE SAITEK PRO FLIGHT MULTI PANEL TROUBLESHOOTING FRANÇAIS DÉMARRAGE INSTALLATION UTILISER LE SAITEK PRO FLIGHT MULTI PANEL DÉPANNAGE DEUTSCH ERSTE SCHRITTE INSTALLATION EINSATZ DES SAITEK PRO FLIGHT MULTI-PANEL FEHLERBEHEBUNG ITALIANO AVVIO INSTALLAZIONE USO DEL PANNELLO MULTIPLO PRO FLIGHT SAITEK RISOLUZIONE PROBLEMI ESPAÑOL...
  • Seite 4: Introduction

    INTRODUCTION The Multi Panel interacts with Microsoft Flight Simulator X to control a range of functions, including auto pilot settings, flaps and trim controls.
  • Seite 5: Driver Installation

    Fix the Multi Panel to the supplied mounting bracket. Insert the screws through the holes at the corners of the Panel into the bracket behind and tighten. If you already own a Saitek Pro Flight Yoke System, you can mount the Panel and bracket on top of the Yoke unit using the screws provided.
  • Seite 6: Using The Saitek Pro Flight Multi Panel

    USING THE SAITEK PRO FLIGHT MULTI PANEL Button Autopilot function Master switch to engage or disengage the autopilot Plane will fly to selected compass heading Plane will fly to selected NAV1 frequency or GPS Plane will fly at selected indicated airspeed...
  • Seite 7: Troubleshooting

    The Pro Flight Multi Panel will not register automatically if you have installed the Pro Flight Multi Panel before installing FSX. To register the Pro Flight Multi Panel with FSX, click on the “Launch the Flightsim X plugin manually” icon to re-run the program.
  • Seite 8: Technical Support

    1. Obtain a Return Authorization Number from Mad Catz Technical Support via ONE of the following methods: a. Submit a Ticket at http://support.madcatz.com b. Call the Mad Catz Tech Support Center nearest you: North America: 1-800-659-2287 (USA) or 1-619-683-2815 (outside USA) United Kingdom: 01633 928072 Europe (outside UK): +44(0) 1633 883110 France: 01 82 88 01 80...
  • Seite 9: Eu Declaration Of Conformity

    IC RF Exposure Statement: The device meets the exemption from the routine evaluation limits in section 2.5 of RSS 102 and compliance with RSS-102 RF exposure, users can obtain Canadian information on RF exposure and compliance. Under Industry Canada regulations, this radio transmitter may only operate using an antenna of a type and maximum (or lesser) gain approved for the transmitter by Industry Canada.
  • Seite 10: Démarrage

    DÉMARRAGE Le Multi Panel interagit avec Microsoft Flight Simulator X pour contrôler un large éventail de fonctions, y compris les paramètres du pilote automatique, le contrôle des volets et de l’assiette.
  • Seite 11: Installation Des Pilotes

    Fixez le Multi Panel à l’aide du support de fixation. Insérez les visses à travers les trous des coins du Panel dans le support arrière et serrez. Si vous possédez déjà un Saitek Pro Flight Yoke System, vous pouvez monter le Panel et son support sur le dessus du châssis de l’appareil à l’aide des visses fournies.
  • Seite 12: Utiliser Le Saitek Pro Flight Multi Panel

    Finir pour terminer l’installation. UTILISER LE SAITEK PRO FLIGHT MULTI PANEL Bouton Fonction Pilote Automatique Interrupteur principale pour engager ou désengager le pilote automatique L’appareil volera en direction du cap sélectionné L’appareil volera en direction de la fréquence NAV1 sélectionnée ou du GPS L’appareil volera à...
  • Seite 13: Dépannage

    ? “, cliquez sur Oui et FSX continuera son chargement. Le Pro Flight Multi Panel ne s’enregistrera pas automatiquement si vous l’avez installé avant le logiciel FSX. Pour enregistrer le Pro Flight Multi Panel avec FSX, cliquez sur l’icône “Lancer manuellement le plugin Flightsim X” pour ré-exécuter le programme.
  • Seite 14: Assistance Technique

    Catz. En aucun cas la responsabilité de Mad Catz ne pourra dépasser le prix d’achat d’origine du produit. Cette garantie ne s’applique pas à : (a) une usure normale ou un mauvais usage ; (b) une utilisation industrielle, professionnelle ou commerciale ; (c) un produit ayant fait l’objet de modifications.
  • Seite 15 ATTENTION - N’utilisez cette unité que dans le but pour lequel elle a été conçue. - Pour prévenir tout risque d’incendie ou de choc électrique, n’exposez pas cette unité à la pluie ou à l’humidité. Ne l’utilisez pas à moins de 9 mètres de l’eau (par exemple une piscine, une baignoire ou un évier).
  • Seite 16 Cet appareil répond aux exigences lui permettant d’être exempté des limites de l’évaluation de routine exposées à la section 2.5 de la norme RSS 102 et est conforme aux limites d’exposition aux RF établies par la norme RSS-102. Les utilisateurs peuvent obtenir des informations du gouvernement canadien relatives à...
  • Seite 17: Erste Schritte

    ERSTE SCHRITTE Das Multi-Panel interagiert mit dem Microsoft Flugsimulator X und steuert so eine Reihe von Funktionen wie Autopilot-Einstellungen, Bremsklappen und Trimmungsregler.
  • Seite 18: Installation

    Schrauben durch die Öffnungen in den Panelecken und durch die Halterung dahinter und ziehen Sie die Schrauben an. Falls Sie bereits ein Saitek Pro Flight Yoke System besitzen, können Sie Panel und Halterung mit den Schrauben oben auf dem Yoke montieren.
  • Seite 19: Einsatz Des Saitek Pro Flight Multi-Panel

    Programmierumgebung angezeigt wird. Um die Profilbearbeitung zu überspringen, deaktivieren Sie das Kontrollkästchen, und klicken Sie auf Fertigstellen, um die Installation abzuschließen. EINSATZ DES SAITEK PRO FLIGHT MULTI-PANEL Taste Autopilot-Funktion Hauptschalter zum Aktivieren bzw. Deaktivieren des Autopilot Flugzeug fliegt auf dem ausgewählten Kurs Flugzeug fliegt gemäß...
  • Seite 20: Fehlerbehebung

    Das Pro Flight Multi Panel wird nicht automatisch registriert, wenn Sie das Pro Flight Multi Panel vor der Installation von FSX installiert haben. Um das Pro Flight Multi Panel bei FSX zu registrieren, klicken Sie auf das Symbol “ Launch the Flightsim X plugin manually” (Flightsim X Plugin manuell...
  • Seite 21: Nordamerika Und Europa

    NORDAMERIKA UND EUROPA Gehen Sie folgendermaßen vor, um eine Garantieleistung in Anspruch zu nehmen: Fordern Sie mit EINER der folgenden Methoden eine Rücksende-Autorisierungsnummer (Return Authorization Number) vom technischen Support von Mad Catz an: a. Übermitteln Sie auf http://support.madcatz.com ein Ticket. b.
  • Seite 22: Eu-Konformitätserklärung

    darf nur von qualifiziertem Personal gewartet werden. Führen Sie, mit Ausnahme der zulässigen Elemente, keine Gegenstände jeglicher Art in das Gerät ein, da sie gefährliche Spannungspunkte berühren oder einen Kurzschluss auslösen können, was zum Ausbruch von Feuer oder elektrischem Schock führen kann. Wenn Sie sich müde oder unwohl fühlen oder Schmerzen in Ihrer Hand oder Ihrem Arm haben, beenden Sie unverzüglich die Verwendung der Einheit.
  • Seite 23: Avvio

    AVVIO Il pannello multiplo interagisce con Microsoft Flight Simulator X per controllare varie funzioni, tra cui le impostazioni del pilota automatico e i controlli di flap e trim.
  • Seite 24: Installazione

    Fissate il pannello multiplo alla staffa di montaggio fornita. Inserite le viti, attraverso i fori negli angoli del pannello nella parte posteriore della staffa e stringetele. Se possedete già una cloche Saitek Pro Flight Yoke System, potete montare il pannello e la staffa sulla parte superiore della cloche usando le viti fornite.
  • Seite 25 L’aereo vola fino al punto-bussola selezionato L’aereo vola alla frequenza NAV1 o GPS selezionata L’aereo vola alla velocità dell’aria selezionata indicata L’aereo vola fino all’altezza selezionata e la mantiene L’aereo sale o scende alla velocità verticale selezionata L’aereo vola verso il localizzatore di pista (runway localizer) L’aereo vola verso il back course del localizzatore.
  • Seite 26: Risoluzione Problemi

    “sì” e FSX continuerà il caricamento. Il pannello Multi Pro Flight non registra automaticamente se avete installato il pannello prima di installare FSX. Per registrare il pannello Multi Pro Flight con FSX, fate click sull’icona “Launch the Flightsim X plugin manually” per ri-eseguire il programma.
  • Seite 27: Assistenza Tecnica

    Spagna: 93 181 63 94 Nord America: 1-800-659-2287 (USA) o 1-619-683-2815 (al di fuori degli USA) Una volta ottenuto il numero di autorizzazione per la restituzione, effettuare quanto segue: 1. Inviare il prodotto a Mad Catz a proprie spese per l’assistenza. 2.
  • Seite 28: Primeros Pasos

    PRIMEROS PASOS El panel múltiple interactúa con el Simulador de Vuelo X de Microsoft para controlar una serie de funciones, incluyendo las configuraciones del piloto automático, las alas y los controles de trimado (trim).
  • Seite 29: Instalación Del Software

    INSTALACIÓN DEL SOFTWARE 1. En la pantalla Instalación del software, haz clic en Siguiente y un cuadro emergente te preguntará si “deseas confiar en el software de Saitek.” Haz clic en sí, y a continuación en Siguiente. 2. Tras la instalación, puedes Ejecutar el editor de perfiles, que te mostrará el entorno de programación.
  • Seite 30: Utilización Del Panel Múltiple Pro Vuelo De Saitek

    UTILIZACIÓN DEL PANEL MÚLTIPLE PRO VUELO DE SAITEK Botón Función del piloto automático Conmutador máster para activar o desactivar el piloto automático El avión volará con el rumbo de compas seleccionado El avión volará a la frecuencia NAV1 o GPS seleccionados El avión volará...
  • Seite 31: Resolución De Problemas

    FSX. Cuando abra FSX Microsoft le preguntará “¿Confía en este controlador de Saitek?” (“Do you trust this driver from Saitek?”). Haga clic en “Sí” (“Yes”). A continuación le preguntará “Siempre quiere cargar este accesorio durante el lanzamiento del Sin de Vuelo X?” (“Do you always want to load this plug-in when launching Flight Sims X?”).
  • Seite 32: Apoyo Técnico

    La garantía limitada de dos (2) años de Mad Catz sólo se aplica a los compradores de Norteamérica y Europa. El único remedio que se ofrece es la reparación o reposición del producto de Mad Catz. La responsabilidad de Mad Catz en ningún caso excederá el precio de compra original del producto.
  • Seite 33 Teléfono Europa (fuera del Reino Unido): de lunes a viernes (con excepción de los días festivos), +44(0) 1633 883110. PRECAUCIONES - Use este equipo únicamente del modo previsto. - Para evitar riesgo de incendio o de descarga eléctrica, no exponga este equipo a la lluvia ni a la humedad.
  • Seite 35 ©2015 Mad Catz Europe, Ltd. 1-2 Shenley Pavilions, Chalkdell Drive. Shenley Wood, Milton Keynes, Buckinghamshire MK5 6LB, Royaume-Uni (UK). Mad Catz, Saitek, le logo Pro Flight, le logo Saitek et le logo Mad Catz sont des marques de commerce ou des marques déposées de Mad Catz Interactive, Inc., de ses filiales et sociétés affiliées.

Inhaltsverzeichnis