Herunterladen Inhalt Inhalt Diese Seite drucken

Werbung

Verfügbare Sprachen
  • DE

Verfügbare Sprachen

PCUSBVGA
USB 2.0 UNIVERSAL MULTI-DISPLAY ADAPTOR (HIGH DEFINITION)
UNIVERSELE USB 2.0 MULTIDISPLAY-ADAPTER (HD)
ADAPTATEUR USB 2.0 MULTI-ÉCRANS UNIVERSEL (HD)
ADAPTADOR USB 2.0 MULTIPANTALLAS UNIVERSAL (HD)
UNIVERSELLER USB 2.0 MULTIDISPLAY-ADAPTER (HD)
USER MANUAL
GEBRUIKERSHANDLEIDING
NOTICE D'EMPLOI
MANUAL DEL USUARIO
BEDIENUNGSANLEITUNG
3
 
12
 
21
 
30
 
39
 

Werbung

Inhaltsverzeichnis
loading

Inhaltszusammenfassung für Velleman PCUSBVGA

  • Seite 1 PCUSBVGA USB 2.0 UNIVERSAL MULTI-DISPLAY ADAPTOR (HIGH DEFINITION) UNIVERSELE USB 2.0 MULTIDISPLAY-ADAPTER (HD) ADAPTATEUR USB 2.0 MULTI-ÉCRANS UNIVERSEL (HD) ADAPTADOR USB 2.0 MULTIPANTALLAS UNIVERSAL (HD) UNIVERSELLER USB 2.0 MULTIDISPLAY-ADAPTER (HD) USER MANUAL   GEBRUIKERSHANDLEIDING   NOTICE D’EMPLOI   MANUAL DEL USUARIO  ...
  • Seite 2 A port USB type mini-B B port DVI femelle C DEL d’état A Mini-B USB-Puerto A puerto USB tipo mini-B B DVI-Buchse B puerto DVI hembra C Status-LED C LED de estado Figure 1 19/02/2009 © 2008 Velleman Components nv...
  • Seite 3: Safety Instructions

    If in doubt, contact your local waste disposal authorities. Thank you for choosing Velleman! Please read the manual thoroughly before bringing this device into service. If the device was damaged in transit, do not install or use it and contact your dealer. Damage caused by disregard of certain guidelines in this manual is not covered by the warranty and the dealer will not accept responsibility for any ensuing defects or problems.
  • Seite 4: Adaptor Installation

    The USB port must be type USB 2.0 or higher → • Connect the DVI port [B] of the PCUSBVGA to a monitor. If the monitor has a DVI connector, use a normal DVI cable (not incl.). To connect to an analogue VGA or HDMI monitor, use the appropriate adaptor (included).
  • Seite 5 When returning to normal operation, the open windows are not moved back to extended monitor. Login screens will always show up on the primary monitor. Windows Vista: it is advised to run video or DVD playback applications on the primary → monitor to ensure playback performance. 19/02/2009 © 2008 Velleman Components nv...
  • Seite 6 • To enable primary mode, go to the display settings of the operating system. Right click anywhere on the desktop, select ‘Properties’ and select ‘settings’. • Select the DisplayLink Graphics Adapter from the drop-down menu and check the ‘Use this device as primary monitor’ box (see below). Close the window. 19/02/2009 © 2008 Velleman Components nv...
  • Seite 7: Additional Information

    60 85 60 85 1440 x 900 1280 x 1024 60 75 85 60 75 1600 x 1200 1360 x 768 1680 x 1050 59 60 59 60 NOTICE: Interlaced modes are not supported. → 19/02/2009 © 2008 Velleman Components nv...
  • Seite 8 • To verify the local setting, right-click ‘Computer’ on the desktop and select ‘Device Manager’. Expand the ‘Display adaptor’ item. 19/02/2009 © 2008 Velleman Components nv...
  • Seite 9 • The Mac driver is designed for Mac OS X v10.4 (Tiger) and Mac OS X v10.5 (Leopard) and enables to add up to 4 extra monitors to an Intel based Mac using DisplayLink technology. For every additional monitor, a PCUSBVGA is required. NOTICE: Power PC Macintosh computers e.g.
  • Seite 10: Troubleshooting

    Q5: In extended mode, a black border is shown around the desktop of the add-on monitor • The resolution of the add-on monitor is set higher than the resolution of the primary monitor. When possible, set the same resolution on both monitors. 19/02/2009 © 2008 Velleman Components nv...
  • Seite 11: Technical Specifications

    The information in this manual is subject to change without prior notice. © COPYRIGHT NOTICE The copyright to this manual is owned by Velleman Components nv. All worldwide rights reserved. No part of this manual or the described software may be copied, reproduced, translated or reduced to any electronic medium or otherwise without the prior written consent of the copyright holder.
  • Seite 12: Gebruikershandleiding

    30 MB of meer | besturingssysteem: Windows 2000 (SP4), XP (SP2) 32-bit, Vista™ 32/64-bit, Mac OS X v10.4 of v10.5 | monitor: Super VGA (800x600) of hoger | afspelen van dvd via adapter: multikernprocessor @ 2,0 GHz, resolutie 800x600 met 16-bit kleuren 19/02/2009 © 2008 Velleman Components nv...
  • Seite 13: Installatie Van De Adapter

    • Raadpleeg de figuren op pagina 2 van deze handleiding. • Plug de kleinere stekker (type B) van de meegeleverde USB-kabel in de mini-B-poort [A] van de PCUSBVGA. Plug de grotere stekker (type A) in een vrije USB 2.0-poort van uw computer. OPMERKING: Gebruik enkel een USB-poort type USB 2.0 of hoger.
  • Seite 14 De applicaties keren echter niet naar de hoofdmonitor terug. Het inlogvenster verschijnt altijd op de hoofdmonitor. Windows Vista™: Voor de beste resultaten is het aan te raden om videobestanden en dvd’s → op de hoofdmonitor af te spelen. 19/02/2009 © 2008 Velleman Components nv...
  • Seite 15 • Ga naar de scherminstellingen van het besturings-systeem: klik met de rechtermuisknop op het bureaublad, selecteer Properties en Settings. • Selecteer DisplayLink Graphics Adapter uit het uitrolmenu en vink Use this device as primary monitor aan (zie hieronder). Sluit het venster. 19/02/2009 © 2008 Velleman Components nv...
  • Seite 16: Extra Informatie

    60 85 60 85 1440 x 900 1280 x 1024 60 75 85 60 75 1600 x 1200 1360 x 768 1680 x 1050 59 60 59 60 OPMERKING: Interlacing wordt niet ondersteund. → 19/02/2009 © 2008 Velleman Components nv...
  • Seite 17 (Windows Device Driver Model). Het stuurprogramma ondersteunt Vista™ Aero niet. • In deze opstelling worden enkel een ‘extended’ (eerste adapter) en een ‘mirror’ monitor (tweede adapter) ondersteund. • Klik met de rechtermuisknop op Computer en selecteer Device Manager. Rol Display adaptor uit. 19/02/2009 © 2008 Velleman Components nv...
  • Seite 18 (Leopard), en laat toe tot 4 extra monitors aan een Mac met Intel -processor aan te sluiten via DisplayLink™. Voor elke aangesloten monitor heeft u een PCUSBVGA nodig. OPMERKING: Een Power Macintosh, bv. de laatste iMac, PowerBook of PowerMac, wordt niet ondersteund.
  • Seite 19: Problemen En Oplossingen

    5: Er verschijnt een zwarte rand rondom het bureaublad van de aangesloten monitor in extended-opstelling. • De resolutie van de aangesloten monitor staat hoger ingesteld dan die van de hoofdmonitor. Gebruik dezelfde resolutie voor beide monitors. 19/02/2009 © 2008 Velleman Components nv...
  • Seite 20: Technische Specificaties

    90 x 45 x 18 mm Gebruik dit toestel enkel met originele accessoires. Velleman Components nv is niet aansprakelijk voor schade of kwetsuren bij (verkeerd) gebruik van dit toestel. Voor meer informatie over dit product, zie www.velleman.eu. De informatie in deze handleiding kan te allen tijde worden gewijzigd zonder voorafgaande kennisgeving.
  • Seite 21: Consignes De Sécurité

    3. Directives générales ® Se référer à la Garantie de service et de qualité Velleman en fin de cette notice. • Protéger contre les chocs et le traiter avec circonspection pendant l’opération. • Se familiariser avec le fonctionnement avant l’emploi.
  • Seite 22: Installation De L'adaptateur

    N’utiliser qu’un port USB 2.0 ou plus. → • Raccorder le port DVI [B] du PCUSBVGA à un moniteur. Utiliser un câble DVI normal (non inclus) avec un moniteur muni d’une connexion DVI ; utiliser l’adaptateur dédié (inclus) avec un moniteur VGA ou HDMI™.
  • Seite 23 Les applications ne seront ensuite plus déplacées vers le moniteur d’extension. La page de connexion sera toujours affichée sur le moniteur principal. Windows Vista™ : Il est conseillé de jouer des fichiers vidéo sur le moniteur principal pour → les meilleurs résultats. 19/02/2009 © 2008 Velleman Components nv...
  • Seite 24 • Accéder à la configuration du système d’exploitation : cliquer avec le bouton droit sur le bureau, sélectionner Properties et Settings. • Sélectionner DisplayLink Graphics Adapter dans le menu à déroulement vertical et cocher la case Extend my desktop onto this monitor (voir ci-dessous). Fermer la fenêtre. 19/02/2009 © 2008 Velleman Components nv...
  • Seite 25: Information Supplémentaire

    1440 x 900 1280 x 1024 60 75 85 60 75 1600 x 1200 1360 x 768 1680 x 1050 59 60 59 60 REMARQUE : Les modes d’entrelacement ne sont pas supportés. → 19/02/2009 © 2008 Velleman Components nv...
  • Seite 26 Vista™ Aero. • Cette configuration ne supporte qu’un moniteur d’extension (premier adaptateur) et un moniteur en miroir (second adaptateur). • Cliquer avec le bouton droit sur Computer et sélectionner Device Manager. Dérouler Display adaptor. 19/02/2009 © 2008 Velleman Components nv...
  • Seite 27 Preferences vers le moniteur principal. Configuration d’un moniteur depuis la barre de menu • Cocher la case Show displays in menu bar dans la fenêtre Display Preferences pour configurer un moniteur depuis l’icône dans la barre de menu. 19/02/2009 © 2008 Velleman Components nv...
  • Seite 28: Problèmes Et Solutions

    5 : Apparition d’un cadre noir autour du bureau du moniteur ajouté en mode d’extension. • La résolution du moniteur ajouté est plus élevée que celle du moniteur principal. Choisir la même résolution sur les deux moniteurs. 19/02/2009 © 2008 Velleman Components nv...
  • Seite 29: Spécifications Techniques

    © DROITS D’AUTEUR SA Velleman Components est l’ayant droit des droits d’auteur pour cette notice. Tous droits mondiaux réservés. Toute reproduction, traduction, copie ou diffusion, intégrale ou partielle, du contenu de cette notice par quelque procédé ou sur tout support électronique que se soit est interdite sans l’accord préalable écrit de l’ayant droit.
  • Seite 30: Instrucciones De Seguridad

    Si tiene dudas, contacte con las autoridades locales para residuos. ¡Gracias por haber comprado el PCUSBVGA! Lea atentamente las instrucciones del manual antes de usarlo. Si el aparato ha sufrido algún daño en el transporte no lo instale y póngase en contacto con su distribuidor.
  • Seite 31 Utilice sólo un puerto USB 2.0 o superior. → • Conecte el puerto DVI [B] del PCUSBVGA a un monitor. Utilice un cable DVI normal (no incl.) con un monitor equipado con una conexión DVI; utilice el adaptador adecuado (incl.) con un monitor VGA o HDMI™.
  • Seite 32 La ventana de conexión siempre se visualizará en el monitor principal. Windows Vista™: Reproduzca los ficheros de vídeo y los DVD en el monitor principal para → obtener los mejores resultados. 19/02/2009 © 2008 Velleman Components nv...
  • Seite 33 • Entre en la configuración del sistema operativo: haga clic con el botón derecho en el escritorio, seleccione Properties et Settings. • Seleccione DisplayLink Graphics Adapter en el menú desplegable y marque el cajetín Extend my desktop onto this monitor (véase abajo). Cierre la pantalla. 19/02/2009 © 2008 Velleman Components nv...
  • Seite 34: Información Adicional

    60 85 1440 x 900 1280 x 1024 60 75 85 60 75 1600 x 1200 1360 x 768 1680 x 1050 59 60 59 60 NOTA: No están soportados los modos de entrelazado. → 19/02/2009 © 2008 Velleman Components nv...
  • Seite 35 WDDM (Windows Device Driver Model). El driver no está compatible con Vista™ Aero. • Esta configuración soporta sólo un monitor adicional (primer adaptador) y un monitor en espejo (segundo adaptador). • Haga clic con el botón derecho en Computer y seleccione Device Manager. Despliegue Display adaptor. 19/02/2009 © 2008 Velleman Components nv...
  • Seite 36 • El driver para usuarios Mac es para Mac OS X v10.4 (Tiger) y Mac OS X v10.5 (Leopard), y permite ® conectar hasta 4 monitores adicionales a un Mac equipado con un microprocesador Intel utilizando DisplayLink. Cada conexión de un monitor adicional necesita un PCUSBVGA. NOTA: Los ordenadores Power Macintosh (iMac, PowerBook y PowerMac) no son compatibles.
  • Seite 37: Solución De Problemas

    5: Aparece un marco negro alrededor del escritorio del monitor conectado en el modo extended. • La resolución del monitor conectado es más elevada que la del monitor principal. Elija la misma resolución en los dos monitores. 19/02/2009 © 2008 Velleman Components nv...
  • Seite 38: Especificaciones

    90 x 45 x 18 mm Utilice este aparato sólo con los accesorios originales. Velleman NV no será responsable de daños ni lesiones causados por un uso (indebido) de este aparato. Para más información sobre este producto, visite nuestra página web www.velleman.eu. Se pueden modificar las especificaciones y el contenido de este manual sin previo aviso.
  • Seite 39: Sicherheitshinweise

    Falls Zweifel bestehen, wenden Sie sich für Entsorgungsrichtlinien an Ihre örtliche Behörde. Wir bedanken uns für den Kauf des PCUSBVGA! Lesen Sie diese Bedienungsanleitung vor Inbetriebnahme sorgfältig durch. Überprüfen Sie, ob Transportschäden vorliegen. Sollte dies der Fall sein, verwenden Sie das Gerät nicht und wenden Sie sich an Ihren Händler.
  • Seite 40: Windows Treiber Installieren

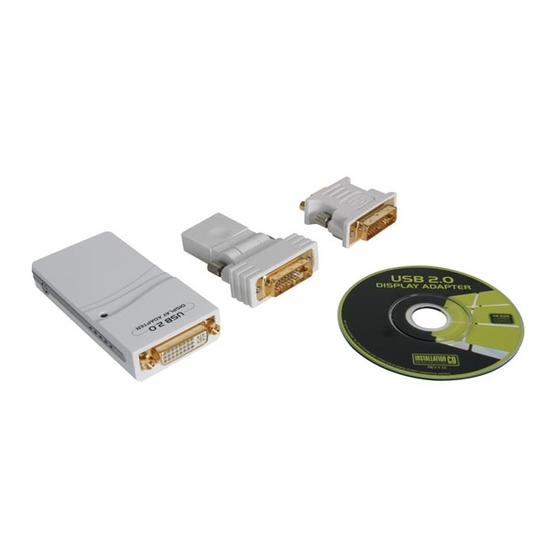
    • Siehe die Abbildungen Seite 2 der Bedienungsanleitung. • Stecken Sie den kleineren Stecker (Typ B) des mitgelieferten USB-Kabel in den Mini-B-Port [A] des PCUSBVGA ein. Stecken Sie den größeren Stecker (Typ A) in einen freien USB 2.0-Port des Computers ein.
  • Seite 41: Anwendung Unter Windows

    Anwendung versucht, auf dem angeschlossenen Monitor zu erscheinen, auch wenn der Monitor ausgeschaltet ist. Um dies zu vermeiden, schleppen Sie eine geöffnete Anwendung zuerst zum Hauptmonitor ehe Sie diese schließen, besonders wenn Sie den angeschlossenen Monitor sporadisch verwenden. 19/02/2009 © 2008 Velleman Components nv...
  • Seite 42 Maustaste auf die Arbeitsoberfläche, wählen Sie Properties und Settings aus. • Wählen Sie DisplayLink Graphics Adapter im Aufklappmenü aus und kreuzen Sie Extend my Windows desktop onto this Monitor an (siehe unten). Schließen Sie das Fenster. 19/02/2009 © 2008 Velleman Components nv...
  • Seite 43: Zusätzliche Informationen

    56 60 72 75 85 56 60 72 75 85 1368 x 1024 x 60 75 85 60 75 85 1400 x 60 75 85 60 75 85 1050 1280 x 60 85 60 85 1440 x 19/02/2009 © 2008 Velleman Components nv...
  • Seite 44 • Sie können bis zu 6 Adapter simultan mit einem einzigen Computer verbinden (abhängig von den freien USB-Anschlüssen). BEMERKUNG: XDDM unter Windows Vista™ unterstützt nur 2 Adapter! (siehe §8.3) → • Installieren Sie zuerst einen Adapter (siehe §6). Verbinden Sie alle anderen Adapter nach der Installation. 19/02/2009 © 2008 Velleman Components nv...
  • Seite 45 • Der Treiber für Mac-Benutzer eignet sich für Mac OS X v10.4 (Tiger) und Mac OS X v10.5 ® (Leopard), und erlaubt es, 4 zusätzliche Monitoren über DisplayLink™an einen Mac mit Intel Prozessor anzuschließen. Für jeden angeschlossenen Monitor brauchen Sie einen PCUSBVGA. BEMERKUNG: Einen Power Macintosh, z.B. letzte iMac, PowerBook oder PowerMac, wird nicht unterstützt.
  • Seite 46: Problemlösung

    5: Es erscheint einen schwarzen Rand rund um die Benutzeroberfläche des angeschlossenen Monitors im extended-Modus. • Die Auflösung des angeschlossenen Monitors steht höher eingestellt als die des Hauptmonitors. Verwenden Sie dieselbe Auflösung für beide Bildschirme. 19/02/2009 © 2008 Velleman Components nv...
  • Seite 47: Technische Daten

    1 x DVI-I-Stecker auf HDMI™-Buchse Abmessungen 90 x 45 x 18 mm Verwenden Sie dieses Gerät nur mit originellen Zubehörteilen. Velleman NV übernimmt keine Haftung für Schaden oder Verletzungen bei (falscher) Anwendung dieses Gerätes. Für mehr Informationen zu diesem Produkt, siehe www.velleman.eu. Alle Änderungen ohne vorherige Ankündigung vorbehalten.
  • Seite 48 • Velleman® can decide to replace an article with an equivalent gebruik of gebruik van het toestel strijdig met de voorschriften article, or to refund the retail value totally or partially when the van de fabrikant.
  • Seite 49 - Schäden verursacht durch Brandschaden, Wasserschaden, Blitz, Velleman® ; Unfälle, Naturkatastrophen, usw. - se calcula gastos de transporte de y a Velleman® si el aparato - Schäden verursacht durch absichtliche, nachlässige oder ya no está cubierto por la garantía. unsachgemäße Anwendung, schlechte Wartung, •...

Inhaltsverzeichnis