Herunterladen Inhalt Inhalt Diese Seite drucken
Klarstein Herakles Bedienungsanleitung
Vorschau ausblenden Andere Handbücher für Herakles:

Werbung

Verfügbare Sprachen
  • DE

Verfügbare Sprachen

  • DEUTSCH, seite 1
Herakles Standmixer
10028562 10029868

Werbung

Inhaltsverzeichnis
loading

Inhaltszusammenfassung für Klarstein Herakles

  • Seite 1 Herakles Standmixer 10028562 10029868...
  • Seite 2: Inhaltsverzeichnis

    Sehr geehrter Kunde, wir gratulieren Ihnen zum Erwerb Ihres Gerätes. Lesen Sie die folgenden Anschluss- und Anwendungshin- weise sorgfältig durch und befolgen Sie diese, um möglichen technischen Schäden vorzubeugen. Für Schä- den, die durch Missachtung der Sicherheitshinweise und unsachgemäßen Gebrauch entstehen, übernehmen wir keine Haftung.
  • Seite 3 • Das Gerät darf von Personen mit verminderten körperlichen, sensorischen oder geistigen Fähigkeiten oder mangelnder Erfahrung verwendet werden, wenn sie in die sichere Benutzung des Gerätes eingewiesen wurden und die damit verbundenen Gefahren verstehen. • Der Missbrauch des Gerätes kann zu Verletzungen führen. Anschluss an die Stromversorgung •...
  • Seite 4: Geräteübersicht

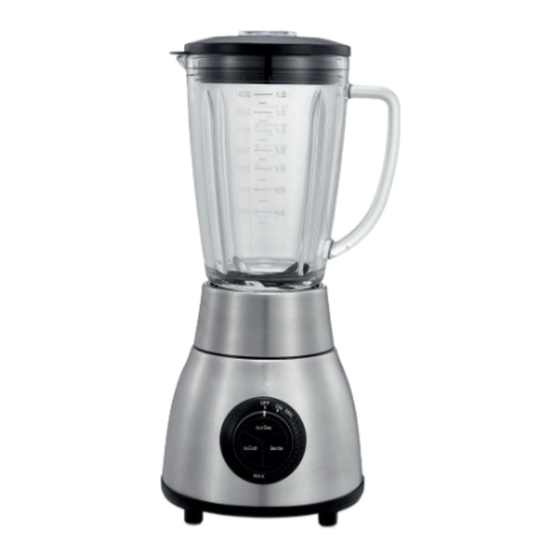
    Geräteübersicht Messbecher Deckel Mixbehälter Kreuzklinge Dichtring Behälterbasis Gerätebasis mit Motor Drehknopf Vor dem Gebrauch Vor dem ersten Gebrauch • Alle Teiles des Mixers müssen vor der ersten Verwendung gründlich gereinigt werden. • Wickeln Sie die benötigte Länge des Netzkabels von der Kabelaufwicklung der Gerätebasis ab und schließen Sie das Gerät an die Stromversorgung an.
  • Seite 5: Bedienung

    2. Setzen Sie das Messerwerk mit dem Dichtring in die Basis des Mixbehälters. 3. Setzen Sie den Mixbehälter auf die Basis und drehen Sie den Mixbehälter im Uhrzeigersinn, bis er fest sitzt. 4. Setzen Sie den Messbecher auf den Deckel. 5.
  • Seite 6: Pflege Und Reinigung

    Pflege und Reinigung Die Reinigung ist einfach. Leeren Sie den gläsernen Mixbehälter und füllen Sie ihn mit Wasser. Montieren Sie den Mixbehälter auf die Gerätebasis und drehen Sie den Drehregler mehrere Male in die Auto-clean.Stellung. Leeren Sie den Glasbehälter und spülen Sie ihn, bis er sauber ist. Hinweise zur Entsorgung Befindet sich die linke Abbildung (durchgestrichene Mülltonne auf Rädern) auf dem Produkt, gilt die Europäische Richtlinie 2012/19/EU.
  • Seite 7: Technical Data

    Dear Customer, Congratulations on purchasing this equipment. Please read this manual carefully and take care of the follow- ing hints on installation and use to avoid technical damages. Any failure caused by ignoring the mentioned items and cautions mentioned in the operation and installation instructions are not covered by our warranty and any liability.
  • Seite 8 • Appliances can be used by persons with reduced physical, sensory or mental capabilities or lack of experi- ence and knowledge if they have been given supervision or instruction concerning use of the appliance in a safe way and if they understand the hazards involved. •...
  • Seite 9: Equipment Overview

    Equipment Overview measuring cup jug cover blender jug blade sealing ring cup base motor base rotary switch Before Use Before first use • All parts of the blender are to be thoroughly cleaned before being used for the first time. •...
  • Seite 10: Usage

    2. Put the blade unit with sealing ring into the cup base. 3. Mount the jug onto the cup base unit and tune the cup base unit, and turn clockwise until jar locks into place. 4. Mount the measure cup onto the jar cover. 5.
  • Seite 11: Cleaning And Care

    Cleaning and Care Empty the glass jar and fill it with water. Place the glass jar on the motor base and turn the switch several times into the Auto-cleaning setting. Empty the glass jar and rinse until clean. Disposal Considerations According to the European waste regulation 2012/19/EU this symbol on the product or on its packaging indicates that this product may not be treated as household waste.
  • Seite 12: Dati Tecnici

    Gentile cliente, La ringraziamo per aver scelto il nostro prodotto. La preghiamo di leggere e seguire attentamente le seguenti istruzioni per evitare eventuali danni. Decliniamo ogni responsabilità in caso di danni dovuti a una mancata osservanza delle norme di sicurezza e a un uso improprio del prodotto. Indice Dati tecnici .
  • Seite 13 • Questo dispositivo non deve essere utilizzato da persone (compresi i bambini) con capacità fisi-che, sen- soriali o mentali ridotte; da persone a cui manchino l’ e sperienza e la conoscenza del dispositivo, a meno che una persona responsabile della loro sicurezza li abbia istruiti relativamente all’utilizzo del dispositivo e ai suoi pericoli.
  • Seite 14: Descrizione Del Prodotto

    Descrizione del prodotto Misurino Coperchio Bicchiere del frullatore Lama a stella Guarnizione ad anello Base del bicchiere Base del dispositivo Interruttore girevole con motore Prima dell’uso Primo utilizzo Prima dell’uso lavare tutti i componenti del Frullatore. Dall’ a vvolgicavo posto sotto la base del dispositivo, dispiegare il cavo per la lunghezza necessaria. E allacciare il dispositivo alla rete elettrica.
  • Seite 15: Utilizzo

    Assemblaggio del bicchiere del frullatore 1. Inserire la guarnizione ad anello lungo il bordo interno dell’ a ttacco del gruppo lame. 2. Montare il gruppo lame con la guarnizione ad anello nella base del bicchiere del frullatore. 3. Montare il bicchiere del frullatore sulla base e avvitarlo in senso orario fino a fissarlo completamente. 4.
  • Seite 16: Pulizia E Manutenzione

    Pulizia e Manutenzione La pulizia è molto semplice. Svuotare il bicchiere in vetro del frullatore e riempirlo di acqua. Montare il bic- chiere del frullatore sulla base del dispositivo e ruotare più volte l’interruttore girevole sulla posizione “Au- to-clean”. Svuotare il bicchiere del frullatore e sciacquarlo fino a che non risulta pulito. Avvertenze per lo smaltimento Se sul prodotto è...
  • Seite 17: Données Techniques

    Chère cliente, cher client, Toutes nos félicitations pour l’ a cquisition de ce nouvel appareil. Veuillez lire attentivement les instructions de branchement et d’utilisation afin d’ é viter d’ é ventuels dommages techniques. Le fabricant ne saurait être tenu pour responsable des dommages dus au non-respect des consignes de sécurité et à la mauvaise utilisation de l’...
  • Seite 18 • Cet appareil ne doit être utilisé par des personnes dont les capacités physiques et mentales sont réduites, ou par des personnes manquant d’ e xpérience ou de connaissances, seulement une fois que celles-ci aient été entièrement sensibilisées aux consignes d’utilisation et de sécurité. •...
  • Seite 19: Aperçu De L'appareil

    Aperçu de l‘appareil Bouchon doseur Couvercle Bol mixeur Couteau à lames croisées Anneau d’ é tanchéité Bol de montage Bloc moteur Bouton de réglage Avant la première utilisation Avant la première utilisation • Nettoyer toutes les pièces du mixeur avant la première utilisation. •...
  • Seite 20: Fonctionnement

    2. Placer le couteau et l’ a nneau d’ é tanchéité sur la base du bol mixeur. 3. Placer le bol mixeur sur le bol de montage et tourner le bol dans le sens des aiguilles d’une montre jusqu’ à ce qu’il soit bien vissé.
  • Seite 21: Nettoyage Et Entretien

    Nettoyage et entretien Le nettoyage de l’ a ppareil est simple. Vider le bol mixeur et le remplir d’ e au. Le placer ensuite sur le bloc moteur et tourner le bouton de réglage plusieurs fois sur la position « Auto-clean ». Vider le bol mixeur et le rincer jusqu’...
  • Seite 22: Datos Técnicos

    Estimado cliente: Le felicitamos por la adquisición de este producto. Lea atentamente el siguiente manual y siga cuidadosa- mente las instrucciones de uso con el fin de evitar posibles daños. La empresa no se responsabiliza de los daños ocasionados por un uso indebido del producto o por haber desatendido las indicaciones de seguridad. Índice Datos técnicos .
  • Seite 23 • Las personas, incluidos niños, con discapacidades físicas, psíquicas o sensoriales o carentes de la expe- riencia y conocimiento necesarios no podrán utilizar el aparato salvo que estén bajo supervisión o hayan sido previamente instruidas sobre su utilización y las indicaciones de seguridad y se hayan familiarizado con sus funciones.
  • Seite 24: Descripción Del Aparato

    Descripción del aparato Vaso medidor Tapa del recipiente Recipiente Cuchilla Junta de goma Base del recipiente Base con motor Botón regulador Antes de utilizar el aparato Antes del primer uso Limpie todas las piezas de la batidora antes de utilizarla por primera vez. Desenrolle el cable lo suficiente de la base del motor y conéctelo a una toma de corriente.
  • Seite 25: Uso

    3. Monte el recipiente en su base y ajuste esta última girándola en el sentido de las agujas del reloj hasta que el recipiente quede encajado. 4. Coloque el vaso medidor en la tapa. 5. Encaje la tapa en el recipiente presionándola hacia abajo. Colocación el recipiente: 1.
  • Seite 26: Limpieza Y Cuidado

    Limpieza y cuidado La limpieza del aparato es muy sencilla. Vacíe el recipiente y llénelo de agua. Monte el recipiente de nuevo en la base y gire el regulador varias veces hasta la posición „Auto-clean“. Vacíe el recipiente y enjuáguelo hasta que esté...

Inhaltsverzeichnis