Herunterladen Inhalt Inhalt Diese Seite drucken
Vorschau ausblenden Andere Handbücher für DA 310:

Werbung

Verfügbare Sprachen
  • DE

Verfügbare Sprachen

  • DEUTSCH, seite 50
DA 310
DA 310
Micro System with
CD/MP3 player
UK User Manual
DK Brugervejledning
DE Bedienungsanleitung
NL Gebruikershandleiding
IT
Manuale di istruzioni
FR Guide d'instructions
E
Manual de instrucciones
1

Werbung

Inhaltsverzeichnis
loading

Inhaltszusammenfassung für Scansonic DA 310

  • Seite 1 DA 310 DA 310 Micro System with CD/MP3 player UK User Manual DK Brugervejledning DE Bedienungsanleitung NL Gebruikershandleiding Manuale di istruzioni FR Guide d'instructions Manual de instrucciones...
  • Seite 2 Safety warnings • Read all the instructions carefully before using the unit and keep them for future reference. • Retain the manual. If you pass the unit onto a third party make sure to include this manual. • Check that the voltage marked on the rating label matches your mains voltage.
  • Seite 3 ensure that curtains and other materials do not obstruct the ventilation vents. • Do not install or place this unit in a bookcase, built-in cabinet or in another conined space. Ensure the unit is well ventilated. Safety • Always disconnect the unit from the mains supply before connection/ disconnecting other devices or moving the unit.
  • Seite 4 CAUTION CAUTION RISK OF ELECTRIC SHOCK RISK OF ELECTRIC SHOCK DO NOT OPEN DO NOT OPEN The lightning lash with arrowhead symbol, within an equilateral triangle, is intended do alert the user to the presence of uninsulated “dangerous voltage” within the unit’s enclosure that may be of suficient magnitude to constitute a risk of delectric shock.
  • Seite 5 Product overview Front view I◄◄ MODE 5 6 7 14. I◄◄ Button 1. Disk tray 10. SKIP/TUNE SEARCH 2. Display Button 3. Remote Control Sensor Skip backwards to the beginning Receive signal from the remote of the track or to the previous control.
  • Seite 6 1. Mains Cable 1. Mains Cable 2. FM Aerial 2. FM Aerial Remote control 1. STANDBY Button Switch the unit between the ON and STANDBY modes. 2. Number buttons 3. REPEAT Button Set repeat function. 4. EQ Button Select the EQ (Equaliser) mode. 5.
  • Seite 7 12. USB Button switch to USB operating mode. 13. BLUETOOTH Button switch to Bluetooth operating mode. I◄◄ 14. I◄◄ Button Button Skip backwards to the beginning of the track or to the previous track in bluetooth mode. 15. Display Button Display track information in CD or USB mode.
  • Seite 8 30. TUNER/DAB Button switch to TUNER or DAB operating mode. 31. ►/II Button Start and pause playback in bluetooth mode. 25. I►► Button Button Skip forwards to the next track in bluetooth mode. 33. ►/II Button Start and pause playback in CD or USB mode. 34.
  • Seite 9 Handling the Battery • Improper or incorrect use of batteries may cause corrosion or battery leakage, which could cause ire, personal injury or damage to property. • Install the battery correctly in the battery compartment. Normally the battery’s positive polarity (+) will face up. •...
  • Seite 10 Remote control operation range • The remote control sensor on the front unit is sensitive to the remote control’s commands up to a maximum of 4 metres away and within a maximum of 60° arc. • Please note that the operating distance may vary depending on the brightness of the room.
  • Seite 11 When you irst connect the unit to the mains socket, display will show the General operation powering ON/OFF When you irst connect the unit to the mains socket, display will show the When you irst connect the unit to the mains socket, display will show the “Scan Time 00:00:00”...
  • Seite 12 I◄◄ I◄◄ If you cannot received any DAB signal, you can manually set the time. Once DAB signal is received, the time will be automatically updated. digits lash. I◄◄ I►► Setting the daily timer to conirm. Th will lash on the display. 1.
  • Seite 13: Factory Reset

    2. The system is now set to turn off after the number of minutes you have set. The display will show “SLEEP #”, e.g. “SLEEP 10” means the unit will switch itself off after 10 minutes, “SLEEP 20” means the unit will switch itself off after 20 minutes, and so on.
  • Seite 14: Manual Tune

    Once the scan has inished the unit will select the irst alphanumerically 25. I►► Button 14. I◄◄ Button found station. to explore the found stations, press Full scan The full scan will search for the entire DAB Band III channels. After the scan has inished, the irst alphanumerically found station will be automatically selected.
  • Seite 15 2. Press PRESET to select your desired preset station number.Then press ENTER conirm. 3. The station will be stored in few seconds and the screen will then show “Preset # Stored”. Recalling a stored station 1. Once you have saved a station to one of the preset buttons, you can recall it by pressing MEMORY.
  • Seite 16 DLS (Dynamic Label Segment) Dynamic label segment is a scrolling message that the broadcaster may include with their transmissions. The message usually includes information, such as programme details etc. I◄◄ Programme Type This describes the “style” or “genre” of the programme that is being broadcast.
  • Seite 17 The unit will automatically switch between stereo and mono mode, but you can override this and switch this function manually. This is helpful when receiving poor signal reception. Preset stations You can store up to 30 of your favourite stations to the memory. This will enable you to access your favourite stations quickly and easily.
  • Seite 18 Station Name This displays the station name. Audio Type This displays if the station being received is in mono or stereo. Compatible disc types Disc Types Disc Logo Recorded Content CD-R (CD Recordable) AUDIO CD-RW (CD-Rewritable) AUDIO I◄◄ AUDIO-CD (Compact Disc Digital Audio) AUDIO I◄◄...
  • Seite 19 Repeat playback 1. During stop or playback mode, press I◄◄ REPEAT once on the remote control, “REP_ ONE” will show on the display. The CD will play the current track repeatedly. 2. Press REPEAT twice, “REP_ALL” will show on the display. The CD will play all tracks repeatedly.
  • Seite 20 Bluetooth ® operation The unit has a Bluetooth function that can receive a signal within 8 metres. Pairing the unit with a Bluetooth device to listen to music: 1. While in the ON mode, press MODE repeatedly on the unit or press BLUETOOTH on the remote to select Bluetooth mode.
  • Seite 21 • Press REPEAT once, “REP_ONE” will show on the display, It will play the current track repeatedly. • Press REPEAT twice, “REP_ALBUM” will show on the display. It will play the current folder repeatedly. • Press REPEAT three times, “REP_ALL” will show on the display. It will play all iles repeatedly.
  • Seite 22 To clean the unit, wipe the case with a slightly moist, lint-free cloth. Do not use any cleaning luids containing alcohol, ammonia or • abrasives. • Do not spray aerosol at or near the unit. Handling discs • Do not touch the playback side of the disc. •...
  • Seite 23 Hints and tips If a problem occurs, it may often be due to something very minor. The following table contains various tips: Problem Solution No power Ensure the mains cable is connected securely at both ends. Make sure that the ON mode is selected. The remote Use the remote control near the unit.
  • Seite 24 350 mm (W) x 120 mm (D) x 190 mm (H) Net Weight Unit ~ 2.9 kg Features and speciications are subject to change without prior notice. Designed in Denmark · Made in China Imported by Dantax Radio A/S Bransagervej 15 · 9490 Pandrup · Denmark www.scansonic.dk...
  • Seite 25 DA 310 DA 310 Mikrosystem med CD/MP3-afspiller DK Brugervejledning...
  • Seite 26 Sikkerhedsadvarsler • Læs alle instruktionerne omhyggeligt, før du bruger enheden, og behold dem til senere brug. • Gem vejledningen. Hvis du giver afspilleren til en anden, skal du lade denne vejledning følge med. • Kontroller, at spændingen på mærkepladen passer til spændingen i din stikkontakt.
  • Seite 27 Ventilation • For at undgå risiko for elektrisk stød eller brand som følge af overophedning skal du sørge for at gardiner eller andre materialer ikke spærrer for ventilationshullerne. • Undlad at placere dette apparat i en bogreol, et indbygget skab eller på andet indelukket sted.
  • Seite 28 FORSIGTIG CAUTION RISIKO FOR ELEKTRISK STØD RISK OF ELECTRIC SHOCK MÅ IKKE ÅBNES DO NOT OPEN Det trekantede symbol med lynet er beregnet på at gøre bruger opmærksom på, at apparatets indre indeholder strømførende dele, der ikke er isolerede, og hvis strømstyrke er tilstrækkelig til at udgøre en fare for skade på...
  • Seite 29 Oversigt over afspilleren I◄◄ Frontpanel MODE 5 6 7 14. I◄◄ Button 1. Diskskuffe 10. SKIP/TUNE SØG -knap 2. Display Springer tilbage til starten på 3. Fjernbetjeningssensor den aktuelle skæring eller til Modtager signalet fra foregående skæring. fjernbetjeningen. Gør det muligt at søge hurtigt 4.
  • Seite 30 1. Mains Cable 1. Strømkabel 2. FM-antenne 2. FM Aerial Fjernbetjening 1. STANDBY-knap Tænder afspilleren eller stiller den på STANDBY. 2. Numeriske knapper 3. REPEAT-knap Valg af gentagefunktion. 4. EQ-knap Valg af indstilling for equalizer. 5. SELECT/MONO/ST. -knap Skifter mellem mono og stereo i FM-tilstand.
  • Seite 31 12. USB-knap skifter til USB-tilstand. 13. BLUETOOTH-knap skifter til Bluetooth-tilstand. 14. I◄◄ Button -knap I◄◄ Springer tilbage til starten på den aktuelle skæring eller til foregående skæring i Bluetooth-tilstand. 15. Display-knap Viser oplysninger om skæringen i CD- eller USB-tilstand. 16. SCAN -KNAP Automatisk kanalsøgning i DAB-tilstand.
  • Seite 32 30. TUNER/DAB-knap Skifter til TUNER eller DAB-tilstand. 31. ►/II-knap Starter og pauser afspilningen i Bluetooth-tilstand. 25. I►► Button -knap Springer frem til næste skæring i Bluetooth-tilstand. 33. ►/II-knap Starter og pauser afspilningen i CD- eller USB-tilstand. 34.  Stop-knap Afbryder afspilningen i CD- eller USB-tilstand. 35.
  • Seite 33 Håndtering af batterier • Forkert anvendelse eller håndtering af batterier kan forårsage korrosion eller batterilækage, der kan føre til brand, person- eller tingskade. • Læg batteriet korrekt i batterirummet. Almindeligvis vender batteriets positive pol (+) opad. • Brug udelukkende den type batterier, der er angivet i denne vejledning.
  • Seite 34 Fjernbetjeningens rækkevidde • Fjernbetjeningssensoren på afspillerens front er i stand til at modtage signalet fra fjernbetjeningen indenfor en afstand på op til 4 meter og indenfor en vinkel på maks. 60°. • Vær opmærksom på, at betjeningsrækkevidden kan variere afhængigt af lysforholdene i rummet.
  • Seite 35 When you irst connect the unit to the mains socket, display will show the Generel betjening Sådan tænder og slukker du When you irst connect the unit to the mains socket, display will show the Første gang, du forbinder afspilleren til lysnettet, viser displayet “Scan Time 00:00:00”...
  • Seite 36 I◄◄ I◄◄ Hvis du ikke kan modtage DAB-signaler, kan du indstille uret manuelt. Når afspilleren modtager DAB-signaler, opdateres uret automatisk. Indstilling af den daglige timer/vækker digits lash. 1. Tryk og hold knappen TIMER på I◄◄ I►► fjernbetjeningen, indtil displayet viser “On to conirm.
  • Seite 37: Factory Reset

    2. Systemet er nu indstillet til at slukke efter det valgte antal minutter. Displayet viser “SLEEP #”, f.eks. “SLEEP 10” som betyder, at afspilleren slukker af sig selv efter 10 minutter, “SLEEP 20” som betyder, at afspilleren slukker af sig selv efter 20 minutter osv. 3.
  • Seite 38: Manual Tune

    I◄◄ Når søgningen er gennemført, stiller radioen automatisk ind på den først fundne station i alfanumerisk rækkefølge. Hvis du vil gennemse de fundne 25. I►► Button 14. I◄◄ Button stationer, skal du trykke på Fuld kanalsøgning Den fulde kanalsøgning søger efter alle stationer på hele DAB Bånd III. Når søgningen er gennemført, stiller radioen automatisk ind på...
  • Seite 39 2. Tryk på knappen PRESET og vælg nummeret på den faste programplads, hvor du vil gemme stationen. Tryk dernæst på ENTER for at bekræfte. 3. Det tager nogle få sekunder at gemme stationen, hvorefter displayet viser “Preset # Stored”. Genkald af en fast station 1.
  • Seite 40 DLS (Dynamic Label Segment) Dynamisk label segment er en rulletekst, som udbyder kan vælge at sende sammen med udsendelsen. Rulleteksten vil som oftest indeholde oplysninger om det aktuelle program etc. I◄◄ Programme Type Her angives “stil” eller “genre” for det program, der sendes. Audio Bit Rate I◄◄...
  • Seite 41 Afspilleren skifter automatisk mellem stereo og mono, men du kan underkende dette og vælge at skifte manuelt. Det er nyttigt, hvis du modtager et signal, der går svagt igennem. Forudindstillede stationer Du kan gemme op til 30 af dine foretrukne stationer i afspillerens hukommelse.
  • Seite 42 Station Name Her vises stationens navn. Audio Type Her kan du se, om stationen modtages i mono eller stereo. Kompatible disktyper Disktyper Disk-logo Indhold CD-R (skrivbar CD) AUDIO CD-RW (genskrivbar CD) AUDIO I◄◄ AUDIO-CD (Compact Disc Digital Audio) AUDIO Afspilning af CD I◄◄...
  • Seite 43 Gentagefunktion 1. Tryk én gang på knappen REPEAT på I◄◄ fjernbetjeningen under afspilning eller afspilningsstop, hvorefter “REP_ONE” vises på displayet. Afspilleren gentager den aktuelle skæring. 2. Tryk på knappen REPEAT for anden gang, hvorefter “REP_ALL” vises på displayet. Afspilleren gentager alle skæringer. 3.
  • Seite 44 Afspilning via Bluetooth ® Afspilleren har en Bluetooth-funktion, der kan modtage signaler fra op til 8 meters afstand. Sådan parrer du afspilleren med en Bluetooth-enhed, så du kan lytte til musik: 1. I ON-tilstand, tryk gentagne gange på knappen MODE på selve afspilleren eller på...
  • Seite 45 • Tryk én gang på knappen REPEAT, hvorefter “REP_ONE” vises på displayet, og afspilleren gentager den aktuelle skæring. Tryk på knappen REPEAT for anden gang, hvorefter “REP_ALBUM” • vises på displayet, og afspilleren gentager den aktuelle mappe. • Tryk på knappen REPEAT for tredie gang, hvorefter “REP_ALL” vises på...
  • Seite 46 • Når afspilleren trænger til rengøring, skal du tørre kabinettet over med en let fugtet fnugfri klud. • Brug aldrig rengøringsmidler indeholdende alkohol, ammoniak eller slibemidler. • Brug ikke spray på eller nær afspilleren. Håndtering af diske • Undlad at berøre diskens dataside. •...
  • Seite 47 Tips og anvisninger Hvis du oplever et problem, kan det ofte løses med få midler. Tabellen herunder indeholder diverse forslag: Problem Løsning Ingen strøm Sørg for, at strømkablet sidder godt fast i hhv. afspiller og stikkontakt. Tryk på ON for at tænde afspilleren. Fjernbetjeningen beinder sig for langt fra afspilleren, gå...
  • Seite 48 350 mm(B) x 120 mm(D) x 190 mm(H) Nettovægt Afspiller Ca. 2,9 kg Ret til ændring i features og speciikationer uden varsel forbeholdes. Designed in Denmark · Made in China Imported by Dantax Radio A/S Bransagervej 15 · 9490 Pandrup · Denmark www.scansonic.dk...
  • Seite 49: Mikrosystem Mit Cd/Mp3-Player

    DA 310 DA 310 Mikrosystem mit CD/MP3-Player DE Bedienungsanleitung...
  • Seite 50 Sicherheitshinweise • Lesen Sie die gesamte Anleitung sorgfältig durch, bevor Sie das Gerät benutzen. Bewahren Sie die Anleitung zum späteren Nachschlagen auf. • Heben Sie die Bedienungsanleitung auf. Sollten Sie dieses Gerät an Dritte weitergeben, dann muss diese Bedienungsanleitung mit ausgehändigt werden.
  • Seite 51 Lüftung • Um das Risiko eines Stromschlags oder Brands aufgrund von Überhitzung zu verhindern, dürfen die Lüftungsschlitze des Geräts nicht mit Vorhängen oder anderen Dingen blockiert werden. • Installieren oder stellen Sie dieses Gerät nicht in einem Bücherregal, Einbauschrank oder einem geschlossenen Bereich auf. Achten Sie auf gute Belüftung des Geräts.
  • Seite 52 VORSICHT CAUTION RISK OF ELECTRIC SHOCK STROMSCHLAGGEFAHR NICHT ÖFFNEN DO NOT OPEN Das Blitzsymbol in einem Dreieck weist den Anwender auf eine nicht isolierte „gefährliche Spannungsquelle“ im Gehäuse des Geräts hin, die stark genug sein kann, um einen elektrischen Schlag zu verursachen. Das Ausrufezeichen in einem gleichseitigen Dreieck weist den Anwender auf wichtige Anweisungen zum Betrieb und zur Instandhaltung in der mit dem Gerät gelieferten Literatur hin.
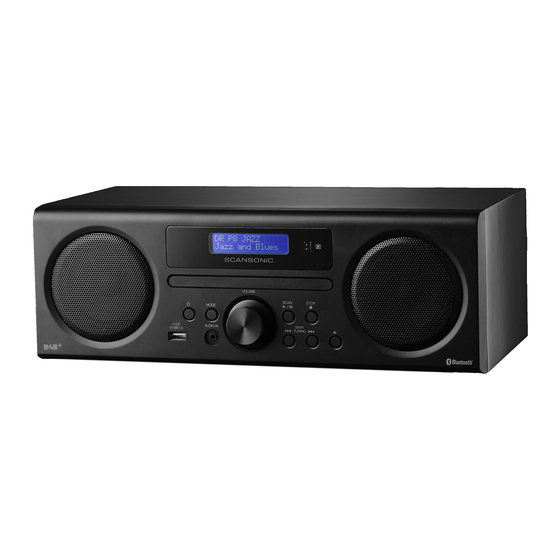
  • Seite 53 Produktübersicht Vorderansicht I◄◄ MODE 5 6 7 1. Diskschublade 10. Taste Überspringen/ 14. I◄◄ Button Sendersuche 2. Display Rückwärts zum Anfang des 3. Fernbedienungssensor Tracks oder zum vorherigen Empfängt die Signale von der Track springen. Fernbedienung. Schneller Rücklauf des 4. USB … 5 V, 1 A Ladeanschluss aktuellen Tracks.
  • Seite 54 1. Mains Cable 1. Netzkabel 2. UKW-Teleskopantenne 2. FM Aerial Fernbedienung 1. Taste STANDBY Schaltet das Gerät zwischen Modus ON und STANDBY um. 2. Zifferntasten 3. Taste REPEAT Stellt die Wiederholungsfunktion ein. 4. Taste EQ Wählt den EQ-Modus aus. 5. Taste SELECT/MONO/ST. Umschaltet im UKW-Modus zwischen Mono oder Stereo um.
  • Seite 55 12. Taste USB Schaltet in den USB-Wiedergabemodus um. 13. Taste BLUETOOTH Schaltet in den Bluetooth-Wiedergabemodus um. 14. I◄◄ Button 14. Taste Springt im Bluetooth-Modus rückwärts zum Anfang des Tracks oder I◄◄ zum vorigen Track. 15. Taste DISPLAY Zeigt Trackinformationen im CD- oder USB-Modus an. 16.
  • Seite 56 30. Taste TUNER/DAB Schaltet in den TUNER- oder DAB-Modus um. 31. Taste ►/II Startet im Bluetooth-Modus die Wiedergabe oder hält sie vorübergehend an. 25. I►► Button 32. Taste Springt im Bluetooth-Modus vorwärts zum nächsten Track. 33. Taste ►/II Startet im CD- oder USB-Modus die Wiedergabe oder hält sie vorübergehend an.
  • Seite 57 Handhabung von Batterien • Unsachgemäßer oder falscher Gebrauch von Batterien kann zu Korrosion oder Auslaufen der Batterie führen, was ein Feuer, Verletzungen oder Sachschäden verursachen kann. • Setzen Sie die Batterien ordnungsgemäß in das Batteriefach ein. Normalerweise beindet sich der Pluspol (+) der Batterie oben. •...
  • Seite 58 Arbeitsbereich der Fernbedienung • Der Fernbedienungssensor auf der Gerätevorderseite reagiert auf die Befehle der Fernbedienung bis zu einem Abstand von maximal 4 Metern und innerhalb eines Winkels von maximal 60°. • Beachten Sie, dass der Arbeitsbereich in Abhängigkeit von der Helligkeit vom Zimmer variiert.
  • Seite 59 When you irst connect the unit to the mains sock Allgemeiner Bedienung Ein-/Ausschalten When you irst connect the unit to the mains socket, display will s Beim ersten Anschluss des Geräts an eine Steckdose zeigt das Display „Scan Time 00:00:00“ an und synchronisiert sich mit der aktuellen Ortszeit, ⏻...
  • Seite 60 I◄◄ I◄◄ Wenn Sie können kein DAB-Signal empfangen können, können Sie die Uhrzeit manuell einstellen. Sobald ein DAB-Signal empfangen wurde, wird die Uhrzeit automatisch aktualisiert. digits lash. Einstellen des Tagestimers I◄◄ I►► 1. Halten Sie die Taste TIMER auf der to conirm.
  • Seite 61: Factory Reset

    2. Das System ist jetzt zum Abschalten nach den von Ihnen eingestellten Minuten bereit. Das Display zeigt „SLEEP #“ an, z. B. „SLEEP 10“. Dies bedeutet, dass sich das Gerät nach 10 Minuten abschaltet, „SLEEP 20“ schaltet das Gerät nach 20 Minuten ab usw. 3.
  • Seite 62 Sobald der Suchlauf beendet ist, wählt das Gerät den ersten gefundenen, alphanumerisch sortierten Sender. Drücken Sie zum Erkunden der 25. I►► Button 14. I◄◄ Button gefundenen Sender Vollständiger Suchlauf Der vollständige Suchlauf durchsucht das gesamte DAB Band III nach Kanälen. Nach dem Scan wird der erste alphanumerische Sender automatisch gewählt und angezeigt.
  • Seite 63 2. Wählen Sie mit PRESET Ihre gewünschte Senderspeichernummer aus. Bestätigen Sie dann mit ENTER. 3. Der Sender wird in wenigen Sekunden gespeichert und auf dem Display wird anschließend „Preset # Stored“ angezeigt. Gespeicherten Sender aufrufen 1. Sobald Sie einen Sender auf einer der Speichertasten abgelegt haben, können Sie ihn durch Drücken von MEMORY abrufen.
  • Seite 64 DLS (Dynamic Label Segment) „Dynamic Label Segment“ (Dynamisches Anzeigesegment) ist ein Lauftext, den der Rundfunkanbieter mit seinen Übertragungen mitliefert. Die Mitteilungen enthalten gewöhnlich Informationen wie Einzelheiten zum Programm und dergleichen. Programme Type I◄◄ Hier wird der „Typ“ oder das „Genre“ des übertragenen Programms beschrieben.
  • Seite 65 Das Gerät schaltet automatisch zwischen Stereo- und Mono-Modus um. Sie können dies jedoch ändern und das Wechseln manuell vornehmen. Das hilft bei Sendern mit schwachem Signalempfang. Sender speichern Sie können bis zu 30 Lieblingssender im Speicher ablegen. So können Sie Ihre Lieblingssender schnell und einfach aufrufen.
  • Seite 66 Station Name Zeigt den Sendernamen an. Audio Type Dies zeigt an, ob der Sender in Mono oder Stereo empfangen wird. Kompatible Disktypen Disktypen Disklogo Aufgenommene Inhalte CD-R (CD Recordable) AUDIO CD-RW (CD Rewritable) AUDIO AUDIO-CD (Digital Audio Compact Disc) AUDIO I◄◄...
  • Seite 67 Wiedergabe wiederholen 1. Drücken Sie im Stopp- oder Wiedergabe- Modus einmal REPEAT auf der Fernbedienung. Auf dem Display wird „REP_ONE“ angezeigt. Die CD gibt wiederholt den aktuellen Track wieder. 2. Drücken Sie zweimal REPEAT. Auf dem Display wird „REP_ALL“ angezeigt. Die CD I◄◄...
  • Seite 68 Anspielen Während der Wiedergabe • Drücken Sie während der Wiedergabe INTRO auf der Fernbedienung. Auf dem Display wird erscheint die Anzeige „INTRO“. Das Gerät spielt jeden Track für 10 Sekunden an. • Kehren Sie mit einem erneuten Tastendruck auf INTRO auf der Fernbedienung zur normalen Wiedergabe zurück.
  • Seite 69 USB-Betrieb 1. Wenn an Ihr Mikrosystem ein USB-Gerät angeschlossen wurde, drücken wiederholt MODE auf dem Gerät oder USB auf der Fernbedienung, um den USB-Modus auszuwählen. 2. Das Mikrosystem zeigt automatisch die Gesamtanzahl der Tracks an. 3. Alle Wiedergabefunktionen sind genau identisch wie bei der Wiedergabe einer MP3 CD.
  • Seite 70 • Schlagen Sie beim Anschluss eines externen Audiogeräts in dessen Bedienungsanleitung sowie im Handbuch nach. • Beispiele für externe Audiogeräte, die mit dem Mikrosystem verbunden werden können, sind: Tragbare MP3-Player, Kassettenplayer, MiniDisc-Player, DVD-Player usw. 4 Stunde Wiedergabe: 1. Wenn sich das Gerät länger als 4 Stunden im AUX-Modus beindet, schaltet es automatisch in den Standby-Modus.
  • Seite 71 Reinigung von Disks • Fingerabdrücke und Staub auf der Disk führen zu Tonstörungen. Wischen Sie die Disk mit einem weichen Tuch von innen nach außen ab. Halten Sie die Disk stets sauber. • Wenn Sie den Staub nicht mit einem weichen Tuch abwischen können, wischen Sie die Disk vorsichtig mit einem angefeuchteten weichen Tuch und anschließend mit einem trockenen Tuch ab.
  • Seite 72 Hinweise und Tipps Wenn ein Problem auftritt, ist es sehr häuig geringfügig. Die folgende Tabelle enthält verschiedene Tipps: Problem Lösung Keine Prüfen Sie, ob das Netzkabel sicher an beiden Enden angeschlossen Stromversorgung ist. Vergewissern Sie sich, dass ersten Aufrufen des ON-Modus Benutzen Sie die Fernbedienung in der Nähe des Geräts.
  • Seite 73 > 2,9 kg Wir behalten uns das Recht vor, ohne Ankündigung Änderungen an den Funktionen und den technischen Daten vorzunehmen. Designed in Denmark · Made in China Imported by Dantax Radio A/S Bransagervej 15 · 9490 Pandrup · Denmark www.scansonic.dk...
  • Seite 74 DA 310 DA 310 Microsysteem met CD/MP3-speler NL Gebruikershandleiding...
  • Seite 75 Veiligheidsvoorschriften • Lees voordat u het apparaat in gebruik neemt deze gebruiksaanwijzing zorgvuldig door en bewaar hem om hem in de toekomst te kunnen raadplegen. • Bewaar de handleiding. Als u dit apparaat aan iemand anders geeft, overhandig dan ook deze handleiding. •...
  • Seite 76 Ventilatie • Zorg ervoor dat er geen gordijnen of andere materialen de ventilatieopeningen afdekken om het risico op elektrische schokken of brandgevaar als gevolg van oververhitting te vermijden. • Installeer of plaats dit apparaat niet in een boekenkast, inbouwkabinet of andere omsloten ruimte. Zorg ervoor dat het apparaat goed wordt geventileerd.
  • Seite 77 OPGELET CAUTION RISK OF ELECTRIC SHOCK RISICO OP ELEKTRISCHE SCHOK NIET OPENEN DO NOT OPEN Het bliksemschichtsymbool binnenin een gelijkzijdige driehoek is bestemd de gebruiker te waarschuwen op de aanwezigheid van ongeïsoleerde “gevaarlijke spanning” binnenin de productbehuizing die voldoende krachtig kan zijn om een risico op elektrische schokken te vormen.
  • Seite 78 Productoverzicht Vooraanzicht I◄◄ MODE 5 6 7 9. SCAN/►/II Toets 1. Diskhouder 2. Display Het afspelen starten/pauzeren/ 3. Afstandsbedieningsensor hervatten. Signaalontvangst vanuit de Automatische scan in DAB/FM- afstandsbediening. modus. 14. I◄◄ Button 4. USB … 5V 1A Laadpoort 10. VORIGE/ZOEK Toets •...
  • Seite 79 1. Mains Cable 1. Netsnoer 2. FM Antenne 2. FM Aerial Afstandsbediening 1. STANDBY Toets Het apparaat wisselen tussen modi ON en STANDBY. 2. Cijfertoetsen 3. REPEAT Toets De herhaalfunctie instellen. 4. EQ Toets De EQ-modus (Equalizer) selecteren. 5. SELECT/MONO/ST. Toets Wisselen tussen mono of stereo in FM-modus.
  • Seite 80 12. USB Toets De USB-gebruiksmodus selecteren. 13. BLUETOOTH Toets De Bluetooth-gebruiksmodus selecteren. 14. I◄◄ Button Toets Terug naar het begin van de track of naar de vorige track in Bluetooth- I◄◄ modus. 15. Display Toets Trackinformatie weergeven in CD- of USB-modus. 16.
  • Seite 81 30. TUNER/DAB Toets De TUNER- of DAB-gebruiksmodus selecteren. 31. ►/II Toets Het afspelen starten en pauzeren in Bluetooth-modus. 25. I►► Button Toets De volgende track selecteren in Bluetooth-modus. 33. ►/II Toets Het afspelen starten en pauzeren in CD- of USB-modus. 34.
  • Seite 82 De batterij hanteren • Ongepast of incorrect gebruik van batterijen kan tot corrosie of batterijlekkage leiden, wat vervolgens brand, persoonlijk letsel of eigendomschade kan veroorzaken. • Installeer de batterij correct in de batterijhouder. De positieve batterijpool (+) is gewoonlijk omhoog gericht. Gebruik uitsluitend het batterijtype gespeciiceerd in deze handleiding.
  • Seite 83 Gebruiksbereik van de afstandsbediening • De afstandsbedieningsensor op het voorpaneel kan de signalen ontvangen tot op 4 meter en binnen een hoek van 60°. • Vergeet a.u.b. niet dat de gebruiksafstand kan variëren afhankelijk van hoe helder de kamer is. MODE 30°...
  • Seite 84 When you irst connect the unit to the mains socket, display will show the Algemene bediening In/uitschakelen When you irst connect the unit to the mains socket, display will show the Wanneer u het apparaat voor het eerst aansluit op het stopcontact, zal de display “Scan Time 00:00:00”...
  • Seite 85 I◄◄ I◄◄ Als u geen enkel DAB-signaal kunt ontvangen, dient u de tijd I◄◄ handmatig in te stellen. De tijd zal automatisch worden bijgewerkt zodra het apparaat een DAB-signaal ontvangt. De dagelijkse timer instellen digits lash. I◄◄ I►► 1. Houd TIMER op de afstandsbediening ingedrukt totdat de “On Timer”...
  • Seite 86: Factory Reset

    2. Het systeem is nu ingesteld om uit te schakelen zodra het ingestelde aantal minuten is verlopen. De display zal nu “SLEEP #” tonen, bijv. “SLEEP 10” betekent dat het apparaat zichzelf na 10 minuten zal uitschakelen en “SLEEP 20” betekent dat het zichzelf na 20 minuten zal uitschakelen, enz.
  • Seite 87: Manual Tune

    I◄◄ Zodra de scan is voltooid kiest de radio automatisch het eerste 25. I►► Button 14. I◄◄ Button alfanumerieke station dat is gevonden. Druk op om de gevonden stations te doorlopen. Volledige scan De volledige scan zal naar kanalen op de gehele DAB Band III zoeken. Zodra de scan is voltooid kiest de radio automatisch het eerste alfanumerieke station dat is gevonden.
  • Seite 88 2. Druk op “PRESET” om het gewenste geheugennummer te selecteren en druk ter bevestiging op “ENTER”. 3. Het station zal na enkele seconden worden opgeslagen en het scherm zal vervolgens “Preset # Stored” weergeven. Een opgeslagen station herroepen 1. Nadat u eenmaal een station hebt toegewezen aan een van de stationgeheugens, kunt u deze herroepen door op “MEMORY”...
  • Seite 89 DLS (Dynamic Label Segment) Dynamisch labelsegment is een rollende melding die de zender kan toevoegen aan hun uitzendingen. Het bericht bevat meestal informatie zoals programmagegevens, enz. Programme Type I◄◄ Dit beschrijft de “stijl” of het “genre” van het programma dat wordt uitgezonden.
  • Seite 90 Het apparaat zal automatisch wisselen tussen stereo en mono modus, maar u kunt dit annuleren en deze functie handmatig wisselen. Dit is nuttig wanneer u stations ontvangt met een zwak signaal. Stationgeheugens U kunt tot op 30 voorkeurstations opslaan in het geheugen. U kunt op deze manier uw favoriete stations snel en eenvoudig selecteren.
  • Seite 91 Station Name Dit toont de stationsnaam. Audio Type Dit geeft aan of het station in mono of stereo wordt ontvangen. Compatibele disktypes Disktypes Disklogo Opgenomen inhoud CD-R (CD-Opneembaar) AUDIO CD-RW (CD-Herschrijfbaar) AUDIO AUDIO-CD (Compact Disk Digitale Audio) AUDIO I◄◄ CD-bediening I◄◄...
  • Seite 92 Herhaald afspelen 1. Druk in stop- of afspeelmodus eenmaal op “REPEAT” op de afstandsbediening en I◄◄ “REP_ONE” zal op de display verschijnen. Het apparaat zal nu de huidige track blijven herhalen. 2. Druk tweemaal op “REPEAT” en “REP_ALL” zal op de display verschijnen. Het apparaat zal nu alle tracks herhaald afspelen.
  • Seite 93 Bluetooth ® bediening Dit apparaat is voorzien van een Bluetooth-functie die signalen kan ontvangen tot op 8 meter. Het apparaat met een Bluetooth-apparaat paren om naar muziek te luisteren: 1. Terwijl in modus “ON”, druk meerdere keren op “MODE” op het apparaat of druk op “BLUETOOTH”...
  • Seite 94 • Druk eenmaal op “REPEAT”, “REP_ONE” zal op de display verschijnen en de huidige track zal herhalend worden afgespeeld. • Druk tweemaal op “REPEAT”, “REP_ALBUM” zal op de display verschijnen en de huidige folder zal herhalend worden afgespeeld. • Druk driemaal op “REPEAT”, “REP_ALL” zal op de display verschijnen en alle bestanden worden herhalend afgespeeld.
  • Seite 95 • Veeg de behuizing schoon met een ietwat vochtig, pluisvrij doekje. • Gebruik geen reinigingsmiddelen die alcohol, ammonia of agressieve stoffen bevatten. • Gebruik geen spuitmiddelen op of in de buurt van het apparaat. Disks hanteren • Raak de afspeelzijde van disks niet aan. •...
  • Seite 96 Hints en tips Als er een probleem optreedt, dan ligt dit vaak aan iets kleins. De volgende tabel bevat verschillende tips: Probleem Oplossing Geen voeding Controleer of beide uiteinden van de voedingskabel stevig zijn aangesloten. Controleer of modus ON is geselecteerd. De afstandsbediening Gebruik de afstandsbediening dichter in de buurt van het werkt niet...
  • Seite 97 350 mm(B) x 120 mm(D) x 190 mm(H) Netto Gewicht Apparaat ~ 2,9 kg Eigenschappen en speciicaties kunnen zonder voorafgaande kennisgeving worden veranderd. Designed in Denmark · Made in China Imported by Dantax Radio A/S Bransagervej 15 · 9490 Pandrup · Denmark www.scansonic.dk...
  • Seite 98 DA 310 DA 310 Sistema Audio Micro con lettore CD/MP3 Manuale di istruzioni...
  • Seite 99 Avvertenze di sicurezza • Leggete attentamente tutte le istruzioni prima di utilizzare il dispositivo e conservatele per future consultazioni. • Conservate questo manuale. In caso di trasferimento dell’unità a una parte terza, accludete questo manuale. Veriicate che il voltaggio segnato sull’etichetta corrisponda a quello •...
  • Seite 100 Aerazione Per prevenire il rischio di scosse elettriche o incendi causati da • surriscaldamento, assicuratevi che tende o altri materiali non ostruiscano i fori di ventilazione. • Non installate o collocate l’unità in una libreria, in un armadio riscaldato o all’interno di un altro spazio chiuso. Assicuratevi che l’unità sia ben ventilata.
  • Seite 101 ATTENZIONE CAUTION RISK OF ELECTRIC SHOCK RISCHIO DI SCOSSE ELETTRICHE NON APRIRE DO NOT OPEN Il simbolo del lampo a freccia iscritta in un triangolo equilatero avverte l’utente circa la presenza di “tensione pericolosa” non isolata nel contenitore dell’unità che potrebbe avere la portata suficiente da provocare scosse elettriche.
  • Seite 102 Panoramica del prodotto Vista frontale I◄◄ MODE 5 6 7 1. Portadisco 10. Tasto SKIP/TUNE SEARCH 2. Schermo 14. I◄◄ Button 3. Sensore del telecomando Torna indietro all’inizio della Per ricevere il segnale dal traccia o alla traccia precedente. telecomando. Consenti il riavvolgimento 4.
  • Seite 103 1. Mains Cable 1. Cavo di alimentazione 2. Antenna FM 2. FM Aerial Telecomando 1. Tasto STANDBY Scegliere tra le modalità ON e STANDBY. 2. Tasti numerici 3. Tasto REPEAT Per impostare la funzione ripetizione. 4. Tasto EQ Per impostare la modalità EQ (Equalizzatore).
  • Seite 104 12. Tasto USB scegliete la modalità operativa USB. 13. Tasto BLUETOOTH scegliete la modalità operativa Bluetooth. 14. I◄◄ Button 14. Tasto Tornate indietro all’inizio della traccia o alla traccia precedente in I◄◄ modalità Bluetooth. 15. Tasto Display Per visualizzare le informazioni sulla traccia in modalità CD o USB. 16.
  • Seite 105 30. Tasto TUNER/DAB Passate alla modalità operativa TUNER o DAB. 31. Tasto ►/II Avviate e fermate la riproduzione in modalità Bluetooth. 25. I►► Button 32. Tasto Passate alla traccia successiva in modalità Bluetooth. 33. Tasto ►/II Avviate e mettete in pausa la riproduzione in modalità CD o USB. 34.
  • Seite 106 Uso della batteria • L’uso incorretto o improprio della batteria potrebbe causare corrosioni o perdite che possono provocare incendi e danni a persone e cose. • Installate la batteria nell’apposito scompartimento. Di solito il polo positivo della batteria (+) è rivolto verso l’alto. •...
  • Seite 107 Raggio di azione del telecomando Il sensore del telecomando davanti all’unità è sensibile ai comandi ino a • un massimo di 4 metri di distanza e con un’angolazione di 60°. • Attenzione: la distanza operativa potrebbe variare a seconda della luminosità...
  • Seite 108 When you irst connect the unit to the mains socket, display will show the Funzionamento generale When you irst connect the unit to the mains socket, display will show the alimentazione ON/OFF Quando collegate l’unità per la prima volta, il display mostrerà “Scan Time ⏻...
  • Seite 109 I◄◄ I◄◄ Se non ricevete il segnale DAB, potete regolare l’ora manualmente. Quando ricevete il segnale DAB, l’ora si aggiornerà automaticamente. digits lash. Regolazione del timer giornaliero I◄◄ I►► 1. Tenete premuto TIMER sul telecomando inché to conirm. The minute digits sul display compare “On Timer”, e le cifre will lash on the display.
  • Seite 110: Factory Reset

    2. Il sistema è ora regolato per spegnersi dopo il numero di minuti da voi programmato. Sul display comparirà “SLEEP #”, es.: “SLEEP 10” signiica che l’unità si spegnerà da sola dopo 10 minuti, “SLEEP 20” signiica che l’unità si spegnerà da sola dopo 20 minuti, eccetera. 3.
  • Seite 111 Una volta terminata la scansione, l’unità selezionerà la prima stazione trovata in ordine alfanumerico, per cercare nuove stazioni premete 25. I►► Button 14. I◄◄ Button Scansione Completa La scansione completa cercherà nell’intera gamma di canali DAB Band III. Una volta terminata la scansione, verrà selezionata automaticamente la prima stazione in ordine alfabetico.
  • Seite 112 2. Premete PRESET per selezionare il numero di stazione salvata desiderato, poi premete ENTER per confermare. 3. La stazione sarà salvata nel giro di qualche secondo e sullo schermo comparirà “Preset # Stored”. Recuperare una stazione memorizzata 1. Quando avete una stazione salvata sotto uno dei tasti programmati, potete recuperarla premendo MEMORY.
  • Seite 113 DLS (Dynamic Label Segment) Un Dynamic label segment è un messaggio scorrevole che il trasmettitore potrebbe voler includere nella trasmissione. Di solito questo messaggio comprende informazioni come dettagli sul programma e altro. I◄◄ Programme Type Descrive lo “stile” o il “genere” di programma che sta venendo trasmesso. Audio Bit Rate I◄◄...
  • Seite 114 L’unità cambierà automaticamente tra le modalità stereo e mono, potete evitare che succeda automaticamente e scegliere di effettuare questo cambiamento manualmente. Questo si rileva utile in caso di ricezione di un segnale debole. Stazioni preimpostate Potete registrare in memoria ino a 30 stazioni preferite. Questo vi permetterà...
  • Seite 115 Station Name Mostra il nome della stazione. Audio Type Mostra se la stazione ricevuta è mono o stereo. Tipi di dischi compatibili Tipi di disco Logo del disco Contenuto registrato CD-R (CD Registrabile) AUDIO CD-RW (CD-Riscrivibile) AUDIO I◄◄ AUDIO-CD (Compact Disc Digital Audio) AUDIO I◄◄...
  • Seite 116 Ripetere la riproduzione 1. Durante la modalità riproduzione o arresto, I◄◄ premete REPEAT una volta sul telecomando, “REP_ONE” comparirà sul display. Il CD riprodurrà la traccia in corso ripetutamente. 2. Premete REPEAT due volte, “REP_ALL” comparirà sul display. Il CD riprodurrà ripetutamente tutte le tracce.
  • Seite 117 Funzionamento Bluetooth ® L’unità è dotata di una funzione Bluetooth che può ricevere un segnale ino a 8 metri. Associazione dell’unità con un dispositivo Bluetooth per ascoltare musica: 1. In modalità ON, premete ripetutamente MODE sull’unità o premete BLUETOOTH sul telecomando per selezionare la modalità Bluetooth. 2.
  • Seite 118 Premete una volta REPEAT, “REP_ONE” comparirà sullo schermo, la • traccia in corso verrà riprodotta ripetutamente. • Premete due volte REPEAT, “REP_ALBUM” comparirà sul display. La cartella attuale verrà riprodotta ripetutamente. Premete tre volte REPEAT, “REP_ALL” comparirà sul display. Tutti i ile •...
  • Seite 119 • Pulite l’esterno dell’unità utilizzando un panno leggermente umido e anti-pelucchi. Non usate detergenti liquidi che contengano alcol, ammoniaca o • sostanze abrasive. • Non utilizzate spray sull’unità o nelle sue vicinanze. Uso dei dischi • Non toccate il lato del disco dedicato alla riproduzione. •...
  • Seite 120 Consigli e suggerimenti Se doveste riscontrare problemi, potrebbe trattarsi di qualcosa di poco grave. La tabella seguente contiene alcuni suggerimenti: Problema Soluzione Assicuratevi che il cavo di alimentazione sia collegato correttamente da Assenza di alimentazione entrambe le estremità. Assicuratevi di aver selezionato la modalità ON. Il telecomando Usate il telecomando vicino all’unità.
  • Seite 121: Speciiche Tecniche

    350 mm (L) x 120 mm (P) x 190 mm (H) Peso netto Unità ~ 2,9 kg Le caratteristiche e le speciiche sono soggette a cambiamenti senza previa notiica. Designed in Denmark · Made in China Imported by Dantax Radio A/S Bransagervej 15 · 9490 Pandrup · Denmark www.scansonic.dk...
  • Seite 122 DA 310 DA 310 Micro système avec lecteur de CD/MP3 FR Guide d'instructions...
  • Seite 123 Avertissements de sécurité • Lisez attentivement tout le manuel et le conserver pour toute référence future. • Conservez ce guide d'instructions. Si vous remettez votre appareil à une autre personne, n'oubliez pas d'y joindre ce guide. Vériiez que la tension marquée sur la plaque signalétique correspond à •...
  • Seite 124 Ventilation Pour prévenir tout risque de choc électrique ou d'incendie dû à une • surchauffe, il faut veiller à ce que des rideaux et autres matériaux n'obstruent pas les fentes d'aération. • Ne placez jamais cet appareil dans un espace restreint, par exemple à...
  • Seite 125 ATTENTION CAUTION RISK OF ELECTRIC SHOCK RISQUE DE CHOC ÉLECTRIQUE NE PAS OUVRIR DO NOT OPEN L’éclair avec un symbole de lèche à l'intérieur d'un triangle équilatéral alerte l'utilisateur de la présence d'une « tension dangereuse » non isolée à l'intérieur du coffret, d'une amplitude peut-être sufisante pour présenter un risque de choc électrique pour des personnes.
  • Seite 126 Présentation de l'appareil I◄◄ Vue avant MODE 5 6 7 1. Plateau de disque 14. I◄◄ Button 10. Touche de recherche 2. Écran SKIP/TUNE 3. Détecteur de la télécommande Positionne la lecture au début Détecte les signaux qui sont du titre actuel ou du titre envoyés par la télécommande.
  • Seite 127 1. Câble d'alimentation secteur 1. Mains Cable 2. Antenne FM 2. FM Aerial Télécommande 1. Touche STANDBY Bascule l'appareil entre les modes ON et STANDBY. 2. Touches numériques 3. Touche REPEAT Conigure la fonction de répétition. 4. Touche EQ Sélectionne un mode d'égaliseur (EQ).
  • Seite 128 12. Touche USB Bascule en mode USB. 13. Touche BLUETOOTH Bascule en mode Bluetooth. 14. I◄◄ Button 14. Touche Positionne la lecture au début du titre actuel ou du titre précédent en mode Bluetooth. I◄◄ 15. Touche DISPLAY Afiche des informations sur le titre en mode CD ou USB. 16.
  • Seite 129 30. Touche TUNER/DAB Bascule en mode TUNER ou radio numérique. 31. Touche ►/II Démarre la lecture et marque une pause en mode bluetooth. 25. I►► Button 32. Touche Passe au titre suivant en mode bluetooth. 33. Touche ►/II Démarre la lecture et marque une pause en mode CD ou USB. 34.
  • Seite 130 Manipulation de la pile • L'utilisation inappropriée ou incorrecte de la pile peut entraîner leur corrosion ou une fuite de leur électrolyte, avec le risque de déclencher un incendie, de causer des blessures corporelles et de provoquer des dommages matériels. •...
  • Seite 131 Portée de transmission de la télécommande • Le détecteur placé sur la face avant de votre appareil peut capter les signaux de la télécommande jusqu'à une distance de 4 mètres et un décalage angulaire de 60°. Veuillez noter que la distance de fonctionnement peut varier selon •...
  • Seite 132 When you irst connect the unit to Principales opérations Mise en marche/arrêt Lorsque vous allumez votre système audio pour la première fois, celui-ci When you irst connect the unit to the mains socket, display will sh afiche le message « Scan Time 00:00:00 » et synchronise son horloge ⏻...
  • Seite 133 I◄◄ Référez-vous à la procédure de réglage manuel de l'horloge lorsque votre appareil ne détecte aucun signal de diffusion numérique. À la réception ultérieure d'un signal de diffusion numérique, l'horloge I◄◄ sera automatiquement synchronisée. I◄◄ Réglage du minuteur journalier 1. Appuyez sur la touche TIMER de la télécommande et maintenez-la enfoncée digits lash.
  • Seite 134: Factory Reset

    1. Pour choisir un délai avant l'arrêt automatique, appuyez sur la touche SLEEP de la télécommande. Chaque pression afiche une autre valeur. Les nombres de minutes s'afichent sur l'écran, selon la séquence suivante : 2. Votre système audio est maintenant programmé pour s'arrêter après le nombre de minutes que vous avez choisi.
  • Seite 135 I◄◄ Mode radio numérique DAB Lorsque vous branchez votre système audio sur le secteur et l'allumez depuis le mode veille pour la première fois, celui-ci se place automatiquement en mode numérique et démarre une recherche de stations. L'indication « Scanning… » s'afiche sur l'écran ainsi qu'une barre de progression de la recherche et le nombre de stations qui ont été...
  • Seite 136 Services supplémentaires Un symbole « > », placé après le nom d'une station, indique que des services supplémentaires sont disponibles pour cette station. Ces services supplémentaires concernent la station principale. Par exemple, pour une station dédiée au sport, l'accès à des commentaires constituera un service supplémentaire.
  • Seite 137 Ensemble Cette option afiche le nom du multiplexe contenant Ensemble la station que vous écoutez. Un multiplexe est un paquet de stations de radio transmises sur une certaine fréquence. Un multiplexe peut être national Signal Strength ou local. Le multiplexe local est limité aux stations spéciiques à...
  • Seite 138 Vous pourrez conigurer la recherche pour ignorer les stations de signal trop faible. Recherche manuelle de stations Pour rechercher manuellement les stations FM, appuyez sur les touches 25. I►► Button 14. I◄◄ Button jusqu'à atteindre la fréquence que vous désirez. En mode FM, vous pouvez avoir à...
  • Seite 139 Informations afichées en mode radio FM Appuyez sur la touche DISPLAY de la télécommande pour accéder à diverses informations. Pour chaque page-écran, les informations sont afichées sur le dernier segment en bas de l'écran. Radio Text Radio Text Le radiotexte est un message déilant reproduisant des informations concernant l'émission qui est actuellement diffusée.
  • Seite 140 4. Attendez que le nombre total de titres disponibles sur le disque CD/ MP3 apparaisse sur l'écran et appuyez sur la touche SCAN/►/II pour démarrer la lecture du premier titre. • Votre lecteur peut lire tous les disques CD, CD-R et CD-RW de 8 cm. Pause dans la lecture 1.
  • Seite 141 Programmation d'une liste d'écoute Vous pouvez programmer la lecture d'au plus 32 titres pour un disque CD et 64 titres pour un disque MP3, dans l'ordre que vous désirez. Cette programmation s'effectue en mode STOP. 1. Appuyez sur la touche MEMORY pour passer en mode programmation.
  • Seite 142 Lorsque le signal est trop faible, votre récepteur Bluetooth risque • de se déconnecter, mais il se replacera automatiquement en mode couplage. Pour améliorer la réception, retirez tout ce qui peut gêner la • transmission des signaux entre votre système audio et la source Bluetooth.
  • Seite 143 Appuyez une troisième fois sur la touche REPEAT ; l'indication • « REP_ALL » apparaît sur l'écran. Dans ce mode, tous les titres sont lus indéiniment. Pour annuler le mode répétition, appuyez une quatrième fois sur la • touche REPEAT. Mode AUX 1.
  • Seite 144 Essuyez l'extérieur de l'appareil avec un chiffon légèrement humide qui • ne peluche pas. • N'utilisez aucun produit de nettoyage contenant de l'alcool, de l'ammoniaque ou des agents abrasifs. • Ne pulvérisez aucun produit en aérosol sur ou à proximité de votre appareil.
  • Seite 145 Conseils et astuces Souvent, les problèmes de fonctionnement sont dus à une cause mineure. Le tableau suivant vous suggère diverses solutions selon le problème rencontré. Problème Solution Vériiez que le câble d'alimentation est correctement branché à ses L'appareil ne s'allume pas. deux extrémités.
  • Seite 146 350 mm(L) x 120 mm(P) x 190 mm(H) Appareil Poids net Appareil Environ 2,9 kg Les caractéristiques et les spéciications sont sujettes à modiication sans notiication préalable. Designed in Denmark · Made in China Imported by Dantax Radio A/S Bransagervej 15 · 9490 Pandrup · Denmark www.scansonic.dk...
  • Seite 147 DA 310 DA 310 Microcadena con reproductor de CD/MP3 ES Manual de instrucciones...
  • Seite 148 Avisos de seguridad • Lea detenidamente todas las instrucciones antes de usar la unidad y consérvelas para futuras consultas. • Guarde el manual. Si en el futuro entrega la unidad a otra persona, asegúrese de incluir también este manual. Compruebe que la tensión indicada en la etiqueta de especiicaciones •...
  • Seite 149 Ventilación • Para evitar el riesgo de descargas eléctricas o el peligro de incendio por sobrecalentamiento, asegúrese de que las cortinas u otros materiales similares no obstruyan las ranuras de ventilación. No coloque o instale la unidad en el interior de un mueble librería, •...
  • Seite 150 PRECAUCIÓN CAUTION RISK OF ELECTRIC SHOCK RIESGO DE DESCARGA ELÉCTRICA NO ABRIR DO NOT OPEN El símbolo de relámpago con punta de lecha dentro de un triángulo equilátero advierte al usuario de la presencia de “tensiones peligrosas” no aisladas dentro de la carcasa de la unidad que pueden ser de una magnitud suiciente como para constituir un riesgo de descarga eléctrica.
  • Seite 151 Vista general del producto Vista frontal I◄◄ MODE 5 6 7 1. Bandeja portadiscos 10. Botón SALTAR/SINTONIZAR 14. I◄◄ Button 2. Pantalla BUSQUEDA 3. Sensor del mando a distancia Salta hacia atrás al principio de Recibe la señal procedente del la pista o a la pista anterior.
  • Seite 152 1. Cable de alimentación 1. Mains Cable 2. Antena FM 2. FM Aerial Mando a distancia 1. Botón ENCENDIDO Conmuta la unidad entre los modos de encendido y en espera. 2. Botones numéricos 3. Botón REPEAT Ajusta la función repetir. 4.
  • Seite 153 12. Botón USB Cambia al modo de funcionamiento USB. 13. Botón BLUETOOTH Cambia al modo de funcionamiento Bluetooth. 14. I◄◄ Button 14. Botón Salta hacia atrás al principio de la pista o a la pista anterior en el modo I◄◄ Bluetooth.
  • Seite 154 30. Botón TUNER/DAB Cambia el modo de funcionamiento a RADIO/DAB. 31. Botón/►/II Inicia y hace una pausa en la reproducción en el modo Bluetooth. 25. I►► Button 32. Botón Salta avanzando hasta la pista siguiente en el modo Bluetooth. 33. Botón/►/II Inicia y hace una pausa en la reproducción en el modo CD o USB.
  • Seite 155 Manipulación de la batería Una utilización inadecuada o incorrecta de las pilas puede provocar • corrosión o derrames de ácido de la batería, lo cual podría provocar un incendio, lesiones personales o daños materiales. • Coloque la pila correctamente dentro del compartimiento de la pila. Normalmente el polo positivo de la pila (+) está...
  • Seite 156 Alcance del mando a distancia • El sensor del mando a distancia situado en la parte delantera de la unidad es sensible a las órdenes enviadas desde el mando a distancia hasta una distancia de 4 metros y en un sector máximo de 60 grados. •...
  • Seite 157 When you irst connect the unit to the mains socket, display will show the Funcionamiento general Encender/Apagar When you irst connect the unit to the mains socket, display will show the La primera vez que enchufe la unidad a la toma de corriente, en la pantalla aparecerá...
  • Seite 158 I◄◄ Si no puede recibir la señal DAB, puede ajustar la hora I◄◄ manualmente. Una vez que reciba la señal DAB, se hora se actualizará automáticamente. I◄◄ Ajustar el temporizador diario 1. Mantenga pulsado el botón TIMER en el mando a distancia hasta que aparezca en la digits lash.
  • Seite 159 1. Para ajustar el temporizador de apagado automático pulse varias veces el botón SLEEP en el mando a distancia para ver los diferentes ajustes del temporizador. El número de minutos mostrados aparecerá en esta secuencia: 2. El sistema está ahora conigurado para apagarse automáticamente una vez transcurran los minutos que haya establecido.
  • Seite 160 Funcionamiento DAB Si la unidad está enchufada a la toma de corriente y se enciende por primera vez desde el modo en espera, la unidad entrará automáticamente en el modo DAB y efectuará una búsqueda automática. Durante la búsqueda en la pantalla aparecerá “Scanning…” junto con una barra indicadora del progreso de búsqueda y la cantidad de emisoras I◄◄...
  • Seite 161 Servicios secundarios A veces podrá ver el símbolo “>” después del nombre de una emisora. Esto indica que hay servicios secundarios disponibles para esa emisora. Estos servicios secundarios contienen servicios adicionales relacionados con la emisora principal, p.ej. emisoras deportivas que puedan querer añadir comentarios adicionales.
  • Seite 162 Ensemble Ensemble Esta pantalla muestra el nombre del multiplex a la que pertenece la emisora que está escuchando. Un multiplex es un conjunto de emisoras de Signal Strength radio que se agrupan y transmiten en una misma frecuencia. Hay multiplexes locales y nacionales. Los multiplexes locales son especíicos para esa Time / Date área especíica.
  • Seite 163 Búsqueda automática Mantenga pulsado el botón SCAN/►/II hasta que la sintonizadora de la radio empiece a buscar una emisora. Para buscar hacia abajo en la banda de frecuencias, mantenga pulsado el botón SCAN/►/II. Una vez que encuentre una emisora, la búsqueda se parará automáticamente. La búsqueda no se parará...
  • Seite 164 Recuperar una emisora guardada 1. Una vez guardada una emisora en uno de los botones de memoria, podrá recuperarla pulsando el botón MEMORY. 2. Pulse el botón PRESET hasta que aparezca en pantalla la emisora que desea; entonces pulse ENTER para conirmar. Las emisoras guardadas se almacenarán en la memoria y no se borrarán cuando apague la unidad.
  • Seite 165 I◄◄ Funcionamiento CD I◄◄ Pulse el botón MODE varias veces en la unidad o pulse CD en el mando a distancia para seleccionar el modo CD. Reproducir 1. Pulse el botón “▲ open/close” para abrir la bandeja portadiscos. 2. Coloque el CD con la etiqueta hacia arriba sobre la bandeja y puse otra vez el botón “▲...
  • Seite 166 Reproducción aleatoria Se pueden reproducir aleatoriamente todas las pistas del disco. 1. Desde el modo de reproducción pulse el botón RANDOM en el mando a distancia. El indicador “RANDOM” aparecerá en la pantalla. Todas las pistas del disco se reproducirán aleatoriamente. 25.
  • Seite 167 2. Si la unidad no está emparejada con algún dispositivo Bluetooth, en la pantalla aparecerá “BT LINK” parpadeando. 3. Active su dispositivo Bluetooth y seleccione el modo de búsqueda. 4. Le aparecerá “BT speaker N” en la lista de dispositivo Bluetooth disponibles.
  • Seite 168 Pulse el botón REPEAT una vez, aparecerá “REP_ONE” en la pantalla • y se empezará a reproducir la canción actual repetidamente. Si pulsa el botón REPEAT dos veces, aparecerá “REP_ALBUM” en la • pantalla. La unidad reproducirá la carpeta actual repetidamente. Si pulsa el botón REPEAT tres veces, aparecerá...
  • Seite 169 Para limpiar la unidad, limpie la supericie exterior con un paño • ligeramente humedecido que no suelte pelusa. No use agentes de limpieza que contengan alcohol, amoniaco o • productos abrasivos. • No utilice limpiadores en aerosol sobre o cerca de la unidad. Manipulación de los discos •...
  • Seite 170 Consejos y trucos Si ocurre algún problema, a menudo se debe a algo sin importancia. La tabla siguiente contiene algunos consejos: Problema Solución No hay Asegúrese de que el cable de alimentación está bien conectado en alimentación ambos extremos. Asegúrese de que la unidad está ON. El mando a Use el mando a distancia cerca de la unidad.
  • Seite 171 350 mm (A) x 120 mm (F) x 190 mm (Al) Peso neto Unidad ~ 2,9 kg Las características y especiicaciones están sujetas a cambios sin notiicación previa. Designed in Denmark · Made in China Imported by Dantax Radio A/S Bransagervej 15 · 9490 Pandrup · Denmark www.scansonic.dk...

Inhaltsverzeichnis