Werbung
Quicklinks
ATTENZIONE!
Leggete attentamente le istruzioni riportate nel presente manuale. Questo manuale è parte integrante del prodotto e deve essere conservato in un
luogo sicuro per future consultazioni.
COMPETENZE MECCANICHE - La maggior parte delle operazioni di manutenzione e riparazione della bicicletta richiedono competenze specifiche,
esperienza e attrezzatura adeguata. La semplice attitudine alla meccanica potrebbe non essere sufficiente per operare correttamente sulla vostra
bicicletta. Se avete dubbi sulla vostra capacità di effettuare tali operazioni, rivolgetevi a personale specializzato.
"UN INCIDENTE" – Vi preghiamo di notare che nel presente manuale si fa riferimento al fatto che potrebbe verificarsi "un incidente". Qualunque
incidente può provocare danni alla bicicletta, ai suoi componenti e, soprattutto, potrebbe essere causa di gravi ferite o persino di morte per voi o
per un passante.
USO DESIGNATO - Queste ruote Fulcrum
®
sono state progettate e fabbricate per essere usate solo su biciclette del tipo "cross-country" e "all
mountain/enduro". Non utilizzatele per fare downhill, freestyle, off-road acrobatico, four-cross o qualsiasi altra disciplina di off-road estremo. Un uso
improprio delle ruote potrebbe essere causa di incidenti, lesioni fisiche o morte.
CICLO VITALE - USURA - NECESSITA' DI ISPEZIONE - Il ciclo vitale dei componenti Fulcrum
dipende da molti fattori, per esempio il peso dell'uti-
®
lizzatore e le condizioni di utilizzo. Urti, cadute, incidenti, più in generale un uso improprio o aggressivo possono compromettere l'integrità strutturale
delle componenti, riducendone considerevolmente il ciclo vitale. Alcuni componenti sono inoltre soggetti a usura nel tempo. Vi preghiamo di far
ispezionare regolarmente la bicicletta e i suoi componenti da un meccanico qualificato per controllare che non vi siano cricche, deformazioni, segni
di logoramento o usura (per individuare eventuali cricche sui particolari, si raccomanda l'utilizzo di liquidi penetranti o altri agenti visivi). Durante
questi controlli, è necessario smontare i componenti della bicicletta, soprattutto i pedali. Se l'ispezione evidenziasse qualsiasi deformazione, cricca,
segni di impatto o di fatica, non importa quanto piccoli, rimpiazzate immediatamente il componente; anche i componenti eccessivamente usurati
devono essere immediatamente sostituiti. La frequenza delle ispezioni dipende da molti fattori; contattate un rappresentante della Fulcrum wheels
S.r.l. per scegliere l'intervallo più adatto a voi.
• Se pesate più di 109 kg/240 lbs vi raccomandiamo di non utilizzare queste ruote. La mancata osservanza di questo avvertimento può provo-
care un danneggiamento irreversibile del prodotto.
• Se pesate più di 82 kg/180 lbs, dovete prestare particolare attenzione e fare ispezionare la vostra bicicletta con una maggiore frequenza
(rispetto a chi pesa meno di 82 kg/180 lbs). Verificate con il vostro meccanico che le ruote che avete scelto siano adatte all'uso che ne farete e stabilite
con lui la frequenza delle ispezioni.
Nota: Utensili forniti da altri produttori per componenti simili ai componenti Fulcrum
potrebbero non essere compatibili con i componenti Fulcrum
®
Similmente, utensili forniti dalla Fulcrum wheels S.r.l. potrebbero non essere compatibili con i componenti di altri produttori. Verificate sempre col
vostro meccanico o col fabbricante dell'utensile la compatibilità, prima di usare gli utensili di un fabbricante sui componenti di un altro fabbricante.
L'utilizzatore di questo prodotto Fulcrum
®
riconosce espressamente che l'uso della bicicletta può comportare dei rischi che includono la rottura di
un componente della bicicletta come pure altri rischi, dando luogo a incidenti, lesioni fisiche o morte. Acquistando e utilizzando questo prodotto
Fulcrum
, l'utilizzatore accetta espressamente, volontariamente e coscientemente e/o assume tali rischi e accetta di non imputare alla Fulcrum wheels
®
S.r.l. la colpa di qualsiasi danno che ne potrebbe derivare.
Se avete qualsiasi domanda vi preghiamo di contattare il vostro meccanico o il più vicino rivenditore Fulcrum
®
per ottenere ulteriori informazioni.
WARNING!
Carefully read, follow and understand the instructions given in this manual. It is an essential part of the product, and you should keep it in a safe
place for future reference.
MECHANIC QUALIFICATION - Please be advised that many bicycle service and repair tasks require specialized knowledge, tools and experience.
General mechanical aptitude may not be sufficient to properly service or repair your bicycle. If you have any doubt whatsoever regarding your
service/repair ability, please take your bicycle to a qualified repair shop.
INTENDED USE - These Fulcrum
wheels have been designed and manufactured for use only on bicycles of the "cross-country" and "all
®
mountain/enduro" types. Do not use them for downhill, freestyle, acrobatic, four-cross or any extreme off-road riding. Misuse of the wheel may
result in an accident, personal injury or death.
"AN ACCIDENT" - Please note that throughout this manual, reference is made that "an accident" could occur. Any accident could result in
damage to your bicycle, its components and, more importantly, could cause you or a bystander to sustain severe personal injury or even death.
LIFESPAN - WEAR - INSPECTION REQUIREMENT - The lifespan of Fulcrum
components depends on many factors, such as rider size and
®
riding conditions. Impacts, falls, accidents, improper use or harsh use in general may compromise the structural integrity of the components and
significantly reduce their lifespan. Some components are also subject to wear over time. Please have your bicycle and its components regularly
inspected by a qualified mechanic for any cracks, deformation, signs of fatigue or wear (use of penetrating fluid or other visual enhancers to local
cracks on parts is recommended). Disassembly of your bicycle components, and especially the pedals, is required during these inspections. If the
inspection reveals any deformation, cracks, impact marks or stress marks, no matter how slight, immediately replace the component; components
that have experienced excessive wear also need immediate replacement. The frequency of inspection depends on many factors; check with your
authorized representative of Fulcrum wheels S.r.l. to select a schedule that is best for you.
• If you weigh over 109 kg/240 lbs we advise you not to use this product. Non compliance with this warning can damage the product irreversibly.
• If you weigh 82 kg/180 lbs or more, you must be especially vigilant and have your bicycle inspected more frequently (than someone weighing less
than 82 kg/180 lbs). Check with your mechanic to discuss whether the wheels you selected are suitable for your use, and to determine the frequency
of inspections.
Note: Tools supplied by other manufacturers for components similar to Fulcrum
components may not be compatible with Fulcrum
®
Likewise, tools supplied by Fulcrum wheels S.r.l. may not be compatible with components supplied by other manufacturers. Always check with your
mechanic or the tool manufacturer to insure compatibility before using tools supplied by one manufacturer on components supplied by another.
The user of this Fulcrum
®
product expressly recognizes that there are risks inherent in bicycle riding, including but not limited to the risk that a
component of the bicycle can fail, resulting in an accident, personal injury or death. By his purchase and use of this Fulcrum
expressly, voluntarily and knowingly accepts and/or assumes these risks and agrees to hold Fulcrum wheels S.r.l. harmless against any resulting
damages.
If you ever have any questions, please contact your mechanic or your nearest Fulcrum
dealer for additional information.
®
www.fulcrumwheels.com
Fulcrum Wheels S.r.l.
Via Enrico Fermi 13
36057 Arcugnano (Vi)
RED POWER
Italy
tel. +39-0444-289306
fax +39-0444-280749
RED POWER HP
Il prodotto effettivo potrebbe differire dall'illustrazione, poiché queste istruzioni sono
WHEELS
finalizzate in modo specifico a spiegare le procedure per l'uso della ruota.
The actual product may differ from the illustration because these instructions are inten-
ded specifically to explain the procedure for use of the wheel.
Das tatsächliche Produkt könnte von der Darstellung abweichen, da diese Anleitung in
erster Linie die Verfahren zum Gebrauch des Rads erklären soll.
USER'S MANUAL
7225679
cod.
- 03/2014
Printed on 100% recycled paper
© Fulcrum Wheels S.r.l. 2014
ACHTUNG!
Wir bitten Sie, die Anweisungen in diesem Handbuch aufmerksam zu lesen. Sie sollten sie verstehen und genau befolgen. Die Nichtbeachtung
irgendeiner in diesem Handbuch aufgeführten Anweisung kann zu Schäden am Produkt führen und Unfälle mit körperlichen und sogar lebensge-
fährlichen Verletzungen verursachen. Dieses Handbuch ist integrierender Bestandteil der Laufräder und ist an einem sicheren Ort aufzubewahren,
damit es auch in Zukunft jederzeit wieder konsultiert werden kann.
MECHANISCHE KENNTNISSE – Ein Großteil der Montage-, Wartungs- und Reparaturarbeiten an den Laufrädern erfordern spezielle Fachkenntnisse,
Erfahrung und geeignetes Werkzeug. Mechanisches Talent allein könnte nicht ausreichen, um fachgerechte Wartungs- und Reparaturarbeiten an Ihren
Laufrädern auszuführen. Sollten Sie an Ihren Fähigkeiten, diese Arbeiten korrekt durchzuführen, zweifeln, so wenden Sie sich bitte an spezialisiertes Personal.
VERWENDUNGSZWECK – Diese Fulcrum
®
-Laufräder wurden ausschließlich für den Gebrauch an Cross-Country- und All Mountain/Enduro-
Mountainbikes entwickelt und hergestellt. Verwenden Sie sie nicht für Disziplinen wie Downhill, Freestyle, Off-Road-Akrobatik, Four Cross oder irgend-
eine sonstige Off-Road-Extremsportart. Ein ungeeigneter Gebrauch könnte Unfälle mit körperlichen oder sogar lebensgefährlichen Verletzungen
verursachen.
LEBENSDAUER - ABNUTZUNG - ERFORDERLICHE KONTROLLEN - Die Lebensdauer der Fulcrum
-Laufräder hängt von vielen Einzelfaktoren, wie z.B.
®
vom Fahrergewicht, von der verwendeten Reifenart und von den Einsatzbedingungen ab. Stöße, Schläge, Stürze und ganz generell ungeeigneter Gebrauch
können die strukturelle Unversehrtheit der Laufräder beeinträchtigen und deren Lebensdauer dadurch erheblich verkürzen. Einige Laufradkomponenten
unterliegen außerdem im Laufe der Zeit einer gewissen Abnutzung. Wir bitten Sie, Ihre Laufräder regelmäßig von einem Fahrradmechaniker kontrollieren zu
lassen, um festzustellen, ob Risse, Deformierungen oder sonstige Anzeichen für Materialermüdung oder Abnutzung vorhanden sind (zur Risserkennung an
den Teilen empfehlen wir die Verwendung von Eindringmitteln oder anderen Erkennungsverfahren für Mikrobrüche). Sollten bei der Kontrolle irgendwelche
auch noch so geringfügige Deformierungen, Zeichen von Schlägen oder Ermüdungserscheinungen festgestellt werden, so ist die betroffene Komponente
sofort auszuwechseln. Auch zu stark abgenutzte Komponenten müssen sofort ausgewechselt werden. Die Inspektionshäufigkeit hängt von vielen Faktoren
ab; wenden Sie sich an einen Vertreter von Fulcrum Wheels S.r.l., um das für Sie am besten geeignete Inspektionsintervall zu wählen. Eventuell durch Schläge
oder Unfälle bzw. Stürze verbogene oder beschädigte Teile sind sofort durch Fulcrum
®
-Originalersatzteile zu ersetzen und dürfen nicht repariert werden.
• Beträgt Ihr Körpergewicht mehr als 240 lb / 109 Kg, sollten Sie diese Bestandteile/Räder nicht verwenden. Die Nichtbeachtung dieses
Hinweises kann zu einer irreversiblen Beschädigung des Produktes führen.
• Beträgt Ihr Körpergewicht mehr als 180 lb/ 82 Kg, sollten Sie besonders achtsam sein und Ihr Fahrrad häufiger (als die Personen, die weniger
als 180 lb/82 Kg wiegen) überprüfen lassen. Prüfen Sie zusammen mit Ihrem Mechaniker, ob die von Ihnen ausgewählten Fulcrum
vorgesehenen Einsatzbedingungen geeignet sind und legen Sie gemeinsam mit ihm das Inspektionsintervall fest.
Hinweis: Es kann sein, dass Werkzeug, das von anderen Herstellern für ähnliche Laufräder wie Fulcrum
®
-Laufräder geliefert wird, nicht mit den Fulcrum
Laufrädern kompatibel ist. Ebenso kann es sein, dass von Fulcrum Wheels S.r.l. geliefertes Werkzeug nicht mit Komponenten/Laufrädern von anderen
Herstellern kompatibel ist. Bevor Sie das Werkzeug eines Herstellers an Komponenten/Laufrädern eines anderen Herstellers benutzen, sollten Sie sie
daher immer mit Ihrem Fahrradmechaniker oder mit dem Werkzeughersteller auf ihre Kompatibilität prüfen. Wird die Kontrolle auf Kompatibilität zwischen
Werkzeug und Komponenten unterlassen, so kann dies zu falscher Funktion oder zum Bruch der Komponente führen und könnte Unfälle mit körperlichen
und sogar lebensgefährlichen Verletzungen verursachen.
Der Benutzer dieser Fulcrum
®
-Laufräder erkennt ausdrücklich an, dass der Gebrauch des Fahrrads Gefahren mit sich bringen kann. Dazu gehören der
Bruch einer Fahrradkomponente sowie auch andere Risiken, ohne jedoch darauf beschränkt zu sein, welche Unfälle mit körperlichen und sogar lebensge-
fährlichen Verletzungen verursachen könnten. Mit dem Kauf und Gebrauch dieser Fulcrum
-Laufräder akzeptiert und/oder übernimmt der Benutzer diese
®
Risiken ausdrücklich, willentlich und wissentlich. Dies gilt auch einschließlich des Risikos der passiven oder aktiven Fahrlässigkeit von Fulcrum S.r.l., d.h. bei
verborgenen, latenten oder offensichtlichen Mängeln, ohne jedoch darauf beschränkt zu sein, und befreit Fulcrum S.r.l. von jeglicher Haftung im Rahmen
des maximalen gesetzlich erlaubten Umfangs für jedwelche daraus entstehenden Schäden.
Falls Sie irgendwelche Fragen haben, wenden Sie sich für weitere Informationen bitte an Ihren Mechaniker oder an den nächstgelegenen Fulcrum
Fachhändler.
Wir machen Sie darauf aufmerksam, dass in dieser Bedienungsanleitung wiederholt auf die Möglichkeit eines Unfalls hingewiesen wird. Hierzu sollten Sie
sich bewusst sein, dass durch die Folgen eines Unfalls Schäden an Ihrem Fahrrad und, was noch wichtiger ist, körperliche oder sogar lebensgefährliche
Verletzungen für Sie und andere Beteiligte entstehen können. Befolgen Sie immer alle Sicherheitshinweise und Anweisungen in dieser Anleitung.
Führen Sie niemals Änderungen irgendwelcher Art an Fulcrum
®
-Laufrädern und ihren Komponenten aus.
1 - SPECIFICHE TECNICHE
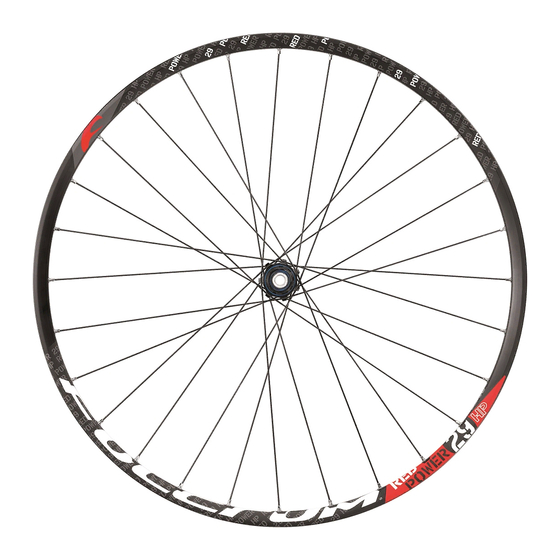
Misura cerchio
584x19c (27,5")
622x19c (29")
Dimensione battuta mozzo
ANT. 100 mm
POST. 135 mm
ANT.
QR standard - 15 mm thru-axle
Mozzi
POST.
QR standard - 12 mm thru-axle 135 mm/142 mm
Pressione di gonfiaggio
rispettate le pressioni massime indicate sullo pneumatico
ATTENZIONE!
Si raccomanda di attenersi scrupolosamente alle istruzioni fornite dal produttore dello pneumatico.
2 - PNEUMATICI
NOTA: Le ruote RED POWER / RED POWER HP sono state concepite per essere utilizzate solo con coperture
tradizionali dotate di camera d'aria.
• Prima di montare le coperture, installate sul cerchio il flap (rim tape) di protezione utilizzando esclusivamente quello
in dotazione.
• Prima di montare le coperture, controllate che la copertura e il cerchio siano compatibili.
2.1 - INSTALLAZIONE DELLO PNEUMATICO
Prestate attenzione a non danneggiare o, comunque, a non piegare alcuna porzione di cerchio durante l'installazione
dello pneumatico.
• Inserite un lato dello pneumatico nell'apposita sede sul cerchio (Fig. 1).
• Posizionate la camera d'aria tra cerchio e pneumatico iniziando con l'inserire la valvola nel foro sul cerchio.
• Al fine di montare correttamente la camera d'aria e lo pneumatico sul cerchio, è necessario prima gonfiare leggermente
la camera d'aria.
.
• E' necessario poi montare manualmente la camera d'aria e lo pneumatico sul cerchio, facendo attenzione che la came-
®
ra d'aria sia posizionata correttamente all'interno dello pneumatico e che lo pneumatico, a sua volta, sia posizionato
correttamente sul cerchio.
• Inserite il secondo lato dello pneumatico nella sede del cerchio.
Si può quindi procedere a gonfiare la camera d'aria fino al raggiungimento della corretta pressione di esercizio.
Gonfiare la camera d'aria lentamente, assicurandosi di mantenere la stessa e lo pneumatico nella corretta posizione sul cerchio.
2.2 - GONFIAGGIO E SGONFIAGGIO DELLA RUOTA
• Per gonfiare lo pneumatico: Rimuovete il tappo, svitate la valvola e gonfiate utilizzando un compressore o una pompa
con manometro per ottenere la pressione desiderata, riavvitate la valvola, quindi riposizionate il tappo.
• Per sgonfiare lo pneumatico: Rimuovete il tappo, svitate leggermente la valvola, quindi premetela fino a raggiugere
la pressione desiderata; riavvitate la valvola, quindi riposizionate il tappo.
1 - TECHNICAL SPECIFICATIONS
Rim size
584x19c (27,5")
622x19c (29")
O.L.D.
FRONT 100 mm
REAR 135 mm
F.
QR standard - 15 mm thru-axle
Hubs
R.
QR standard - 12 mm thru-axle 135 mm/142 mm
Inflation pressure
comply with the maximum pressures stamped on the tyre
WARNING!
We recommend strictly adhering to the tyre manufacturer's instructions.
2 - TYRES
NOTE : RED POWER / RED POWER HP wheels have been designed for use exclusively with traditional tires with
inner tubes.
2.1 - INSTALLING THE TIRES
Be sure that you do not damage or otherwise bend any portion of the rim when installing the tyre.
• Insert one side of the tyre into the seat provided on the rim (Fig. 1).
• Insert the valve through the hole in the rim, and then position the remainder of the inner tube between the rim and
the tyre.
• In order to install the tube on the rim, inflate the tube slightly first.
• You should then manually set the tube and tire on the rim, making sure that the tube is positioned correctly within the
tire and that the tire is positioned correctly on the rim.
• Insert the second side of the tyre tire into its seat in the rim.
components.
®
You may then fully inflate the tube to the correct working pressure. Please inflate the tube slowly, making sure that you
maintain the correct positioning of the tube and tire on the rim.
2.2 - INFLATING AND DEFLATING THE TIRE
®
product, the user
• To inflate the tire: Remove the cap, unscrew the valve and inflate the tire using a compressor or a pump with a pressure
gauge to obtain the required pressure, then tighten the valve and replace the cap.
• To deflate the tire: Remove the cap, unscrew the valve, press and hold down the valve to obtain the required pressure
then; tighten the valve and replace the cap.
WARNING!
Never exceed the maximum pressure recommended by the tyre manufacturer.
• Excessive tire pressure reduces grip on the road and increases the risk that the tire will unexpectedly burst.
1
2
6
6.1
1 - TECHNISCHE SPEZIFIKATIONEN
Felge
584x19c (27,5")
622x19c (29")
O.L.D.
VORNE 100 mm
HINTEN 135 mm
V.
QR standard - 15 mm thru-axle
Abmessung Nabenanschlag
H.
QR standard - 12 mm thru-axle 135 mm/142 mm
Luftdruck
die auf dem angegebenen Höchstdruckwerte einhalten
ACHTUNG!
Es wird empfohlen, sich gewissenhaft an die Anweisungen des Reifenherstellers zu halten.
2 - REIFEN
HINWEIS : Die Laufräder RED POWER / RED POWER HP wurden nur für den Gebrauch mit herkömmlichen
Schlauchreifen mit Luftschlauch geschaffen.
• Vor der Montage von Reifenmänteln ist auf der Felge nur das mitgelieferte Schutzband zu montieren.
• Bevor Sie die Reifen montieren, kontrollieren Sie, dass sowohl Reifen als auch die Felge gefertigt wurden.
2.1 - MONTAGE DES REIFENS
Beachten, dass kein Felgenbereich während der Reifenmontage beschädigt bzw. gebogen wird.
®
-Laufräder für die
• Eine Seite des Drahtreifens in den für ihn vorgesehene Sitz einführen (Abb. 1).
• Den Schlauch zwischen Felge und Drahtreifen positionieren und dabei langsam das Ventil in die Bohrung der Felge
®
-
einzuführen.
• Um den Luftschlauch korrekt auf die Radfelge montieren zu können, muss er zuvor leicht aufgepumpt werden.
• Dann müssen Schlauch und Reifen von Hand auf die Felge gezogen werden, wobei darauf zu achten ist, dass der
Schlauch richtig im Reifen positioniert ist und dass der Reifen wiederum richtig auf der Felge sitzt.
• Nun den zweiten Saum des Drahtreifens in die Felge einführen.
Erst dann kann der Schlauch bis auf den richtigen Fahrdruck aufgepumpt werden. Den Schlauch langsam aufpumpen und
dabei immer kontrollieren, dass Schlauch und Reifen in richtiger Position im Felgenbett sitzen.
2.2 - AUFPUMPEN UND ABLASSEN DES LAUFRADS
• Aufpumpen des Reifens: Ventilkappe abnehmen, Ventil lösen und mit einem Kompressor oder einer Pumpe mit
Manometer aufpumpen, um den gewünschten Druck herzustellen, Ventil aufschrauben und Kappe einsetzen.
-
®
• Ablassen des Reifens: Ventilkappe abnehmen und Ventil leicht lösen. Dann so lange drücken, bis der gewünschte
Druck erreicht ist. Anschließend Ventil anziehen und Kappe einsetzen.
ACHTUNG!
Nie den vom Hersteller des Reifens empfohlenen Höchstdruck überschreiten.
6 - MONTAGGIO DEI PIGNONI
ATTENZIONE!
6.1 - MONTAGGIO / SMONTAGGIO DEI PIGNONI HG 8/9/10s DELLA SHIMANO INC. e PG 8/9/10s DELLA SRAM CORP.
• Non superare mai la pressione massima consigliata dal fabbricante dello pneumatico.
6.1.1 - MONTAGGIO
• Una pressione eccessiva riduce l'aderenza dello pneumatico alla strada e aumenta il rischio che lo pneumatico possa
scoppiare improvvisamente. Una pressione troppo bassa riduce le prestazioni della ruota e aumenta la possibilità che
• Inserite i pignoni sul corpo RL.
lo pneumatico si sgonfi improvvisamente e inaspettatamente. Una pressione troppo bassa potrebbe inoltre causare
• Mediante l'utensile TL-LR15 della Shimano Inc. o FR-5 della Park Tool Co. (B - Fig. 10) serrate la ghiera (C - Fig. 10),
danni e usura prematura del cerchio. Una pressione dello pneumatico non corretta potrebbe causare la rottura dello
fornita in dotazione con i pignoni, sul corpo ruota libera alla coppia di serraggio indicata.
pneumatico o la perdita di controllo della bicicletta ed essere causa di incidenti, lesioni fisiche o morte.
6.1.2 - SMONTAGGIO
3 - MONTAGGIO DELLA RUOTA SUL TELAIO
• Smontate la ghiera (C - Fig. 10) utilizzando l'utensile TL-LR15 della Shimano Inc. o FR-5 della Park Tool Co. (B - Fig. 10)
e una chiave con catena (D - Fig. 10).
Queste ruote sono compatibili con differenti sistemi di bloccaggio del perno.
• Sfilate i pignoni dal corpo RL.
3.1 - RUOTA ANTERIORE
6.2 - MONTAGGIO E SMONTAGGIO DEL PACCO PIGNONI XX1 DELLA SRAM CORP
• Nel caso in cui la ruota ANTERIORE sia predisposta per il montaggio con "Quick Release" (Fig.2), seguite le istruzioni
"Quick Release", fornite in dotazione con la ruota.
6.2.1 - MONTAGGIO
• Nel caso in cui la ruota ANTERIORE sia predisposta per il montaggio con perno passante HH15 (Fig. 3), seguite le istru-
• Prima di inserire il pacco pignoni sul corpetto ruota libera XD, lubrificate con con grasso sintetico la filettatura del
zioni di montaggio fornite dal costruttore della bicicletta o della forcella.
corpetto.
• Inserite il pacco pignoni sul corpetto ruota libera XD.
3.2 - RUOTA POSTERIORE
• Mediante l'utensile TL-LR15 della Shimano Inc. o FR-5 della Park Tool Co. serrate il pacco pignoni sul corpetto ruota
• Nel caso in cui la ruota POSTERIORE sia predisposta per il montaggio con "Quick Release" (Fig. 4 / Fig. 4.1), seguite le
libera XD alla coppia di serraggio indicata dal produttore.
istruzioni "Quick Release", fornite in dotazione con la ruota.
• Nel caso in cui la ruota POSTERIORE sia predisposta per il montaggio con perno passante HH12 per larghezze 135
6.2.2 - SMONTAGGIO
(Fig.5 – 5.1) oppure 142 mm (Fig.6 – 6.1), seguite le istruzioni di montaggio fornite dal costruttore del telaio o della bicicletta.
• Smontate il pacco pignoni utilizzando l'utensile TL-LR15 della Shimano Inc. o FR-5 della Park Tool Co. e una chiave con
catena.
4 - CORPETTO RUOTA LIBERA E SISTEMI DI BLOCCAGGIO DELLA RUOTA POSTERIORE
• Sfilate il pacco pignoni dal corpetto ruota libera XD.
La ruota posteriore è disponibile, a seconda della versione, con:
7 - FRENI
- Corpetto ruota libera per pignoni HG 8/9/10s della Shimano INC. e PG 8/9/10s della SRAM CORP. (Fig.7)
- Corpetto ruota libera XD per pignoni XX1 della SRAM CORP (Fig.8)
Le ruote Fulcrum
E' possibile trasformare le ruote da una versione all'altra acquistando il corpetto ruota libera necessario ed i relativi adatta-
- per freni a disco con sistema ISO a 6 viti;
tori a seconda del sistema di bloccaggio utilizzato (vi preghiamo di consultare le relative istruzioni).
- per freni a disco tipo "Center Lock" (con Fulcrum
5 - BLOCCAGGIO DEL CORPETTO RUOTA LIBERA
Entrambi i corpetti ruota libera disponibili, prevedono che la boccola destra (Fig.9 / 9.1) deve essere avvitata in senso anti-
Scegliete la versione adatta al tipo di freni utilizzati. Non utilizzate freni tradizionali su una ruota per freni a disco
orario rispettando la coppia di serraggio (15 Nm - 133in.lbs).
e viceversa. Una combinazione errata potrebbe risultare in incidenti, lesioni fisiche o morte.
Nota: Per le istruzioni di utilizzo e manutenzione dei freni fate riferimento al Foglio Istruzioni fornito dal produttore dei freni.
Inflation pressure that is too low reduces tire performance and increases the probability of sudden and unexpected
• Using tool TL-LR15 from Shimano Inc. or FR-5 from Park Tool Co. (B - Fig. 10) tighten the ring (C - Fig. 10),
loss of tire pressure. In addition, premature wear and damage to the rim may occur.
provided with the sprockets, on the freewheel body to the indicated tightening torque.
• Incorrect tire pressure could cause tire failure or loss of control of the bicycle, resulting in an accident, personal
injury or death.
6.1.2 - DISASSEMBLY
• Remove the ring (C - Fig. 10) using tool TL-LR15 from Shimano Inc. or FR-5 from Park Tool Co. (B - Fig. 10) and
3 - FITTING THE WHEEL ON THE FRAME
a chain whip (D - Fig. 10).
• Remove the sprockets from the freewheel body.
These wheels are compatible with different axle locking systems.
3.1 - FRONT WHEEL
6.2 - ASSEMBLY AND DISASSEMBLY OF XX1 SRAM CORP. SPROCKET PACK
• If the FRONT wheel is predisposed for "Quick Release" mounting (Fig.2) follow the "Quick Release" instructions which
6.2.1 - ASSEMBLY
came with the wheel.
• Before inserting the sprocket pack on the XD FW body, lubricate the body thread with synthetic grease.
• If the FRONT wheel is predisposed for HH15 through-axle mounting (Fig. 3) follow the mounting instructions provided by
• Insert the sprocket pack on the XD FW body.
the bicycle or fork manufacturer.
• Use the Shimano Inc. TL-LR15 tool or the Park Tool Co. FR-5 tool to tighten the sprocket pack onto the XD FW body at
the torque indicated by the manufacturer.
3.2 - REAR WHEEL
• If the REAR wheel is predisposed for "Quick Release" mounting (Fig. 4 / Fig. 4.1) follow the "Quick Release" instructions
6.2.2 - DISASSEMBLY
which came with the wheel.
• Disassemble the sprocket pack using the Shimano Inc. TL-LR15 tool or the Park Took Co. FR-5 tool and a wrench with
• If the REAR wheel is predisposed for HH12 through-axle mounting for 135 (Fig.5 – 5.1) or 142 mm width (Fig.6 – 6.1) follow
chain.
the mounting instructions provided by the frame or bicycle manufacturer.
• Remove the sprocket pack from the XD FW body.
4 - FW BODY AND REAR WHEEL LOCKING SYSTEM
7 - BRAKES
Depending on the version, the rear wheel is available with:
Fulcrum
- FW body for Shimano INC. HG 8/9/10s and SRAM CORP. PG 8/9/10s sprockets (Fig.7)
- for disc brakes with the ISO 6-bolts system;
- XD FW body for SRAM CORP. XX1 sprockets (FIG.8)
- for disc brakes "Center Lock" (with Fulcrum
The wheel can be transformed from one version to the other purchasing the FW body required and the relative adaptors
depending on the locking system used (please see the relative instructions).
5 - LOCKING OF THE FW BODY
Choose the appropriate version for the type of brakes used. Do not use traditional brakes on a wheel for disc
brakes and vice versa. Improper matching could result in an accident, personal injury or death.
Both the FW bodies available require the right bush (Fig.9 / 9.1) to be tightened anticlockwise, observing the tightening
Note: For use and maintenance instructions of the brakes, refer to the Instruction Leaflet provided by the brake manufacturer.
torque (15 Nm-133in.lbs).
7.1 - ASSEMBLING THE ROTOR ON AXIAL FIXING SYSTEM™ SYSTEMS
6 - SPROCKET MOUNTING
• Fit the rotor into its seat, taking care with the direction of rotation indicated by the arrow (Fig. 11).
• Fit the washer (A - Fig. 11) and screw the provided lockring, code M1-101 (B – Fig. 11).
6.1 - ASSEMBLY AND DISASSEMBLY OF HG 8/9/10s OF SHIMANO INC. and PG 8/9/10s OF SRAM CORP.
• Tighten the lockring to 35 Nm (310 in.lbs) using the tool UT-BB130 (C - Fig. 11 - not provided) and torque wrench
6.1.1 - ASSEMBLY
(D - Fig. 11).
• Fit the sprockets on the FW body.
3
4
15 Nm (133 in.lbs)
7
8
9
• Ziehen Sie mithilfe des Werkzeugs TL-LR15 von Shimano Inc. oder des Werkzeugs FR-5 von Park Tool Co. (B - Abb. 10)
Ein zu hoher Reifendruck reduziert die Straßenhaftung des Reifens und erhöht das Risiko, dass der Reifen plötzlich
platzt. Ein zu niedriger Reifendruck setzt die Leistung des Laufrads herab und erhöht die Möglichkeit, dass der Reifen
die mit den Ritzeln gelieferte Hülse (C - Abb. 10) am Freilaufkörper fest.
plötzlich und ohne Vorzeichen den Druck verliert und platt wird. Außerdem kann ein zu niedriger Reifendruck zu
6.1.2 - DEMONTAGE
Schäden und vorzeitiger Abnutzung der Felge führen.
• Ein falscher Reifendruck könnte zum Platzen des Reifens oder zum Verlust der Herrschaft über das Fahrrad führen
• Demontieren Sie die Hülse (C - Abb. 10), indem Sie das Werkzeug TL-LR15 von Shimano Inc. oder das Werkzeug FR-5
und Unfälle, Verletzungen oder gar den Tod zur Folge haben.
(B – Abb. 10) von Park-Tool Co. und einen Zahnkranzabnehmer mit Rennkette (D - Abb. 10) verwenden.
• Nehmen Sie die Ritzel vom RL-Freilaufkörper ab.
3 - MONTAGE DES LAUFRADS AUF DEN RAHMEN
6.2 - MONTAGE UND DEMONTAGE DES RITZELPAKETS XX1 VON SRAM CORP.
Diese Laufräder sind mit verschiedenen Befestigungssystemen der Welle kompatibel.
6.2.1 - MONTAGE
• Bevor das Ritzelpaket am Freilaufkörper XD eingesetzt wird, das Gewinde des Freilaufkörpers mit synthetischem Fett
3.1 - VORDERES LAUFRAD
schmieren.
• Falls das VORDERE Laufrad für die Montage mit "Quick Release" (Abb. 2) vorgerüstet ist, die mit dem Rad mitgelieferte
• Das Ritzelpaket am Freilaufkörper XD einsetzen.
Anleitung "Quick Release" befolgen.
• Mit dem Werkzeug TL-LR15 von Shimano Inc. oder FR-5 von Park Tool Co. das Ritzelpaket mit dem vom Hersteller
• Falls das VORDERE Laufrad für die Montage mit Steckachse HH15 (Abb. 3) vorgerüstet ist, die vom Hersteller des Fahrrads
angegebenen Anzugsmoment am Freilaufkörper XD anziehen.
oder der Gabel gelieferte Montageanleitung befolgen.
6.2.2 - DEMONTAGE
3.2 - HINTERES LAUFRAD
• Das Ritzelpaket mit dem Werkzeug TL-LR15 von Shimano Inc. oder FR-5 von Park Tool Co. und einem Schlüssel mit Kette
• Falls das HINTERE Laufrad für die Montage mit "Quick Release" (Abb. 4 / Abb. 4.1) vorgerüstet ist, die mit dem Rad
abmontieren.
mitgelieferte Anleitung "Quick Release" befolgen.
• Das Ritzelpaket vom Freilaufkörper XD abziehen.
• Falls das HINTERE Laufrad für die Montage mit Steckachse HH12 für Breiten 135 (Abb. 5 – 5.1) oder 142 mm (Abb. 6 – 6.1)
vorgerüstet ist, die vom Hersteller des Rahmens oder des Fahrrads gelieferte Montageanleitung befolgen.
7 - BREMSEN
4 - FREILAUFKÖRPER UND BEFESTIGUNGSSYSTEME DES HINTEREN LAUFRADS
Die Laufräder Fulcrum
Das hintere Laufrad ist, je nach Version, erhältlich mit:
- für Scheibenbremsen mit ISO-System mit 6 Schrauben;
- für Scheibenbremsen vom Typ "Center Lock" (mit Fulcrum
- Freilaufkörper für Ritzel HG 8/9/10S von Shimano INC. und PG 8/9/10s von SRAM CORP. (Abb. 7)
- Freilaufkörper XD für Ritzel XX1 von SRAM CORP (Abb. 8)
Oversize)
Es ist möglich, die Laufräder von einer Version auf die andere umzuwandeln, indem man den notwendigen Freilaufkörper
und die entsprechenden Adapter je nach verwendetem Befestigungssystem erwirbt (bitte sehen Sie in den entsprechenden
Anleitungen nach).
Wählen Sie die Version, die für den von Ihnen verwendeten Bremsentyp geeignet ist. Verwenden Sie keine
herkömmlichen Bremsen an einem Laufrad für Scheibenbremsen und umgekehrt. Eine falsche Kombination von
5 - BLOCKIERUNG DES FREILAUFKÖRPERS
Felgen und Bremsen könnte Unfälle mit körperlichen und sogar lebensgefährlichen Verletzungen verursachen.
Beide verfügbaren Freilaufkörper sehen vor, dass die rechte Buchse (Fig.9 / 9.1) gegen den Uhrzeigersinn eingeschraubt
Hinweis : Für die Bedienungs- und Wartungsanleitungen der Bremsen sollten Sie sich nach dem beiliegenden
werden muss, wobei der Anzugsmoment (15 Nm -133 in.lbs) zu beachten ist.
Technischen Merkblatt des Bremsenherstellers richten.
6 - MONTAGE DER RITZEL
7.1 - MONTAGE DES ROTORS BEI AXIAL FIXING SYSTEM™-BEFESTIGUNGSSYSTEM
• Setzen Sie den Rotor in seinen Sitz ein und achten Sie dabei auf die vom Pfeil angegebene Drehrichtung (Abb. 11).
6.1 - MONTAGE UND DEMONTAGE DER RITZEL HG 8/9/10s VON SHIMANO INC. UND PG 8/9/10s VON SRAM CORP.
• Setzen Sie die Unterlegscheibe (A - Abb. 11) auf und schrauben Sie die mitgelieferte -Hülse (B – Abb. 11).
6.1.1 - MONTAGE
• Setzen Sie die Ritzel auf den Freilaufkörper auf.
7.1 - MONTAGGIO DEL ROTORE CON SISTEMA AXIAL FIXING SYSTEM™
• Infilate il rotore nella sua sede prestando attenzione al senso di rotazione indicato dalla freccia (Fig. 11).
• Inserite la rondella (A - Fig. 11) e avvitate la ghiera cod. M1-101 fornita in dotazione (B - Fig. 11).
• Serrate la ghiera a 35 Nm (310 in.lbs) con l'utensile UT-BB130 (C - Fig. 11 - non fornito) e una chiave dinamometrica
(D - Fig. 11).
7.2 - MONTAGGIO DEL ROTORE CON SISTEMA ISO A 6 VITI
• Infilate il rotore nella sua sede prestando attenzione al senso di rotazione indicato dalla freccia (Fig. 12)
• Avvitate le 6 viti a 5/7 Nm (44/62 in.lbs) (Fig. 12).
8 - VERIFICHE PRELIMINARI / MANUTENZIONE PERIODICA
• Assicuratevi che non vi sia alcun raggio danneggiato o allentato.
.
• Assicuratevi che le ruote siano perfettamente centrate. Fate girare la ruota per verificare che non ondeggi su e giù o da lato
a lato e che, se utilizzate sistemi di frenata sul cerchio, ruotando non tocchi i pattini dei freni. L'utilizzo di ruote non centrate
correttamente o con raggi rotti e/o danneggiati può provocare incidenti, lesioni fisiche o morte.
ATTENZIONE! NOTA PER MECCANICI SPECIALIZZATI
PER LE ISTRUZIONI DI ASSEMBLAGGIO, MANUTENZIONE E SOSTITUZIONE CERCHI, RAGGI E MOZZI RIVOLGETE-
VI AL VOSTRO PARTNER COMMERCIALE FULCRUM
CON LUI LA FREQUENZA DELLE ISPEZIONI IN FUNZIONE DELLE CONDIZIONI DI UTILIZZO E DELL 'INTENSITÀ DELLA
VOSTRA ATTIVITÀ (ESEMPIO: AGONISMO, PIOGGIA, STRADE SALATE, STRADE FANGOSE, PESO DELL 'UTILIZZATORE
ECC.).
8.1 - PULIZIA DELLE RUOTE
Per la pulizia delle ruote usate solamente prodotti non aggressivi come acqua e sapone neutro o prodotti specifici per la
pulizia delle biciclette. Non utilizzate solventi o detergenti chimici. Asciugate con un panno morbido: Non utilizzate mai
spugne abrasive o metalliche.
®
RED POWER / RED POWER HP sono disponibili nelle seguenti versioni:
NOTE
®
Axial Fixing System™ - non compatibili con "Center Lock" Oversize)
- Il sale, il fango e la sabbia danneggiano gravemente la bicicletta e i suoi componenti. Sciacquate, pulite e asciugate accu-
ratamente la vostra bici dopo averla usata.
- Se utilizzate l'acqua a pressione per lavare la vostra bicicletta, vi consigliamo di non rivolgere mai il getto d'acqua diret-
ATTENZIONE!
tamente sui mozzi. L'acqua a pressione, perfino quella che esce dall'ugello di una canna da giardino, può oltrepassare le
guarnizioni ed entrare all'interno dei mozzi, danneggiando irreparabilmente i cuscinetti.
8.2 - TRASPORTO E CUSTODIA
Quando trasportate la ruota separatamente dalla bicicletta o in vista di un periodo di inutilizzo, riponetela in una borsa per
ruote per proteggerla dagli urti, dalla polvere e dallo sporco.
7.2 - ASSEMBLING THE ROTOR ON THE ISO 6-BOLTS SYSTEM
• Fit the rotor into its seat, taking care with the direction of rotation indicated by the arrow (Fig. 12)
• Screw in the 6 screws to 5/7 Nm (44/62 in.lbs) (Fig. 12).
8 - PERIODICAL WHEEL MAINTENANCE
• Ensure that there are no damaged or loose spokes.
• Ensure that the wheels are centred perfectly. Turn the wheel to ensure that it does not wobble up and down or from one
side to the other and that, if you are using rim brakes, it does not touch the brake pads. The use of wheels that are not
centred properly or that have broken or damaged spokes can result in an accident, personal injury or death
ATTENTION! NOTE FOR SPECIALIZED MECHANICS
CONTACT YOUR FULCRUM
ASSEMBLING, MAINTAINING AND REPLACING RIMS, SPOKES AND HUBS. CHOOSE WITH HIM THE MOST SUITA-
BLE INTERVAL OF INSPECTIONS FOR YOU ON THE BASIS OF THE CONDITIONS OF USE AND INTENSITY OF YOUR
ACTIVITIES (E.G. RACING, RAIN, SALTED ROADS, MUDDY ROADS, CYCLIST'S WEIGHT, ETC.).
8.1 - CLEANING THE WHEELS
Only use non-aggressive products such as water and neutral soap or specific products designed for cleaning bicycles when
cleaning the wheels. Do not use detergents or chemical cleaners. Dry them using a soft cloth. Never use abrasive or metal
pads.
NOTES
- Salt, mud and sand seriously damage bicycles and their components. Thoroughly rinse, clean and dry your bike after using
RED POWER / RED POWER HP wheels are available in the following versions:
®
it in these conditions.
Axial Fixing System™ - not compatible with "Center Lock" Oversize)
- If you use water under pressure to wash your bike, we recommend that you never point the water jet directly onto the
®
hubs. Water under pressure, even just from the nozzle of a garden hose, can penetrate the seals inside hubs and irreparably
damage the bearings.
WARNING!
8.2 - TRANSPORT AND SAFEKEEPING
When you transport the wheel separately from the bike or if you do not intend to use the wheel for a while, put it in a wheel
bag to protect it from impacts, dust and dirt.
Fulcrum wheels S.r.l. reserves to modify the content of this manual without notice.The updated version will always be avai-
lable www.fulcrumwheels.com
4.1
5
D
D
C
C
B
B
CHIUDERE
CLOSE
15 Nm (133 in.lbs)
APRIRE
OPEN
9.1
10
7.2 - MONTAGE DES ROTORS MIT ISO-SYSTEM MIT 6 SCHRAUBEN
• Setzen Sie den Rotor in seinen Sitz ein und achten Sie dabei auf die vom Pfeil angegebene Drehrichtung (Abb. 12).
• Ziehen Sie die 6 Schrauben mit 5/7 Nm (44/62 in.lbs) fest (Abb. 12).
8 - REGELMÄSSIGE WARTUNG DER LAUFRÄDER
Stellen Sie sicher, dass alle Speichen in einwandfreiem Zustand sind und dass keine Speiche locker ist.
• Kontrollieren Sie, dass die Laufräder perfekt zentriert sind. Lassen Sie das Laufrad drehen, um festzustellen, dass es
keinen Höhen- und Seitenschlag aufweist und dass es, wenn Sie Felgenbremssysteme verwenden, beim Drehen nicht die
Bremsschuhe berührt. Der Gebrauch von nicht richtig zentrierten Laufrädern oder von Laufrädern mit gebrochenen und/
oder beschädigten Speichen könnte Unfälle mit körperlichen und sogar lebensgefährlichen Verletzungen verursachen.
ACHTUNG! HINWEIS FÜR DEN FAHRRADMECHANIKER
WENDEN SIE SICH FÜR DIE ANWEISUNGEN ZUM ZUSAMMENBAU, ZU WARTUNG UND ERSATZ VON FELGEN,
SPEICHEN UND NABEN AN IHREN FULCRUM
FÜR DIE INSPEKTIONEN, DIE IHREN JEWEILIGEN EINSATZBEDINGUNGEN (Z.B. BEIM WETTKAMPFSPORT, IM REGEN,
IN MEERESNÄHE UND AUF GESALZENEN UND SCHLAMMIGEN STRASSEN ETC.), DER GEBRAUCHSINTENSITÄT
UND DEM FAHRERGEWICHT ANZUPASSEN SIND.
8.1 - REINIGUNG DER LAUFRÄDER
Verwenden Sie für die Reinigung der Laufräder nur milde Produkte wie Wasser und Neutralseife oder spezifische Produkte
zur Fahrradreinigung. Zum Reinigen des Rads dürfen keine Reinigungsmittel oder chemische Reinigungsmittel verwendet
werden. Trocknen Sie mit einem weichen Tuch nach: Verwenden Sie niemals Scheuer- oder Metallschwämme zur Reinigung.
RED POWER / RED POWER HP sind in folgenden Versionen erhältlich:
®
HINWEIS
- Salz, Schlamm und Sand können das Fahrrad und seine Komponenten erheblich beschädigen. Nach dem Gebrauch sollten
Axial Fixing System™ - nicht kompatibel mit "Center Lock"
®
Sie Ihr Fahrrad daher sorgfältig abspülen, reinigen und trocknen.
- Wenn Sie Wasser unter Druck verwenden, um Ihr Fahrrad zu waschen, empfehlen wir Ihnen, den Wasserstrahl niemals direkt
auf die Naben zu richten. Wasser unter Druck, sogar Wasser aus der Düse eines Gartenschlauchs kann durch Dichtungen
ACHTUNG!
dringen, in das Innere der Naben gelangen und auf diese Weise den Lagern irreparable Schäden zufügen.
8.2 - TRANSPORT UND SCHUTZHÜLLE
Sollten Sie das Laufrad getrennt vom Fahrrad transportieren oder es voraussichtlich über lange Zeit nicht benutzen, so
bewahren Sie es zum Schutz vor Stößen und Schmutz in seiner Tragetasche auf.
®
O AL VOSTRO SERVICE CENTER FULCRUM. CONCORDATE
.
SALES PARTNER OR YOUR FULCRUM SERVICE CENTER FOR THE INSTRUCTIONS FOR
®
5.1
A
A B C
B
C
D
D
35 Nm
35 N.m
5/7Nm
(310 in.lbs)
5/7 N.m
(44/62 in.lbs)
11
12
®
-SERVICE CENTER. VEREINBAREN SIE MIT IHM DIE ZEITINTERVALLE
Werbung

Verwandte Anleitungen für Fulcrum Red Power


Inhaltszusammenfassung für Fulcrum Red Power
- Seite 1 8.1 - REINIGUNG DER LAUFRÄDER ab; wenden Sie sich an einen Vertreter von Fulcrum Wheels S.r.l., um das für Sie am besten geeignete Inspektionsintervall zu wählen. Eventuell durch Schläge • Vor der Montage von Reifenmänteln ist auf der Felge nur das mitgelieferte Schutzband zu montieren.
- Seite 2 TION, SUR ROUTES MOUILLÉES, BOUEUSES OU SALÉES PENDANT L ’HIVER, LE POIDS DU CYCLISTE, ETC.). « Quick Release » fournies avec la roue. les composants très usés. La fréquence des contrôles dépend de nombreux facteurs; contactez un représentant de la Fulcrum wheels S.r.l. pour choisir 2.1 - INSTALLATION DU PNEU •...