Herunterladen Inhalt Inhalt Diese Seite drucken

Werbung

Verfügbare Sprachen
  • DE

Verfügbare Sprachen

  • DEUTSCH, seite 35
USER MANUAL
MANUALE D'USO
BEDIENUNGSANLEITUNG
MANUAL DE USUARIO
UHD
MANUEL DE L'UTILISATEUR
MANUAL DO USUÁRIO
INSTRUKCJA OBSŁUGI
ΟΔΗΓ ΊΕ Σ ΧΡ ΉΣΗΣ
UHD
Ultra High
Definition
2-inch
Wide Angle
2160p@24fps
Waterproof
1.5 Hours
LCD
Lens
up to 30m

Werbung

Inhaltsverzeichnis
loading

Inhaltszusammenfassung für Midland H7+ UHD

  • Seite 1 USER MANUAL MANUALE D’USO BEDIENUNGSANLEITUNG MANUAL DE USUARIO MANUEL DE L’UTILISATEUR MANUAL DO USUÁRIO INSTRUKCJA OBSŁUGI ΟΔΗΓ ΊΕ Σ ΧΡ ΉΣΗΣ Ultra High Definition 2-inch Wide Angle 2160p@24fps Waterproof 1.5 Hours Lens up to 30m...
  • Seite 2 Il manuale multilingua e disponibile sul sito www.midlandeurope.com The multi-language user manual is available on our website www.midlandeurope.com Die mehrsprachige Anleitung finden Sie auf unserer Webseite www.midlandeurope.com El manual multilingue esta disponible en www.midlandeurope.com Le manuel multi langue est disponible sur notre site internet www.midlandeurope.com O manual multilingua disponivel em www.midlandeurope.com Το...
  • Seite 3: Key Features

    English Cautions • Do not drop your camera. • Do not place heavy objects on the camera. • Keep the camera away from water and liquids (unless used in the waterproof case). This may cause the camera to malfunction. • Recharge the battery via the USB cable. •...
  • Seite 4: What's In The Box

    2. What’s in the box • Camera • Remote control • Waterproof case • Frame • 90° mount • Tripod mont • Curved mount • Flat mount • 3M double side adhesive • Quick release mount • USB Cable • Screw...
  • Seite 5: Camera Description

    3. Camera Description Recharging indicator Working status indicator Shoot button Power button Wifi button Lens & indicator Memory card interface Micro USB interface Micro HDMI interface Display...
  • Seite 6 Turn off: Press and hold the Power button for 2 seconds. 4.2 Modes Midland H7+ has 3 different operative modes: Video, Picture and Play back. The camera switches automatically to video mode when turned on. To switch to different modes you have to press Shoot but- ton for 1,5 seconds: Video ...
  • Seite 7 4.6 Charging the camera Before using the H7+ for the first time, please fully charge the bat- tery first. • Connect the camera to the charger via USB cable. The red indi- cator will be on, charging is in process. •...
  • Seite 8 5. Setting your camera 5.1 Video mode setting When the camera is on video mode, press the Power button once (release immediately, if it is held too long, the camera will switch off), then enter the picture setting menu. Use the Wi-Fi button to scroll, the Shoot button to confirm, the Power button to go back to the latest menu.
  • Seite 9 • “10 Min”: the video will be separated into difference files by every 10 minutes. • For example, if you select “5 Min”, time length, a 20 Minutes video will be separated into 4 Video Clips (5 Minutes each Clip). Time-lapse Record: this feature allows you to set the intervals at which a frame is captured.
  • Seite 10 5.2 Picture mode setting When the camera is in photo mode, press the Power button once (release immediately, if it is held too long, the camera will switch off), then enter the picture setting menu. Use the Wi-Fi button to scroll, the Shoot button to confirm, the Power button to go back to the previous menu.
  • Seite 11: General Settings

    Color Mode: users can choose different color mode from options: Normal - Black&White - Sepia - Dive Mode Saturation: users can setup saturation to: High - Standard - Low ISO: to determine how sensitive the camera sensor is. Options are: Auto - 100 - 200 - 400 Exposure: this function allows users to choose exposure parameter from options including +2.0 +1.7 +1.3 +1.0 +0.7 +0.3 0.0 -0.3 -0.7...
  • Seite 12 French, Spanish, Italian ect. TV Mode: Select the NTSC or PAL to suit your TV system. TV Out: this option allows to output the video on USB port. Users can choose OFF or ON. The display of the unit will turn OFF. Frequency: Select correct light frequency to avoid strobing.
  • Seite 13: Remote Control

    7. Remote Control A. Picture key B. Video key C. Power Off key D. Indicator Note: before using the remote control, please charge its battery. 1. Picture key: Press once to take a single picture. 2. Video key: Press once to start recording a video, press again to stop.
  • Seite 14 tons of remote. 4. When the pairing is finished, the middle indicator lights up blue. Note: the camera must be paired only once, afterwards it will recog- nize automatically; Wi-Fi function & remote controller cannot be used simultaneously. 8. PC Camera (Webcam) The Camera can be used as a PC camera (webcam) •...
  • Seite 15: Reset The Camera

    11. Reset the Camera The “Reset” button is under the connector’s cap, near to the USB and TF card interface. • When the camera does not work properly or is jammed, you might use a pin to press the “Reset” button for 2 seconds to re- set the camera, so that you can restart the camera for properly shooting.
  • Seite 16 Q: The camera cannot turn on. Why? A: Check if the battery is running flat, if yes, charge the battery via USB cable or AC adaptor first. Q: The camera freezes. What should I do ? A: reset the camera. Q: The video and photos are blurred.
  • Seite 17: Technical Specifications

    Technical specifications Video resolution 2880x2160p@24fps, 2.7K@30fps, 1080p@60fps, 1080p@30fps, 720p@120fps, 720p@60fps, 1440p@30fps Image resolution 12MP, 8MP, 5MP, 3MP Storage Micro SD card up to 32GB (optional) Video looping OFF, every 3, 5, 10 minutes Sensitivity automatic ISO 100-200-400 Microphone built-in Display 2”...
  • Seite 18 Remote power source built-in rechargeable Li-Ion battery 90mAh Battery life of the remote up to 450 minutes Remote Wi-Fi range about 15meters To download firmware updatings and for information about the war- ranty, go to www.midlandeurope.com...
  • Seite 19: Principali Funzioni

    Italiano Precauzioni • Non appoggiate oggetti pesanti sulla videocamera. • Se non utilizzate la custodia waterproof, non bagnate la video- camera: potrebbe danneggiarsi irreparabilmente. • Ricaricate la batteria tramite il cavo USB in dotazione. • Non esponete la videocamera a temperature oltre i 65°C. •...
  • Seite 20 2. Contenuto della confezione • Videocamera • Telecomando • Custodia waterproof • Cornice • Supporto 90° • Aggancio a vite • Base curva • Base piatta • Biadesivo 3M • Aggancio rapido • Cavo USB • Vite...
  • Seite 21: Descrizione Dei Comandi

    3. Descrizione dei comandi Indicatore di carica LED indicatore Tasto Scatto Tasto Accensione/Spegnimento Lente Tasto Wi-Fi Alloggiamento Micro SD Porta micro USB Interfaccia Mini HDMI Display...
  • Seite 22 • Spegnimento: Tenere premuto il tasto Accensione per 2 secondi. 4.2 Modalità Midland H7+ opera in 3 diverse modalità: Video, Foto (Picture) e Riproduzione (Play back). Quando accendete la videocamera, au- tomaticamente commuta in modalità video. Per passare ad altre modalità...
  • Seite 23 4.6 Ricaricare la videocamera • Ricaricate la videocamera prima di utilizzarla per la prima volta. • Per la ricarica collegate la videocamera al PC tramite il cavo USB. L’indicatore di stato si illumina di rosso durante la fase di carica. •...
  • Seite 24 5. Impostazioni 5.1 Impostazione modalità Video • Quando H7+ è in modalità Video, premete il tasto Accensione (rilasciatelo immediatamente, se lo premete a lungo la videocam- era si spegnerà), poi entrate nel menu Impostazione Foto. • Utilizzate il tasto Wi-Fi per scorrere, il tasto Scatto per confer- mare e il tasto Accensione per ritornare al menu precedente.
  • Seite 25 minuti sarà suddiviso in 4 file da 5 minuti ciascuno. Time-lapse: questa funzione permette di impostare gli intervalli di tempo predefiniti con cui vengono acquisiti i fotogrammi. Modalità possibili: Off - 1 Secondo - 5 Secondi - 10 Secondi - 30 Secondi - 1 Minuto - 5 Minuti - 10 Minuti Slow Motion: questa funzione permette di creare un video rallentato di 1 / 4 (opzione disponibile solo con una risoluzione 720@120fps).
  • Seite 26 5.2 Impostazione modalità Foto • Quando H7+ è in modalità Foto, premete il tasto Accensione (rilasciatelo immediatamente perchè se lo tenete premuto a lungo, la videocamera si spegne) ed entrate nel menu imposta- zione Foto. • Per scorrere le varie foto utilizzate il tasto Wi-Fi, il tasto Scatto per confermare e il tasto Accensione per ritornare all’ultimo menu selezionato.
  • Seite 27: Impostazioni Generali

    il bilanciamento automatico, ma potete regolarlo a piacimento a seconda delle condizioni di luce. Modalità colore: è possible scegliere tra alcune modalità colore: Normale - Nero & Bianco - Seppia - Modalità subacquea (Dive Mode) Saturazione: Alta - Standard - Bassa ISO: determina la sensibilità...
  • Seite 28 data e l’ora. Il formato impostato è AA/GG/MM ma è possibile modi- ficarlo in questa voce del menu. Spegnimento automatico (Auto power off): É possible program- mare lo spegnimento automatico della videocamera se non viene utilizzata per 3, 5 o 10 minuti. Beep tastiera: Off: Disattivazione beep tastiera.
  • Seite 29 vedrete “WIFI_H7Plus”. d. Inserite la password “12345678” per collegare H7+ al vostro smartphone o tablet. e. Aprite la App “MelifeCam-I3”. 7. Telecomando A. Tasto scatto foto B. Tasto video C. Tasto accensione/spegnimento D. Indicatori LED Nota: prima di utilizzare il telecomando, è necessario ricaricarlo. 1.
  • Seite 30 porpora; Indicatore di destra: Durante la registrazione di un filmato, il led lampeggia di verde; Ogni volta che viene scattata una foto, il led lampeggia. 7.1 Abbinare H7+ al telecomando • Assicuratevi innanzitutto che la videocamera ed il telecomando siano completamente carichi. •...
  • Seite 31 • 9. Collegare H7+ alla TV É possibile rivedere i vostri filmati e foto sulla TV tramite un cavo HDMI. • Collegate H7+ alla TV con un cavo HDMI. • Accendete la videocamera. • La TV vi mostrerà in diretta ciò che state riprendendo, oppure potete rivedere i vostri filmati e foto già...
  • Seite 32 D: La videocamera non si accende. Perché? R: Controllate che la batteria sia carica. Se è scarica caricatela tramite il cavo USB o con un adattatore CA. D: La telecamera è bloccata. Cosa devo fare? R: Eseguite il reset della videocamera. D: I video e le foto sono offuscate.
  • Seite 33: Specifiche Tecniche

    Specifiche tecniche Risoluzione video 2880x2160p@24fps, 2.7K@30fps, 1080p@60fps, 1080p@30fps, 720p@120fps, 720p@60fps, 1440p@30fps Risoluzione immagini 12MP, 8MP, 5MP, 3MP Memoria Micro SD con una capacità fino a 32GB (opzionale) Registrazione ciclica OFF / 3 / 5 / 10 minuti Sensibilità automatica ISO 100-200-400 Microfono incorporato Display...
  • Seite 34 Tipo telecomando 2.4GHz RF Alimentazione telecomando: pacco batteria Li-Ion incorporato 90mAh Autonomia telecomando fino a 450 minuti Copertura Wi-Fi telecomando circa 15metri Per scaricare aggiornamenti firmware e per informazioni sulla garanzia visitate il sito www.midlandeurope.com...
  • Seite 35: Wichtige Funktionen

    Vorsicht • Die Kamera nicht fallen lassen. • Keine schweren Gegenstände auf die Kamera legen. • Die Kamera von Wasser und anderen Flüssigkeiten fernhalten (es sei denn, sie wird im Unterwassergehäuse verwendet). Dies kann zu Fehlfunktionen der Kamera führen. • Den Akku über das USB-Kabel aufladen. •...
  • Seite 36 2. Lieferumfang • Kamera • Gebogene Klebehalterung • Fernbedienung • Klebehalterung • Unterwassergehäuse • 3M Doppelseitiger Kleber • Rahmenhalterung • Schnellspannhalterung • 90° Halterung • USB Kabel • Stativhalterung • Schraube...
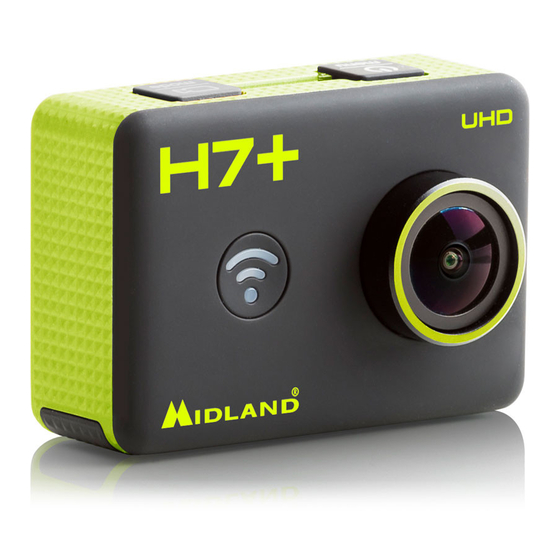
  • Seite 37 3. Kameraübersicht Ladestandsanzeige LED-Anzeige Auslöser Ein/Aus WLAN-Taste Objektiv microSD-Kartensteckplatz USB-Port Mini-HDMI-Port LCD-Display...
  • Seite 38 Standard-Videomodus. • Ausschalten: Halten Sie Ein/Aus für 2 Sekunden gedrückt. 4.2 Modi Die Midland H7+ hat 3 verschiedene Betriebsarten: Video, Foto und Wiedergabe. Zum Umschalten des Modus halten Sie den Auslöser für 1,5 Sekunden gedrückt: Video  Foto  Wiedergabe 4.3 Video aufnehmen...
  • Seite 39: Einlegen Der Tf-Karte

    4.6 Kamera laden • Bevor Sie die H7+ das erste mal benutzen, laden Sie bitte den Akku komplett auf. • Verbinden Sie die Kamera mit einem USB-Kabel am Ladegerät. Die rote Anzeige leuchtet auf und der Ladevorgang beginnt. • Wenn der Akku vollständig geladen ist, schaltet sich die rote An- zeige aus.
  • Seite 40 5. Kamera einrichten 5.1 Videoeinstellungen Mit der Kamera im Videomodus drücken Sie einmal Ein/Aus (nur kurz drücken, da sich die Kamera ansonsten ausschaltet), um das Menü Video Setting aufzurufen. Mit der WLAN-Taste scrollen Sie, mit dem Auslöser bestätigen Sie, mit Ein/Aus kehren Sie in das vor- herige Menü...
  • Seite 41 Wenn Sie zum Beispiel eine Zeitlänge von „5 Min” auswählen, wird ein 20-minütiges Video in 4 Videoclips (von jeweils 5 Minuten) aufgeteilt. Zeitraffer: Mit dieser Funktion können Sie das Intervall einstellen, in dem ein Bild erfasst werden soll. Sie können das Intervall wie folgt einstellen: Aus - 1 Sekunde - 5 Sekunden - 10 Sekunden - 30 Sekunden - 1 Minute - 5 Minuten - 10 Minuten Zeitlupe: Diese Funktion ermöglicht Ihnen Videos in Zeitlupe...
  • Seite 42 5.2 Bildeinstellungen Mit der Kamera im Einzelbildmodus drücken Sie einmal Ein/Aus (nur kurz drücken, da sich die Kamera ansonsten ausschaltet), um das Menü Picture Setting aufzurufen. Mit der WLAN-Taste scrollen Sie, mit dem Auslöser bestätigen Sie, mit Ein/Aus kehren Sie in das vorherige Menü...
  • Seite 43 Weißabgleich: Die Voreinstellung ist „Automatisch”; Sie können den Modus an konkrete Lichtverhältnisse anpassen. Farbmodus: Benutzer können aus verschiedenen Farboptionen aus- wählen: Normal - Schwarz&Weiss - Sepia - Tauchmodus. Sättigung: Benutzer können folgende Sättigungen auswählen: Hoch - Standard - Niedrig ISO: Stellen Sie die Empfindlichkeit des Kamerasensors ein. Folgen- de Optionen sind möglich: Auto - 100 - 200 - 400 Belichtung: Die Belichtung kann auf folgende Werte eingestellt werden: +2.0 +1.7 +1.3 +1.0 +0.7 +0.3 0.0 -0.3 -0.7 -1.0 -1.3 -1.7...
  • Seite 44: Weitere Einrichtung

    5.3 Weitere Einrichtung Mit der Kamera im Einzelbild- oder Videomodus drücken Sie einmal Ein/Aus, dann halten Sie den Auslöser für 1,5 Sekunden gedrückt, um das Menü Set-up More aufzurufen. Mit der WLAN-Taste scrollen Sie, mit dem Auslöser bestätigen Sie, mit Ein/Aus kehren Sie in das vorherige Menü...
  • Seite 45: Wlan-Einrichtung

    6. WLAN-Einrichtung Hinweis: Stellen Sie sicher, dass die Kamera vollständig aufgeladen ist, bevor Sie die WLAN-Funktion verwenden. a. Laden Sie die App „MelifeCam-I3“ aus dem Google Playstore oder Apple Appstore auf Ihr Smartphone oder Tablet herunter. b. Schalten Sie die Kamera ein, dann drücken Sie die WLAN-Taste zum Aufrufen des WLAN-Modus;...
  • Seite 46 Sie den Akku. 1. Bildtaste: Zur Aufnahme eines einzelnen Bildes einmal drücken. 2. Videotaste: Um eine Videoaufzeichnung zu starten, einmal drücken. Erneut drücken, um die Aufnahme zu beenden. 3. Ausschalttaste: Für 4 Sekunden gedrückt halten, um die Kamera auszuschalten. 4. Anzeigefunktion: Linke Anzeige: Blinkt blau bei WLAN-Verbindung.
  • Seite 47: Anschluss Am Fernseher

    8. PC-Kamera (Webcam) Die Kamera kann als PC-Kamera (Webcam) verwendet werden. • Verbinden Sie die Kamera und einen PC über ein USB-Kabel; • Die Kamera schaltet sich automatisch ein und zeigt zwei Op- tionen, „Mass Storage“ (Massenspeicher) & „PC Camera“, wählen sie „PC Camera“...
  • Seite 48 halten Sie die Rücksetztaste für 2 Sekunden mit einem Stift zum Zurücksetzen der Kamera gedrückt. F: Die Kamera lässt sich nicht einschalten. Warum? A: Überprüfen Sie, ob der Akku leer ist. In diesem Fall laden Sie den Akku zunächst über USB-Kabel oder Netzteil. F: Die Kamera friert ein.
  • Seite 49: Gewährleistung

    • Mängel, die durch falsche Verwendung oder den Anschluss an bzw. die Verwendung mit Zubehör und/oder Software, die kein Originalprodukt von Midland sind, entstanden sind. Die Garantie ist nicht vollstreckbar: • Wenn das Produkt durch andere Personen als autorisierte Ser- vicecentermitarbeiter demontiert, verändert oder repariert...
  • Seite 50 • Wenn die Seriennummer entfernt, gelöscht oder verändert wurde bzw. unleserlich geworden ist. Eine Entschädigung für die Zeit der Nichtnutzbarkeit des Geräts ist ausgeschlossen, ebenso wie eine Rückerstattung oder Ansprüche aus direkt verursachten oder Nebenschäden einer unsachgemäßen Verwendung des Geräts.
  • Seite 51: Technische Daten

    12. Technische Daten Videoauflösung 2880x2160p@24fps, 2.7K@30fps, 1080p@60fps, 1080p@30fps, 720p@120fps, 720p@60fps, 1440p@30fps Fotoauflösung 12MP, 8MP, 5MP, 3MP Speicher microSD-Karte bis zu 32 GB (gehört nicht zum Lieferumfang) Video-Aufnahmeschleife AUS, jede 3,5,10 Minuten Empfindlichkeit Automatisch ISO 100-200-400 Mikrofon Integriert Display 2” TFT-LCD-Bildschirm Weitwinkel 150°...
  • Seite 52 Übertragung 2,4 GHz HF (nicht richtungsgebunden) Akku Fernbedienung Integrierter Lithium-Ionen-Akku, 90 mAh Fernbedienung Akkulaufzeit Bis zu 450 Minuten WLAN-Reichweite Ca. 15 m Fernbedienung Um die Gewährleistung in Anspruch zu nehmen, füllen Sie bitte das Support-Formular unter www.midlandeurope.com aus.
  • Seite 53: Características Principales

    • La cámara no debe alcanzar temperaturas superiores a 65 ºC. • Si la cámara no funciona, no la desmonte usted mismo. En caso de apertura, modificación o reparación por parte de personal no autorizado por Midland, la garantía quedará invalidada. 1. Características principales • Resolución de vídeo: 2880x2160p@24fps, 2.7k@30fps, 1080p@60fps, 1080p@30fps, 720p@120fps, 720@60fps, 1440p@30fps.
  • Seite 54: La Caja Incluye

    2. La caja incluye • Cámara • Control Remoto • Carcasa waterproof • Carcasa portátil • Soporte 90º • Soporte para trípode • Base curva • Base plana • Biadhesivos 3M • Pivote • Cable USB • Tornillo...
  • Seite 55 3. Diagrama de la cámara Indicador de carga Indicador de estado Botón Disparador Botón de Encendido Botón e Indicador Lente WiFi Ranura MicroSD Puerto USB Puerto MicroHDMI Pantalla...
  • Seite 56 • Apagar: mantenga presionado durante 2 segundos el botón de Encendido. 4.2 Modos La Midland H7+ tiene 3 modos operativos diferentes: Vídeo, Foto y Reproductor. La cámara está en modo Vídeo por defecto cuando se enciende. Para navegar por los distintos modos presione el botón Disparador durante 1,5 segundos: VídeFotoReproductor...
  • Seite 57 • Mantenga presionado el botón Disparador durante 1,5 segundos para cambiar a modo Vídeo. 4.6 Cargar la cámara Antes de usar la H7+ por primera vez, por favor, cargue completamente la batería. • Conecte la cámara al cargador con el cable USB. El LED indicador rojo estará...
  • Seite 58: Configuración De La Cámara

    5. Configuración de la cámara 5.1 Configuración modo Vídeo En modo Vídeo, presione una sola vez el botón Encendido y entre en el menú Vídeo. Use el botón Wi-Fi para navegar, el botón Disparador para seleccionar y el botón Encendido para volver al menú anterior. Resolución: seleccione entre 4k@24fps, 2.7k@30fps, 1080p@60fps, 1080p@30fps, 720p@120fps, 720p@60fps, 1440p@30fps.
  • Seite 59 minutos. • Seleccione “10 Min”: los vídeos se separarán en ficheros de 10 minutos. • Por ejemplo, si selecciona “5 Min”, un vídeo de 20 minutos se separará en 4 clips de vídeo de 5 minutos cada uno. Time Lapse: esta función permite ajustar en qué intervalos son capturados los fotogramas.
  • Seite 60 5.2. Configuración modo Foto • Cuando la cámara esté en modo Foto, presione una vez el botón Encendido y entre en el menú Foto. Use el botón Wi-Fi para navegar, el botón Disparador para seleccionar y el botón Encen- dido para volver al menú anterior. Modo Captura: •...
  • Seite 61: Configuración General

    Balance de blancos: por defecto está en automático, puede regularlo dependiendo de las condiciones de luz. Modo de color: puede escoger modos de color diferentes entre las opciones: Normal - Blanco y Negro - Sepia - Modo Buceo Saturación: se puede seleccionar Alta - Estándar - Baja ISO: determina la sensibilidad del sensor.
  • Seite 62 apagará si no se utiliza en 1, 3 o 5 min. Sonido de las teclas: Off: desactiva el sonido de las teclas On: activa el sonido de las teclas Idioma: puede escoger entre 7 idiomas, incluyendo Inglés, Francés, Español, Italiano, etc. Modo TV: seleccione NTSC o PAL según su sistema de TV.
  • Seite 63: Control Remoto

    6. Configuración Wi-Fi Importante: asegúrese de que la batería está completamente cargada antes de utilizar la función Wi-Fi. a. Descargue la App “MelifeCam-13” a su smartphone o tableta desde Google Play o Apple Store; b. encienda la cámara, presione el botón Wi-Fi para entrar en el modo Wi-Fi;...
  • Seite 64 4. LEDs luminosos: LED izquierdo: si el Wi-Fi está encendido, parpadea en azul. LED central: cuando acaba el emparejamiento, se ilumina en azul; durante la carga, se ilumina en rojo; durante la carga con la cámara encendida, se ilumina en morado. LED derecho: durante una grabación, parpadea en verde;...
  • Seite 65 8. Webcam La cámara se puede usar como webcam. • Conecte la cámara y el PC mediante el cable USB suministrado; • La cámara se encenderá automáticamente y mostrará dos op- ciones, “Mass Storage” y “PC Camera”. Escoja “PC Camera”. 9.
  • Seite 66 P: La cámara no se enciende. ¿Por qué? R: Compruebe la carga de la batería y cárguela si es necesario. P: La cámara se congela. ¿Qué debo hacer? R: Resetee la cámara con el botón Reset. P: Los vídeos y las fotos están desenfocados. ¿Por qué? R: Limpie la lente si está...
  • Seite 67: Especificaciones

    Especificaciones Resolución vídeo 2880x2160p@24fps, 2.7k@30fps, 1080p@60fps, 1080p@30fps, 720p@120fps, 720p@60fps, 1440p@30fps Resolución foto 12MP, 8MP, 5MP, 3MP Tipo de memoria Micro SD hasta 32GB (no incluida) Loop vídeo OFF, cada 3,5, 10 min Sensibilidad automática ISO 100-200-400 Micrófono incorporado Display LCD 2” TFT Gran angular 150°...
  • Seite 68 Conexión RC 2.4GHz RF omnidireccional Alimentación RC batería Li-Ion recargable integrada de 90mAh Autonomía RC hasta 450 minutos Rango RC aprox. 15 metros Para descargar actualizaciones de firmware y para información sobre la garantía, vaya a www.midlandeurope.com...
  • Seite 69: Caracteristiques Principales

    Français Mise en garde • Ne laissez pas tomber votre appareil photo. • Ne placez pas d’objets lourds sur l’appareil photo. • Gardez l’appareil hors de l’eau et des liquides (à moins de l’utiliser dans le boîtier étanche). Cela peut provoquer des problèmes de fonctionnement.
  • Seite 70 2. Dans la boite • Caméra • Télécommande • Caisson étanche • Cadre • Support 90° • Tripod • Support courbé • Support plat • Adhésif double face 3M • Support à attache rapide • Câble USB • Vis...
  • Seite 71 3. Camera Indicateur de recharge Indicateur de fonctionnement Declencheur Bouton d’alimentation Indicateur et Lentille bouton WIFI interface carte mémoire Interface micro USB Interface micro HDMI Affichage...
  • Seite 72 • Éteindre: Appuyez et maintenez enfoncé le bouton d’alimenta- tion pendant 2 secondes. 4.2 Modes Le Midland H7+ dispose de 3 modes de fonctionnement différents: Vidéo, Photo et lecture. L’appareil passe automatiquement en mode vidéo lorsqu’il est allumé. Pour passer à différents modes vous devez appuyer sur le déclencheur pendant 1,5 secondes:...
  • Seite 73 4.6 Charger la caméra Avant la première utilisation de la H7+, veuillez la recharger com- plètement une première fois. • Branchez l’H7+ à l’ordinateur via un câble USB. Le voyant rouge s’allume, la charge est en cours. • Lorsque la batterie est complètement chargée, le voyant rouge s’éteint.
  • Seite 74 5. Configurer votre caméra 5.1 Configuration du mode Vidéo Lorsque l’appareil est en mode vidéo, appuyez sur le bouton d’ali- mentation une fois (relâchez immé- diatement, s’il est maintenu trop longtemps, l’appareil s’éteint), puis entrez dans le menu de réglage de l’image.
  • Seite 75 • Par exemple, si vous sélectionnez “5 min” comme durée, une vidéo de 20 minutes sera séparé en 4 Clips vidéo (de 5 minutes chaqu’un). Enregistrement Time-Laps: Cette fonction vous permets d’inserer un intervalle entre chaques images capturés. Vous pouvez selectionnez les intevalles de temps suivant: OFF, 1 seconde, 5 secondes, 10 secondes, 30 secondes, 1 minute, 5 min- utes, 10 minutes.
  • Seite 76 Microphone: • Sélectionnez “On”, Film avec le son. • Sélectionnez “Off”, Film sans le son. Horodatage: Vous pouvez définir la date et l’heure et l’afficher ou non sur vos vidéos. 5.2 Configuration du mode photo Lorsque l’appareil est en mode photo, appuyez sur le bouton d’ali- mentation une fois (relâchez immédiatement, si elle est maintenue trop longtemps, l’appareil s’éteint), puis entrez dans le menu de réglage de l’image.
  • Seite 77 Résolution: Sélectionnez la valeur entre 12M – 8M – 5M – 3M Rafale: l’appareil photographie 3 images rapidement. Vous pouvez utiliser cette fonction même avec la minuterie réglée dans “Capture Mode”. Qualité: Sélectionnez la qualité de l’image: Bonne – Normal – Economique Mesure: cette option permet de sélectionner la manière dont l’ap- pareil mesure et ajuste l’exposition.
  • Seite 78 5.3 Paramètre général Lorsque l’H7+ est en mode photo ou en mode vidéo, appuyez sur le bouton d’alimentation une fois, puis appuyez et maintenez le dé- clencheur pendant 1,5 secondes, puis entrez dans le menu de con- figuration. Utilisez le bouton Wi-Fi pour faire défiler, le déclencheur pour confirmer, le bouton d’alimentation pour revenir au menu précédent.
  • Seite 79 Mot de passe WI-FI: Configurer le mot de passe WI-FI par vous même. Le mot de passe par défaut est “12345678” 6. Configuration WI-FI Remarque: Assurez-vous que la batterie de votre appareil soit à pleine charge avant d’utiliser la fonction Wifi. a.
  • Seite 80 1. Touche Photo: Appuyer une fois pour prendre une seul photo. 2. Touche vidéo: Appuyez une fois pour démarrer l’enregistrement d’une vidéo, appuyez à nouveau pour arrêter l’enregistrement. 3. Touche Off: Appuyez et maintenez enfoncé pendant 4 secondes pour éteindre la caméra. 4.
  • Seite 81 8. Webcam La Caméra peut être utilisé comme webcam pour PC. a. Connectez la caméra au PC via un câble USB b. L’appareil photo s’allume automatiquement et affiche deux op- tions: “Mass storage” (Stockage de masse) et “PC Camera” (caméra PC), puis choisissez PC Camera. 9.
  • Seite 82 F.A.Q Q: L’appareil photo ne peut pas s’allumer. Pourquoi? A: Vérifiez si la batterie est à plat, si oui, charger la batterie via le câble USB ou l’adaptateur secteur en premier. Q: La caméra se fige. Que devrais-je faire ? A: Réinitialiser la caméra.
  • Seite 83: Specification Technique

    Specification technique Résolution Vidéo 2880x2160p@24fps, 2.7K@30fps, 1080p@60fps, 1080p@30fps, 720p@120fps, 720p@60fps, 1440p@30fps Résolution d’Image 12MP, 8MP, 5MP, 3MP Mémoire Carte Micro SD maximum 32GB (optionel) Vidéo Loop OFF, toutes les 3, 5, 10 minutes Sensibilité Automatique ISO 100-200-400 Micro Incorporé Affichage Ecran LCD 2”...
  • Seite 84 Alimentation RC Batterie Li-Ion rechargeable intégrée de 90mAh Autonomie RC Jusqu’à 450 minutes Portée WI-FI Pour télécharger les mises à jour et pour plus d’informations sur la garantie, rendez-vous sur www.midlandeurope.com...
  • Seite 85: Podstawowe Parametry

    Polski Ostrzeżenia • Chroń kamerę przed upadkiem na twarde podłoże. • Nie kładź na kamerę ciężkich przedmiotów. • Chroń kamerę przed zanurzenia w wodzie i innych płynach jeśli nie jest zamknięta w obudowie wodoodpornej. • Ładuj akumulator przez kabel USB. •...
  • Seite 86 2. Zawartość opakowania • Kamera • Mocowanie łukowe • Pilot zdalnego sterowania • Obudowa wodoodporna • Ramka • Mocowanie szybko rozłączalne • Mocowanie 90° • Kabel USB • Mocowanie statywowe • Mocowanie płaskie • Przylepiec dwustronny 3M • Śruba...
  • Seite 87: Rozmieszczenie Elementów

    3. Rozmieszczenie elementów Wskaźnik ładowania Wskaźnik statusu Przycisk migawki Przycisk zasilania Przycisk WiFi Obiektyw i wskaźnik Miejsce na kartę pamięci Gniazdo micro USB Gniazdo micro HDMI Wyświetlacz...
  • Seite 88: Nagrywanie Filmów

    • Wyłączanie: wciśnij i przytrzymaj przez 2 sek, przycisk zasilania. 4.2 Tryby Midland H7+ pracuje w 3 różnych trybach: Video, Zdjęcia, Odtwarzanie. Po łączeniu kamera automatycznie uruchamia się w trybie Video. Zmiana trybu odbywa się przez wciśnię- cie i przytrzymanie przez 1,5 sek.
  • Seite 89 Naciśnięcie i przytrzymanie przez 1,5 sek. przycisku migawki przełącza kamerę w tryb Video. 4.6 Ładowanie Przed pierwszym użyciem kamery należy w pełni naładować akumu- lator. • Połącz kamerę ze źródłem prądu stałego o napięciu 5V kablem USB. Czerwona dioda będzie się świecić podczas procesu ład- owania.
  • Seite 90: Ustawienia Kamery

    5. Ustawienia kamery 5.1 Ustawienia w trybie Video Kiedy kamera jest w trybie wideo wciśnij krótko przycisk zasilania (dłuższe przytrzymanie spowoduje, że kamera wyłączy się) aby wejść w tryb ustawień. Przyciskiem WiFi poruszasz się po menu, a przycisk- iem migawki zatwierdzasz wybór. Przyciskiem zasilania cofasz się do poprzedniego ekranu.
  • Seite 91 sek. – 5 sek. – 10 sek. – 30 sek. – 1 min. – 5 min. – 10 min. Zwolnione tempo: Ta opcja pozwala nagrać film, który będzie od- twarzany w zwolnionym tempie i jest dostępna tylko w rozdzielczości 720@120fps. Po nagraniu filmu włączoną opcją ON, będzie on od- twarzany z 1:4 prędkości nagrywania.
  • Seite 92 5.2 Ustawienia w trybie zdjęć Kiedy kamera jest w trybie zdjęć wciśnij krótko przycisk zasilania (dłuższe przytrzymanie spowoduje, że kamera wyłączy się) aby wejść w tryb ustawień. Przyciskiem WiFi poruszasz się po menu, a przycisk- iem migawki zatwierdzasz wybór. Przyciskiem zasilania cofasz się do poprzedniego ekranu.
  • Seite 93 Tryb koloru: Do wyboru tryby Normalny, Czarno-biały, Sepia, Pod- wodny. Nasycenie: Wysokie – Standardowe – Niskie. ISO: Określa czułość przetwornika obrazu. Do wyboru Auto – 100 – 200 – 400. Ekspozycja: Dobieranie wartości przesłony w zależności od intensy- wności oświetlenia planu zdjęciowego. Dostępne opcje to: +2.0 +1.7 +1.3 +1.0 +0.7 +0.3 0.0 -0.3 -0.7-1.0 -1.3 -1.7 -2.0.
  • Seite 94 5.3 Ustawienia podstawowe Jeżeli kamera jest w trybie Zdjęć lub Video naciśnij przycisk zasila- nia, a potem wciśnij i przytrzymaj 1,5 sek. przycisk migawki. Uzys- kałeś dostęp do menu ustawień podstawowych. . Przyciskiem WiFi poruszasz się po menu, a przyciskiem migawki zatwierdzasz wybór. Przyciskiem zasilania cofasz się...
  • Seite 95: Zdalne Sterowanie

    Hasło Wi-Fi: Można ustanowić własne hasło do sieci Wi-Fi. Do- myślne to „12345678”. 6. Ustawienia Wi-Fi Uwaga: Przy korzystaniu z opcji Wi-Fi akumulator kamery powinien być w pełni naładowany. a. Pobierz aplikację „MelifeCam-I3” do smarfona lub tabletu z App store lub Google play. b.
  • Seite 96 3. Przycisk zasilania: Wciśnij i przytrzymaj 4 sek., aby wyłączyć kamerę. 4. Funkcje wskaźnika Lewa dioda: miga na niebiesko, kiedy ustanowiono połączenie WiFi. Środkowa dioda: Kiedy sparowano świeci na niebiesko. W trakcie ładowania świeci na czerwono. Podczas ładowania, kiedy kamera jest włączona świeci na fioletowo.
  • Seite 97: Przesyłanie Plików Do Komputera

    8. Kamera internetowa PC (Webcam) Kamera może być używana jako kamera internetowa (webcam) • Połącz komputer z kamerą kable USB • Kamera włączy się automatycznie i pokaże 2 opcje do wyboru „Pamięć masowa” i „Kamera PC”. Wybierz „Kamera PC”. 9. Połączenie z telewizorem •...
  • Seite 98: Najczęściej Zadawane Pytania

    Najczęściej zadawane pytania Pyt: Kamera nie włącza się. Co zrobić? Odp: Sprawdź czy akumulator jest naładowany. Jeśli nie naładuj przez kabel USB i adaptor zasilający. Pyt: Kamera zawiesiła się. Co zrobić? Odp: Zresetuj kamerę Pyt: Filmy zdjęcia są nieostre. Dlaczego? Odp: Prawdopodobnie brudny obiektyw.
  • Seite 99: Specyfikacja Techniczna

    Specyfikacja techniczna Rozdzielczość 2880x2160p@24fps, 2.7K@30fps, 1080p@60fps, 1080p@30fps, 720p@120fps, 720p@60fps, 1440p@30fps Zdjęcia 12//8/5/3 MP Dzielenie filmów wyłączone, co 3,5,10 minut Czułość automatyczne ISO 100-200-300 Mikrofon Wbudowany Wyświetlacz 2’ kolorowy Obiektyw 7G szerokokątny 150° Wodoodporność do 30m w obudowie wodoodpornej Zasilanie 3,7V/1000mAh wymienny akumulator Czas pracy Do 90min dla 1080P przy wyłączonym WiFi...
  • Seite 100 Czas pracy pilota Do 450min Zasięg WiFi Do 15 m Tryby Wideo, Zdjęcia, Zdjęcia seryjne, Film poklatkowy, Aktualizacje oprogramowania i warunki gwarancji można znaleźć na www.midlandeurope.com...
  • Seite 101 • Utilize sempre cartões SD específicos para cámaras desportivas • Se a câmara não funciona não a desmonte. Em caso de abertura, modificação ou reparação por parte de pessoal não autorizado por Midland a garantía fica invalidada 1. Caracteristicas principais • Resolução de video: 2880x2160p@24fps, 2.7k@30fps, 1080p@60fps, 1080p@30fps, 720p@120fps, 720@60fps, 1440p@30fps.
  • Seite 102 2. A Caixa inclui: • Câmara • Comando remoto • Caixa estanque • Mount portátil • Suporte 90º • Suporte para tripé • Base curva • Base plana • Bio-adesivos 3M • Pivote • Cabo USB • Parafuso...
  • Seite 103 Diagrama da câmara Indicador de carga indicador de estado Botão disparado Botão de Ligado Botão e indi- Lente cador WIFI Ranhura MicroSD Porta USB Porta Micro HDMI Ecran...
  • Seite 104 • APAGAR: Mantenha pressionado duante 2 segundos o botão de ligar 4.2 Modos: A Midland H7+ tem 3 modos operativos diferentes: Video, foto e reproductor. Acâmara está em modo video por defeito quando se liga. Para navegar pelos destintos modos pressione o botão dispoarador durante 1,5 segundos 4.3 Gravar video...
  • Seite 105: Cartão Microsd

    4.6 Carregar a câmara Antes de utilizar a H7+ por primeira vez por favor carregue completamente a batería. • ligue a câmara ao carregador con o cabo USB. O LED indicador encarnado fica ligado durante a carga. • Quando a batería estiver totalmente carregada o LED indicador encarnado de apaga.
  • Seite 106: Configuração Da Câmara

    5. Configuração da câmara 5.1 – Configuração em video Em video pressione uma única vez o botão de ligar e entre no menú video. Utilize o botão WiFi para navegar, o botão disparador para seleccionar e o botão de ligar para voltar ao menú. Resolução: selecione entre 4k@24fps, 2.7k@30fps, 1080p@60fps, 1080p@30fps, 720p@120fps, 720p@60fps, 1440p@30fps.
  • Seite 107 • Se seleciona “5mi”, um video de 20 minutos se divide em 4 clips de video de 5 minutos cada um Time Lapse: esta função permite ajustar em que intervalos são gravados os fotogramas. Pode ajustar intervalos em: off - 1 segundo - 5 segundos - 10 segundos - 30 segundos - 1 minuto - 5 minutos - 10 minutos.
  • Seite 108 5.2. Configuração foto Quando a câmara está em foto pressione uma vez o botão de ligar e entre no meni foto. Utilize o botão WiFi para navegar. O botão disparador para seleccionar e o botão ligar para voltar ao menú anterior Modo Captura: •...
  • Seite 109 Burst: A câmara tira 3 fotos seguidas. Pode utilizar esta função com o temporizador configurado no modo captura Qualidade:Pode escolher entre fina – normal - económica Metering: esta opção permite selecionar a forma em que a câmara mede e ajusta a exposição. Se poede escolher entre Matricial - Centrada - Pontual Definição: Pode selecionar Alta - Standar - Baixa Balance brancos: por defeito está...
  • Seite 110 apaga-se se não utiliza em 1,3 ou 5 minutos. Som das teclas: OFF: desactiva o som das teclas – ON: activa o som das teclas Lingua: Pode escolher 7 linguas distintas. Modo TV: selecione NTSC ou PAL segundo o sistema da sua TV. TV Out: esta opção permite a saida de video através de uma porta USB.
  • Seite 111: Configurações De Wifi

    6. Configurações de WiFi Importante: Certifique-se de que a bateria está totalmente carregada antes de utilizar a função WiFi. a. Baixe a App “MelifeCam-13” para o seu smartphone ou tablet no Google Play ou Apple Store; b. ligar a câmara, pressione o botão WiFi para entrar em WiFi; c.
  • Seite 112 mente para parar. 3. Botão ligar: mantenha pressionado o botão por 4 segundos para desligar a câmara. 4. LED LED esquerdo: Se o Wi-Fi estiver activado, azul pisca. LED Central: quando o emparelhamento termina, brilha em azul; durante o carregamento, a luz se acende na cor vermelha; en- quanto carrega com a câmara ligada, a luz é...
  • Seite 113 • Ligue a câmara à TV com o cabo HDMI; • ligar a câmara; • A TV mostra a cena ativa; • Mantenha pressionado o botão ligar por 2 segundos para desligar a câmara. 10. Transferência de arquivos do PC Pode transferir fotos e vídeos armazenados no PC.
  • Seite 114 P: A câmara não liga. Porquê? R: Verifique a carga da bateria e carregue se necessário. P: A câmara congela. O que devo fazer? R: Reinicie a câmara com o botão Reset. P: Os vídeos e as fotos estão desfocadas. Porquê? R: Limpe a lente se estiver suja.
  • Seite 115 Especificações Resolução vídeo 2880x2160p@24fps, 2.7k@30fps, 1080p@60fps, 1080p@30fps, 720p@120fps, 720p@60fps, 1440p@30fps Resolução foto 12MP, 8MP, 5MP, 3MP Tipo de memoria soporta Micro SD hasta 32GB (no incluida) Loop vídeo OFF, cada 3,5, 10 min Sensibilidade automática ISO 100-200-400 Microfone incorporado Display LCD 2”...
  • Seite 116 Autonomia RC hasta 450 minutos Raio RC aprox. 15 metros Para descarregar actualizações de firmware e para informação sobre a garantia, consultar em www.midlandeurope.com...
  • Seite 117 Ελληνικά Προφυλάξεις • Φροντίστε να μη σας πέφτει η κάμερα. • Μη τοποθετείτε βαριά αντικείμενα πάνω στην κάμερα. • Διατηρήστε την κάμερα μακριά από νερό και υγρά (εκτός και αν την χρησιμοποιείτε με την αδιάβροχη θήκη). Μπορεί να προκληθεί βλάβη στην...
  • Seite 118: Περιεχόμενα Συσκευασίας

    2. Περιεχόμενα Συσκευασίας • Κάμερα • Βάση στήριξης κυρτής επιφάνειας • Τηλεχειριστήριο • Βάση στήριξης επίπεδης επιφάνειας • Αδιάβροχη θήκη • Αυτοκόλλητη ταινία 3M διπλής όψης • Θήκη τύπου κορνίζας • Βάση γρήγορης προσάρτησης • Περιστρεφόμενη 90ο βάση • Καλώδιο USB •...
  • Seite 119 3. Βασικά μέρη της κάμερας Ένδειξη φόρτισης Ένδειξη Κατάστασης Λειτουργίας Κλείστρο Πλήκτρο ενεργοποίησης Πλήκτρο WiFI Φακός & Ενδείξεων Υποδοχή Κάρτας Μνήμης Υποδοχή Micro USB Υποδοχή Micro HDMI Οθόνη...
  • Seite 120 Απενεργοποίηση: Πιέστε και κρατήστε πατημένο το πλήκτρο ενεργοποίησης για 2 δευτερόλεπτα. 4.2 Τρόποι Λειτουργίας Η Midland H7+ διαθέτει 3 διαφορετικούς τρόπους λειτουργίας: Βίντεο (Video), Φωτογραφία (Picture) και Αναπαραγωγή (Play back). Η κάμερα, μόλις ενεργοποιηθεί, μεταβαίνει αυτόματα σε κατάσταση λήψης βίντεο.
  • Seite 121 Αναπαραγωγή (playback). Σε αυτή την κατάσταση μπορείτε να δείτε όλες τις φωτογραφίες και τα βίντεο που έχετε τραβήξει. • Χρησιμοποιήστε το πλήκτρο WiFi για να μετακυλήσετε μεταξύ των επιλογών, το κλείστρο για να επιλέξετε και να κάνετε αναπαραγωγή και το πλήκτρο ενεργοποίησης για την προστασία/διαγραφή του μενού...
  • Seite 122 γ. Μια καινούρια Micro SD κάρτα θα πρέπει να έχει αναδιαμορφωθεί (format) με την κάμερα πριν τη χρήση της. 4.8 Πώς να χρησιμοποιήσετε την αδιάβροχη θήκη Η κάμερα μπορεί να υποστηρίξει υποβρύχια λήψη σε βάθος 30 μέτρων με χρήση της αδιάβροχης θήκης. •...
  • Seite 123 5. Ρύθμιση της κάμερας 5.1 Ρυθμίσεις Βίντεο (Video mode setting) Όταν η κάμερα είναι σε κατάσταση Βίντεο (video), πιέστε το πλήκτρο ενεργοποίησης μία φορά (ελευθερώστε το πλήκτρο αμέσως, αν το κρατήστε για μεγαλύτερο χρονικό διάστημα, η κάμερα θα κλείσει), στη συνέχεια...
  • Seite 124 Για παράδειγμα, αν επιλέξετε την επιλογή “5 Min”, χρονικό διάστημα, ένα βίντεο 20 λεπτών θα χωριστεί σε 4 ξεχωριστά βίντεο (5 λεπτών το καθένα) Εγγραφή Time-lapse: Αυτή η λειτουργία σας επιτρέπει να ρυθμίσετε τα διαστήματα κατά τα οποία λαμβάνεται ένα πλαίσιο. Μπορείτε...
  • Seite 125 Εγγραφή ήχου: Επιλέξτε “On” για εγγραφή βίντεο με ήχο. Επιλέξτε “Off” για εγγραφή βίντεο χωρίς ήχο. Ημερομηνία & Ώρα (Date Stamp): Μπορείτε είτε να θέσετε την ώρα και την ημερομηνία είτε όχι στα βίντεο σας. 5.2 Ρυθμίσεις Φωτογραφίας Όταν η κάμερα βρίσκεται σε κατάσταση λήψης φωτογραφίας, πιέστε το κλείστρο...
  • Seite 126 χρονοδιακόπτη ρυθμισμένο σε λειτουργία “Capture”. Ποιότητα: Ρυθμίστε την ποιότητα της εικόνας: Fine – Normal – Economy. Μετρητής (Metering): αυτή η επιλογή σας επιτρέπει να επιλέξετε τον τρόπο που η συσκευή μετρά και προσαρμόζει την έκθεση. Οι χρήστε μπορούν να επιλέξουν Average – Center – Spot. Ευκρίνεια...
  • Seite 127 5.3 Γενικές Ρυθμίσεις Όταν η κάμερα βρίσκεται σε κατάσταση Φωτογραφία ή Βίντεο, πιέστε μία φορά το πλήκτρο ενεργοποίησης, στη συνέχεια πιέστε και κρατήστε πατημένο το κλείστρο για 1.5 δευτερόλεπτα, έπειτα μεταβείτε στο μενού περισσότερων ρυθμίσεων (Set-up more). Χρησιμοποιήστε το πλήκτρο Wi-Fi για να μετακυλήσετε μεταξύ των επιλογών, το κλείστρο για...
  • Seite 128 εργοστασιακή ταυτότητα SSID είναι “WiFi_H7Plus”. Κωδικός Wi-Fi (Password): Ρυθμίστε μόνοι σας κωδικό Wi-Fi. Ο αρχικός κωδικός για το Wi-Fi είναι “12345678”. 6. Ρύθμιση Wi-Fi (Wi-Fi set-up) Σημείωση: Βεβαιωθείτε ότι η κάμερα είναι πλήρως φορτισμένη προτού χρησιμοποιήσετε τη λειτουργία Wi-Fi. α. Κατεβάστε την εφαρμογή “MelifeCam-I3” στο smart-phone κινητό ή tablet σας...
  • Seite 129 Σημείωση: προτού χρησιμοποιήσετε το ασύρματο χειριστήριο, παρακαλούμε να φορτίσετε την μπαταρία του. 1. Πλήκτρο Φωτογραφίας: Πιέστε μια φορά για λήψη μεμονωμένης φωτογραφίας. 2. Πλήκτρο Βίντεο: Πιέστε μία φορά για να ξεκινήσετε την εγγραφή βίντεο. Πιέστε ξανά για διακοπή. 3. Πλήκτρο απενεργοποίησης: Πιέστε και κρατήστε το πατημένο για 4 δευτερόλεπτα...
  • Seite 130 8. Κάμερα Η/Υ (Webcam) Η κάμερα μπορεί αν χρησιμοποιηθεί και ως κάμερα για υπολογιστή (web- cam) α. Συνδέστε την κάμερα στον υπολογιστή μέσω του USB καλωδίου. β. Η κάμερα θα ενεργοποιηθεί αυτόματα και θα εμφανίσει δύο επιλογές, “Mass Storage” & “PC Camera”. Επιλέξτε PC Camera. 9.
  • Seite 131: Συχνές Ερωτήσεις

    Συχνές Ερωτήσεις E: Η κάμερα δεν ανοίγει. Γιατί? A: Ελέγξτε αν η κάμερα είναι φορτισμένη, αν όχι, φορτίστε την μπαταρία μέσω του USB καλωδίου ή του AC αντάπτορα. E: Η κάμερα παγώνει. Τι πρέπει να κάνω? A: Χρησιμοποιήστε μια καρφίτσα για να πιέσετε το πλήκτρο επαναφοράς (reset) που...
  • Seite 132: Τεχνικά Χαρακτηριστικά

    Τεχνικά Χαρακτηριστικά Ανάλυση βίντεο 2880-2160p@24fps, 2.7K@30fps, 1080p@60fps, 1080p@30fps, 720p@120fps, 720p@60fps, 1440p@30fps Ανάλυση φωτογραφίας 12ΜΡ, 8ΜΡ, 5ΜΡ, 3ΜΡ Αποθήκευση Micro SD κάρτα έως 32GB (προαιρετική) Video looping OFF, κάθε 3, 5, 10 λεπτά Ευαισθησία Αυτόματο ISO 100-200-400 Μικρόφωνο Ενσωματωμένο Οθόνη 2” TFT LCD οθόνη Γωνία...
  • Seite 133 Τροφοδοσία ασύρματου Ενσωματωμένη επαναφορτιζόμενη τηλεχειριστηρίου μπαταρία Li-Ion 90mAh Εμβέλεια ασύρματου Wi-Fi Περίπου 15 μέτρα Για να “κατεβάσετε” αναβαθμίσεις του firmware και για πληροφορίες εγγύησης, παρακαλούμε επισκεφτείτε την ιστοσελίδα www.midland- europe.com...
  • Seite 135 • INFORMAZIONE AGLI UTENTI Ai sensi dell’art. 13 del decreto legislativo 25 luglio 2005, n.151 “Attuazione delle Direttive 2002/95/CE, 2002/96/ CE e 2003/108/CE, relative alla riduzione dell’uso di sostanze pericolose nelle apparecchiature elettriche ed elettroniche, nonché allo smaltimento dei rifiuti”. Il simbolo del cassonetto barrato riportato sull’apparecchiatura indica che il prodotto alla fine della propria vita utile deve essere raccolto separatamente dagli altri...
  • Seite 136 • Todos los artículos que exhiban este símbolo en el cuerpo del producto, en el embalaje o en el manual de instrucciones del mismo, no deben ser desechados junto a los residuos urbanos normales sino que deben ser depositados en los centros de recogida especializados. En estos centros, los materiales se dividirán en base a sus características y serán reciclados, para así...
  • Seite 137 Hereby Cte International Srl declares that this product is in compliance with the essential requirements and other relevant provisions of Directive 2014/53/UE. The declaration of conformity is available on the web site http://www.midland- europe.com/it/pagina/10090-certifications AT / DE / CH / LI Hiermit erklärt Cte International Srl, dass das Produkt die grundlegenden An-...
  • Seite 138 CTE INTERNATIONAL Srl förkunnar att produkten överensstämmer med de väsentliga kraven och övriga bestämmelser i direktiv 2014/53/EU. Denna försäkran om överensstämmelse finns på webbplatsen http://www.midland- europe.com/it/pagina/10090-certifications CTE INTERNATIONAL Srl vakuuttaa, että tuote täyttää direktiivin 2014/53/ UE. Vaatimuksenmukaisuusvakuutus on saatavilla http://www.midlandeurope.
  • Seite 139 Cte International Srl ovime izjavljuje da je ime ovog modela u suglasnosti sa bitnim zahtjevima te ostalim relevantnim odredbama Propisa 2014/53/EU. Ova Izjava o suglasnosti je dostupna na web stranici http://www.midlandeurope.com/it/pagi- na/10090-certifications. Käesolevaga kinnitab Cte International Srl selle mudeli vastavust direktiivi 2014/53/UE.
  • Seite 140 L’APPARATO È DI LIBERO USO IN TUTTI I PAESI EUROPEI. THE EQUIPMENT IS FREE USE IN ALL UE COUNTRIES. DIESES PRODUKT KANN IN ALLEN EU-LÄNDERN VERWENDET WERDEN. EL PRODUCTO ES DE LIBRE USO EN TODOS LOS PAÍSES DE LA UE. CE PRODUIT EST LIBRE D’UTILISATION DANS TOUS LES PAYS MEMBRE DE L’UE.
  • Seite 142 Via. R.Sevardi 7 42124 Mancasale, Reggio Emilia - Italy www.midlandeurope.com Read the instructions carefully before installation and use. Importado por: MIDLAND IBERIA, SA Cobalt, 48 08940 Cornellà de Llobregat - España www.midland.es Lea atentamente las instrucciones de uso antes de su instalación y uso.

Inhaltsverzeichnis