Educational Insights My First Workbench Bedienungsanleitung
Verfügbare Sprachen
Verfügbare Sprachen
Quicklinks
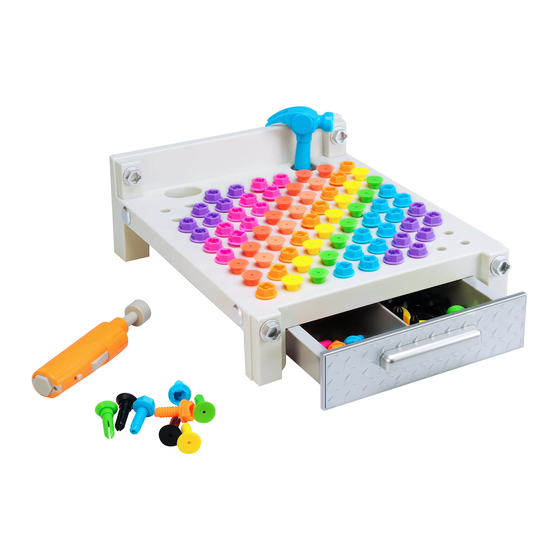
With My First Workbench, kids can take creative construction play
to a whole new level! The sturdy workbench, colorful bolts, nails,
and realistic tools encourage little engineers to develop a variety of
important skills, from color recognition and counting, to fine motor
skills and following directions.
Contents
● Motorized mini-drill (with bolt bit)
● Hammer
● Workbench (with drawer to store bolts and nails)
● 60 Bolts
● 60 Nails
My First Workbench
EI-4171
3
Ages
+

Verwandte Anleitungen für Educational Insights My First Workbench


Inhaltszusammenfassung für Educational Insights My First Workbench
- Seite 3 Bird • Pájaro • Oiseau • Vogel Butterfly • Mariposa • Papillon • Schmetterling House • Casa • Maison • Haus Stripes • Rayas • Rayures • Streifen...
- Seite 8 MUSTER LEGEN Inhalt: Bevor Sie Ihrem Kind die Mustervorlagen zeigen, lassen Sie es zuerst • Batteriebetriebener Minibohrer (mit Bohreinsatz) nach eigener Fantasie mit Schrauben und Nägeln experimentieren • Hammer • Werkbank (mit Schublade als Stauraum für Schrauben und Nägel) oder einfache Muster und Bilder legen. Wenn Sie das Gefühl haben, •...