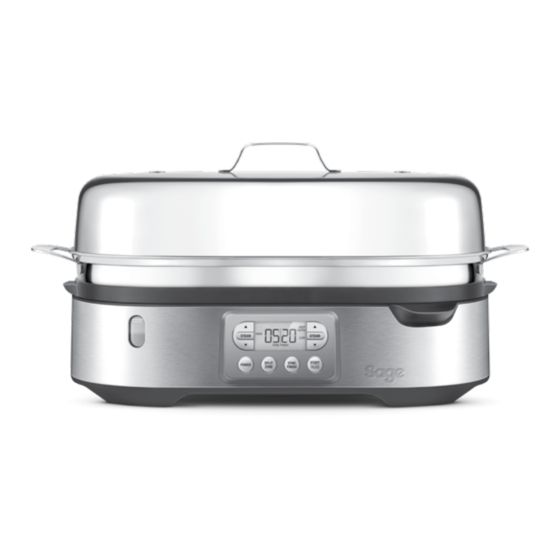
Sage the Steam Zone SFS800 Kurzanleitung
Vorschau ausblenden
Andere Handbücher für the Steam Zone SFS800:
- Bedienungsanleitung (17 Seiten) ,
- Kurzanleitung (53 Seiten) ,
- Kurzanleitung (80 Seiten)
Inhaltsverzeichnis
Werbung
Verfügbare Sprachen
Verfügbare Sprachen
Quicklinks
Werbung
Inhaltsverzeichnis

Inhaltszusammenfassung für Sage the Steam Zone SFS800
- Seite 1 Steam Zone ™ SFS800 QUICK GUIDE KURZANLEITUNG...
-
Seite 2: Sage ® Recommends Safety First
RECOMMENDS • Do not place the food steamer SAFETY FIRST near the edge of a table, counter or bench top during operation. At Sage we are very safety ® Ensure that the surface is level, conscious. We design and clean and free of water. -
Seite 3: Important Safeguards For All Electrical Appliances
IMPORTANT • Do not put any food or liquid other than water into the water SAFEGUARDS tank in the steamer base. FOR ALL Only the steaming tray and the steam baskets are designed ELECTRICAL to cook food. APPLIANCES • Do not leave the appliance unattended when in use. - Seite 4 If damaged or maintenance It should be taken to a local other than cleaning is authority waste collection centre required, please contact Sage designated for this purpose or to Customer Service or go to a dealer providing this service. sageappliances.com For more information, please •...
- Seite 5 Components A. Polished stainless steel steaming lid F. Water level window B. Stainless steel steaming baskets with G. Water fill spout glass steaming lids H. Steamer base with integrated water tank C. Steaming tray (maximum capacity 1.8L) D. Drip tray I.
-
Seite 6: Control Panel
CONTROL PANEL a. LCD screen b. POWER button c. SPLIT ZONE button d. SYNC FINISH button e. START/PAUSE button f. TIMER button g. STEAM button h. RAPID START... - Seite 7 8. If checking food during steaming, stop or pause steaming before removing the steaming lids. Functions 9. The captured steam in the steam zone is very hot. Always keep your face and hands away from the steamer when opening the steaming lids.
- Seite 8 Synchronised finish 7. Press the START/PAUSE button to start steaming. RAPID START will flash on the 1. Press the SPLIT ZONE button for split LCD screen while the steamer heats up. zone steaming. 8. The steaming level (HIGH/LOW) will flash 2.
-
Seite 9: Care & Cleaning
Descaling DESCALE ME will display on your LCD when Care & Cleaning it is time to perform the descale. NOTE 1. Unplug the power cord of the food steamer and allow the base, drip tray, steaming tray, If the DESCALE ME reminder is ignored, steaming baskets, basket lids and stainless the unit will prevent any further cooking until steel lid to cool down before disassembling... -
Seite 10: Wichtige Sicherheitshinweise
WICHTIGE Inhalt SICHERHEITS HINWEISE 10 Sage® empfiehlt: Sicherheit BITTE ALLE ANWEISUNGEN geht vor VOR DEM GEBRAUCH 14 Komponenten LESEN UND ZUR 16 Funktionen SPÄTEREN BEZUGNAHME 19 Pflege und Reinigung AUFBEWAHREN. • Die komplette Informationsbroschüre ist unter sageappliances.com verfügbar. • Vor dem ersten Gebrauch prüfen, dass Ihre Netzspannung... - Seite 11 • Keinen Teil des Geräts in • Keine heißen Oberflächen einen Gas-, Elektro- oder berühren. Zur Entnahme von Mikrowellenherd oder Deckel und Dämpfeinsätzen die auf eine heiße Gas- oder Griffe verwenden. Elektrokochplatte stellen. • Kontakt mit Dampf vermeiden, der aus den Dampfaustritten im •...
-
Seite 12: Wichtige Sicherheits Hinweise Für Alle Elektrog Eräte
Wenden Sie sich bei 220–240 V anschließen. Schäden oder zur Wartung • Gerät immer AUSschalten, (außer Reinigung) bitte an sofern möglich auch an der den Sage-Kundendienst Steckdose, Netzstecker ziehen oder besuchen Sie und alle Teile abkühlen lassen, sageappliances.com ehe Sie das Gerät bewegen, •... - Seite 13 • Es wird der Einbau eines Fehlerstromschutzschalters mit maximal 30 mA Nennleistung im Stromkreis des Geräts empfohlen. Fachgerechte Beratung erhalten Sie von Ihrem Elektriker. VORSICHT • Gerät nicht auf einer geneigten Oberfläche verwenden. Dieses Symbol zeigt, dass das Gerät nicht im normalen Hausmüll entsorgt werden sollte.
- Seite 14 Komponenten A. Dampfgardeckel aus poliertem Edelstahl F. Wasserstandsfenster B. Dampfgarkörbe aus Edelstahl mit G. Wassereinfüllstutzen Glasdeckel H. Dampfgargefäß mit integriertem C. Dampfgartablett Wassertank (max. Kapazität 1,8 L) D. Tropfschale I. Dampfdüsen E. Entfernbares Netzkabel Leistungsangaben 220–240V~ 50–60Hz 1900–2200W...
-
Seite 15: Kontrollpanel
KONTROLLPANEL a. LCD-Anzeige b. POWER (AN-Taste) c. SPLIT ZONE (Taste für GETEILTES GAREN) d. SYNC FINISH (Taste für SYNC FERTIG) e. START/PAUSE (Taste für START/PAUSE) f. TIMER (ZEITSCHALTER-Taste) g. STEAM (DAMPF-Taste) h. RAPID START (SCHNELLSTART) -
Seite 16: Funktionen
6. Drücken Sie den Pfeil von UP (HOCH) oder DOWN (RUNTER) bis zur gewünschten Funktionen Härte zwischen Hrd1 (weichstes Wasser) und Hrd5 (härtestes Wasser). START-Taste zum Einstellen drücken. 7. Ihr Gerät ist nun zur Nutzung bereit. VOR DER ERSTBENUTZUNG Wasserhärte prüfen/wechseln Das gesamte Verpackungsmaterial und 1. - Seite 17 Schnellstartmodus Use the count-up timer to start steaming immediately in both combined and split zone modes. 1. Wassertank mit sauberem Wasser aus dem Wasserhahn befüllen.Vergewissern Sie sich, dass die MAX-Markierung auf dem Wasserfenster nicht überschritten ist. 2. Die Tropfschale und das Gartablett auf das Dampfgargefäß...
- Seite 18 4. Die Taste START/PAUSE drücken und der HINWEIS Garraum mit der längeren Garzeit startet automatisch. Der zweite Garraum startet Das Gerät lässt kein weiteres Garen zu, wenn automatisch, so dass beide Garräume das die Nachricht DESCALE ME zum Entkalken Dämpfen zur selben Zeit beenden. ignoriert wird.
-
Seite 19: Pflege Und Reinigung
Pflege und WARNUNG Reinigung Dampfgargefäß, Netzkabel oder Netzstecker nicht in Wasser oder andere Flüssigkeit tauchen. Stromschlagrisiko! 1. Den Netzstecker aus dem Dampfgarer entfernen und Dampfgargefäß, Tropfschale, AUFBEWAHRUNG Gartablett, Garkörbe, Korbdeckel und Edelstahldeckel vor dem Auseinandernehmen Die Dämpfkörbe und das entfernbare Netzkabel und Reinigen abkühlen lassen. - Seite 20 Sage Appliances GmbH Johannstraße 37, 40476 Düsseldorf, Deutschland Für den Kundendienst besuchen Sie bitte www.sageappliances.com BRG Appliances Limited Unit 3.2, Power Road Studios, 114 Power Road, London, W4 5PY Freephone (UK Landline): 0808 178 1650 Mobile Calls (National Rate): 0333 0142 970 www.sageappliances.com...

