Herunterladen Diese Seite drucken

Werbung

Verfügbare Sprachen
  • DE

Verfügbare Sprachen

  • DEUTSCH, seite 4
WEB-MANAGED
GIGABIT ETHERNET
SWITCH
WITH 4 SFP PORTS
QUICK INSTALL GUIDE
MODELS 560801 & 560818
Model 560801, 16-Port
Model 560818, 24-Port
INT-560801/560818-QIG-ML1-1212-01

Werbung

loading

Inhaltszusammenfassung für Intellinet 560801

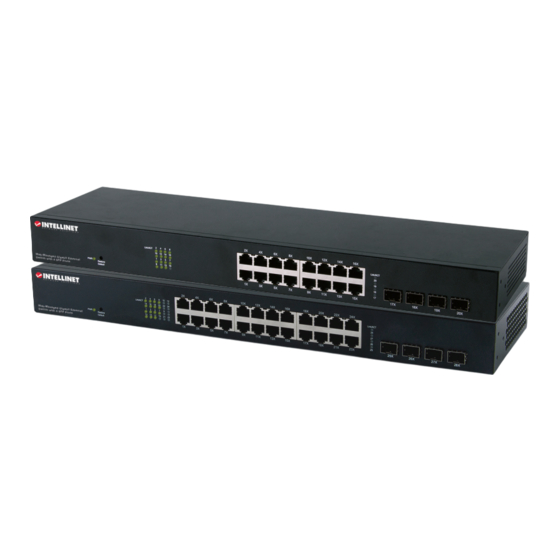
  • Seite 1 WEB-MANAGED GIGABIT ETHERNET SWITCH WITH 4 SFP PORTS QUICK INSTALL GUIDE MODELS 560801 & 560818 Model 560801, 16-Port Model 560818, 24-Port INT-560801/560818-QIG-ML1-1212-01...
  • Seite 2 This guide presents the basic steps to set up and operate this device. For detailed instructions and specifications, refer to the user manual enclosed with this product or at intellinet-network.com. Placement Prior to use, it is recommended that the switch be placed/positioned: • on a level surface that can support the weight of the switch (and...
  • Seite 3 Basic Web-Based Browser Management 1. Open your Web browser. 2. Enter “http://” and the IP address of the switch in the Address field. The default management IP address is 192.168.2.1 192.168.2.1. 3. Press <Enter> to display the login 192.168.2.1 screen. In the Username field, enter “admin”; in the Password field, enter “1234.” Click OK. 192.168.2.1 Graphic User Interface Once you’ve logged in, the initial screen displays for the Graphic User...
  • Seite 4 Web-Managed Gigabit Ethernet Switch • Kurzanleitung Deutsch Diese Kurzanleitung zeigt die grundlegenden Schritte zur Einrichtung und Inbetriebnahme dieses Geräts. Für genauere Anweisungen nutzen Sie bitte das beiliegende Handbuch oder auf intellinet-network.com. Nutzungsumgebung Er wird empfohlen, den Switch vor der Nutzung folgendermaßen aufzustellen: • auf ebenem Untergrund, der das Gewicht des Switches (und evtl. anderer Gegenstände) trägt; • mit mindestens 25 mm Abstand zu allen Seiten für angemessenen Luftdurchsatz; • fern von anderen Übertragungsgeräten wie Radios, Breitband- verstärker, etc.; • nicht in feuchten Umgebungen. Diesem Switch liegen Haltewinkel und Schrauben für optionale Rackmontage bei. 1. Trennen Sie alle Kabel von dem Switch.
  • Seite 5: Grundlagen Der Steuerung Über Den Webbrowser

    Grundlagen der Steuerung über den Webbrowser 1. Öffnen Sie Ihren Webbrowser. 2. Geben Sie “http://” und die IP- Adresse des Switches in der 192.168.2.1 Adresszeile ein. Die Standard-IP- Adresse lautet 192.168.2.1. 192.168.2.1 3. Drücken Sie <Enter>, um zum Loginfenster zu gelangen. Geben Sie als Benutzernamen “admin” 192.168.2.1 und als Passwort “1234” ein. Klicken Sie auf OK. Benutzeroberfläche admin Sobald Sie sich eingeloggt haben, 1234 zeigt die grafische Benutzeroberfläche drei Hauptabschnitte: Wählen Sie den “Configuration”- Abschnitt aus, in dem Sie Einstellungen vornehmen oder ändern möchten.
  • Seite 6 Switch Administrable Gigabit Ethernet • Guía de Instalación Rápida Español Esta guía presenta los pasos básicos para instalar y operar este dispositivo. Para obtener instrucciones detalladas y más especificaciones, consulte el manual de usuario incluido o en intellinet-network.com. Colocación Antes de utilizarlo, se recomienda que el switch sea colocado/fijado: • Sobre una superficie plana que pueda soportar el peso del switch (y cualquier otro artículo que deba ser considerado); • Con un mínimo de 25 mm (1” aprox.) de espacio libre en la parte superior y en los lados para una ventilación adecuada; • Apartado de fuentes de ruido eléctrico: radios, transmisores, amplificadores, tc.; • Donde no sea afectado por la humedad excesiva. El switch incluye los soportes y tornillos para su montaje en Rack (opcional). 1. Desconecte cualquier cable del switch. 2. Coloque el soporte sobre los orificios de montaje, ubicados a un lado del switch y sujételo con los tornillos. 3. Repita el paso 2 en el lado contrario del switch.
  • Seite 7 Administración básica vía Navegador Web 1. Inicie su Navegador Web. 2. Ingrese “http://” y la dirección IP del switch en la barra de direcciones. La dirección de administración por 192.168.2.1 defecto es 192.168.2.1. 3. Presione <Enter> para ingresar a 192.168.2.1 la pantalla de inicio de sesión. El nombre de usuario es “admin”, la contraseña es “1234”. Haga clic en 192.168.2.1 Aceptar. Interfaz Gráfica de Usuario Una vez que ingrese, se mostrará la admin pantalla inicial con la Interfaz Gráfica 1234...
  • Seite 8 Commutateur Gigabit Web Ethernet • Guide d’installation rapide Français Ce guide décrit les bases pour configurer et opérer cet appareil. Pour des instructions et spécifications détailées, veuillez lire le manuel de l’utilisateur inclus ou sur intellinet-network.com. Placement Avant d’utiliser le commutateur, il est recommandé de le placer: • sur une surface plane qui peut supporter son poids (et celui d’autres objets); • ac. un écartement minimal de 25 mm d’autres objets pour une ventilation suffisante; • loin des appareils électriques qui peuvent être source d‘interférence (des radios etc.); • loin des environnements humides. Le commutateur inclut des équerres et vis pour un montage en rack optionnelle. 1. Déconnectez tous les cordons du commutateur. 2. Positionnez une équerre sur les trous de montage à un côté du commutateur et sécurisez-la avec des vis. 3. Répétez l’étape 2 à l’autre côté du commutateur. 4. Positionnez le commutateur en rack et vissez les équerres au rack. 5. Reconnectez tous les cordons. Connexions • Tous les ports de ce commutateur supportent la fonctionnalité Auto-MDI/MDI-X, donc vous pouvez utiliser des câbles UTP/STP croisés ou non-croisés pour connecter les ports RJ45 aux PCs,...
  • Seite 9: Interface Graphique

    Base de la gestion Web 1. Ouvrez votre navigateur Web. 2. Entrez “http://” et l’adresse IP du commutateur dans le champ 192.168.2.1 Adresse. L’adresse IP par défaut de gestion est 192.168.2.1. 192.168.2.1 3. Appuyez sur <Entrée> pour afficher la fenêtre connexion. Dans le champ nom utilisateur, entrez 192.168.2.1 “admin”; dans le champ mot de passe, entrez “1234.” Cliquez sur Interface graphique admin 1234 Dès que vous avez connecté, l’interface graphique vous affiche trois sections principales : A Sélectionnez la section Configuration où vous voudriez établir ou changer des paramètres.
  • Seite 10 Zarządzalny przełącznik Gigabit Ethernet • Instrukcja szybkiej instalacji Polski Ta instrukcja prezentuje podstawowe kroki podłączenia i instalacji urządzenia. Aby uzyskać szczegółowe informacje techniczne oraz instrukcję użytkownika zapoznaj się z zawartością dołączoną do opakowania lub odwiedź stronę intellinet-network.com. Umiejscowienie Zaleca się, aby urządzenie w trakcie użytkowania było umiejscowione: • na płaskiej powierzchni, w miejscu odpowiednim do wagi urządzenia; • dla zapewnienia dobrej wentylacji w odległości co najmniej 25 mm obudowy urządzenia od podłoża, na którym się znajduje; • z dala od źródeł zakłóceń elektrycznych: radia, nadajniki szerokopasmowe, itp.; • z dala od nadmiernej wilgoci. W zestawie znajdują się uchwyty oraz śrubki do opcjonalnego mocowania rackowego. 1. Odłącz wszystkie kable od przełącznika. 2. Umieść uchwyt na dziurach na bocznej części przełącznika i przykręć go śrubami. 3. Powtórz czynność z punktu nr 2 dla drugiego uchwytu. 4. Umieść przełącznik w racku i przykręć go śrubami. 5. Podłącz kable. Podłączenie • Wszystkie porty przełącznika obsługują auto-krosowanie MDI/MDI-X, możliwe więc jest użycie kabla prostego lub krosowanego, aby połączyć porty RJ45 z komputerami, routerami, czy innymi przełącznikami. • Użyj dołączonego kabla, aby podłączyć zasilanie do gniazda na tylnym panelu Dioda Status Objaśnienie...
  • Seite 11: Konfiguracja Podstawowa

    Konfiguracja podstawowa 1. Otwórz przeglądarkę internetową. 2. Wpisz „http://” oraz adres IP przełącznika w pasek adresu 192.168.2.1 przeglądarki. Domyślnym adresem IP urządzenia jest 192.168.2.1. 192.168.2.1 3. Wciśnij <Enter>, aby wyświetlić okno logowania. W pole nazwa użytkownika wpisz „admin”, w pole 192.168.2.1 hasło wpisz „1234”. Wciśnij OK. Graficzny interfejs użytkownika admin Po zalogowaniu się do urządzenia 1234 wyświetlony zostanie graficzny interfejs użytkownika podzielony na trzy główne sekcje: A Wybierz sekcję Configuration, jeśli chcesz dokonać konfiguracji lub jej edycji. B W tej sekcji możesz sprawdzić informacje systemowe. Wybierz Logout w panelu nawigacyjnym, aby wyjść z interfejsu. Uwaga: Aby przywrócić przełącznik do jego ustawień domyślnych, wciśnij i przytrzymaj przez jedną sekundę przycisk resetu znajdujący się na przednim panelu urządzenia. Przełącznik automatycznie zrestartuje się i wczyta konfigurację fabryczną. LOGOUT POLSKI...
  • Seite 12 Ethernet Switch Gigabit Web-Managed • Guida rapida all’installazione Italiano Questa guida fornisce le indicazioni basilari per settare e mettere in funzione l’apparecchio. Per istruzioni dettagliate e ulteriori specifiche, fare riferimento al manuale d’istruzione contenuto nel CD incluso al prodotto o sul sito intellinet-network.com. Posizionamento Prima di utilizzare il prodotto, si consiglia di fare attenzione a dove viene collocato lo switch: • su una superficie piana che può supportare il peso dello switch (o qualsiasi altro oggetto che deve essere tenuto in considerazione); • con un minimo di 25 mm (approssimativamente 1”) di spazio libero verso l’alto e lateralmente per permettere un’adeguata ventilazione; • lontano da sorgenti che possono provocare disturbi e interferenze elettro magnetiche: radio, trasmettitori, amplificatori di banda, ecc.; • dove non venga sottoposto ad eccessiva umidità. Lo switch include staffe e viti per il montaggio opzionale a rack. 1. Disconnettere qualsiasi cavo dallo switch. 2. Posizionare la staffa sui fori di fissaggio su un lato dello switch e assicurarla sul posto con le viti.
  • Seite 13 Gestione tramite browser 1. Aprire il vostro Web browser. 2. Inserire “http://” e l’indirizzo IP dello switch nel campo riservato 192.168.2.1 all’indirizzo. L’indirizzo IP predefinito è 192.168.2.1. 192.168.2.1 3. Premere <Invio> per visualizzare la schermata di accesso. Nel campo Username, inserire “admin”; nel 192.168.2.1 campo Password, inserire “1234.” Cliccare OK. Interfaccia grafica utente admin Appena effettuato l’accesso, viene 1234 visualizzata l’interfaccia grafica utente iniziale, la quale presenta tre pricipali sezioni: A Selezionare la sezione Configurazione se si desidera creare o modificare delle impostazioni.
  • Seite 14 WARRANTY INFORMATION English: For warranty information, go to intellinet-network.com/warranty. Deutsch: Garantieinformationen finden Sie unter intellinet-network.com/warranty. Español: Si desea obtener información sobre la garantía, visite intellinet-network.com/warranty. Français: Pour consulter les informations sur la garantie, visitez intellinet-network.com/warranty. Polski: Informacje dotyczące gwarancji znajdują się na stronie intellinet-network.com/warranty. Italiano: Per informazioni sulla garanzia, accedere a intellinet-network.com/warranty. En México: Póliza de Garantía Intellinet — Datos del importador y responsable ante el consumidor IC Intracom México, S.A.P.I. de C.V. • Av. Interceptor Poniente # 73, Col. Parque Industrial La Joya, Cuautitlán Izcalli, Estado de México, C.P. 54730, México. • Tel. (55)1500-4500 La presente garantía cubre este producto por 3 años contra cualquier defecto de fabricación en sus materiales y mano de obra, bajo las siguientes condiciones: 1. Todos los productos a que se refiere esta garantía, ampara su cambio físico, sin ningún cargo para el consumidor. 2. E l comercializador no tiene talleres de servicio, debido a que los productos que se garantizan no cuentan con reparaciones, ni refacciones, ya que su garantía es de cambio físico. 3. La garantía cubre exclusivamente aquellas partes, equipos o sub-ensambles que hayan sido instaladas de fábrica y no incluye en ningún caso el equipo adicional o cualesquiera que hayan sido adicionados al mismo por el usuario o distribuidor.
  • Seite 15 Germany Taiwan, ROC All trademarks and trade names are the property of their respective owners. Alle Marken und Markennamen sind Eigentum Ihrer jeweiligen Inhaber. Todas las marcas y nombres comerciales son propiedad de sus respectivos dueños. Toutes les marques et noms commerciaux sont la propriété de leurs propriétaires respectifs. Wszystkie znaki towarowe i nazwy handlowe należą do ich właścicieli. Tutti i marchi registrati e le dominazioni commerciali sono di proprietà dei loro rispettivi proprietari. © IC Intracom. All rights reserved. Intellinet is a trademark of IC Intracom, registered in the U.S. and other countries.

Diese Anleitung auch für:

560818