Inhaltsverzeichnis
Werbung
Verfügbare Sprachen
Verfügbare Sprachen
Quicklinks
Einbauanleitung für Tweeter-Set
Einbauanleitung für Tweeter
Einbauanleitung für Tweeter
DL-T20
DL-T20 + Weiche
Bitte vor Beginn der Arbeiten Einbauanleitung sorgfältig lesen!
Bitte vor Beginn der Arbeiten Einbauanleitung sorgfältig
Bitte vor Beginn der Arbeiten Einbauanleitung sorgfältig
rainbow audio GmbH
ainbow audio GmbH Kreuzenstrasse 94 D-74076 Heilbronn
Dream Line
Phone +49 7131 / 3958 180 - Fax +49 7131 / 3958 182
Phone +49 7131 / 3958 180
info@rainbow-audio.de
http://www.rainbow-audio.de
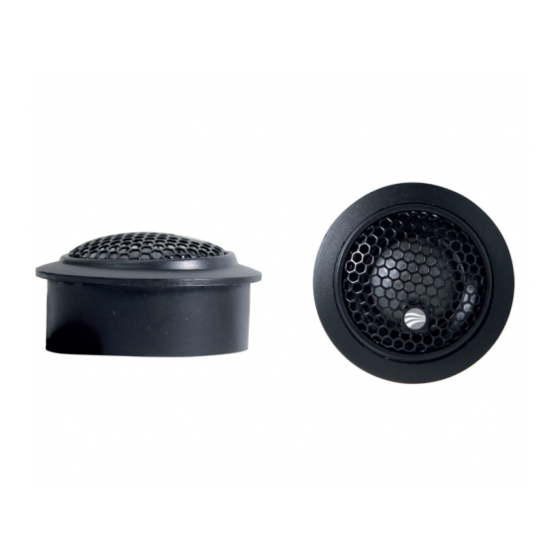
20 mm Seide-Hochtöner
20 mm Seide-Hochtöner
ax +49 7131 / 3958 182
0 Watt Art.Nr. 231088
150 Watt
150 Watt
0 Watt Art.Nr. 231090
74076 Heilbronn
Werbung
Kapitel
Inhaltsverzeichnis

Verwandte Anleitungen für Rainbow audio Dream Line DL-T20

Inhaltszusammenfassung für Rainbow audio Dream Line DL-T20
- Seite 1 Bitte vor Beginn der Arbeiten Einbauanleitung sorgfältig Bitte vor Beginn der Arbeiten Einbauanleitung sorgfältig Bitte vor Beginn der Arbeiten Einbauanleitung sorgfältig lesen! rainbow audio GmbH ainbow audio GmbH Kreuzenstrasse 94 D-74076 Heilbronn 74076 Heilbronn Phone +49 7131 / 3958 180...
- Seite 2 Sicherheitshinweise für den Anwender Bitte lesen Sie alle Warnungen in dieser Anleitung. Diese informieren Sie über mögliche persönliche Schäden oder Beschädigungen von Sachwerten! Die Produkte sind nur für Anwender mit dem erforderlichen Einbaufachwissen geeignet. Die einschlägigen Sicherheitsbestimmungen über tragende Karosserieteile, Vorschriften über die innere Fahrzeugsicherheit STVZO-TÜV,...
-
Seite 3: Inhaltsverzeichnis
Inhaltsverzeichnis Sicherheitshinweise für Anwender Wichtige Betriebshinweise Inhalt und Teilebezeichnung Technische Daten Leistungsmerkmale Positionierung der Lautsprecher Bild 1 Positionierung der Lautsprecher Einbau und Befestigung der Hochtöner Bild 2 Aufbaupult-Montage Bild 3 Einbautopf-Montage Bild 4 Schrägpult-Montage Kabelvorbereitung Anschluss der Frequenzweiche Bild 5 Anschluss Hochtöner an Kabelweiche Wartung und Pflege Garantiebedingungen... -
Seite 4: Inhalt Und Teilebezeichnung
Inhalt und Teilebezeichnung 2 Stück Hochtöner DL-T20 (Teile-Nr. 241302) 2 Stück Weichen (nur 231090 / Teile-Nr. 252007) 2 Stück Aufbaupult 2 Stück Einbautopf 2 Stück Schrägpult 1 Stück Einbauanleitung Befestigungsmaterial Technische Daten Hochtöner Spezifikation DL-T20 Impulsbelastbarkeit (nur mit Hochpass !) 120 Watt Nennbelastbarkeit (nur mit Hochpass !) 80 Watt... -
Seite 5: Positionierung Der Lautsprecher
Positionierung der Lautsprecher In Fahrzeugen bieten sich verschiedene Einbaupositionen für Rainbow Lautsprecher an. Bei der Auswahl des Einbauortes sollten Sie folgende Hinweise beachten: Tieftöner benötigen für die Wiedergabe ein großes Volumen. Die Türen mit großem Luftpolster zwischen Türverkleidung und Außenblech oder die Heckablage mit großvolumigem Kofferraum bieten den idealen Einbauort. - Seite 6 Türeinbau: Um ein gutes Frontstaging zu erhalten, dürfen die Hochtöner nicht zu tief im Türraum Um ein gutes Frontstaging zu erhalten, dürfen die Hochtöner nicht zu tief im Türraum Um ein gutes Frontstaging zu erhalten, dürfen die Hochtöner nicht zu tief im Türraum platziert werden.
- Seite 7 Einbau und Befesti Einbau und Befestigung der DL-T20 Einbauart: Türeinbau vorne / hinten, Fondeinbau, Spiegeldreieck Türeinbau vorne / hinten, Fondeinbau, Spiegeldreieck-, Armaturenbrett , Armaturenbrett- und Heckablageneinbau Aufbaumontage: Bild 2 • Unterteil/Bodenplatte (U) am ausgewählten Einbauort aufstellen, Kabeldurchführung und ) am ausgewählten Einbauort aufstellen, Kabeldurchführung und ) am ausgewählten Einbauort aufstellen, Kabeldurchführung und Befestigungsbohrungen markieren.
-
Seite 8: Kabelvorbereitung
Montage mit Schrägpult: Bild 4 • Schrägpult ausgewählten ausgewählten ausgewählten Einbauort Einbauort Einbauort aufstellen, aufstellen, aufstellen, Kabeldurchführung Kabeldurchführung Kabeldurchführung Befestigungslöcher anreißen, und Befestigungslöcher anreißen, und bohren. • Schrägpult (S) mit den beigelegten Schrauben befestigen. ) mit den beigelegten Schrauben befestigen. •... -
Seite 9: Anschluss Der Frequenzweiche
Anschluss der Frequenzweiche an Autoradio oder den Verstärker Das Lautsprecherkabel, je Kanal (Links/Rechts) vom Radio- oder Verstärkerausgang nach Bild 7, jeweils zum Woofer und zum Eingang „Amp Input“ der Hochtönerweiche (W) verlegen und unter Beachtung der Polarität anschließen. Lautsprecherkabel vom Tieftöner und Lautsprecherkabel vom Eingang „Amp Input“... -
Seite 10: Wartung Und Pflege
Fall Lösungs- oder organische Reinigungsmittel. Garantiebedingungen Rainbow audio GmbH übernimmt für die Produkte eine mindestens 2-jährige Garantie oder die gesetzlich vorgeschriebene Garantielaufzeit auf einwandfreie Funktion aller Teile. Die Garantie beginnt mit dem Erwerb des Produktes beim autorisierten Fachhandel und steht nur dem unmittelbaren Erstkäufer zu und ist nicht übertragbar. - Seite 11 Please read carefully before you start installation! Please read carefully before you start installation! Please read carefully before you start installation! rainbow audio GmbH ainbow audio GmbH Kreuzenstrasse 94 74076 Heilbronn 74076 Heilbronn Germany Phone +49 7131 / 3958 180...
-
Seite 12: Important Safety Instructions
Important Safety Instructions Please read all warnings found in this manual. They inform you of the potential danger of personal injury or damage to property. Our products are intended for use only by those possessing the necessary specialized knowledge. The relevant safety regulations regarding related auto parts, the regulations on internal vehicle safety, as well as the regulations of the authorized vehicle manufacturers should be followed diligently. - Seite 13 Contents Important Safety Instructions Contents Important Operational Instructions Detail of Parts Technical Data Positioning the Loudspeaker Installing and Attaching the Tweeter Surface Installation Figure 1 Flush Mount Cup Installation Figure 2 Angle Mount Cup Installation Figure 3 Cable Preparation Connecting and Setup Crossover Diagram of Connections and Cable Preparation Figure 4 Maintenance...
-
Seite 14: Technical Data
Technical Data System: DL-T20 Peak power handling (with high-pass only) 120 Watt Nominal power handling (with high-pass only) 80 Watt Sensitivity 90 dB – 1W / 1m Frequency Response 2.000 Hz – 21.000 Hz Impedance Fehler! Textmarke nicht definiert. Recommended active crossover frequencies and slopes 3.800 Hz with 12 dB / Oct. -
Seite 15: Installing And Attaching The Tweeter
Installation on Rear Installation on Rear Windshield Deck Place the tweeter as close to the woofer as possible. Keep distance to rear window and headrests. The Place the tweeter as close to the woofer as possible. Keep distance to rear window and headrests. The Place the tweeter as close to the woofer as possible. -
Seite 16: Cable Preparation
Installation with angle-mount-cup (figure 3) Put the angle mount cup (S) on the installation place. Scribe and finish the cable,- and mounting holes. Fix the angle mount cup (S) with the provided screws. Twist the tweeter distance ring to remove it from the tweeter. -
Seite 17: Connecting And Setup Crossover
Connecting and Setup Crossover With all component systems, the tweeter range has been provided with a thermal protection device in the crossover. This added measure protects the high-quality tweeter against overly high performance levels. However, with extremely high performance levels, the thermal protection device will shut down the tweeter to a low level. -
Seite 18: Maintenance
God, or others for which rainbow audio GmbH cannot be held accountable. In particular, water and fire are not subject to warranty. Normal wear and tear is not covered under warranty.