Smartwares CS89T Schnellstartanleitung
Quicklinks
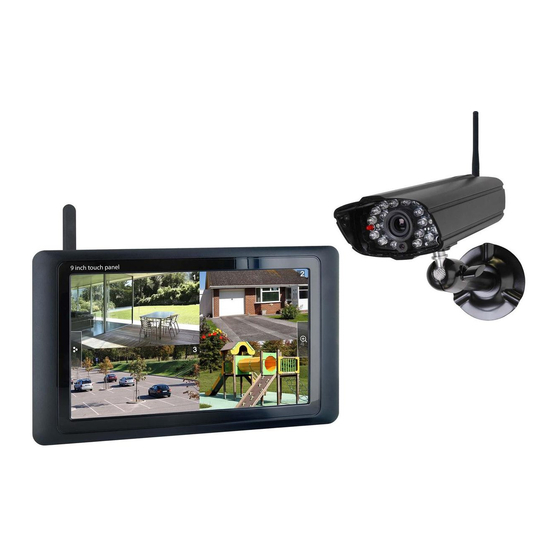
GB Real-time digital camera system with 9" touch panel
DE Digitales echtzeit-kamerasystem mit 9" touchbildschirm
PL
Cyfrowy system do monitoringu w czasie rzeczywistym z 9" panelem dotykowym
NL Digitaal camerasysteem met 9"touch screen
FR Système de caméra numerique temps réel avec 9" écran tactile
ES
Sistema de cámara digital a tiempo real con 9" pantalla táctil
1
2
PAIRING
PAIRING
2.a
monitor
camera setup
3
4
5
6
QUICK START GUIDE
Download your
OMGUARD APP
CS89T
MICRO SD
DC 5V
A
select camera to pair
press
pairing
countdown
short 1sec.
55
PAIRING
1
GB
1- Digital Wireless Receiver x 1, Digital Wireless Camera x 1, Camera Stand x 1, Camera Antenna x 1, Power Adapter x 2,
AV Cable x 1, Screw Pack x 1, Manual CD x 1
2- Power up the camera and receiver. Connect monitor to WiFi router (A).
3- Download the OMGUARD APP from the APP Store or Google Play
4- From the APP, tap Add Camera and search to select the camera connecting to the router
5- Setup WiFi network. Tap Camera Setting , select System Information, enter Advanced (default 123456). Go to WiFi to select the router and
enter router password.
6- Install and align the camera
DE
1. Digitaler drahtloser Empfänger x 1, digitale drahtlose Kamera x 1, Kameraständer x 1, Kamera-Antenne x 1, Netzteil x 2, AV-Kabel x 1,
Schraubensatz x 1, Handbuch-CD x 1
2. Schalten Sie die Kamera und den Empfänger ein, und verbinden Sie den Monitor mit dem Wi-Fi-Router (A).
3. Laden Sie die App "OMGuard" aus dem APP Store oder von Google Play herunter
4. In der APP, drücken Sie auf Kamera Hinzufügen und Suchen, um die Kamera auszuwählen, die mit dem Router verbunden werden soll
5. Das WiFi-Netzwerk einstellen. Drücken Sie auf Kameraeinstellung, wählen Sie Systeminformationen, öffnen Sie Erweitert (Standard 123456).
Gehen Sie zu WiFi, um den Router auszuwählen und geben Sie das Router-Passwort ein
6. Installieren und richten Sie die Kamera aus
PL
1- Cyfrowy odbiornik bezprzewodowy x 1, Cyfrowa kamera bezprzewodowa x 1, Statyw kamery x 1, Antena kamery x 1, Adapter zasilania x 2,
Kabel AV x 1, Opakowanie ze śrubkami x 1, CD z instrukcjami x 1
2- Włącz kamerę i odbiornik. Podłącz monitor doroutera WiFi (A).
3- Pobierz aplikację „OMGuard" z APP Store lub Google Play
4- W aplikacji stuknij „dodaj kamerę oraz wyszukaj", aby podłączyć kamerę do routera
5- Konfiguracja sieci WiFi. Stuknij „ustawienia kamery", wybierz „informacje o systemie", wejdź w „ustawienia zaawansowane" (domyślne:
2x
123456). Przejdź do WiFi i wybierz router, a następnie wprowadź hasło routera.
6- Zamontuj i ustaw kamerę
NL
1- Digitale draadloze ontvanger x 1, digitale draadloze camera x 1, camerastandaard x 1, camera-antenne x 1, voedingsadapter x 2, AV-kabel x
1, schroevenpakket x 1, handleiding CD x 1
2- Zet de camera en de ontvanger aan. Sluit de monitor aan op de Wi-Fi router (A)
3- Download de "OMGuard" APP uit de APP Store of via Google Play
4- In de APP, tikt u op camera toevoegen en zoek naar de camera die verbonden moet worden met de router.,
5- Instellen WiFi netwerk. Tik op camera instellingen, selecteer systeeminformatie, voer in Gevorderd (fabrieksinstellingen123456). Ga naar WiFi
om de router te selecteren en het wachtwoord van de router in te voeren.
6- Installeer en richt de camera
FR
1- 1 récepteur sans fil numérique, 1 caméra sans fil numérique, 1 pied de caméra, 1 antenne de caméra, 2 adaptateurs de puissance, 2 câbles
AV, 1 jeu de vis, 1 manuel sur CD
2- Mettez en route la camera et le récepteur. Connectez le moniteur au routeur WiFi (A).
3- Téléchargez l'application « OMGuard » depuis les boutiques d'applications APP Store ou Google Play
1,5A
4- Depuis l'application, appuyez sur « Add camera » et « Search » pour sélectionner la caméra à connecter au routeur
5- Configuration du réseau WiFi. Touchez « Réglage de la caméra », sélectionnez « Information du système », accédez à « Avancé » (par défaut
123456). Accédez à WiFi pour sélectionner le routeur et saisissez le mot de passe du routeur.
6- Installez et alignez la caméra
ES
1- Receptor inalámbrico digital x 1, Cámara inalámbrica digital x 1, Soporte de la cámara x 1, Antena de la cámara x 1, Adaptador de corriente x
2, Cable AV x 1, Juego de tornillos x 1, Manual en CD x 1
2- Encienda la cámara y el receptor. Conecte el monitor al router Wifi (A).
3- Descargue la aplicación "OMGuard" de APP Store o Google Play
home
4- Desde la APP, pulse Añadir cámara y Buscar para seleccionar la cámara que se conecte al router.
5- Prepare la red de wifi. Pulse Configuración de la cámara, seleccione Información del sistema y entre en Avanzado (pred. 123456). Vaya a
WiFi, seleccione el router e introduzca la contraseña del router.
6- Instale y alinee la cámara
PAIRING
, proceed as illustrated 2.a
KOPPLUNG
, folgen Sie Abbildung 2.a
PAROWANIE
, postępuj tak, jak pokazano w 2.a
PAIRING
, ga verder zoals weergegeven in afbeelding 2.a
PAIRAGE
, procédez tel que le montre l'illustration 2.a.
EMPAREJAMIENTO
, proceda como se ilustra 2.a

Verwandte Anleitungen für Smartwares CS89T


Inhaltszusammenfassung für Smartwares CS89T
- Seite 1 6- Install and align the camera FR Système de caméra numerique temps réel avec 9” écran tactile CS89T Sistema de cámara digital a tiempo real con 9” pantalla táctil 1. Digitaler drahtloser Empfänger x 1, digitale drahtlose Kamera x 1, Kameraständer x 1, Kamera-Antenne x 1, Netzteil x 2, AV-Kabel x 1, Schraubensatz x 1, Handbuch-CD x 1 2.
- Seite 2 10- PLAYBACK / E- Tap the Camera Setting and then the Event List icon. / F- Tap the le that you want to playback from the list. / G- The APP begins to playback the video. CS89T 7- LIVE-AUFNAHME – iOS 8- LIVE-AUFNAHME –...