REV AD-2220S Bedienungsanleitung
Quicklinks
TÜRSPRECHANLAGE
DE
DOOR-INTERCOM
GB
1
CZ
DOMOVNÍ TELEFON
INTERCOMUNICADOR PORTERO
ES
PORTIER AUDIO
FR
PORTAFONA
HR
KAPUTELEFON
HU
IT
CITOFONO
NL
INTERCOM
DOMOFONA
SI
Namensschild wechseln
name plate change
NAME PLATE
03.2011
AD-2210S, AD-2220S, AD-2230S
2
1
1
2
4
NAME PLATE
6
3
NAME PLATE
NAME PLATE
20
10
17
14
15
3
4
5
80cm
80cm
50°
50°
15
165
165
cm
cm
optional
optional
6
3-Familienhaus AD 2230S
21
MASTER
IN
IN
11
ROT / RED
11
11
18
9
9
9
18
14
Ext. Netzteil
Ext. Netzteil
14
14
Ext. Netzteil
5- poliges
20
SLAVE
5- poliges
18
+ -
18
DEUTSCH
Wir danken Ihnen für den Kauf einer REV Türsprechanlage.
ACHTUNG: Niemals direkt an Netzspannung
anschließen!
DIE MODELLE
AD-2210S (1-Familienhaus)
A.3.1. Anschluss eines externen elektronischen Gongs
AD-2220S (2-Familienhaus)
(Abb. 6)
AD-2230S (3-Familienhaus)
Nur für Typ: AD-2220S (IN)
unterscheiden sich nur in der Anzahl der Innenstationen und
An die Schraubklemmen (ext. Door Chime) können Sie
Taster auf der Außensprechstelle. Technisch sind sie
nur einen externen elektronischen Gong anschließen.
identisch.
Ein potentialfreier Kontakt steht zur Verfügung (ext. Gong),
Diese Anlagen zeichnen sich durch einfache Montage und
an dem Sie einen Standard-Gong als externe Klingel
anschließen können. Die Innenstelle ersetzt den
Bedienung aus. Die Türsprechstelle ist im Außenbereich
einsetzbar und für Aufputzmontage vorgesehen. Die Verbindung
Klingelknopf des Gongs. Die Pin-Belegung finden Sie in
zwischen der Türsprechstelle und der Innenstation erfolgt jeweils
der Bedienungsanleitung Ihres Gongs.
mit einer 2-Draht-Leitung und kann mit einer handelsüblichen
2-Draht-Leitung (Ø 0,75 mm) bis auf ca. 70 Meter verlängert
A.4. Anschluss a vorh ndenen Türöffner (Abb. 6)
werden.
Bei der Ver
unten angegebenen Spezifikationen muss eine 2-Draht
Bei der Verwendung eines handelsüblichen elektrischen
leitung von d r Türsprechstelle z m Tü öffner ge egt
Türöffners kann die Eingangstür ebenfalls über die 2-Draht-
werden. Der Türöffner muss mit 12 Volt Gleichspannung
Leitung (pro Innenstation) mit einer separaten Taste an der
betrieben werden könn n und darf maxim l 1 Ampere
Innenstation geöffnet werden. Hierzu ist nur eine 2-Drahtleitung
benötigen.
von der Türsprechstelle zum Türöffner zu legen.
B. Bedienun
Lieferumfang (Abb. 1):
Wenn der Besuche den Klingeltaster (6) der
AD-2210S (1-Familienhaus)
Türsprechstelle betätigt, ertön der Kling lton an der
1x Innenstation (2)
Innenstation. Um mit dem Besuche sprechen zu können,
1x Türsprechstelle (1) (mit einem Klingelknopf)
1x Netzteil (14)
müssen Sie die »
1x Verbindungskabel (17)
angeschlossen, kann durch drücken der Taste »
1x Verbindungskabel (20)
geöffnet werden. Wird die
2x Winkel (15) (zur Befestigung)
»
«
(1 ) erneut gedrückt, befindet sich die
2
11x Schrauben
Türsprechanlage wieder im Standby-Betrieb.
9x Dübel
Die Klingel-Lautstärke wird mit dem seitlich angebrachten
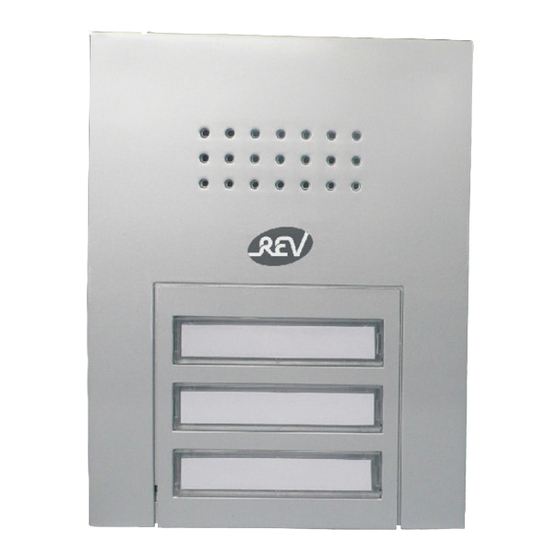
AD-2220S (2-Familienhaus)
Schiebeschalter (16) an der Innenstation eingest llt. Mit
2x Innenstation (2)
dem Schiebeschalter
1x Türsprechstelle (1) (mit zwei Klingelknöpfen)
ausgewählt werden. Es steh n 3 verschiedene Töne zur
2x Netzteil (14)
Verfügung.
2x Verbindungskabel (17)
5
1x Verbindungskabel (20)
C. Abbildungen
3x Winkel (15) (zur Befestigung)
1 = Türsprechstelle
15x Schrauben
2 = I nenstation
n
12x Dübel
3 = Namensschild(er)
AD-2230S (3-Familienhaus)
4 = Lautspr cher
3x Innenstation (2)
5 = Netz-Kontrolle (Power)
1x Türsprechstelle (1) (mit drei Klingelknöpfen)
6 = Klingeltaster
3x Netzteil (14)
7 = Aufhängun
3x Verbindungskabel (17)
8 = Schra bklemmen
1x Verbindungskabel (20)
9 = Vertiefung für Winkel
4x Winkel (15) (zur Befestigung)
10 = RJ-11 Steckverbinder
19x Schrauben
11 = Stromversorgun sbuchse
12
15x Dübel
12 = Sprec en-Taste »
13 = Türöffner-Tas e »
A. Vorbereitung zur Montage von Türsprechstelle (1) und
14 = Netzteil
Innenstation(en) (2) (Abb. 3)
13
15 = Wi kel
n
16 = Lautstärkesc alter (laut/l ise)
Bevor Sie die Türsprechstelle und die Innenstation(en)
befestigen, sollte eine geeignete Stelle ausgesucht werden
17 = Verbindungskabel
18 = Buchse für den RJ-11 Ste kverbinder
(Abb.3). Dann ermitteln Sie die Leitungslänge, welche mit einer
möglichen erforderlichen Verlängerung ca. 70 Meter nicht
19 = Melodiewahlschalter
überschreiten darf.
20 = Verbindungskabel der Zus tzsprec stelle
21 = Türöffner
Achtung: Die Leitung darf nicht direkt neben Netzleitungen
HI
16
verlegt werden. Um Störungen zu vermeiden, bitte einen Abstand
D. Hinw ise
e
LO
von ca.10 cm einhalten.
Hinwe se zur CE-Konformität
i
Eine Netzsteckdose für das Netzteil (14) der Innenstation sollte
Unter Einwirkung von stark n statischen, elek rischen der
in der Nähe der Innenstationsbefestigung vorhanden sein.
hochfrequent n Feldern (Entladungen, Mob ltelefonen,
19
Funkanlagen, Handys, Mikrowellen) kann es zu
A.1. Kabelverlegung oder Verlängerung
Funktionsbeeinträchtigungen der Geräte (des Gerätes)
Die Anschlusskabel müssen zum Befestigungsort der
kommen.
Innenstation(en) verlegt werden, wenn noch keine Leitung
vorhanden ist. Achten Sie auf eine ausreichende Länge für die
Reinigung und Pflege
Anschlussmontage. Ist eine Verlängerung erforderlich, kann
diese mit handelsüblichem 2-Drahtkabel (Ø 0,75mm) auf
Netzbetriebene Geräte vor dem R inigen vom Netz t en en
(Stecker ziehen). Die Oberfläche des Gehäuses kann mit
insgesamt max. 70 Meter Kabellänge durchgeführt werden.
Achten Sie bei der Installation auf korrekten Anschluß (farbige
einem mit Seifen auge angef uchtetem weichen Tuch
Markierungen an den Geräten).
gereinigt werden. Verwenden Sie keine Scheuermittel oder
Chemikalien. S aubablagerungen an Lüftungsschlitzen nur
Hinweis zu AD-2220S und AD-2230S: Pro Innenstation muss
mit ein m P nsel lösen und gegebenenfalls mit einem
e
jeweils eine 2-Drahtleitung gelegt werden.
Staubsa ger absaugen. Die augdüse nicht direkt a das
u
Gerä halten.
t
A.2. Montage der Türsprechstelle (1) (Abb. 4, 5)
Variante 1 mit Schutzgehäuse (Abb. 4)
Sicherheitsh nweis
7
Markieren Sie anhand des Schutzgehäuses die benötigten
Bei Be chädigung von Gehä sen, Steckern, Netzkabel
s
Bohrlöcher an der Wand und bohren Sie anschließend mit dem
oder Isolationsschäden, Geräte sofort außer Betrieb
6mm Bohrer ca. 4mm tief. Stecken Sie jeweils einen Dübel in die
nehmen und Netzleitungen abziehen. STROMSCHLAG -
Löcher und schrauben Sie das Schutzgehäuse an die Wand.
LEBENSGEFAHR. (Netzstecker aus der S eckdose
Achten Sie darauf, dass die oberen Abstandhalter des
ziehen ) Schäden sofort du ch Fachmann beheben lassen!
!
Schutzgehäuses nicht durch die beiden Schrauben
zusammengedrückt werden, die Schraubenköpfe sollen an den
Abstandhaltern des Schutzgehäuses anliegen. An dem mittleren
Keine eigenen Re araturversuche durchführen!
Loch unten wird der Winkel (15) festgeschraubt. Die
Anschlussdrähte werden durch das Loch des Schutzgehäuses
E. Technische Daten
geführt und dann an der Türsprechstelle angeschlossen.
Netzadapter:
Variante 2 ohne Schutzgehäuse (Abb. 5)
Die Türsprechstelle wird mit Schrauben befestigt. Um die Löcher
Bereitschaft
für die Schrauben zu bohren, können Sie die beigelegte
9
In Betrieb:
Bohrschablone verwenden. Stecken Sie in die Löcher jeweils
Bet iebstemperatur:
r
einen Dübel und schrauben Sie die beiden oberen Schrauben so
Klingel-Laut tärke:
weit in die Wand, dass zwischen den Schraubköpfen und der
Türöffneranschluß:
Wand jeweils noch 3-4 cm Platz ist. An dem unteren Loch wird
der Winkel (15) festgeschraubt.
Anschluß für den ext rnen G ng: max. DC 12V / 1A
Jetzt können Sie die Leitung an die dafür vorgesehenen
Schraubklemmen anschließen (7) und die Türsprechstelle an den
* Der Türöffner muss diesen Spezifikationen entsprechen.
zwei Schrauben einhängen. Der Winkel (15) sollte jetzt an dem
Gerät dafür vorgesehene Vertiefung passen und wird dort
verschraubt. Eventuell muss der Winkel noch etwas nachjustiert
Änderungen ohne Ankündigung vorbeha ten. Im Rahmen
8
7
werden und/oder die beiden Schrauben etwas weiter hinein-
unserer Produktpflege und G rä eoptimierung, kann der
/hinausgeschraubt werden.
Inhalt von den Verpackungsangaben abweichen.
Soll auch ein Türöffner angeschlossen werden, ist eine
DOOR
zusätzliche 2-Draht Leitung von der Türsprechstelle zu verlegen.
Garantie:
(Abb. 6)
Dieses REV-Produkt durchl uft wäh end der Fertigung
BRAUN / BROWN
mehrere, nach neuesten Techniken aufg baute
Hinweise:
Prüfstationen. Sollte dennoch ein Mangel auftreten, leistet
Sollten Sie bereits eine 2-Draht Türklingelanlage verwenden, so
REV im nachfol enden Umfang Gewähr:
können Sie ohne weitere Leitungsinstallation diese zwei
vorhandenen Klingeldrahtleitungen für den Anschluss der
1. Die Dauer der Garantie beträgt 24 Monate ab em
Türsprechstelle verwenden. Auch das Türöffnersignal wird über
Kaufdatum.
die selben zwei Leitungen übertragen. Die Anschlussleitungen
2. Das Gerät wird von REV entweder unentgelt ich
sollten sich möglichst direkt hinter der Türsprechstelle befinden.
nachgeb ssert oder ausget uscht, wenn es inner alb
Dadurch sind sie besser gegen Beschädigungen geschützt. Die
der Gewährleistungspflicht nachweisbar wegen eines
Befestigung muss in einem regen- und spritzwassergeschützten
Bereich erfolgen, oder es muss eine entsprechende Abdeckung
Fertigu gs- oder
bzw. Überdachung angebracht werden.
3. Die Haftung erstreckt sich nicht auf Transportschäden
sowie auf Schäden, die durch fehler afte Installat on
A.3. Montage einer Innenstation (2) (Abb. 5, 6)
entstehe .
Die Innenstation wird genauso wie die Türsprechstelle montiert
4. W rd innerhalb von 6 Mon ten nach Nichtanerkennung
i
(s. Punkt A.2.). Achten Sie auf die Nähe einer Steckdose für den
des Haftungsf lles durch REV kein Widerspruch
Netzadapter (14).
eingelegt, verjährt das Re ht auf Nachbesse ung.
Das Anschlusskabel entsprechend der Farbangabe bzw. der
5. Im Gewährleistungsfall ist das Gerät zusammen mit
Zahlenangabe an die Klemmen (8) anschließen, die
d
em Kaufbeleg und ei er kurzen Mangel eschrei ung
Innenstation(en) verbinden und den Anschlussstecker des
a n den Händler oder REV zu senden.
Netzadapters in die Innenstationsbuchse (11) stecken.
6. Ohne Garantienachweis erfolgt Nachbesserung
Alternativ zum Netzadapter können Sie auch ein Netzteil direkt
ausschließlich gegen Berechnung.
an die Schraubklemmen der Innenstation anschließen (Abb. 6).
Hinweis
Es muss je Innenstation ein Netzteil verwendet werden!
Achten Sie dabei auf korrekte Polung.
Jede Inneneinheit benötigt ein eigenes Netzteil.
REV Ritter GmbH • Frankenstr.
Service-Telefon: +49180 5 007359 • Fax: +49180 5 00 7410
Hinweis:
Der Gleichstromtrafo muss 15 Volt DC und mindestens
1,3 Ampere liefern.
ENGLISH
Thank you for purchasing the REV Door Intercom System.
THE MODELS
AD-2210S
(1-family house)
AD-2220S
(2- family house)
AD-2230S
(3- family house)
AD-2230S (IN)
differ only in the number of interior stations and buttons
on the door station. They are technically identical.
These systems are characterized by the ease of installation
and operation. The door station is installed outside and is
designed for wall-mounting. The connection between the
door station and the interior station is made via a 2-wire cable
and can be extended by up to approximately 70 m using
commonly available 2-wire cable(Ø 0.75 mm).
n
a
we
ndung eines elektrischen Türöff ers m t den
n
i
When using a standard electrical door opener, the entrance
-
door can also be opened via the 2-wire cable (one per interior
station) using a separate button on the interior station. Only
e
u
r
l
one 2-wire cable is required from the door station to the door
e
a
opener to do this.
Included with delivery (Fig. 1):
g
AD-2210S (1-family house)
1x Interior station (2)
r
t
e
1x door station (1) (with one push-button door bell)
r
1x power supply unit (14)
1x connecting cable (17)
« (12) rücken. Ist ein Türöffner
d
1x connecting cable (20)
« (13)
2x angle brackets (15) (for mounting)
11x screws
9x wall-plugs
AD-2220S (2- family house)
2x Interior stations (2)
e
(19 kann ein a derer Klingelton
)
n
1x door station (1)(with two push-button door bells)
e
2x power supply units (14)
2x connecting cable (17)
1x connecting cable (20)
3x angle brackets (15) (for mounting)
15x screws
12x wall-plugs
AD-2230S (3- family house)
e
3x Interior stations (2)
1x door station (1)(with three push-button door bells)
3x power supply units (14)
g
u
3x connecting cable (17)
1x connecting cable (20)
4x angle brackets (15) (for mounting)
g
19x screws
h
«
15x wall-plugs
t
«
A. Preparations for installing the door station (1) and
interior station(s) (3) (Fig. 3)
Before mounting the door and interior station(s), make sure
h
e
you have found a suitable location (Fig. 3). Then determine
c
the length of the cable required, remembering that it should
not exceed 70 meters, including extensions.
a
h
Important: The cable must not be installed directly next to
power supply cables. To avoid disturbances, keep a gap of
around 10 cm.
A power socket for the interior station power supply (14)
e
t
o
should be available close to the interior station installation
point.
e
i
A.1. Installing cables or extension cables
The connection cable must be installed to the interior
station(s) if a line is not available. Check that the cable is
long enough to reach the connection terminal. If an extension
is required, this can be achieved using standard 2-wire cable
e
r
n
(Ø 0.75 mm) up to a maximum of 70 meters.
l
e
Note the correct terminals during installation (colored labels
on the units).
t
i
Information about the AD-2220S/AD-2230S:
One 2-wire cable must be installed for each interior station.
S
n
A.2. Mounting the door station (1) (Fig. 4, 5)
Variant 1 with protective casing (Illustr. 4)
i
e
Use the protective casing to mark the required drill holes in
u
the wall and then drill approx. 4 cm deep using the 6 mm drill.
Stick one plug each into the holes and screw the protective
casing to the wall. Take care that the upper spacers of the
t
r
protective casing are not squeezed together by the two
screws, the screw heads should fit closely to the spacers of
the protective casing. The elbow (15) is screwed to the
p
central hole. The connection wires are drawn through the
hole of the protective casing and then connected to the door
phone.
100-240VAC~, 0/60 Hz,15 VDC/
5
1000 m
A
Variant 2 without protective casing (Illustr. 5)
:
3 Watt
The door station is mounted using 3 screws. Use the drilling
template provided when drilling holes for the screws. Push a
10 Wa t
t
-10°C - +45°C
wall-plug into each hole and screw the two top screws into
s
max 80dB (A) / 0,3 Meter
.
the wall leaving 3-4mm space between the screw heads and
the wall. The angle bracket (15) is fixed to the lower hole.
DC 12V, max. 1A*
e
o
You can now connect the cables to the screw terminals
provided and hang the door station on the two screws. The
angle bracket (15) should now slot into the recess on the unit
and is screwed on in this position. It may be necessary to
adjust the angle bracket slightly and/or screw the two
l
mounting screws further in or out to decrease/increase the
e t
gap between the screw heads and the wall.
If a door opener is also to be connected, then an additional 2-
wire cable must be installed from the door station to the door
ä
r
opener (see Fig. 6).
e
Note:
g
If you are already using a 2-wire door bell system, you can
use these two door bell cables to make the connection to the
door station without having to install further cables. The door
d
opener signal is sent over the same two wires. The
l
connection lines should be located as directly as possible to
the back of the door station. This provides additional
e
a
h
protection against damage.
n
M
aterialfehlers nbrauchbar wird.
u
The holder must be installed in a rain and splash-water
protected area, otherwise a cover or canopy is required.
h
i
n
A.3. Assembly of an interior station (2) (fig. 5,6)
The interior station is assembled in the same way as the door
a
a
station (s. item A.2.). Make sure that there is a power socket
c
r
for the adapter (14) near by.
Attach the connecting cable to the clamps (8) according to
n
b
b
the colour indications resp. the numbers, connect the interior
station(s) and insert the plug of the adapter into the interior
station socket (11). As an alternative you can also connect
the power supply unit directly to the screw terminal of the
interior station (fig. 6).
Notice
One power supply unit each must be used for every interior
station! Thereby pay attention to the correct polarity.
•
1-4 • D-63776 Mömbris
Each interior unit requires its own power supply unit.
E-mail: service@rev.biz• www.rev.biz
IMPORTANT: Never connect directly to the mains power
supply!
ÈESKY
A.3.1. Connecting an external electronic door chime
Dìkujeme Vám, že jste se rozhodli pro koupi domovního telefonu
(Fig. 6)
spoleènosti REV.
Only for Typ: AD-2220S (IN)
TYPY
AD-2230S (IN)
AD-2210S
(Rodinný dùm)
You can only connect (ext. Door Chime) an external
AD-2220S
(Dùm se 2 byty)
electronic door chime.
AD-2230S
(Dùm se 3 byty)
A potential-free contact is at disposal at the contact element
(ext. door chime) to which you can connect a standard door
Technicky jsou identické.
chime as external chime. The indoor station replaces the
bell button of the door chime. Please find the pin assignment
Obsah balení (obr. 1):
AD-2210S (Rodinný dùm)
in the operating instructions of your chime.
1x Ivnitøní stanice (2)
1x dveøní vysílací jednotka (1)
1x sí ový zdroj (14)
A.4.Connection with existing door openers (fig. 6)
1x propojovací kabel (17)
When using an electric door opener with the specifications
1x propojovací kabel (20)
AD-2230S (Dùm se 3 byty)
stated below, a 2-wire circuit must be installed from the door
3x vnitøní stanice (2)
2x úhelník (15) (pro pøipevnìní)
station to the door opener. The door opener must be
11x šrouby
1x dveøní vysílací jednotka (1)
operated with 12 volt direct current and may require a
9x hmoždinky
3x sí ový zdroj (14)
3x propojovací kabel (17)
maximum of 1 ampere.
AD-2220S (Dùm se 2 byty)
1x propojovací kabel (20)
2x vnitøní stanice (2)
4x úhelník (15) (pro pøipevnìní)
B. Operation.
1x dveøní vysílací jednotka (1)
19x šrouby
When the visitor activates the bell button (6) of the door
2x sí ový zdroj (14)
15x hmoždinky
station, the ring tone will sound from the interior station. In
2x propojovací kabel (17)
1x propojovací kabel (20)
order to speak to the visitor, you must press the »
« (12).
If the door opener is connected, the door can be opened by
3x úhelník (15) (pro pøipevnìní)
15x šrouby
pressing the »
« button (13). By pressing the »
« once
12x hmoždinky
more, the door intercom will return to standby operation.
A. Pøíprava pro montáž dveøní vysílací jednotky (1) a vnitøní
Note on Safety Features and Equipment
stanice (vnitøních stanic) (2) (obr. 3)
To avoid an unwanted opening of the door from inside (e.g.
by children) the door cannot be opened before the interior
Pøed instalací dveøní vysílací jednotky a vnitøní stanice (vnitøních
stanic) byste pro nì mìli najít vhodné místo (obr. 3). Poté vypoèítejte
station has been activated, by ringing the bell outdoors.
délku vedení, která s eventuálním prodloužením v pøípadì potøeby
nesmí pøekroèit hodnotu cca 70 metrù.
The doorbell volume (loudness) is adjusted with the sliding
switch (16) mounted on the side at the inside station. A
Pozor: Vedení nesmí být pokládáno pøímo vedle sí ových vedení.
different doorbell sound can be selected with the sliding
Abyste eliminovali vzájemné rušení, dodržujte prosím vzdálenost cca
switch (19). Three different tones or sounds are available.
10 cm. Sí ová zásuvka pro sí ový zdroj vnitøní stanice (14) by se
mìla nacházet v blízkosti místa instalace vnitøní stanice.
C. Images
A.1. Položení nebo prodloužení kabelù
1 = Door station
Pokud není k dispozici stávající vedení, pøipojovací kabely musejí být
2 = Interior station
položeny k místu instalace vnitøní stanice (vnitøních stanic). Dávejte
3 = Name plate
pozor na dostateènou délku pro montáž pøípojky. Pokud je nezbytné
4 = Loud speaker
prodloužení, lze je pomocí bìžného dvoudrátového vedení (0 0,75
5 = Power LED indicator
mm) provést na celkových max. 70 metrù délky kabelu.
6 = Push-button door bell
Pøi instalaci dávejte pozor na správné pøipojení (barevné oznaèení
na pøístrojích).
7 = Suspension bracket
8 = Screw terminals
Upozornìní pro typ AD-2220S/AD-2230S:
9 = Recess for angle bracket
Dvoudrátové vedení musí být položeno pro každou vnitøní stanici.
10 = RJ-11 connector
11 = Power supply socket
A.2. Montáž dveøní vysílací jednotky (1) (obr. 4, 5)
12 = Speak button »
«
Varianta 1 s ochrannou skøíòkou (viz zobr. 4)
Varianta 2 bez ochranné skøíòky (viz zobr. 5)
13 = Door open button »
«
14 = Power supply unit
A.3. Montáž vnitøní stanice (2) (obr. 5,6)
15 = Angle bracket
Vnitøní stanice se montuje stejnì jako vnìjší. Dbejte na to, aby se
16 = Volume adjust switch (loud/quiet)
nacházela v blízkosti zástrèka pro sí ový zdroj (14). Pøipojovací kabel
17 = Connecting cable
pøipojte na svorky (8) vnitøní stanice podle barvy nebo èíselných
18 = Socket for the RJ-11 connector
znaèení a zástrèku sí ového adaptéru pøipojte do zdíøky vnitøní
19 = Melody selector
stanice (11)
20 = Connecting cable
Alternativnì mùžete pøipojit sí ový zdroj pøímo na svorky vnitøní
stanice (obr. 6)
21 = door opener
Upozornìní:
D. Information
Pro každou vnitøní stanici se musí použít jeden sí ový zdroj!
Information regarding CE-Conformity
Dbejte pøitom na správné póly. Pro každou vnitøní jednotku je tøeba
The functionality of the unit can be affected by the influence
vlastní sí ový zdroj.
of strong static, electrical or high frequency fields
(discharging, mobile phones, radios, microwaves).
POZOR: Nikdy nepøipojujte pøímo na sí ové napìtí!
A.3.1. Pøipojení reproduktoru jako externího gongu (obr. 6)
Cleaning and maintenance
AD-2220S (IN)
Always disconnect mains powered units from the mains
AD-2230S (IN)
supply before cleaning (disconnect the plug). The unit
Na šroubové svorky (ext. audio) mùžete pøipevnit reproduktor jako
housing can be cleaned using a soapy soft cloth. Do not use
externí gong
any abrasive materials or chemicals. Remove dust build-up
A.4. Pøipojení na existující otvíraè dveøí
from ventilation slits using a brush and clean up using a
Pro zapojení elektrického otvíraèe dveøí s níže uvedenými
vacuum cleaner. Do not hold the vacuum cleaner nozzle
specifikacemi, musí být instalováno dvoudrátové vedení od dveøní
directly against the unit.
jednotky k otvíraèi dveøí. Otvíraè dveøí musí být napájený
stejnosmìrným napìtím 12 V a smí spotøebovávat maximálnì proud
1A.
Safety instructions
In the event of damage to the housing, connectors, power
B. Obsluha
cables or isolation shielding, switch off the device
Po stisknutí tlaèítka zvonku návštìvníkem zvoní vnitøní stanice. Pro
immediately and disconnect from the mains power.
mluvení s návštìvníkem musíte stisknout tlaèítko »
ELECTRIC SHOCK-DANGER OF LOSS OF LIFE. (Unplug
je pøipojený otevíraè dveøí mùžete otevøít tlaèítkem »
the mains connector from the socket!). Damage should be
Opìtovným stisknutím tlaèítka »
« (12) je dveøní telefon resp.
stanice zase v pohotovosti.
repaired immediately by a specialist!
C.Obrázky
Never carry out repairs yourself!
1 = dveøní vysílací jednotka
12 = volací tlaèítko »
2 = vnitøní stanice
13 = tlaèítko otevírání dveøí »
E. Technical data
3 = jmenovka
14 = sí ový zdroj
Mains adapter:
100-240VAC ~ ,50/60 Hz, 15 VDC /
4 = reproduktor
15 = úhelník
1000 mA
5 = sí ová kontrola (Power)
16 = regulátor hlasitosti (hlasitì/tiše)
Standby:
3 Watt
6 = tlaèítko zvonku
17 = spojovací kabel
7 = závìs
18 = zdíøka pro konektor RJ-11
In operation:
10 Watt
8 = šroubové svorky
19 = tlaèítko volby melodie
Working temperature:
-10°C - +45°C
9 = prohlubeò pro úhelník
20 = spojovací kabel
Bell volume:
max. 80dB (A) / 0,3 meter
10 = RJ-11 konektor
21 = vrátným
Door opener connection: DC 12V, max. 1A*
11 = zásuvka napájení
elektrickým proudem
* The door opener must conform to these specifications.
D. Pokyny
Pokyny pro ES prohlášení o shodì
Subject to change without prior notification. In the framework
Pùsobení silných statických, elektrických nebo vysokofrekvenèních
of product updates and device optimization, the contents
polí (výboje, mobilní telefony, bezdrátová zaøízení, bezdrátové
may vary from the packaging specificatio
telefony, mikrovlnné trouby) mùže negativnì ovlivòovat funkènost
pøístrojù (pøístroje).
Warranty:
During manufacturing this REV product is passed through
Bezpeènostní pokyny
Pøi poškození krytù, elektrických zástrèek, sí ových kabelù nebo pøi
several quality testing stations which are set up with newest
poškození izolace pøístroje okamžitì vypnìte a vytáhnìte sí ová
technology. Should nevertheless a defect arise, REV offers
vedení. NEBEZPEÈÍ ÚRAZU ELEKTRICKÝM PROUDEM
OHROŽENÍ ŽIVOTA OSOB. (Vytáhnìte zástrèku z elektrické
a warranty to the following extent:
zásuvky!) Závady nechte okamžitì odstranit odborníkem!
1. The duration of the warranty is 24 months after the date
Nesnažte se pøístroj opravovat vlastními silami!
of purchase.
2. The unit is either repaired or replaced by REV free of
E. Technické údaje
Sí ový adaptér:
100-240 VAC ~, 50/60 Hz,
charge or if it can be shown that it has become unusable
15 VDC / 1000 mA
during the warranty period due to a manufacturing or
Pohotovostní režim:
3 watty
material defect.
V provozu:
10 wattù
Provozní teplota:
-10° C - +45° C
3. The liability does not cover transport damages or
Hlasitost zvonku:
max. 80dB (A) / 0,3 metr
damaged incurred through defective installation.
Pøípojka otevírání dveøí: DC 12 V, max. 1 A*
4. If REV repudiates the warranty claim and no objection is
* Zaøízení pro otevírání dveøí musí odpovídat tìmto
made within 6 months, the right to repair becomes time-
specifikacím.
barred.
Zmìny bez oznámení vyhrazeny. V rámci naší péèe o výrobky a
5. In a warranty case the unit must be sent to the dealer or
optimalizace pøístrojù se obsah mùže lišit od údajù, uvedených na
REV together with the sales slip and a short description
obalu.
of the defect.
6. If there is no proof for a warranty liability being in place,
any repair carried out will be invoiced.
REV Ritter GmbH • Frankenstr.
Servis-Telefon: 49180 5 007359 • Fax: 0180 5 00 7410
E-mail: service@rev.biz• www.rev.biz
REV Ritter GmbH • Frankenstr.
•
1-4 • D-63776 Mömbris
Service-Telefon: +49 180 5 00 7359 • Fax: +49180 5 00 7410
E-mail: service@rev.biz• www.rev.biz
ESPAÑA
Muchas gracias por la compra del portero de REV.
LOS MODELOS
AD-2210S
(1-casa unifamiliar)
AD-2220S
(2-casa unifamiliar)
AD-2230S
(3-casa unifamiliar)
Desde el punto de vista técnico son idénticos.
Contenido de paquete (Fig. 1):
AD-2210S (1-casa unifamiliar)
1 x Terminal interior (2)
1 x Placa exterior (1) (con un pulsador de timbre)
1 x Adaptador de red (14)
1 x cable de conexión (17)
1 x cable de conexión (20)
2 x Ángulos (15) (para fijación)
11 x Tornillos
9 x Tacos
AD-2220S (2-casa unifamiliar)
2 x Terminales interiores (2)
1 x Placa exterior (1) (con dos pulsadores de timbre)
2 x Adaptadores de red (14)
2 x cable de conexión (17)
1 x cable de conexión (20)
3 x Ángulos (15) (para fijación)
15 x Tornillos
12 x Tacos
AD-2230S (3-casa unifamiliar)
3 x Terminales interiores (2)
1 x Placa exterior (1) (con dos pulsadores de timbre)
3 x Adaptadores de red (14)
3 x cable de conexión (17)
1 x cable de conexión (20)
4 x Ángulos (15) (para fijación)
19 x Tornillos
15 x Tacos
A. Preparación del montaje de la placa exterior (1) y del terminal
interior (2) (Fig. 3)
Antes de instalar la placa exterior y el terminal interior debe elegir un
lugar adecuado para ambos (fig. 3). Determine seguidamente la
longitud del cable, la cual no debe exceder de 70 metros incluyendo la
prolongación necesaria posible.
Atención: El cable no puede tenderse directamente junto a conductos
eléctricos. Para evitar interferencias mantenga una distancia de aprox.
10 cm.
A.1. Tendido o prolongación de los cables
Si no se dispone aún de ninguna conexión eléctrica, deben tenderse
los cables de conexión hasta el punto de fijación del/de los
terminal(es) interior(es). Preste atención a que la longitud sea
suficiente para la conexión. Si es preciso realizar una prolongación,
puede realizarse ésta mediante un cable de 2 hilos convencional
(Ø 0,75 mm) hasta una longitud máx. de 70 m.
Al realizar la instalación preste atención a una correcta conexión
(marcas de color en los aparatos).
Nota sobre AD-2230S/AD-2230S:
Se debe tender un cable de 2 hilos respectivamente por terminal
interior.
A.3. Montaje de una estación interior (2) (Fig. 5,6)
La unidad interna se monta exactamente como portero de entrada
(véase punto A.2). Preste atención a la cercanía de un enchufe para
el adaptador de red (14). Conectar el cable de conexión según la
especificación del número o del color en las pinzas (8), conectar la
estación(es) interior(es) y enchufar el conector del adaptador de red
en la estación interior (11). Como alternativa al adaptador de red
también puede conectar una fuente de alimentación directamente a
los bornes roscados de la estación interior (fig.6)
Indicación
¡Se debe utilizar una fuente de alimentación por cada unidad interior!
Al hacerlo tenga en cuenta la polaridad.
Cada unidad interior precisa una fuente de alimentación propia. El
transformador debe proporcionar 15 V DC y como mínimo 1,3
amperios.
ATENCIÓN: ¡No conectar nunca directamente a la tensión de red!
A.3.1. Conexión de un altavoz como gong externo (fig.6)
AD-2220S (IN)
AD-2230S (IN)
Puede conectar un altavoz como gong externo en los bornes roscados
(audio ext.)
A.4.Conexión a la apertura de puerta existente (fig.6)
« (12). Jestliže
Al utilizar un portero automático con las especificaciones facilitadas
« (13)
más abajo, se debe colocar una línea de dos hilos desde el portero de
la entrada hasta el portero automático. El portero debe poder
manejarse con una tensión continua de 12 voltios y solo debe requerir
un máximo de 1 amperio.
B. Operación
«
Cuando el visitante aprieta el pulsador del timbre (6) en el portero de
«
entrada, suena el timbre en la estación interior. Para poder hablar con
el visitante, debe de pulsar la »
« (12) . Si el portero está
conectado, se puede abrir pulsando la tecla »
« (13). Si se pulsa
»
« (12) de nuevo, el interfono se vuelve a poner en modo de
espera
C. Figuras
12= Tecla par habla »
a
r
«
1= Placa exterior
13= Tecla del abr pu rtas »
e
e
«
2= Terminal interior
14= A ap ador de red
d
t
3= Placa de nombre
4= Altavoz
15= Á gu o
n
l
5= Control de red (Power)
16= Regulador de vo um n ( lto baj )
l
e
a
/
o
6= Pulsador de timbre
17= Cable de conexión
18 = Hembrill para conecto RJ-11
a
r
7= Colgador
19 = Sele tor de
c
m o
el días
8= Bornes roscados
20 = Cabl de co ex ón
e
n
i
9= Cavidad para ángulo
21 = aper ura de ue ta
t
p
r
10= Conector RJ-11
11= Hembrilla para
alimentación de corriente
D. Indicaciones
Nota sobre Conformidad CE:
Se puede producir un menoscabo del funcionamiento de los aparatos
(del aparato) bajo la influencia de campos eléctricos o de alta
frecuencia (descargas, teléfonos portátiles, sistemas inalámbricos,
móviles, microondas).
Advertencias de seguridad
Si se producen daños en carcasas, enchufes, cables o en el
aislamiento, ponga el aparato inmediatamente fuera de servicio y
retire las conexiones a la red. ELECTROCUCIÓN - PELIGRO DE
MUERTE. (¡Extraer el enchufe!) ¡Las averías deben ser reparadas de
inmediato por un especialista!
¡No realice ningún intento de reparación por su cuenta!
E. Datos técnicos
Adaptador de red:
100-240VAC ~ , 50/60 Hz,
15 VDC / 1000 mA
En disposición:
3 vatios
En servicio
10 vatios
Temperatura de servicio
-10°C - +45°C
Volumen del timbre
máx. 80dB (A) / 0,3 metros
Conexión de abrepuertas
DC 12V, hasta 1A*
•
1-4 • D-63776 Mömbris
* El abrepuertas debe cumplir estas especificaciones.
Se reserva el derecho a realizar cambios sin comunicación previa. El
contenido puede variar de las indicaciones mencionadas en el
embalaje a consecuencia del cuidado de nuestros productos y de la
optimización de nuestros aparatos.
REV
R
itte GmbH Fra ke str
r
•
n
n
.
•
1
-
4
•
D
-6 776
3
M
ömbri
s
Se vic -Te fon +4 18
r
e
l
e
:
9
0
5 0 73 9 • ax +4
0
5
F
:
9
1
80
5
00 741
0
E
-ma l: s rvic @ v.b z• w w ev. iz
i
e
e
r
e
i
w
.
r
b

Verwandte Anleitungen für REV AD-2220S


Inhaltszusammenfassung für REV AD-2220S
- Seite 1 Hinweise: Note: Prüfstationen. Sollte dennoch ein Mangel auftreten, leistet 2. The unit is either repaired or replaced by REV free of Sollten Sie bereits eine 2-Draht Türklingelanlage verwenden, so E. Technické údaje Advertencias de seguridad REV im nachfol enden Umfang Gewähr: If you are already using a 2-wire door bell system, you can Sí...
- Seite 2 (14). Tudnivalók: Het aansluitkabel conform de kleuraangave c.q. de cijferaangave aan de klemmen (8) Napomena za AD-2220S + AD-2220S: Za svaku unutarnju jedinicu mora biti proveden po jedan 2- Na o k p te attenzione che la presa di corrente si trovi nelle vicinanze per collegare l'adattatore di rete Brancher le câble de raccordement conformément aux couleurs indiquées ou aux chiffres...