Herunterladen Inhalt Inhalt Diese Seite drucken
Inhaltsverzeichnis

Werbung

Verfügbare Sprachen
  • DE

Verfügbare Sprachen

  • DEUTSCH, seite 9
Welcome:
Dear user, thank you for purchasing this product.
Much investment in time and effort has gone into its development, and it is our hope
that it will give you many years of trouble-free service.
FCC Compliance Statement:
This device complies with Part 15 of the FCC Rules. Operation is
subjected to the following two conditions: (1) this device may not cause
harmful interference, and (2) this device must accept any interference
received, including interference that may cause undesired operation.
This equipment has been tested and found to comply with limits for a
Class B digital device, pursuant to Part 15 of the FCC rules. These limits
are designed to provide reasonable protection against harmful interference in residential
installations. This equipment generates, uses, and can radiate radio frequency energy, and if
not installed and used in accordance with the instructions, may cause harmful interference to
radio communications.
However, there is no guarantee that interference will not occur in a particular installation. If this
equipment does cause interference to radio or television equipment reception, which can be
determined by turning the equipment off and on, the user is encouraged to try to correct the
interference by one or more of the following measures:
-Reorient or relocate the receiving antenna.
-Move the equipment away from the receiver.
-Plug the equipment into an outlet on a circuit different from that to which the receiver is
connected.
-Consult the dealer or an experienced radio/television technician for additional suggestions.
You are cautioned that any change or modifications to the equipment not expressly approved
by the party responsible for compliance could void Your authority to operate such equipment.
Safety Notice:
1. Do not drop, puncture or disassemble the camcorder; otherwise the warranty will be voided.
2. Avoid all contact with water, and dry hands before using.
3. Do not expose the camcorder to high temperature or leave it in direct sunlight. Doing so may
damage the camcorder.
4. Use the camcorder with care. Avoid pressing hard on the camcorder body.
5. For your own safety, avoid using the camcorder when there is a storm or lightning.
6. Do not use batteries of different specifications. Doing so may lead to the potential for serious
damage.
7. Remove the battery during long periods between usage, as a deteriorated battery may affect
the functionality of the camcorder.
8. Remove the battery if it shows signs of leaking or distortion.
9. Use only the accessories supplied by the manufacturer.
10. Keep the camcorder out of the reach of infants.
11. Risk of explosion if battery is replaced by an incorrect type.
12. Dispose of used batteries according to the instructions.
If the time arises to throw away your product, please
recycle all the components possible.
Batteries and rechargeable batteries are not to be
disposed in your domestic waste! Please recycle
them at your local recycling point.
Together we can help to protect the environment.

Werbung

Inhaltsverzeichnis
loading

Inhaltszusammenfassung für AIPTEK AHD-T8 PRO

  • Seite 1 Welcome: Dear user, thank you for purchasing this product. Much investment in time and effort has gone into its development, and it is our hope that it will give you many years of trouble-free service. FCC Compliance Statement: This device complies with Part 15 of the FCC Rules. Operation is subjected to the following two conditions: (1) this device may not cause harmful interference, and (2) this device must accept any interference received, including interference that may cause undesired operation.
  • Seite 2: Preparing The Camcorder

    Preparing the Camcorder Product overview Playback As Joystck - Up: Icon Down: Video resolution Left: Flash LCD display Speaker Right: Menu LED indicator Shutter Record Delete Power Connector cover TV-out / HDMI output SD card slot earphone connector Tripod socket Zoom out/Volume down Zoom in/Volume up Battery cover...
  • Seite 3: Getting Started

    Getting Started Loading the battery Detach the USB connector as indicated, and then unfasten the battery cover to remove the cover. Place the accessory Li-Ion battery into the compartment. Note that the metallic contacts must be aligned with the contacts in the compartment. Replace the cover.
  • Seite 4: Inserting The Sd Card

    Inserting the SD card Lift the memory card cover to open it as indicated. Insert the card as the direction of indication until it reaches the end of the slot. When the card is inserted successfully, the icon ( ) will appear on screen.
  • Seite 5: Recording A Video Clip

    Recording a video clip Set the focus to an appropriate setting. Normally, you 50cm ~ may set the focus to ( ) for most filming conditions. Select ( ) only for close-ups. 30cm ~ 50cm Press the Record button ( ) to start recording.
  • Seite 6 Exporting to a standard TV and HDTV TV : Traditional CRT TV The TV system is different across areas. If you need to adjust the TV-out setting, please refer to the “Advanced settings” section for more information. (Taiwan: NTSC; America: NTSC;...
  • Seite 7: Advanced Settings

    Advanced settings Key tips Item Option Description The flash is forced to fire in every shot. On ( Flash Strobe (Joystick Left) The flash automatically fires when the lighting is Auto ( insufficient. The flash is disabled. Off ( Video Resolution (Joystick Down) Please refer to the package printing for resolution specification.
  • Seite 8 Setting menu ( ) options (continued) Item Option Description Off ( Disable beep sound. Beep On ( Enable beep sound. Shutter On ( Disable beep sound, but keep Shutter sound. Set TV system compatibility to NTSC. This option is NTSC ( suitable for America, Taiwan, Japan, and Korea areas.
  • Seite 9 Herzlich willkommen! Lieber Benutzer, vielen Dank für den Kauf dieses Produkts. In die Entwicklung des Geräts wurde viel Zeit und Mühe investiert, und wir hoffen, es wird Ihnen viele Jahre störungsfreien Betrieb und Freude bescheren. FCC-Erklärung: Dieses Gerät erfüllt Teil 15 der FCC-Regularien. Der Betrieb unterliegt den folgenden beiden Voraussetzungen: (1) Dieses Gerät darf keine Störungen verursachen, und 2) dieses Gerät muss jegliche empfangenen Störungen hinnehmen, einschließlich Störungen, die zu unbeabsichtigtem Betrieb führen...
  • Seite 10: Vorbereiten Des Camcorders

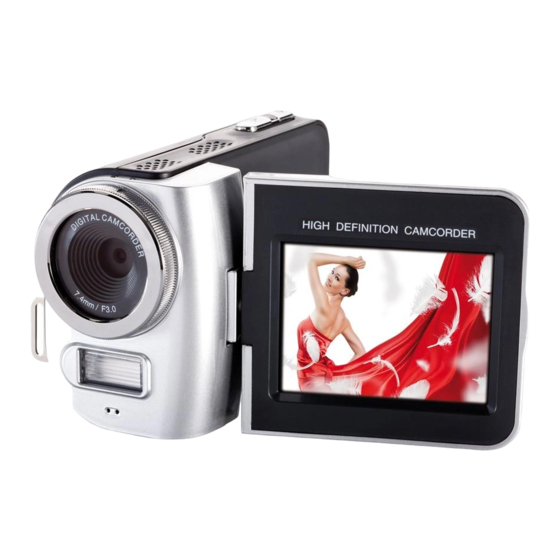
    Vorbereiten des Camcorders Produktübersicht Wiedergabe Als Joystick - Auf: Symbole Nach Unten: Videoauflösung Links: Flash [Blitz] LCD-Anzeige Lautsprecher Rechts: Menü LED-Anzeige Auslöser Aufnahme Löschen Ein-/Austaste Anschlussklappe TV-Ausgang/ HDMI-Ausgang SD-Kartenschlitz Kopfhöreran- schluss Stativgewinde Auszoomen/ Leiser Einzoomen/ Lauter Akkufachdeckel Fokusregler Handschlaufen- halterung (hinten) Objektiv USB-Anschluss Handschlaufen-...
  • Seite 11: Erste Schritte

    Erste Schritte Einlegen des Akkus Lösen Sie den USB-Anschluss (siehe Abbildung); öffnen Sie dann die Batterieabdeckung und nehmen Sie die Abdeckung vom Gerät. Legen Sie den mitgelieferten Lithium- Ionen-Akku in das Akkufach ein. Bitte beachten Sie, dass die Metallkontakte auf die Kontakte im Akkufach auszurichten sind.
  • Seite 12: Einlegen Der Sd-Karte

    Einlegen der SD-Karte Heben Sie die Speicherkartenabdeckung zum Öffnen an (siehe Abbildung). Stecken Sie die Karte in angezeigter Ausrichtung vollständig in den Kartenschlitz hinein. Wenn die Karte korrekt eingelegt ist, erscheint das )-Symbole auf dem Bildschirm. Drücken Sie zum Entfernen der Karte sanft auf deren Kante; ziehen Sie sie dann vorsichtig heraus.
  • Seite 13: Aufzeichnen Eines Videoclips

    Aufzeichnen eines Videoclips Stellen Sie den Fokus richtig ein. Für die meisten 50cm ~ Filmaufnahmen sollten Sie den Fokus auf ( einstellen. Wählen Sie ( ) nur für Nahaufnahmen. 30cm bis 50cm Drücken Sie die Aufnahmetaste ( ), um mit der Aufzeichnung zu beginnen.
  • Seite 14: An Einen Standard-Tv Und Hdtv Exportieren

    An einen Standard-TV und HDTV exportieren TV : Normales Röhrenfernsehgerät Das TV-System ist je nach Regionen unterschiedlich. Falls Sie die TV- Ausgangseinstellung ändern müssen, erhalten Sie dazu im Abschnitt “Erweiterte Einstellungen” weitere Informationen. (Taiwan: NTSC; Amerika: NTSC; Europa: PAL; China: PAL) Schalten Sie den Fernseher ein und schalten Sie ihn in den AV-Modus.
  • Seite 15: Erweiterte Einstellungen

    Erweiterte Einstellungen Kurztipps Element Optionen Beschreibung Der Blitz wird bei jeder Aufnahme ausgelöst. Ein ( Blitz (Joystick nach links) Der Blitz wird bei unzureichender Beleuchtung Auto ( automatisch ausgelöst. Der Blitz ist deaktiviert. Aus ( Videoauflösung (Joystick nach unten) Auflösungsspezifikationen sind auf der Verpackung aufgedruckt. Symbole (Joystick nach oben) Hier aktivieren/deaktivieren Sie die Anzeige der...
  • Seite 16 Optionen des Einstellungsmenüs ( ) (Fortsetzungen) Element Optionen Beschreibung Das Tonsignal wird deaktiviert. Aus ( Signalton Das Tonsignal wird aktiviert. Ein ( Das Tonsignal der Tasten wird abgeschaltet, aber das Auslöser Ein ( Tonsignal des Auslösers bleibt aktiviert. Damit stellen Sie die TV-Systemkompatibilität auf NTSC ein.
  • Seite 17 Bienvenue : Cher utilisateur, nous vous remercions pour l'achat de ce produit. Beaucoup d'investissements en temps et en efforts ont été réalisés pour son développement, et nous espérons qu'il vous procurera des années de bons et loyaux services. Déclaration de conformité à la FCC : Cet équipement est conforme à...
  • Seite 18: Vue D'ensemble Du Produit

    Préparer le caméscope Vue d'ensemble du produit Lecture Comme Joystick - Haut: Icône Bas: Résolution vidéo Gauche: Flash Affichage LCD Haut-parleur Droite: Menu Voyant LED Déclencheur Enregistrer Supprimer Alimentation Couvercle du connecteur Connecteur Sortie HDMI Slot carte SD sortie TV/ Embase pour écouteurs trépied...
  • Seite 19: Mise En Route

    Mise en route Installer la batterie Débranchez le connecteur USB, comme indiqué, puis détachez le couvercle du compartiment de la batterie pour le retirer. Placez la le accessoire Li-Ion dans batterie logement. Notez que les contacts métalliques doivent être alignés avec ceux du logement. Remettez en place la capot.
  • Seite 20: Mise Sous/Hors Tension

    Insertion de la carte SD Soulevez le couvercle de la carte mémoire pour l'ouvrir, comme indiqué. Insérez la carte dans le sens indiqué jusqu’au fond de la fente. Une fois la carte bien insérée, l'icône ( ) apparaît à l'écran. Pour retirer la carte, poussez-la pour la libérer, puis tirez-la doucement hors de la fente.
  • Seite 21: Enregistrer Un Clip Vidéo

    Enregistrer un clip vidéo Ajustez la mise au point sur une position appropriée. 50cm ~ Normalement, vous pouvez régler la mise au point sur ( ) pour la plupart des conditions de tournage. 30cm ~ 50cm Sélectionnez ( ) seulement pour les gros plans. Appuyez sur le bouton Enregistrer ( ) pour Réglages de la mise au point...
  • Seite 22 Exporter vers un téléviseur standard ou un téléviseur haute définition TV : Téléviseur cathodique (CRT) traditionnel Le standard TV est different selon les zones. Si vous avez besoin d'ajuster le réglage de la sortie TV, consultez la section "Réglages avancés" pour plus d'informations. (Taiwan : NTSC;...
  • Seite 23: Réglages Avancés

    Réglages avancés Touches Élément Option Description Marche Le flash est forcé à se déclencher à chaque prise de Flash (à gauche du vue. joystick) Le flash se déclenche automatiquement lorsque Auto ( l'éclairage est insuffisant. Le flash est désactivé. Arrêt ( Résolution vidéo (en bas du joystick) Reportez-vous aux inscriptions de la boîte pour les caractéristiques de...
  • Seite 24 Options du menu de réglage ( )(suite) Élément Option Description Désactive le bip sonore. Arrêt ( Active le bip sonore. Marche ( Déclencheur Désactive le bip sonore, mais conserve le son d'obturation. Marche ( Règle la compatibilité avec le standard TV NTSC. Cette option convient pour les zones États-Unis, Taiwan, Japon, NTSC ( et Corée.
  • Seite 25 Benvenuto: Caro utente, ti ringraziano per avere acquistato questo prodotto. Abbiamo investito molto tempo ed energie in questo progetto e speriamo che vi procuri molti anni di servizio senza problemi. Dichiarazione di conformità FCC: Questo prodotto è conforme alla Parte 15 delle Norme FCC. Il funzionamento è soggetto alle seguenti due condizioni: (1) Questo dispositivo non può...
  • Seite 26: Preparazione Della Videocamera

    Preparazione della videocamera Descrizione del prodotto Riproduzione Come joystck Su: Icona Giù: Risoluzione video Sinistra: Flash Display LCD Altoparlante Destra: Menu Indicatore LED Otturatore Registra Elimina Alimentazione Coperchio connettore Connettore Uscita HDMI Alloggio scheda SD uscita TV / cuffie Aggancio treppiede Riduci/volume giù...
  • Seite 27: Inserimento Della Batteria

    Preparazione Inserimento della batteria Staccare il connettore USB come indicato e poi togliere il coperchio dello scomparto batterie per rimuovere la batteria. Inserire nello scomparto la batteria agli ioni di litio in dotazione. Fare attenzione a che i contatti metallici siano allineati con i contatti del vano.
  • Seite 28: Inserimento Della Scheda Sd

    Inserimento della scheda SD Sollevare, come indicato, il coperchio dello scomparto batterie per aprirlo. Inserire la scheda nella direzione indicata finché raggiunge il fondo all'alloggio. Quando la scheda è inserita correttamente, sullo schermo appare l’icona ( ). Per rimuovere la scheda, premerla per farla uscire e poi estrarla con delicatezza. Rimettere a posto il coperchio.
  • Seite 29: Registrazione Di Una Sequenza Video

    Registrazione di una sequenza video Impostare il fuoco in maniera appropriata. Di norma, è 50cm ~ possibile impostare la messa a fuoco su ( ) per la maggior parte delle condizioni di ripresa. Selezionare 30cm ~ 50cm ) solo per primi piani. Premere il tasto Record (Registrazione) ( ) per Impostazioni di fuoco...
  • Seite 30 Esportazione ad un televisore standard e HD TV: TV CRT tradizionale I sistemi TV sono diversi nei vari paesi. Se è necessario regolare l'impostazione Uscita TV, fare riferimento alla sezione “Impostazioni avanzate” per altre informazioni. (Taiwan: NTSC; America: NTSC; Europa: PAL; Cina: PAL) Accendere il televisore ed impostarlo sulla modalità AV.
  • Seite 31: Impostazioni Avanzate

    Impostazioni avanzate Suggerimenti sui tasti Voce Opzione Descrizione Il flash è attivato forzatamente ad ogni scatto. Attivo ( Flash Automatico Il flash si attiva automaticamente quando la luce è (Joystick sinistra) insufficiente. Disattivo Il flash è disabilitato. Risoluzione video (Joystick giù) Fare riferimento alla stampa sulla confezione per le specifiche sulla risoluzione. Icona (Joystick su) Attivo/ Abilita/disabilita la visualizzazione delle icona OSD sullo Disattivo schermo. Opzioni del menu Impostazioni ( Premere il Joystick destra ( ) per accedere.
  • Seite 32 Opzioni del menu Impostazioni ( ) (segue) Voce Opzione Descrizione Disabilita l’avviso sonoro. Disattivo ( Abilita l’avviso sonoro. Avviso son. Attivo ( Otturatore On Disabilita l’avviso acustico, ma mantiene il suono dell’otturatore. Imposta la compatibilità del sistema TV su NTSC. Questa NTSC ( opzione è adatta per l’America, Taiwan, Giappone e Corea. Modalità TV Imposta la compatibilità del sistema TV su PAL. Questa opzione è...
  • Seite 33: Aviso De Seguridad

    Bienvenido: Estimado usuario, gracias por adquirir este producto. Se ha invertido una gran cantidad de tiempo y mucho esfuerzo en desarrollar este producto, por lo que esperamos que lo pueda disfrutar durante muchos años. Declaración de Cumplimiento FCC: Este dispositivo cumple con el Párrafo 15 de las Normativas FCC. Su uso está...
  • Seite 34: Descripción General Del Producto

    Preparar la videocámara Descripción general del producto Reproducción Como joystick - Subir: Icono Bajar: Resolución vídeo Izquierda: Flash Pantalla LCD Altavoz Derecha: Menú Indicador LED Disparador Grabar Eliminar Alimentación Tapa del conector Conector Ranura para Salida de Salida HDMI tarjeta SD TV y para auricular Toma para trípode...
  • Seite 35: Procedimientos Iniciales

    Procedimientos iniciales Insertar la batería Separe el conector USB tal y como se indica y, a continuación, abra la tapa de la batería para quitar dicha tapa. Coloque la batería de ión-litio en el compartimento. Tenga en cuenta que los contactos metálicos deben estar alineados con los del compartimento.
  • Seite 36: Encender Y Apagar La Unidad

    Insertar la tarjeta SD Levante la tapa de la tarjeta de memoria para abrirla tal y como se indica en la figura. Inserte la tarjeta en la dirección indicada hasta que llegue al final de la ranura. Cuando la tarjeta se haya insertado correctamente, el icono ( ) aparecerá...
  • Seite 37: Grabar Un Clip De Vídeo

    Grabar un clip de vídeo Establezca el enfoque en un valor adecuado. Por lo 50 cm ~ general, el enfoque debe establecerse en ( ) para la mayoría de las condiciones de grabación. Seleccione 30cm ~ 50cm la opción ( ) solamente para primeros planos.
  • Seite 38 Exportar a un TV estándar o de alta definición (HDTV) TV : TV CRT tradicional El sistema de televisión es diferente según la zona de residencia. Si necesita ajustar el parámetro Salida de TV, consulte la sección “Configuración avanzada” para obtener más información.
  • Seite 39: Configuración Avanzada

    Configuración avanzada Información sobre los botones Elemento Opción Descripción Encender El flash se dispara siempre en cada disparo. Flash (botón Izquierda del El flash se dispara automáticamente cuando la joystick) iluminación es insuficiente. Apagar El flash está deshabilitado. Resolución vídeo (botón Abajo del joystick) Por favor, consulte el texto impreso en la caja para obtener especificaciones sobre la resolución.
  • Seite 40 Opciones del menú de configuración ( )(continuación) Elemento Opción Descripción Deshabilita el sonido de un pitido. Apagar ( Habilita el sonido de un pitido. Pitido Encender ( Disparador Deshabilita el sonido de un pitido pero mantiene el sonido activado ( del disparador.
  • Seite 41: Veiligheidsrichtlijnen

    Welkom: Beste gebruiker, bedankt voor de aankoop van dit product. We hebben heel wat tijd en moeite gestopt in de ontwikkeling ervan en we hopen dat u jarenlang zorgeloos zult kunnen genieten van uw nieuwe aankoop. FCC- Compliantieverklaring: Dit apparaat voldoet aan Deel 15 van de FCC-regels. Gebruik is onderhevig aan de volgende twee voorwaarden: (1) dit apparaat mag geen schadelijke ruis veroorzaken en (2) dit apparaat dient ontvangen ruis te accepteren, inclusief ruis die ongewenste werking kan veroorzaken.
  • Seite 42: De Camcorder Voorbereiden

    De camcorder voorbereiden Productoverzicht Afspelen Als joystick- Omhoog: Pictogram Omlaag: Videoresolutie Links: Flits LCD-scherm Luidspreker Rechts: Menu LED-indicator Ontspanknop Opnemen Wissen Voeding Klep aansluitingen Tv-uitgang/ HDMI-uitgang SD-kaartsleuf oortelefoo- naansluiting Statiefbevestiging Uitzoomen / Volume lager Inzoomen / Volume hoger Batterijklep Scherpstel- Polsriemhouder schakelaar (achterkant)
  • Seite 43: Aan De Slag

    Aan de slag De batterij plaatsen Koppel de USB-aansluiting los zoals aangegeven en maak vervolgens de batterijklep los om deze te verwijderen. Plaats de meegeleverde li-ion-batterij in het batterijvak. Zorg ervoor dat de metalen contacten uitgelijnd zijn met de contacten in het batterijvak. Plaats de klep terug.
  • Seite 44: De Sd-Kaart Plaatsen

    De SD-kaart plaatsen Til de klep van de geheugenkaart op om deze te openen zoals aangegeven. Stop de kaart in de richting van de aanwijzing tot deze het einde van de sleuf bereikt. Wanneer de kaart volledig is geplaatst, verschijnt het pictogram ( ) op het scherm.
  • Seite 45: Een Videoclip Opnemen

    Een videoclip opnemen Stel de scherpstelling in op de gewenste instelling. 50cm ~ Voor de meeste opnameomstandigheden stelt u de scherpstelling normaal in op ( ). Selecteer alleen 30cm ~ 50cm ) voor close-ups. Scherpstelinstellingen Druk op de Opnameknop ( ) om de opname te starten.
  • Seite 46 Exporteren naar een standaard tv en HDTV TV: traditionele CRT-tv Het tv-systeem verschilt afhankelijk van het gebied. Raadpleeg "Geavanceerde instellingen" voor meer informatie als u de tv-uitgangsinstelling moet aanpassen, (Taiwan: NTSC; Amerika: NTSC; Europa: PAL; China: PAL) Zet uw tv aan en schakel de tv naar de AV-modus.
  • Seite 47: Geavanceerde Instellingen

    Geavanceerde instellingen Belangrijke tips Item Optie Beschrijving De flitser zal altijd bij elke opname geforceerd worden Aan ( Flits gebruikt. (Joystick links) De flitser gaat automatisch af wanneer de belichting Auto ( onvoldoende is. De flitser is uitgeschakeld. Uit ( Videoresolutie (Joystick omlaag) Raadpleeg de informatie op de verpakking voor de specificaties van de...
  • Seite 48 Opties Instellingsmenu ( )(vervolg) Item Optie Beschrijving Uit ( Pieptoon uitschakelen. Pieptonen inschakelen. Aan ( Piep Ontspanknop De pieptoon uitschakelen, maar het geluid van de aan ( ontspanknop behouden. Stel de compatibiliteit van het tv-systeem in op NTSC. Deze optie is geschikt voor Amerika, Taiwan, Japan en NTSC ( Korea.
  • Seite 49: Normas De Segurança

    Bem-vindo: Caro utilizador, obrigado por ter adquirido este produto. Investimos muito tempo e esforço no seu desenvolvimento e esperamos que o mesmo o sirva durante muitos anos sem problemas. Declaração de conformidade com FCC: Este dispositivo cumpre com a Parte 15 das Normas FCC. O funcionamento está...
  • Seite 50: Preparar A Câmara De Vídeo

    Preparar a câmara de vídeo Visão geral do produto Reprodução Como Joystick - Cima: Ícone Baixo: Resolução vídeo Esquerda: Flash Ecrã LCD Altifalante Direita: Menu LED indicador Obturador Record (Gravar) Eliminar Alimentação Tampa do conector Ranhura para cartões de Conector de Saída HDMI memória SD saída de TV /...
  • Seite 51: Carregamento Da Bateria

    Introdução Introduzir a bateria Retire o conector USB como indicado e depois desaperte a tampa da bateria para remover a tampa. Coloque a bateria de iões de lítio no compartimento. Tenha em atenção que os contactos metálicos devem ficar alinhados com os contactos existentes no compartimento.
  • Seite 52 Inserir o cartão SD Levanta a tampa da ranhura do cartão de memória para a abrir, como indicado. Insira o cartão na direcção indicada até que o mesmo alcance o fim da ranhura. Quando o cartão estiver inserido correctamente, o ícone ( ) irá...
  • Seite 53: Gravação De Um Clip De Vídeo

    Gravação de um clip de vídeo Defina a focagem para a definição pretendida. 50cm ~ Normalmente, pode definir a focagem para ( maioria das condições de gravação. Seleccione ( 30cm ~ 50cm apenas para grandes planos. Prima o botão de gravação ( ) para iniciar a Definições de focagem gravação.
  • Seite 54 Exportar para uma TV tradicional e TV de alta definição TV: TV CRT tradicional O modo de TV varia de país para país. Se necessitar de ajustar a definição relativa à saída de TV, consulte a secção "Configuração avançada" para obter mais informações. (Taiwan: NTSC;...
  • Seite 55: Configuração Avançada

    Configuração avançada Descrições das teclas Item Opção Descrição O flash é forçado a disparar sempre que é Ligado ( tirada uma foto. Flash (Joystick para a Esquerda) O flash dispara automaticamente quando a Auto ( iluminação é insuficiente. Desligado O flash é desactivado. Resolução vídeo (Joystick para Baixo) Consulte a embalagem para a especificação da resolução.
  • Seite 56 Opções do menu de configuração ( ) (continuação) Item Opção Descrição Desactiva o aviso sonoro. Desligado ( Activa o bip. Ligado ( Obturador Desactiva o aviso sonoro mas mantém o som do activado ( obturador. Define o modo de TV para NTSC. Esta opção aplica-se aos Estados Unidos da América, a Taiwan, ao Japão e à...
  • Seite 57: Specifications

    Specifications Item Specification Image Sensor 5 Mega Pixels CMOS Video Clips: FULL HD 30f (1920x1080) / HD 1080P 30f (1440x1080) / WVGA 60f (848x480) / Resolution QVGA30f (320x240; iPod compatible) Still Images: 3 / 5 / 8 / 12 Megapixels External Memory SD / SDHC Card (Max.

Inhaltsverzeichnis