EuroLite LED Bar RGB 252/10 Indoor Bedienungsanleitung
Inhaltsverzeichnis
Verfügbare Sprachen
Verfügbare Sprachen
BEDIENUNGSANLEITUNG
USER MANUAL
MODE D'EMPLOI
MANUAL DEL USUARIO
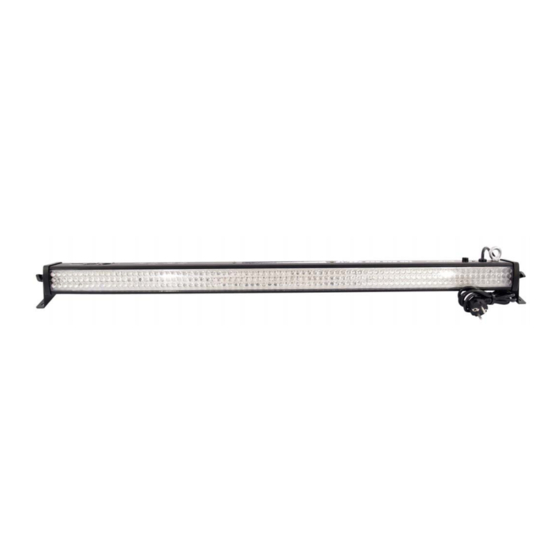
LED Bar RGB
252/10 Indoor
©
Für weiteren Gebrauch aufbewahren!
Copyright
Keep this manual for future needs!
Nachdruck verboten!
Gardez ce mode d'emploi pour des
Reproduction prohibited!
utilisations ultérieures!
Réproduction interdit!
Guarde este manual para posteriores usos.
Prohibida toda reproducción.
Inhaltsverzeichnis

Verwandte Anleitungen für EuroLite LED Bar RGB 252/10 Indoor


Inhaltszusammenfassung für EuroLite LED Bar RGB 252/10 Indoor
- Seite 1 BEDIENUNGSANLEITUNG USER MANUAL MODE D'EMPLOI MANUAL DEL USUARIO LED Bar RGB 252/10 Indoor © Für weiteren Gebrauch aufbewahren! Copyright Keep this manual for future needs! Nachdruck verboten! Gardez ce mode d’emploi pour des Reproduction prohibited! utilisations ultérieures! Réproduction interdit! Guarde este manual para posteriores usos. Prohibida toda reproducción.
-
Seite 2: Inhaltsverzeichnis
MULTI-LANGUAGE-INSTRUCTIONS Inhaltsverzeichnis Table of contents Sommaire Contenido EINFÜHRUNG..............................4 SICHERHEITSHINWEISE..........................4 BESTIMMUNGSGEMÄßE VERWENDUNG..................... 6 INSTALLATION ..............................7 Befestigung ..............................7 Anschluss an den DMX-512 Controller / Verbindung Gerät – Gerät ............. 7 Master/Slave-Betrieb ............................. 8 Anschluss ans Netz ............................8 BEDIENUNG .............................. - Seite 3 You can find the latest update of this user manual in the Internet under: Vous pouvez trouvez la dernière version de ce mode d'emploi dans l'Internet sous: Vd. puede encontrar la versión más reciente de este manual en el Internet bajo: www.eurolite.de 3/35 00026099.DOC, Version 2.2...
-
Seite 4: Einführung
- sich die letzte Version der Anleitung im Internet herunter laden EINFÜHRUNG Wir freuen uns, dass Sie sich für einen EUROLITE LED Bar RGB 252/10 Indoor entschieden haben Wenn Sie nachfolgende Hinweise beachten, sind wir sicher, dass Sie lange Zeit Freude an Ihrem Kauf haben werden. - Seite 5 Bitte überprüfen Sie vor der ersten Inbetriebnahme, ob kein offensichtlicher Transportschaden vorliegt. Sollten Sie Schäden an der Netzleitung oder am Gehäuse entdecken, nehmen Sie das Gerät nicht in Betrieb und setzen sich bitte mit Ihrem Fachhändler in Verbindung. Der Aufbau entspricht der Schutzklasse I. Der Netzstecker darf nur an eine Schutzkontakt-Steckdose angeschlossen werden, deren Spannung und Frequenz mit dem Typenschild des Gerätes genau übereinstimmt.
-
Seite 6: Bestimmungsgemäße Verwendung
BESTIMMUNGSGEMÄßE VERWENDUNG Bei diesem Gerät handelt es sich um einen Effektstrahler, mit dem sich dekorative Lichteffekte erzeugen lassen. Dieses Produkt ist nur für den Anschluss an 230 V, 50 Hz Wechselspannung zugelassen und wurde ausschließlich zur Verwendung in Innenräumen konzipiert. Dieses Gerät ist für professionelle Anwendungen, z. -
Seite 7: Installation
Wird das Gerät anders verwendet als in dieser Bedienungsanleitung beschrieben, kann dies zu Schäden am Produkt führen und der Garantieanspruch erlischt. Außerdem ist jede andere Verwendung mit Gefahren, wie z. B. Kurzschluss, Brand, elektrischem Schlag, Abstürzen etc. verbunden. INSTALLATION Befestigung Vergewissern Sie sich vor der Montage, dass die Montagefläche mindestens die 10-fache Punktbelastung des Eigengewichtes des Gerätes aushalten kann. -
Seite 8: Master/Slave-Betrieb
Im Master/Slave-Betrieb lassen sich mehrere Geräte synchronisieren, die dann von einem Mastergerät gesteuert werden. An der Rückseite des LED Bar RGB 252/10 Indoor befindet sich eine XLR-Einbaubuchse und ein XLR- Einbaustecker, über die sich mehrere Geräte miteinander verbinden lassen. Wählen Sie das Gerät aus, das zur Steuerung der Effekte dienen soll. Dieses Gerät arbeitet dann als Master-Gerät und steuert alle weiteren Slave-Geräte, die über einen zweipoligen geschirmten Kabel mit dem... -
Seite 9: Bedienung
Den Flash stellen Sie mit den DIP-Schaltern 7und 8 ein. Auto Modus In diesem Modus kann der LED Bar RGB 252/10 Indoor auf automatischen Programmablauf gestellt werden. Stellen Sie DIP-Schalter 9 und 10 auf OFF. Stellen Sie DIP-Schalter 1 bis 4 auf OFF. -
Seite 10: Dmx-Gesteuerter Betrieb
Stellen Sie DIP-Schalter 10 auf ON. Stellen Sie die DMX Adressen über Dip Schalter 1 bis 9 ein. Ansteuerung: Nachdem Sie die Startadresse definiert haben, können Sie den LED Bar RGB 252/10 Indoor über Ihren Controller ansteuern. Ω Achtung: Am letzten Projektor muss die DMX-Leitung durch einen 120 . -
Seite 11: Reinigung Und Wartung
REINIGUNG UND WARTUNG LEBENSGEFAHR! Vor Wartungsarbeiten unbedingt allpolig vom Netz trennen! Das Gerät sollte regelmäßig von Verunreinigungen wie Staub usw. gereinigt werden. Verwenden Sie zur Reinigung ein fusselfreies, angefeuchtetes Tuch. Auf keinen Fall Alkohol oder irgendwelche Lösungsmittel zur Reinigung verwenden! Im Geräteinneren befinden sich außer der Sicherung keine zu wartenden Teile.