Herunterladen Inhalt Inhalt Diese Seite drucken

Werbung

Verfügbare Sprachen

Verfügbare Sprachen

www.lupine.de
LIGHTING SYSTEMS
Bedienungsanleitung / User Manual

Werbung

Inhaltsverzeichnis
loading

Inhaltszusammenfassung für Lupine Neo Lamphead

  • Seite 1 LIGHTING SYSTEMS Bedienungsanleitung / User Manual...
  • Seite 2 Abb.3 Fig.3 Abb.1 Fig.1 Abb.4 Fig.4 Abb.2 Fig.2 www.lupine.de...
  • Seite 3: Sicherheitshinweise

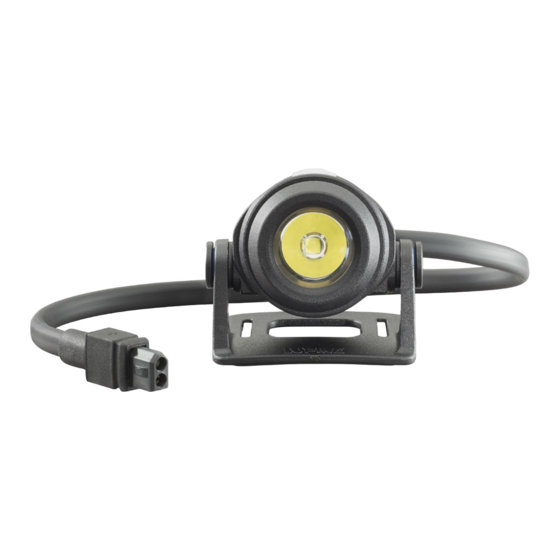
    1 // Sicherheitshinweise Warnung! • Niemals absichtlich den Lichtstrahl in die eigenen oder in die Augen anderer Personen richten. • Falls ein Lichtstrahl in die Augen trifft, sind die Augen bewusst zu schließen und der Kopf aus dem Lichtstrahl zu bewegen. • Es dürfen keine optisch stark bündelnden Instrumente zur Betrachtung des Lichtstrahls verwendet werden. • Bei gewerblicher Nutzung oder bei Nutzung im Bereich der öffentlichen Hand ist der Benutzer entsprechend der Unfallverhütungsvorschrift für La- serstrahlung zu unterweisen. • Dieser Scheinwerfer könnte jederzeit ausfallen. Deshalb ist es hilfreich, im- mer eine kleine Notlampe bereitzuhalten. • Beim Transport z.B. im Rucksack immer Lampenkopf und Akku trennen. • Das Gehäuse der Neo kann bis zu 65°C heiß werden. Im ruhenden Betrieb (Ohne Kühlung durch Bewegung) dimmt der Lampenkopf selbstständig he- runter um nicht zu überhitzen. • Lampenkopf und Akku sind nach FL1 Standard bis zu 2Meter wasserdicht und stoßfest, jedoch nicht zur dauerhaften Benutzung unter Wasser ge- eigent. www.lupine.de...
  • Seite 4 2 // Wie befestige ich die Lampe und den Akku? Helmlampe Neo 2: Das schmale Klettband mit der Seite des Lupine Schriftzuges ca. 4cm durch die linke Seite des Lampenhalters fädeln, umschlagen und festkletten (Sie- he Abb. 1). Erst dann das andere Ende durch die Lüftungsschlitze des Helms führen und duch die zweite Öffnung im Lampenhalter fädeln. Spannen Sie das Klettband so weit wie möglich, um ein Verrutschen während der Benut- zung zu vermeiden (Siehe Abb. 2). Der Akku kann mit dem flexiblen Klettband entweder direkt am Helm (Siehe Abb. 3), oder mit der beiliegenden Verlängerung z.B. im Trikot oder Rucksack verstaut werden. Stirnlampe Neo X2: Mit dem Akku FastClick-System können alle Lupine FastClick Akkus direkt am Stirnband getragen werden (Siehe Abb. 4). Weitere Optionen: GoPro Halter (Art.Nr. 1070) für den Helm und Schnellspanner (Art.Nr. 225 und 231) für die Stange. * Zum Wechsel des Lampenkopfes auf einen anderen Halter müssen die seitlichen Halterschrauben der Neo mit einem 3mm Inbus gelöst werden. www.lupine.de...
  • Seite 5: Benutzung Der Lampe

    3 // Benutzung der Lampe Einschalten und Ausschalten Der Scheinwerfer ist im Lieferzustand sofort einsetzbar. Sie müssen nur noch den Akku voll aufladen. Zum Einschalten den Taster kurz drücken und zum Ausschalten den Taster länger gedrückt halten. Durch kurzen Tastendruck wird zwischen den einzelnen Stufen gewechselt. Akku laden Stecken Sie das Ladegerät in die Steckdose und verbinden dann den Akku mit dem Ladegerät. Der Ladevorgang beginnt automatisch und wird über eine Kontroll-LED angezeigt: LED leuchtet rot: Akku wird geladen LED leuchtet grün: Akku ist voll Warnung! Mit diesem Ladegerät dürfen nur wieder aufladbare Li-Ionen-Akkus geladen werden. Es ist NICHT zum Laden von Ni-MH-Akkus geeignet! Keine Trockenbatterien verwenden! – Explosionsgefahr! Dieses Ladegerät darf NUR vom Hersteller geöffnet werden! www.lupine.de...
  • Seite 6: Leuchtstufen Anpassen

    4 // Leuchtstufen anpassen Zur individuellen Anpassung der Leuchtstufen den Taster gedrückt halten und warten bis der Lampenkopf aufblinkt (ca. jede Sekunde 1x). Lässt man den Taster los, wird das jeweilige Programm wie unten aufgeführt gewählt. Werkseinstellung Stufen: Erläuterung: 0.6W + 7W 75 + 700 Lumen 0.3W + 2.5W + 7W 35 + 270 + 700 Lumen 0.3W + 1.2W + 3.5W + 7W 35 + 140 + 400 + 700 Lumen rot + 0.3W + 3.5W + 7W Schwaches Rotlicht. In Verbindung mit Diffusor zum lesen von Karten rot + 0.6W + 3.5W Low Start an Lampe startet in der niedrigsten Stufe Low Start aus Lampe startet in der höchsten Stufe Battery high Warnung & Reservetank werden früh aktiviert Battery low Warnung & Reservetank werden spät aktiviert Alpines SOS Blinkt bis Akku leer ist oder Tastendruck SOS Blinkt bis Akku leer ist oder Tastendruck www.lupine.de...
  • Seite 7: Weitere Funktionen

    5 // Weitere Funktionen Spannungsanzeige: Beim Anstecken des Akkus an den Lampenkopf beginnen die roten LEDs zu blinken. Die Spannungsanzeige ermöglicht es den Akkuzustand abzuschätzen. Obere rote LEDs leuchten: 1 mal pro Volt Beispiel: Untere rote LEDs leuchten: 1 mal pro 1/10 Volt 7x obere rote LEDs 3x untere rote LEDs Anhaltspunkte: 7.3V Über 8V: voll 7.1 bis 7.9V: nachladen unter 7V: nicht oder nur bedingt einsatzbereit Akkuleerwarnung: Ist die Akkukapazität zu einem erheblichen Teil verbraucht, leuchten am Lampenkopf zusätzlich die roten LEDs. Ist der Akku leer blinkt der Lampenkopf einige Mal hintereinander rasch auf. Sofort stoppen! Die Lampe schaltet sich selbstständig aus. Reservetank: Im Anschluss steht nach dem wieder Einschalten noch für kurze Zeit ein Reservelicht zur Verfügung. Wichtig: den Akku unbedingt zeitnah laden. Tiefentladung schadet dem Akku. Ein aktivierter Reservetank wird durch blinkende rote LEDs angezeigt. www.lupine.de...
  • Seite 8: Lauflicht-Funktion

    Im Anschluss leuchten alle 5 LEDs dauerhaft. Zum Ausschalten des Rücklichts den Taster erneut drücken. Lauflicht-Funktion: Durch 3 kurze Tastenklicks wird ein Lauflicht aktiviert, bei dem durchlaufend jeweils eine LED abwechselnd leuchtet. Zum Ausschalten den Taster erneut drücken. www.lupine.de...
  • Seite 9: Safety Instructions

    In cases where the light is used in a public or commercial setting, users should be provided with training concerning the safety measures for laser light. • Carry a spare light with you at all times, as the product can potentially fail unexpectedly at any time. • If you transport the light, always disconnect the lamphead from the battery. • The Neo housing can heat up to 65°C/149°F . Without any movement, the lamp will dim down automatically to prevent overheating. • Lamphead and battery are waterproof and impact resistant according to the FL1 Standard, up to 2 meters. However keep in mind, this light is no diving light. www.lupine.de...
  • Seite 10 2 // Usage of the Light Switching on and off: The light is ready for use when delivered. All you have to do is charge the batte- ry. Press the button to switch on the light and cycle through the different light modes. Keep the button pressed to switch the light off. Charging the battery: Plug the included Wiesel charger into an outlet and then connect the battery to the Wiesel. Version 1: LED red on: charging LED green on: battery is fully charged Version 2: LED green on: charging LED off: battery is fully charged Warning! This charger is to be used to charge rechargeable Li-Ion batteries only. It is NOT suitable for charging NiMH batteries! Do NOT use non-rechargeable batteries. – Risk of explosion! This charger may be opened ONLY by the manufacturer! www.lupine.de...
  • Seite 11 3 // How to mount the light and battery? Helmetlight Neo 2: First attach the thin velcro with the Lupine logo to the helmetmount (see Fig. 1), then pull the other end of the velcro through the ventilation ope- nings available on your helmet and fix it on the other side of the helmet mount. Direct the light into a straight forward position and tighten the velcro to avoid slipping of the lighthead during use (see Fig. 2). With the provided extension, the battery may be carried in your jersey or backpack. The flexible velcro strap allows to put the battery directly on the helmet (see Fig. 3). Headlight Neo X2: Thanks to the battery FastClick-System you can carry all Lupine FastClick batteries directly on the headband (see Fig. 4). More Options: GoPro mount (Art.No. 1070) for the helmet and Quickrelease mount (Art.No. 225 and 231) for the handlebar. * To change the lamphead from one mount to another, you have to open the two screws on the lamphead with an 3mm allen key. www.lupine.de...
  • Seite 12 4 // Adjust the lightlevels The dimmlevels and a couple of other useful functions can be adjusted. Keep the button pressed and wait till the main light blinks up once a second. If you release the button, the particular program as shown below is chosen. Factory settings Dim levels: Explanation: 0.6W + 7W 75 + 700 Lumens 0.3W + 2.5W + 7W 35 + 270 + 700 Lumens 0.3W + 1.2W + 3.5W + 7W 35 + 140 + 400 + 700 Lumens Red + 0.3W + 3.5W + 7W Low redlight, in combination with the diffu- sor. Good for reading maps. Red + 0.6W + 3.5W Low Start on The light starts on lowest beam Low Start off The light starts on high beam Battery high Warning & Reservepower activated early Battery low Warning & Reservepower activated later Alpine SOS Blinks till battery is empty or button pushed SOS Blinks till battery is empty or button pushed www.lupine.de...
  • Seite 13: Additional Functions

    5 // Additional functions Voltage test: After connecting the lamphead to the battery, the upper and lower red LEDs will blink to indicate the battery voltage. The voltage helps to interpret the remaining capacity. For example: 7x upper red LEDs Upper red LEDs blinks: 1 time each volt 3x lower red LEDs Lower red LEDs blinks: 1 time each 1/10 volt 7.3V Hints: More than 8V = battery fully charged 7.1 to 7.9V = recharge Below 7V = not or only partly ready for use Low battery warning: Once the remaining capacity dropped by a relevant amount, the lampheads red LEDs will turn on. If the battery is empty, the lamphead itself will start to flash a couple of times. Stop immediately! The light will switch off by itself. Reservepower: After switching the light on again, reserve power is available for a short while. Slow down since the light will be switched off automatically. Important: charge the battery in a short while. Deep discharging will harm the battery. An activated reservepower will be shown by the red LEDs flashing. www.lupine.de...
  • Seite 14 5 LEDs will operate continuously. To switch off the taillight, simply press the pad again. Moving light: Press the touch pad three times to activate the moving light. To switch it off press the button another time. www.lupine.de...
  • Seite 15 Letzte Hinweise / Miscellaneous Regelungen/Regulations: Die Verwendung dieses Beleuchtungssystems für bestimmte Zwecke kann in Europa von Land zu Land unterschiedlich geregelt sein. Informieren Sie sich über die in Ihrem Land gültigen Bestimmungen. The laws governing the allowable application domain for this lighting system may vary from one country to another. We recommend that you inform yourself about the relevant laws in this domain in your country. Änderungen/ Changes: Weiterentwicklungen der Produkte und technische Änderungen vorbehalten. Rights for improvements and modifications of our products reserved. Garantie/Warranty: Innerhalb der Garantiezeit von 24 Monaten umfasst die Gewährleistung alle Komponenten und deckt fertigungsbedingte Mängel ab. Ausgenommen ist jedoch der Akku. Des Weiteren erlöschen die Garantieansprüche bei nicht be- stimmungsgemäßer Benutzung oder Veränderungen jeglicher Art. The product's two year warranty applies to all components, as well as any ma- nufacturing defect. The warranty does not include the battery, however. In ad- dition, any modification or improper use of the product will void the warranty. www.lupine.de...
  • Seite 16: Technical Data

    2.5W 6:30h *Runtime varies according to the battery age, condi- 1.2W tion, as well the ambient 0.6W temperature. 0.3W Red LEDs Weight: Neo Lamphead: Neo X2 Smartcore: 175g Wiesel Charger: Neo X2: 195g Input Voltage: 100 – 240V~, 50-60Hz Neo X4: 195g Charging current: 1.2A Neo 2: 175g Neo 4: 175g Register your Neo: Battery: register.lupine.de Neo 2/X2 2.2 Ah / 7.2V Li-Ion registrierung.lupine.de Neo 4/X4 3.3 Ah / 7.2V Li-Ion Protection Class: IP68 Operating temperature: -25°C to +70°C www.lupine.de...

Diese Anleitung auch für:

Neo x2 smartcoreNeo 2Neo 4Neo x2Neo x4

Inhaltsverzeichnis