Optoma ZF2100 Schnellstartanleitung
Quicklinks
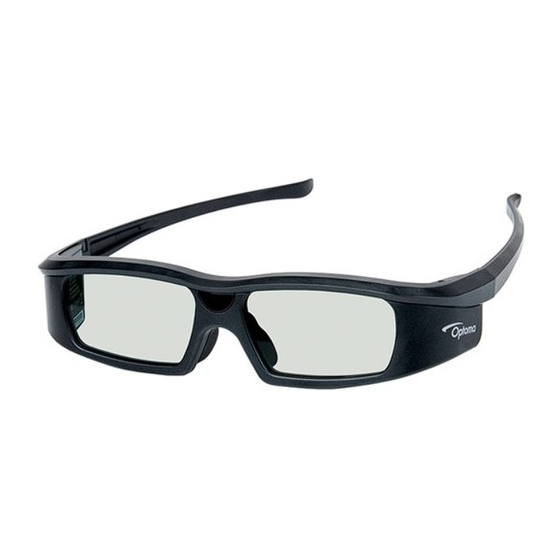
Optoma 3D Glasses – Quick Setup Guide
It is recommended that you charge your 3D glasses for a minimum of 3 hours, before first use, using the supplied
charging cable. (The glasses can still be used while charging)
1
2
Power button
3
Charging
(Blue LED will light whilst charging)
1.
Connect the emitter to your projector's "3D SYNC OUT" port using the supplied
cable. (3.5mm jack / VESA 3-PIN mini DIN)
NB: Ensure that your projector is connected to a compatible 3D source and that
the "3D Sync Out" port is enabled. (This is usually automatic when 3D content
is supplied via HDMI 1.4)
2.
While searching for a 3D signal, the LEDs on the emitter will display a red moving
sequence. When a 3D signal is detected, they will turn solid blue.
3.
Turn on your 3D Glasses by pressing the power button once. The blue LED will flash.
You are now ready for 3D.
(After use, don't forget to recharge your glasses using the supplied cable.)
For full instructions please visit the Optoma website.

Verwandte Anleitungen für Optoma ZF2100


Inhaltszusammenfassung für Optoma ZF2100
- Seite 1 Turn on your 3D Glasses by pressing the power button once. The blue LED will flash. You are now ready for 3D. (After use, don’t forget to recharge your glasses using the supplied cable.) For full instructions please visit the Optoma website. Power button Charging...
- Seite 2 (3) Encienda sus gafas 3D presionando el boton de encendido una sola vez. El LED azul parpadeará. á t (Después de usar sus gafas, no olvide recargar sus gafas usando el cable proporcionado.) Para instrucciones completas por favor visite la página web de Optoma.