Inhaltsverzeichnis
Werbung
Verfügbare Sprachen
Verfügbare Sprachen
Quicklinks
SPEAKER UNIT
INSTALLATIONANLEITUNG
MANUEL D'INSTALLATION
MANUALE D'INSTALLAZIONE : UNITÀ DI DIFFUSIONE
MANUAL DE INSTALACION
TS-C421SPG
TS-C421SPGU
SPEAKER UNIT FOR A JVC PLASMA DISPLAY MONITOR
LAUTSPRECHEREINHEIT FÜR JVC PLASMA BILDSCHIRM
ENCEINTE POUR UN MONITEUR DE VISUALISATION PLASMA
UNITÀ DI DIFFUSIONE PER MONITOR CON SCHERMO AL PLASMA JVC
UNIDAD DE ALTAVOZ PARA UN MONITOR PLASMA DISPLAY
: LAUTSPRECHEREINHEIT
: ENCEINTE
: UNIDAD DE ALTAVOZ
:
INSTALLATION MANUAL
LCT1425-001A
Werbung
Inhaltsverzeichnis

Verwandte Anleitungen für JVC TS-C421SPGU


Inhaltszusammenfassung für JVC TS-C421SPGU
- Seite 1 TS-C421SPGU SPEAKER UNIT FOR A JVC PLASMA DISPLAY MONITOR LAUTSPRECHEREINHEIT FÜR JVC PLASMA BILDSCHIRM ENCEINTE POUR UN MONITEUR DE VISUALISATION PLASMA UNITÀ DI DIFFUSIONE PER MONITOR CON SCHERMO AL PLASMA JVC UNIDAD DE ALTAVOZ PARA UN MONITOR PLASMA DISPLAY LCT1425-001A...
-
Seite 3: Safety Precautions
SAFETY PRECAUTIONS Regarding the “safety precaution” Failure to observe what is symbols mentioned under this symbol could lead to physical injury and WARNING Various symbols are indicated on the product and in this material damage. Extreme Installation Manual. caution should be exercised. These symbols are provided in order to prevent physical injury and material damage. - Seite 4 Attaching the front speakers to displays other than the GD-V42XX series Using the speaker brackets, you can attach the front speakers to the side of the display. • For attaching the front speakers to the GD-V42XX series display, see page 4. •...
- Seite 5 Connecting the speaker cord Attach to the speakers When you connect the supplied speaker cord to the terminal clamp of the speakers, fold the end of each speaker cord to avoid short-circuit. 1. Fold the end of each speaker 2. Press and hold the terminal 3.
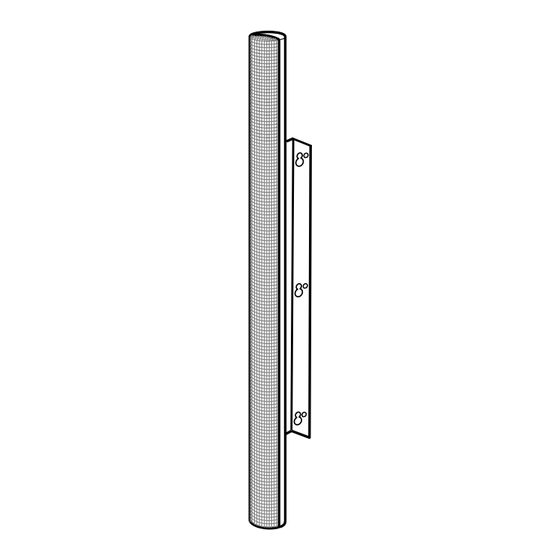
- Seite 6 Attaching the front speakers to the GD-V42XX series display Using the speaker brackets, you can attach the front speakers to the side of the display. • Do not loosen the screws other than the protective screws. • Use only the supplied mounting screws for attaching the front speaker. 1.
-
Seite 7: Specifications
Connecting the speaker cord Attach to the speakers When you connect the supplied speaker cord to the terminal clamp of the speakers, fold the end of each speaker cord to avoid short-circuit. 1. Fold the end of each speaker 2. Press and hold the terminal 3. -
Seite 9: Sicherheitsvorkehrungen
SICHERHEITSVORKEHRUNGEN Symbole für Nichtbeachtung des Hinweises unter Sicherheitsvorkehrungen dem Symbol kann zu Verletzungen und Materialschäden führen. Es WARNUNG Verschiedene Symbole sind auf dem Produkt und in muss mit äußerster Vorsicht vorge- dieser Bedienungsanleitung dargestellt. gangen werden. Diese Symbole sollen Verletzungen und Materialschäden verhindern. - Seite 10 Anschließen der Frontlautsprecher an Displays, die nicht zur Serie GD-V42XX gehören Sie können die Frontlautsprecher mit den Lautsprecherhalterungen an den Seiten des Displays befestigen. • Weitere Informationen zum Befestigen der vorderen Lautsprecher an Monitore der Serie GD-V42XX finden Sie auf Seite 4.
-
Seite 11: Anschluss Der Lautsprecherkabel
Anschluss der Lautsprecherkabel Anschluss an die Lautsprecher Wenn Sie das mitgelieferte Lautsprecherkabel an die Anschlussklemme die Lautsprecher anschließen, biegen Sie das Ende jedes Lautsprecherkabels um, um einen Kurschluss zu vermeiden. 1. Biegen Sie die Enden der 2. Drücken und halten Sie die 3. - Seite 12 Anschließen der Frontlautsprecher an Displays der Serie GD-V42XX Sie können die Frontlautsprecher mit den Lautsprecherhalterungen an den Seiten des Displays befestigen. • Lösen Sie keine anderen Schrauben, außer die Schutzschrauben. • Nur die im Lieferumfang enthaltenen Befestigungsschrauben verwenden, um den Frontlautsprecher zu befestigen. 1.
-
Seite 13: Technische Daten
Anschluss der Lautsprecherkabel Anschluss an die Lautsprecher Um einen Kurzschluss zu vermeiden, biegen Sie das mitgelieferte Lautsprecherkabel an beiden Enden um, bevor Sie es an der Anschlussklemme des Lautsprechers befestigen. 1. Biegen Sie die Enden der 2. Drücken und halten Sie die 3. -
Seite 15: Precautions De Securite
PRECAUTIONS DE SECURITE À propos des symboles des Ne pas respecter ce qui est “Précautions de sécurité” mentionné sous ce symbole peut entraîner des blessures AVERTISSEMENT Divers symboles apparaissent sur le produit et dans ce physiques et des dommages manuel d’installation. matériels. - Seite 16 Fixation des enceintes avant sur un écran qui n’appartient pas à la série GD-V42XX En utilisant les supports d’enceinte, vous pouvez fixer les enceintes avant sur les côtés de l’écran. • Pour fixer les enceintes avant aux écrans de la série GD-V42XX, référez-vous à la page 4. •...
- Seite 17 Conexion des cordon d’enceinte Connexion aux enceintes Pour connecter le cordon d’enceinte fourni au serre-câble de la prise, tordez l’extrémité de chaque cordon d’enceinte afin d’éviter tout court-circuit. 1. Pliez l’extrémité de chaque 2. Maintenez pressé le serre- 3. Insérez le cordon d’enceinte et cordon d’enceinte.
- Seite 18 Fixation des enceintes avant sur un écran de la série GD-V42XX En utilisant les supports d’enceinte, vous pouvez fixer les enceintes avant sur les côtés de l’écran. • Ne desserrez aucunes autres vis que les vis de protection. • Utilisez uniquement les vis de montage fournies pour fixer les enceintes avant. 1.
-
Seite 19: Spécifications
Conexion des cordon d’enceinte Connexion aux enceintes Pour connecter le cordon d’enceinte fourni au serre-câble de la prise, tordez l’extrémité de chaque cordon d’enceinte afin d’éviter tout court-circuit. 1. Pliez l’extrémité de chaque 2. Maintenez pressé le serre- 3. Insérez le cordon d’enceinte et câble. -
Seite 21: Misure Di Sicurezza
MISURE DI SICUREZZA Simboli delle “misure di sicurezza” La mancata osservanza di quanto riportato in Sul prodotto e nel presente Manuale di installazione corrispondenza di questo AVVERTENZA sono presenti vari simboli. simbolo potrebbe comportare Tali simboli hanno la funzione di prevenire lesioni fisiche lesioni fisiche e danni materiali. - Seite 22 Collegamento dei diffusori anteriori a schermi di serie differenti dalla GD-V42XX Per fissare i diffusori anteriori ai lati dello schermo utilizzare le staffe sui diffusori. • Per collegare i diffusori anteriori allo schermo serie GD-V42XX, vedere a pagina 4. • Nelle illustrazioni in questa sezione, vengono mostrati gli schermi serie GM-P420. La posizione delle viti di montaggio su altri schermi è...
- Seite 23 Collegamento dei cavo del diffusore Collegamento ai diffusorispeakers Durante la procedura di collegamento del cavo del diffusore in dotazione al morsetto del terminale sullo diffusore, ripiegare l’estremità di ciascun cavo per evitare il rischio di cortocircuito. 1. Piegare l’estremità di ciascun 2.
- Seite 24 Collegamento del diffusore anteriore allo schermo serie GD-V42XX Per fissare i diffusori anteriori ai lati dello schermo utilizzare le staffe sui diffusori. • Allentare soltanto le viti di protezione. • Per il collegamento del diffusore anteriore, utilizzare soltanto le viti di montaggio in dotazione. 1.
- Seite 25 Collegamento dei cavo del diffusore Collegamento ai diffusorispeakers Durante la procedura di collegamento del cavo del diffusore in dotazione al morsetto del terminale sullo diffusore, ripiegare l’estremità di ciascun cavo per evitare il rischio di cortocircuito. 1. Piegare l’estremità di ciascun 2.
-
Seite 27: Precauciones De Seguridad
PRECAUCIONES DE SEGURIDAD Acerca de las símbolos de Señala una situación “precauciones de seguridad” potencial de riesgo que, si no se evita, puede ocasionar ADVERTENCIA Se indican diversos símbolos en el producto en sí y en lesiones personales y daños el manual de instalación. - Seite 28 Fijación de los altavoces delanteros a displays que no sean de la serie GD-V42XX Utilizando los soportes para altavoz, podrá fijar los altavoces delanteros a los laterales del display. • Con respecto a la fijación de los altavoces delanteros a un display de la serie GD-V42XX, consulte la página 4. •...
- Seite 29 Conexión de los cable de altavoz Fijación a los altavoces Cuando conecte el cable de altavoz suministrado a la abrazadera de terminal del altavoz, doble el extremo de cada cable de altavoz para evitar cortocircuitos. 1. Doble el extremo de cada cable 2.
- Seite 30 Fijación de los altavoces delanteros a un display de la serie GD-V42XX. Utilizando los soportes para altavoz, podrá fijar los altavoces delanteros a los laterales del display. • No afloje otros tornillos que no sean los tornillos de protección. • Utilice solamente los tornillos de montaje suministrados para fijar el altavoz delantero. 1.
-
Seite 31: Especificaciones
Conexión de los cable de altavoz Fijación a los altavoces Cuando conecte el cable de altavoz suministrado a la abrazadera de terminal del altavoz, doble el extremo de cada cable de altavoz para evitar cortocircuitos. 1. Doble el extremo de cada cable 2. - Seite 33 安全注意事項 關于“安全注意事項”之符號 不遵守該符號下面述及的規約將引起 在產品上及本安裝手冊中引用了各種符號。 警告 根據情況引用這些符號是為了防止造成人身傷害和機器 人身傷害和機器損傷 。特別需要引 損傷。在閱讀本說明書之前請務必理解符號之含意。 起注意。 符號之說明 • 切勿改造(拆卸)前置揚聲器。 • 本符號(包括警告在內)表示需要注意的事項。 由此可能引起火災或觸電。 一般注意 不遵守該符號下面述及的規約將引起 注意 人身傷害和機器損傷 。特別需要引 • 下列符號表示禁止執行的事項。 起注意。 禁止拆卸 禁止 • 僅在完成所有所需設備之連接之后才可將電 源線插頭插入牆上插座。 • 下列符號表示要求執行的事項(強迫事項和指令事 在電源線插頭插入牆上插座的狀態下進行連 項) 。 接操作可能引起觸電。 一般指令 配件 請檢查隨機提供的配件是否齊全。括弧內的數字表示配件的數量。若有任何遺漏,請立即與經銷商聯絡。 揚聲器導線 線夾(2) 組裝用螺絲...
- Seite 34 將前置揚聲器安裝至 GD-V42XX 系列以外的顯示屏 您可以利用揚聲器托架將前置揚聲器安裝到顯示屏的側邊上。 • 安裝前置揚聲器至 GD-V42XX 系列顯示屏上時,請參閱第 4 頁。 • 在此部分中,插圖所示的是 GM-P420 系列顯示屏。其它顯示屏組裝用螺絲基本上與 GM-P420 系列顯示屏相 同,因此您可按照下述過程來為其安裝前置揚聲器。 • 切勿擰松組裝用螺絲以外的其它螺絲。 • 僅能使用已經裝在顯示屏上的螺絲。 1. 擰松顯示屏后面板上的組裝用螺絲。 使用十字型螺絲起子擰松組裝用螺絲,讓螺絲露出 大約 3 mm 長。 組裝用 螺絲 組裝用 螺絲 2. 將前置揚聲器放到顯示屏的后面板上。 將揚聲器托架鉤掛在三個組裝用螺絲孔(A)上,並向下推。 組裝用螺絲 前置揚聲器 螺絲孔 (A) 3. 使用十字型螺絲起子牢固擰緊組裝用螺絲。 前置揚聲器...
- Seite 35 連接揚聲器導線 接至揚聲器 當將隨機提供的揚聲器導線連接到揚聲器端子卡夾裡時,須摺回每條揚聲器導線的末端以避免短路。 1. 摺回每條揚聲器導線的末端。 2. 按住端子卡夾。 3. 插入揚聲器導線,並將手指從 端子卡夾上鬆開。 • 將帶有黑色條紋的導線連接至 · (黑) 端子,而將另一條導線連接至 ª (紅) 端子。 • 請注意,如果揚聲器導線的極性 ( ª 和 · ) 連接錯誤會降低立體聲效果和聲音質量。 接至顯示屏 1. 掀開端子卡夾。 2. 插入揚聲器導線。 3. 關上端子卡夾。 • 將帶有黑色條紋的導線連接至 · (黑) 端子,而將另一條導線連接至 ª (紅) 端子。 •...
- Seite 36 將前置揚聲器安裝至 GD-V42XX 系列顯示屏 您可以利用揚聲器托架將前置揚聲器安裝到顯示屏的側邊上。 • 切勿擰松保護用螺絲以外的其它螺絲。 • 僅能使用隨機提供的組裝用螺絲安裝前置揚聲器。 1. 用螺絲起子擰下固定在顯示屏后面板上的 保護用螺絲。 在擰下這些螺絲之前,須明確擰下它們的 目的是要安裝前置揚聲器。 保護用 螺絲 保護用 螺絲 2. 將前置揚聲器放到顯示屏的后面板上,讓揚聲器托架上的螺絲孔(B)對準顯示屏 上的螺絲孔。 螺絲孔 (B) 前置揚聲器 3. 使用十字型螺絲起子牢固擰上 3 個隨機 提供的組裝用螺絲。 請將剩下的 3 個隨機提供的組裝用螺絲用在另一側。 前置揚聲器 前置揚聲器 • 移動顯示屏時,切勿握持揚聲器移動。 • 所用揚聲器為非抗磁型揚聲器。 在設定揚聲器時,切勿在附近放置任何磁力易感性物質,如錄像帶。...
- Seite 37 連接揚聲器導線 接至揚聲器 當將隨機提供的揚聲器導線連接到揚聲器端子卡夾裡時,須折回每條揚聲器導線的末端以避免短路。 1. 折回每條揚聲器導線的末端。 2. 按住端子卡夾。 3. 插入揚聲器導線,並將手指從 端子卡夾上鬆開。 • 將帶有黑色條紋的導線連接至 · (黑)端子,而將另一條導線連接至 ª (紅)端子。 • 請注意,如果揚聲器導線的極性( ª 和 · )連接錯誤會減低立體聲效果和聲音質量。 接至顯示屏 1. 按住端子卡夾。 2. 插入揚聲器導線,並將手指 從端子卡夾上鬆開。 • 將帶有黑色條紋的導線連接至 · (黑)端子,而將另一條導線連接至 ª (紅)端子。 • 請注意,如果揚聲器導線的極性( ª 和 · )連接錯誤會降低立體聲效果和聲音質量。 捆紮揚聲器導線...
- Seite 40 VICTOR COMPANY OF JAPAN, LIMITED © 2003 VICTOR COMPANY OF JAPAN, LIMITED 0303-T-MW-MB...