Inhaltsverzeichnis
Werbung
Verfügbare Sprachen
Verfügbare Sprachen
Quicklinks
Werbung
Kapitel
Inhaltsverzeichnis
Fehlerbehebung

Inhaltszusammenfassung für Heider Pro5 PmR446
- Seite 3 ENGLISH 2-29 DEUTSCH 31-59 FRANÇAIS 61-89 ESPAÑOL 91-119 ITALIANO 121-149 TÜRKÇE 151-179...
-
Seite 4: Inhaltsverzeichnis
RADIO – CTSS CHANNEL, NUMBER AND FREQUENCY CODES ..........3 GENERAL DEFINITION ........................4 WARNING/PRECAUTIONS ......................5 REMOVING FROM THE PACKAGE AND CONTROLLING THE EQUIPMENT ......6 Standard Accessories ............................6 Optional Accessories ............................6 INSERTING THE ACCESSORIES ....................7 Inserting The Belt Clip .............................7 Inserting The Headphones And The Microphone .................7 Inserting The Battery ............................7 Charging The Battery ............................8 KNOW THE DEVICE ........................9... -
Seite 5: Radio - Ctss Channel, Number And Frequency Codes
PMR 446 RADIO – CTSS CHANNEL, NUMBER AND FREQUENCY CODES CTCSS NUMBER FREQUENCY (hz) CTCSS NUMBER FREQUENCY (hz) CTCSS Off 131.8 67.0 136.5 71.9 141.3 74.4 146.2 77.0 151.4 79.7 156.7 82.5 162.2 85.4 167.9 88.5 173.8 91.5 179.9 94.8 186.2 97.4 192.8... -
Seite 6: General Definition
GENERAL DEFINITION HEIDER PRO5 PMR 446 hank you for your trust in Heider PRO5. Please read User’s Manual carefully to obtain information on various features of our radio. This device is a non-licensed FM radio which ensures two-way amateur radio... -
Seite 7: Warning/Precautions
WARNINGS / PRECAUTIONS HEIDER PRO5 PMR 446 • Do not have your device repaired by anyone else than authorized service technicians. • Do not let the radio expose to direct sunlight for too long. • Do not put the radio on a nonstable surface. • Protect the radio against dust and bad weather conditions. • Do use the radio or charge the battery in areas where there is a risk of explosion. SAFETY It is important for user to be aware of the risks emerging from operating the radio. WARNING Please switch your radio off in the places given below: • Areas where explosions may occur (inflammable gas, dust particles, metallic... -
Seite 8: Removing From The Package And Controlling The Equipment
REMOVING FROM THE PACKAGE HEIDER PRO5 PMR 446 AND CONTROLLING THE EQUIPMEN Remove the radio from its box carefully. You should check the parts mentioned below. Contact us if there is a missing or damaged part. STANDARD ACCESSORIES PART ITEM... -
Seite 9: Inserting The Accessories
INSERTING THE ACCESSORIES HEIDER PRO5 PMR 446 INSERTING THE BELT CLIP If there is a need to use the belt clip, attach it behind the battery shown in image 1. Image 1 Warning! Do not use adhesives to support the screw while inserting the belt clip. -
Seite 10: Charging The Battery
INSERTING THE ACCESSORIES HEIDER PRO5 PMR 446 CHARGING THE BATTERY If the battery has not been used before or the bat- tery is down, the battery can be charged by con- necting to the EXT DC socket of the charging de- vice as shown in the image. -
Seite 11: Know The Device
KNOW THE DEVICE HEIDER PRO5 PMR 446 English... -
Seite 12: Explanations Of The Control Buttons
EXPLANATIONS OF THE CONTROL BUTTONS HEIDER PRO5 PMR 446 Main CALL button is used for adjusting the frequency of operation, voice level, menu choices and other settings. In order to switch this CALL button on, pull the button to [CALL] unlock the mechanical call lock and then push the CALL button. -
Seite 13: Lcd Screen
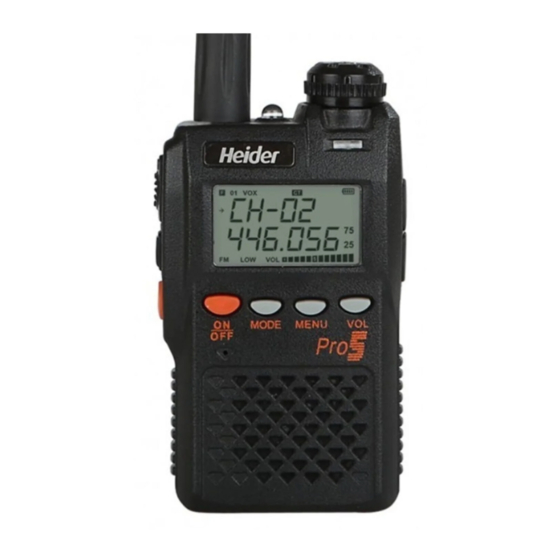
LCD SCREEN HEIDER PRO5 PMR 446 The screen icons are shown during certain procedures or while certain Ch-01 features are active. Knowing the meaning of the indicators and how to 446.006 adjust radio functions will help you to operate the radio easily. -
Seite 14: Menu Explanations
MENU EXPLANATIONS HEIDER PRO5 PMR 446 MENU EXPLANATION SETTINGS ARTICLE RXCODE OFF/CTCSS/DCS SQL (Squelch) LIGHT (LCD Lighting) OFF/ON/Key SOUND (Keypad Sound) OFF/ON OFF/1-9 SAVE (Battery Saving) ON/OFF TOT (Time-Out Timer) OFF/30/60/90/120/150/180S SCANM (Scan Mode) TO/CO BCLO (Busy Channel Lock-Out) ON/OFF... - Seite 15 Push [MENU] button, rotate [CALL] button clockwise or counter LIGHT clockwise, switch to MENU [03] LIGHT. Push [MENU] button, rotate [CALL] button clockwise or counter BEEP clockwise, switch to MENU [04] BEEP. Push [MENU] button, rotate [CALL] button clockwise or counter clockwise, switch to MENU [05] VOX.
-
Seite 16: Operating
OPERATING HEIDER PRO5 PMR 446 SWITCHING ON / OFF Make sure that the battery is inserted and full. Insert the antenna to the ANTENNA socket in the upper top panel. Push [ON/OFF] button and DC voltage will be displayed on LCD for 2 seconds and beeping voice will be heard. -
Seite 17: Advanced Operation
ADVANCED OPERATION HEIDER PRO5 PMR 446 RXCODE In certain situations, you can want to hear the calls only from certain persons or groups. In such situations you can ignore unwanted incoming calls from other persons using the same frequency by using selective call. -
Seite 18: Sql (Squelch)
5. Push [MENU] or [PTT] buttons to EXIT to normal operation mode. LIGHT (LCD Lighting ON/Button/OFF) Heider PRO5 has a red lighting on its monitor for a comfortable use at nights. Red lighting reduces the distortions at night visions to a level of minimum while ensuring that your screen is clearly visible in the dark. -
Seite 19: Beep (Keyboard Sounds On/Off)
ADVANCED OPERATION HEIDER PRO5 PMR 446 The procedure to adjust lighting mode is as follows: 1. Push [MENU] button, rotate [CALL] button, switch to MENU [04] LIGHT. 2. Push [U/V] button to enter adjustment mode. 3. Make the ON/OFF and Key adjustments by rotating [CALL] button clockwise or counter clockwise. -
Seite 20: Vox (Voice Operated Exchange)
ADVANCED OPERATION HEIDER PRO5 PMR 446 VOX (Voice Operated Exchange) VOX, resolves the requirement to change the transmission mode manually each time you want to send a message. The radio automatically switches to transmission mode when VOX switch system senses that you start to speak to the microphone. Please follow the instructions given below: 1. -
Seite 21: Save Battery Saving
HEIDER PRO5 PMR 446 SAVE (Battery Saving) Heider PRO5 has battery saving feature for a long term transmission. In case the incoming signal is strong, power output is automatically adjusted to reduce it with this feature. For instance, there is no need to strong power output to access silencing in close distances to repetitive station. -
Seite 22: Tot (Time-Out Timer)
SCANM (Scan Mode) Heider PRO5 allows you to scan memory channels, operation bands or a section of these bands. The radio automatically pauses on the encountered signals and allows communicatioın with the requested station. Follow the instructions given below to... -
Seite 23: Bclo (Busy Channel Lock-Out)
ADVANCED OPERATION HEIDER PRO5 PMR 446 1. Push [MENU] button, rotate [CALL] button, switch to MENU [16] SCANM. 2. Enter adjustment mode after pressing [U/V] button. 3. Adjust SCANM: TO/CO setting by rotating [CALL] button clockwise or countercloskwise. 4. Push [U/V] button to save the setting. -
Seite 24: Additional Functions And Settings
ADDITIONAL FUNCTIONS AND SETTINGS HEIDER PRO5 PMR 446 EMERGENCY ALARM FEATURE 1. Hold down [F/ALERT] button for approximately 1-2 seconds. 2. Adjust the setting to emergency alarm mode. And the emergency alarm will be heard. 3. Push [PPT] button to exit to normal operation mode. -
Seite 25: Fm Radio Scan
ADDITIONAL FUNCTIONS AND SETTINGS HEIDER PRO5 PMR 446 FM RADIO SCAN Push [F/ALERT]button to scan the entire band on FM Radio mode and then push [MENU]button. Rotate [CALL] button clockwise or counter clockwise to scan the band from low to high or from high to low. The scan will stop on the requested channel when a certain channel is scanned for. -
Seite 26: Technical Specifications
TECHNICAL SPECIFICATIONS HEIDER PRO5 PMR 446 Frequency Range PMR446 (446.00625MHz-446.09375MHz) Channel Capacity 8 Channels Operation Voltage 3.7V Standard Battery 1500mAh Battery Life (5-5-90 operation cycle) 8-12 hours Frequency Stability 2.5 ppm (-20°C - +60°C) Operation Temperature -30°C - +60°C Antenna Impedence 50 Ω... -
Seite 27: Declaration Of Conformity
Radio and Telecommunication Terminal Equipment 1999/5/EC (T & TTE) Regulation Company: Metem Teknoloji Sistemleri San. Ve Tic. Ltd. Sti. Kemankes Mah. Gumus Halka Sok. Bozburun Is Hanı No:4 Kat:2 Karakoy / Beyoglu / ISTANBUL / TURKEY All of the responsibilities of the product titled as PMR446 PRO5 were undertaken and all of the required terms were fulfilled in scope of 1999/e/EC Regulation and its conformity with the below-mentioned standards are accepted and declared by us: Medical: EN 60950-1:2006+A11:2009 EMC: EN 301 489-1 V1.9.2... -
Seite 28: Warranty Certificate
Protection and Market Surveillance pursuant to Law on Consumer Protection No. 4077 and the Regulation on Certificate of Warranty Implementation Principles entering into force based on this Law. Manufacturer and Importer Company’s Title : METEM TEKNOLOJI SISTEMLERI SAN. VE TIC. LTD. STI. Address : Kemankes Mah. Mumhane Cad. Gumus Halka Sk. No:4 Kat:2 Karakoy / Istanbul / TURKEY Phone : +90 212 292 24 24 Fax : +90 212 292 24 48 Product Type : RADIO DEVICES Brand : Heider Model : Pro5 Banderol and Serial Number : ..........................Date and Place of Delivery : ..........................Warranty Period : 2 Years Minimum Period of Repair : 20 work days Distributor Company’s Title : ..........................Address : .......................... -
Seite 29: Terms Of Warranty
1. The warranty period begins as of the date of delivery of the product and is 2 (two) years. 2. The entire product including all of its components is covered by the warranty of our Company. 3. In the event of a product failure within the period of warranty, the duration of time spent for repair is added to the duration of warranty. This duration starts with the date of notification of the malfunction to the service station and in the event that the service station is not available, to the seller, dealer, agency, representative, exporter or importer/ manufacturer. In case the malfunction of the product is not resolved within 15 days,... - Seite 30 ATTENTION You need to submit your Certificate of Warranty and Invoice for all of your applications. Please keep your certificates. Do not open your device in no circumstances, do not operate it with any other accessories than those given to you or do not try to repair it by yourself. Otherwise, the warranty of your device will be void. Pay attention not to damage the device by impact, high temperature or excessive dust. The problems to occur as a result of these reasons are not covered by the warranty. The warranty of your device will be void if your device is opened by unauthorized people. No reimbursement or free service is rendered for devices with void warranty.
-
Seite 31: Radio Dcs Channel, Number And Frequency Codes
PMR 446 RADIO DCS CHANNEL, NUMBER AND FREQUENCY CODES FREQUENCY FREQUENCY FREQUENCY FREQUENCY NUMBER (hz) NUMBER (hz) NUMBER (hz) NUMBER (hz) - Seite 32 w w w . m e t e m t e k n o l o j i . c o m w w w . m e t e m . e u...
- Seite 33 ENGLISH 2-29 DEUTSCH 31-59 FRANÇAIS 61-89 ESPAÑOL 91-119 ITALIANO 121-149 TÜRKÇE 151-179...
- Seite 34 FUNK - CTSS KANAL, NUMMER UND WELLENCODE ................33 ALLGEMEIN ................................34 HINWEISE / VORSICHTSMASSNAHMEN ..................... 35 ENTNAHME AUS DER VERPACKUNG UND ÜBERPRÜFUNG DES EQUIPMENTS....36 Standard Zubehör .............................. 36 Optionales Zubehör ............................36 ANBRINGUNG DES ZUBEHÖRS ....................37 Anbringung Des Gürtelclipses ........................37 Anbringung Der Kopfhörer Und Des Mikrofons ..................
-
Seite 35: Funk - Ctss Kanal, Nummer Und Wellencode
PMR 446 RADIO – CTSS CHANNEL, NUMBER AND FREQUENCY CODES CTCSS NUMMER WELLENCODE (hz) CTCSS NUMMER WELLENCODE (hz) CTCSS Off 131.8 67.0 136.5 71.9 141.3 74.4 146.2 77.0 151.4 79.7 156.7 82.5 162.2 85.4 167.9 88.5 173.8 91.5 179.9 94.8 186.2 97.4 192.8... -
Seite 36: Allgemein
ALLGEMEIN HEIDER PRO5 PMR 446 ielen Dank, dass Sie sich für unser Funk- gerät entschieden haben. Um sich über die verschiedenen technischen Eigensc- haften des Funkgeräts zu informieren, lesen Sie bitte aufmerksam die Bedienungsanleitung. Dieses Gerät der Klasse PMR446 ist ein lizenzfrei- es mikro-miniatur FM Funkgerät, das mit seiner... -
Seite 37: Hinweise / Vorsichtsmassnahmen
HINWEISE / VORSICHTSMASSNAHMEN HEIDER PRO5 PMR 446 • Lassen Sie das Gerät von niemand anderem als den Technikern des zuständigen Dienstleistungsservices erstmals in Betrieb nehmen oder reparieren. • Zerlegen Sie das Funkgerät nicht in seine Einzelteile und versuchen Sie nicht es zu reparieren. • Setzen Sie das Funkgerät nicht für längere Zeit direkter Sonnenstrahlung aus und bewahren Sie es nicht an zu heißen Orten auf. • Legen Sie das Funkgerät nicht auf instabile Oberflächen. • Schützen Sie das Funkgerät vor Staub, Feuchtigkeit und Nasswerden. • Schalten Sie das Funkgerät an Orten oder in Situationen mit Explosionsgefahr nicht ein, laden Sie die Batterien in den obengenannten Umständen nicht auf. SICHERHEIT Der Nutzer muss sich über die Risiken des Gebrauchs von Funkgeräten im Klaren sein. ACHTUNG Bitte schließen Sie ihr Funkgerät an folgenden Orten: • An Orten, wo Explosionen entstehen können oder sich explosive Stoffe... -
Seite 38: Entnahme Aus Der Verpackung Und Überprüfung Des Equipments
ENTNAHME AUS DER VERPACKUNG UND HEIDER PRO5 PMR 446 ÜBERPRÜFUNG DES EQUIPMENTS Nehmen Sie das Funkgerät vorsichtig aus der Verpackung. Wir schlagen Ihnen vor, zu überprüfen, ob die unten genannten Bestandteile alle vorhanden sind. Sollte der Fall eintreten, dass Teile fehlen oder beschädigt sind, so wenden Sie sich bitte direkt an uns. -
Seite 39: Anbringung Des Zubehörs
ANBRINGUNG DES ZUBEHÖRS HEIDER PRO5 PMR 446 ANBRINGUNG DES GÜRTELCLIPSES Bringen Sie den Gürtelclips wie auf Abbildung 1 an der Hinterseite der Batterie an. Achtung! Verwenden Sie bei der Anbringung des Gürtelclipses keine Klebstoffe um die Schrauben zu fixieren. Denn die Acrylsäure in Klebstoffen kann das Batter- iegehäuse beschädigen. -
Seite 40: Aufladen Der Batterie
ANBRINGUNG DES ZUBEHÖRS HEIDER PRO5 PMR 446 AUFLADEN DER BATTERIE Wenn die Batterie zuvor noch nicht in Gebrauch genom- men wurde oder wenn die Batterie leer ist, kann sie -wie auf der Abbildung gezeigt wird- an den EXT DC Stecker des Ladegerätes gesteckt und so aufgeladen werden. -
Seite 41: Das Gerät Kennen Lernen
DAS GERÄT KENNEN LERNEN HEIDER PRO5 PMR 446 Deutsch... -
Seite 42: Erklärung Der Kontrolltasten
ERKLÄRUNG DER KONTROLLTASTEN HEIDER PRO5 PMR 446 Der SUCHE-Knopf wird zur Einstellung von Arbeitsfrequenz und Tonlautstärke, sowie für die Menü-Auswahlen und weitere Einstellungen verwendet. Um den SUCHE-Knopf [SUCHE] zu drehen, drücken Sie den Knopf um die mechanische Suchsperre zu deaktivieren und drücken Sie dann den Suche-Knopf. -
Seite 43: Lcd-Display
LCD-DISPLAY HEIDER PRO5 PMR 446 Wenn bestimmte Aktionen durch- geführt werden oder verschiedene Ch-01 Funktionen aktiv sind, werden die Dis- play-Icons angezeigt. Die Bedeutungen 446.006 dieser Icons zu beherrschen und zu wissen wie die Funktionen des Funkge- rätes einzustellen sind, wird Ihnen die Nutzung vereinfachen. -
Seite 44: Menü-Erklärungen
MENÜ-ERKLÄRUNGEN HEIDER PRO5 PMR 446 MENU ERKLÄRUNG EINSTELLUNGEN NUMMER RXCODE OFF/CTCSS/DCS SQL (Drücken) LIGHT (LCD Beleuchtung) OFF/ON/Key SOUND (Ton des Tastensets) OFF/ON OFF/1-9 SAVE (Batteriesparfunktion) ON/OFF TOT (Pausen-Timer) OFF/30/60/90/120/150/180S SCANM (Scan-Modus) TO/CO BCLO (Busy Channel Lock Out) ON/OFF MENÜ-EINSTELLUNGEN HEIDER PRO5 PMR 446 RXCODE Drücken Sie die [MENU]-Taste, stellen Sie MENU [01] RXCODE ein. - Seite 45 Drücken Sie die [MENU]-Taste, drehen Sie den [SUCHE]-Knopf im LIGHT Uhrzeigersinn oder gegen den Uhrzeigersinn, stellen Sie MENU [03] LIGHT ein. Drücken Sie die [MENU]-Taste, drehen Sie den [SUCHE]-Knopf im BEEP Uhrzeigersinn oder gegen den Uhrzeigersinn, stellen Sie MENU [04] BEEP ein.
-
Seite 46: Inbetriebnahme
INBETRIEBNAHME HEIDER PRO5 PMR 446 EIN- UND AUSSCHALTEN Versichern Sie sich, dass die Batterie eingelegt und der Akku geladen ist. Stecken Sie die Antenne in die dafür vorgesehene Vorrichtung im obersten Paneel. Drücken Sie die [ON/OFF]-Taste und es wird auf dem LCD-Display für zwei Sekunden die vorhandene DC-... -
Seite 47: Bedienung
BEDIENUNG HEIDER PRO5 PMR 446 RXCODE In manchen Situationen kann es vorkommen, dass Sie nur Gespräche bestimmter Personen oder Gruppen hören wollen. In solchen Situationen können Sie mit der selektiv-Funktion ungewollte Gespräche von Personen, die die gleiche Frequenz verwenden, ausblenden. -
Seite 48: Sql (Rauschsperre)
5. Drücken Sie die [MENU]-Taste oder die [PPT]-Taste, um in den normalen Arbeitsmodus überzugehen. LIGHT (LCD Beleuchtung EIN/Taste/AUS) Der Heider PRO5 hat eine rot aufleuchtende integrierte Beleuchtung, damit das Gerät auch in der Nacht einfach verwendet werden kann. Die aufleuchtende Beleuchtung verringert Probleme bei der Nachtsicht um ein Vielfaches und sorgt dafür, dass das Display auch in... -
Seite 49: Das Prozedere Um Den Licht-Modus Einzustellen, Erfolgt Wie Unten Angegeben
BEDIENUNG HEIDER PRO5 PMR 446 Das Prozedere um den Licht-Modus einzustellen, erfolgt wie unten angegeben: 1. Drücken Sie die [MENU]-Taste. Drehen Sie den [SUCHE]-Knopf. Stellen Sie MENU [04] LIGHT ein. 2. Drücken Sie die [U/V]-Taste, um zum Einstellungsmodus zu gelangen. -
Seite 50: Vox (Voice Operated Exchange)
BEDIENUNG HEIDER PRO5 PMR 446 VOX (Voice Operated Exchange) VVOX sorgt dafür, dass sie nicht jedes Mal wenn Sie eine Message senden wollen, den Austausch-Modus manuell ändern müssen. Wenn das VOX-System wahrnimmt, dass Sie angefangen haben in das Mikrofon zu sprechen, geht das Funkgerät sofort automatisch in den Austausch-Modus über. -
Seite 51: Save (Batteriesparmodus)
BEDIENUNG HEIDER PRO5 PMR 446 SAVE (Batteriesparmodus) Der Heider PRO5 besitzt einen Batteriesparmodus, um effektiven Austausch zu ermöglichen. Durch diese Eigenschaft wird die Leistung wenn das Signal stark ist automatisch reguliert und reduziert. Wenn Ihrerseits für einen effektiven Austausch der Batteriesparmodus und die Möglichkeit das Gerät bei niedriger Leistung zu verwenden automatisch eingestellt wird, verhindert das, dass die Batterie ausläuft oder... -
Seite 52: Tot-Sendezeit
BEDIENUNG HEIDER PRO5 PMR 446 TOT (Sendezeit) Durch die TOT Eigenschaft wird der Zeitpunkt des Austauschs durch einen Sicherheitsknopf auf einen im vornherein programmierten Wert eingestellt und die Zeit des Austauschs wird begrenzt, so wird Batterie eingespart. Der angenommene Wert entspricht 180 Sekunden. Der Timer kann wie unten beschrieben eingestellt werden: 1. -
Seite 53: Bclo (Busy-Channel-Lock-Out)
BEDIENUNG HEIDER PRO5 PMR 446 1. Drücken Sie die [MENU]-Taste, drehen Sie den [SUCHE]-Knopf, stellen Sie MENU [16] SCANM ein. 2. Gehen Sie zum Einstellungsmodus über, nachdem Sie die [U/V]- Taste gedrückt haben. 3. Drehen Sie den [SUCHE]-Knopf im Uhrzeigersinn oder gegen den Uhrzeigersinn und machen Sie die Einstellung SCANM:TO/CO. -
Seite 54: Zusätzliche Funktionen Und Einstellungen
ZUSÄTZLICHE FUNKTIONEN HEIDER PRO5 PMR 446 UND EINSTELLUNGEN NOT-ALARM FUNKTION 1. Halten Sie die [F/ALERT]-Taste ungefähr eine halbe Sekunde lang gedrückt. 2. Stellen Sie die Not-Alarm Funktion ein. So Sorgen Sie dafür, dass der Not-Alarm gehört wird. 3. Drücken Sie die [PPT]-Taste, um in den normalen Arbeitsmodus überzugehen. -
Seite 55: Fm-Radio-Suche
ZUSÄTZLICHE FUNKTIONEN HEIDER PRO5 PMR 446 UND EINSTELLUNGEN FM-RADIO SUCHE Um im FM-Radio Modus das ganze Tape zu durchsuchen, drücken Sie den [F/ALERT]- Knopf und anschließend die [MENU]-Taste. Um das Band von niedrig bis hoch oder von hoch bis niedrig zu durchsuchen, drehen Sie den [SUCHE]-Knopf im Uhrzeigersinn oder gegen den Uhrzeigersinn. -
Seite 56: Technische Eigenschaften
TECHNISCHE EIGENSCHAFTEN HEIDER PRO5 PMR 446 Frequenzabstand PMR446 (446.00625 MHz -446.09375 MHz) Kanal-Kapazität 8 Sender Arbeitsspannung 3.7V Standard Batterie 1500mAh Batteriedauer (5-5-90 Arbeitskreislauf) 8-12 Stunden Frequenz-Stabilität 2.5 ppm (-20°C - +60°C) Arbeitstemperatur -30°C - +60°C Antennenimpedanz 50 Ω Maße 47mm x 81mm x 23mm Gewicht ca. -
Seite 57: Konformitätserklärung
Konformitätserklärung gemäß dem Gesetz über Funkanlagen und Telekommunikationsendeinrichtungen (FTEG) und der Richtlinie 1999/5/EG (T&TTE) Firma: Metem Teknoloji Sistemleri San. Ve Tic. Ltd. Sti. Kemankes Mah. Gumus Halka Sok. Bozburun Is Hanı No:4 Kat:2 Karakoy / Beyoglu / ISTANBUL / TURKEY Im Rahmen der Richtlinie 1999/5/EG wird von unsere Seite, unter Übernahme jeglicher Verant- wortung und Ausführung aller Bestimmungen erklärt, dass das Produkt mişt dem Namen PMR446 PRO5 den unten angeführten Standards entspricht. Medikal: EN 60950-1:2006+A11:2009 EMC: EN 301 489-1 V1.9.2 EN 301 489-5 V 1.3.1 Funkgeräte: EN 300 296-1 V 1.3.1 EN 300 296-2 V 1.3.1 Die Kriterien zur Konformitä der Beurteilungsmethoden entsprechend dem 4. Zusatzartikel der Richtlinie T&TTE 1999/5/EG wurden beachtet... -
Seite 58: Garantie-Urkunde
Angaben zur herstellenden und importierenden Firma Titel : METEM TEKNOLOJI SISTEMLERI SAN. VE TIC. LTD. STI. Firmensitz : Kemankes Mah. Mumhane Cad. Gumus Halka Sk. No:4 Kat:2 Karakoy / Istanbul / TURKEY Telefon : +90 212 292 24 24 Fax : +90 212 292 24 48 Angaben zur Ware Art : FUNKGERÄTE Marke : Heider Modell : Pro5 Banderolen- und Seriennummer : ..........................Ausstellungsdatum und -ort : ..........................Garantielaufzeit : 2 Jahre Maximale Reparaturzeit : 20 Arbeitstage Angaben zur verkaufenden Firma Titel : ..........................Anschrift : .......................... -
Seite 59: Garantie-Konditionen
1. Die Garantielaufzeit beginnt mit der Lieferung der Ware und beträgt 2 (zwei) Jahre. 2. Die vollständige Ware, einschließlich aller Teile, steht unter der Garantie unserer Firma. 3. Im Falle eines Defektes innerhalb der Garantielaufzeit wird die Garantielaufzeit um die Zeit verlängert, die für Reparatur beansprucht wird. Die Reparaturzeit der Ware kann maximal 30 (dreißig) Werktage betragen. Diese Zeit beginnt mit der Mitteilung des Defektes an die Servicestelle bzw. – wenn diese nicht vorhanden sein sollte – an den Verkäufer, an den autorisierten Verkäufer, an die Agentur, an die Vertretung, an den Importeur oder an den Hersteller. Wenn der Defekt an der Ware binnen 15 Tagen nicht behoben werden kann, muss der Hersteller bzw. der Importeur bis zum Abschluss der Reparaturarbeiten dem Verbraucher eine Ersatzware mit ähnlichen Eigenschaften zur Verfügung stellen. - Seite 60 BITTE BEACHTEN! Bei allen Fällen von Garantieansprüchen sind die Garantie-Urkunde und die Rechnung vorzulegen! Bitte bewahren Sie die Urkunde und die Rechnung auf! Gerät niemals öffnen, kein Zubehör außer dem mitgelieferten einsetzen bzw. keine eigenen Reparaturver- suche durchführen! Andernfalls wird Ihr Gerät von der Garantie ausgeschlossen. Bitte achten Sie darauf, dass Ihr Gerät während der Nutzung keinen Stößen, hohen Temperaturen und übermäßigem Staub ausgesetzt und dadurch geschädigt wird! Schäden, die auf derartige Gründe zurückzuführen sind, sind von der Garantie ausgeschlossen.
-
Seite 61: Funk - Dcs Kanal, Nummer Und Wellencode
PMR 446 FUNK - DCS KANAL, NUMMER UND WELLENCODE WELLENCODE WELLENCODE WELLENCODE WELLENCODE NUMMER (hz) NUMMER (hz) NUMMER (hz) NUMMER (hz) - Seite 62 w w w . m e t e m t e k n o l o j i . c o m w w w . m e t e m . e u...
- Seite 63 ENGLISH 2-29 DEUTSCH 31-59 FRANÇAIS 61-89 ESPAÑOL 91-119 ITALIANO 121-149 TÜRKÇE 151-179...
- Seite 64 NUMERO DE CTSS- FREQUENCE- NUMERO DE CTSS- FREQUENCE ........63 DESCRIPTION GÉNÉRALE ......................64 AVERTISSEMENTS / PRÉCAUTIONS ..................65 DÉBALLAGE ET VÉRIFICATION DE L’ÉQUIPEMENT ..............66 Les Accessoires Standards..........................66 Les Accessoires En Option ..........................66 LA MISE EN PLACE DES ACCESSOIRES ..................67 Fixation Du Clip Ceinture ..........................
-
Seite 65: Numero De Ctss- Frequence- Numero De Ctss- Frequence
NUMERO DE CTSS- FREQUENCE- NUMERO DE CTSS- FREQUENCE NUMÉRO CTCSS FREQUENCE (hz) NUMÉRO CTCSS FREQUENCE (hz) CTCSS Off 131.8 67.0 136.5 71.9 141.3 74.4 146.2 77.0 151.4 79.7 156.7 82.5 162.2 85.4 167.9 88.5 173.8 91.5 179.9 94.8 186.2 97.4 192.8 100.0 203.5... -
Seite 66: Description Générale
DESCRIPTION GÉNÉRALE HEIDER PRO5 PMR 446 ous vous remercions d’avoir acheté notre talkie-walkie. Veuillez lire atten- tivement le manuel d’utilisation afin de connaitre les caractéristiques techniques différentes de notre talkie-walkie. Grâce à sa capacité de surveillance unique, cet appa- reil, classé dans la catégorie PMR446, est un talkie-walkie FM microminiature, sans licence à... -
Seite 67: Avertissements / Précautions
AVERTISSEMENTS / PRÉCAUTIONS HEIDER PRO5 PMR 446 • Ne laissez pas réparer ou ouvrir votre appareil à quelqu'un d'autre qu'aux techniciens de maintenance agréés. • N'essayez pas de démonter ou de réparer le talkie-walkie pour une quelconque raison. • Ne pas exposer le talkie-walkie directement à la lumière du soleil pendant une longue durée et ne le stocker pas dans des environnements chauds. • Ne pas mettre le talkie-walkie sur une surface instable. • Protéger le talkie-walkie de la poussière, de l'humidité et de l'eau. • Ne pas utiliser le talkie-walkie dans les zones à risque ou situation et ne pas recharger la batterie dans ces circonstances. SÉCURITÉ Il est important pour l'utilisateur de connaitre et de comprendre les risques liés au fonctionnement d'un émetteur-récepteur. AVERTISSEMENT Prière d'éteindre le talkie-walkie dans les endroits suivants: • Les zones où peuvent se trouver des explosifs ou des explosions (gaz inflammable, les particules de poussière, les poudres métalliques, les poudres de céréales, etc.), • Les stations de service, • Les endroits où se trouvent les fournitures médicales, etc. -
Seite 68: Déballage Et Vérification De L'équipement
DÉBALLAGE ET VÉRIFICATION DE HEIDER PRO5 PMR 446 L’ÉQUIPEMENT Retirez délicatement le talkie-walkie de sa boite. Nous vous conseillons de contrôler les pièces mentionnées ci-dessous. S'il y a des pièces manquantes ou endommagées pour les pièces concernées, prenez contact avec nous s'il vous plait. -
Seite 69: La Mise En Place Des Accessoires
LA MISE EN PLACE DES ACCESSOIRES HEIDER PRO5 PMR 446 FIXATION DU CLIP CEINTURE Installer le clip ceinture derrière la batterie comme la montre la photo 1. Attention! N’utilisez pas de colle pour serrer la vis lors de l’installation du clip ceinture. -
Seite 70: Le Chargement De La Batterie
LA MISE EN PLACE DES ACCESSOIRES HEIDER PRO5 PMR 446 LE CHARGEMENT DE LA BATTERIE Si la batterie n’a pas été utilisée auparavant ou si la bat- terie s’est déchargée, la batterie peut être placée dans la prise EXT DC du chargeur, comme indiqué, afin de la charger. -
Seite 71: Reconnaissance De L'appareil
RECONNAISSANCE DE L’APPAREIL HEIDER PRO5 PMR 446 Français... -
Seite 72: Descriptions Des Touches De Commande
DESCRIPTIONS DES TOUCHES DE COMMANDE HEIDER PRO5 PMR 446 Le bouton de RECHERCHE principal est utilisé pour régler la fréquence de fonctionne- ment, le niveau sonore, les choix des menus et autres réglages. Pour tourner ce bouton [RECHERCHE] de RECHERCHE, tirez le bouton afin de déverrouiller la recherche mécanique, puis appu- yez sur le bouton RECHERCHE. -
Seite 73: Écran Lcd
ÉCRAN LCD HEIDER PRO5 PMR 446 Lorsque certaines opérations sont réal- isées ou certaines caractéristiques sont Ch-01 actives, des symboles s’affichent sur l’écran. Elles simplifient la signification 446.006 des indicateurs et le réglage des fonc- tions du talkie-walkie. SYMBOLE DESCRIPTION Clavier secondaire actif (appuyez sur le bouton [F/ALERT].) -
Seite 74: Descriptions Du Menu
DESCRIPTIONS DU MENU HEIDER PRO5 PMR 446 MENU EXPLICATION RÉGLAGES ARTICLE RXCODE OFF/CTCSS/DCS SQL (Réglage des niveaux silencieux) LIGHT (éclairage LCD) OFF/ON/Key VOLUME (Tonalité des touches) OFF/ON OFF/1-9 SAVE (Économiseur de batterie) ON/OFF TOT (Minuterie dépassement de temps) OFF/30/60/90/120/150/180S SCANM (Mode de balayage) TO/CO BCLO (Saut de Canal Occupé) -
Seite 75: Réglages Du Menu Du
Appuyez sur la touche [MENU], tournez le bouton [RECHERCHE] LIGHT dans le sens horaire ou le sens antihoraire, placez-vous sur MENU [03] LIGHT. Appuyez sur la touche [MENU], tournez le bouton [RECHERCHE] BEEP dans le sens horaire ou le sens antihoraire, placez-vous sur MENU [04] BEEP. -
Seite 76: Fonctionnement
FONCTIONNEMENT HEIDER PRO5 PMR 446 MARCHE/ARRÊT Assurez-vous que la batterie est bien insérée et chargée. el. Connectez l’antenne à la prise ANTENNE sur le panneau supérieur. Appuyez sur la touche [ON/OFF] et vous allez voir la tension DC présente pendant 2 secondes sur l’afficheur LCD et vous allez entendre un bip. -
Seite 77: Fonctionnement En Avant
FONCTIONNEMENT EN AVANT FONCTIONNEMENT EN AVANT HEIDER PRO5 PMR 446 RXCODE Dans certains cas, il est possible que vous souhaitiez entendre seulement les appels de certaines personnes ou groupes. Dans ce cas de figure, tout en utilisant l’appel sélectif, vous pouvez ignorer les appels des autres personnes utilisant la même fréquence. -
Seite 78: Sql (Réglage Des Niveaux Silencieux)
5. Appuyez sur les touches [MENU] ou [PTT] pour QUITTER le mode de fonctionnement normal. LIGHT (Eclairage LCD OUVERT/Touche/FERME) LIGHT (Eclairage LCD OUVERT/Touche/FERME) Heider PRO5, possède un éclairage de couleur rouge pour Heider PRO5, possède un éclairage de couleur rouge pour une utilisation tranquille pendant la nuit. L’ é clairage rouge une utilisation tranquille pendant la nuit. L’ é clairage rouge réduit au minimum les déformations de la vision de nuit et... -
Seite 79: Beep (Tonalité Des Touches Ouverte/Fermée)
FONCTIONNEMENT EN AVANT HEIDER PRO5 PMR 446 La procédure pour régler le mode lumière est comme suit: La procédure pour régler le mode lumière est comme suit: 1. Appuyez sur la touche [MENU], tournez le bouton [RECHERCHE], déplacez-vous à 1. Appuyez sur la touche [MENU], tournez le bouton [RECHERCHE], déplacez-vous à... -
Seite 80: Vox (Commande Vocale)
FONCTIONNEMENT EN AVANT HEIDER PRO5 PMR 446 VOX (Commande vocale) À chaque fois que vous souhaitez envoyer un message, VOX élimine la nécessité de modifier le mode de transmission manuelle. Lorsque le système de circuit VOX détecte que vous commencez à parler dans le microphone, le talkie-walkie passe automatiquement à... -
Seite 81: Save (Économiseur De Batterie)
SAVE (Économiseur de batterie) SAVE (Économiseur de batterie) Heider PRO5, possède un économiseur de batterie pour une communication efficace Heider PRO5, possède un économiseur de batterie pour une communication efficace (transmission). Grâce à cette caractéristique, si le signal reçu est puissant, la puissance (transmission). Grâce à cette caractéristique, si le signal reçu est puissant, la puissance... -
Seite 82: Tot (Minuterie Dépassement De Temps)
SCANM (Mode Balayage) SCANM (Mode Balayage) Heider PRO5 permet de balayer les canaux mémoire radio, les bandes de fonctions Heider PRO5 permet de balayer les canaux mémoire radio, les bandes de fonctions ou une partie de ces bandes. Le talkie-walkie s’arrête automatiquement lorsqu’il ou une partie de ces bandes. Le talkie-walkie s’arrête automatiquement lorsqu’il... -
Seite 83: Bclo (Saut De Canal Occupé)
FONCTIONNEMENT EN AVANT HEIDER PRO5 PMR 446 1. Appuyez sur la touche [MENU], tournez le bouton [RECHERCHE], 1. Appuyez sur la touche [MENU], tournez le bouton [RECHERCHE], déplacez-vous acumen [16] SCANM. déplacez-vous acumen [16] SCANM. 2. Appuyez sur la touche [U/V] pour entrer dans le mode réglage. 2. Appuyez sur la touche [U/V] pour entrer dans le mode réglage. 3. Tourner le bouton [RECHERCHE] dans le sens horaire ou 3. -
Seite 84: Les Fonctions Supplémentaires Et Les Réglages
LES FONCTIONS SUPPLÉMENTAIRES ET LES FONCTIONS SUPPLÉMENTAIRES ET LES HEIDER PRO5 PMR 446 LES RÉGLAGES RÉGLAGES FONCTION ALARME D’URGENCE FONCTION ALARME D’URGENCE 1. Maintenez appuyer pendant environ ½ seconde la touche [F/ALERT]. 1. Maintenez appuyer pendant environ ½ seconde la touche [F/ALERT]. 2. Régler le mode d’alarme d’urgence. Ainsi, l’alarme d’urgence sera entendue. -
Seite 85: Balayage Radio Fm
LES FONCTIONS SUPPLÉMENTAIRES ET HEIDER PRO5 PMR 446 LES RÉGLAGES BALAYAGE RADIO FM BALAYAGE RADIO FM En mode radio FM, pour balayer toute la bande, appuyez sur le bouton [F/ALERT] En mode radio FM, pour balayer toute la bande, appuyez sur le bouton [F/ALERT] puis sur la touche [MENU]. -
Seite 86: Caractéristiques Techniques
CARACTÉRISTIQUES TECHNIQUES CARACTÉRISTIQUES TECHNIQUES HEIDER PRO5 PMR 446 Plage de fréquence PMR446 (446.00625MHz-446.09375MHz) Capacité des Canaux 8 Canaux Tension de fonctionnement 3.7V Batterie standard 1500mAh Autonomie de la batterie (5-5-90 cycle de travail) 8-12 heures Stabilité de fréquence 2.5 ppm (-20°C - +60°C) Température de fonctionnement... -
Seite 87: Déclaration De Conformité
Réglementation 1999/5/CE (T & TTE) des Équipements Sans fil et de Télécommunication Société: METEM TEKNOLOJI SISTEMLERI SAN. VE TIC. LTD. STI. Kemankes Mah. Gumus Halka Sok. Bozburun Is Hanı No:4 Kat:2 Karakoy / Istanbul / TURQUIE En prenant toutes les responsabilités de la directive 1999/5/CE concernant le produit PMR446 PRO5 et en remplissant toutes les conditions nécessaires, nous acceptons et déclarons la conformité des normes précisées ci-dessous. Médical: EN 60950-1:2006+A11:2009 EMC: EN 301 489-1 V1.9.2 EN 301 489-5 V 1.3.1 Talkie-walkie: EN 300 296-1 V 1.3.1 EN 300 296-2 V 1.3.1 Conformément à l’article annexe 4 de la réglementation T&TTE 1999/5/CE, les procédures d’évaluation de la conformité des critères sont prises en compte. -
Seite 88: Certificat De Garantie
4077 sur la Protection des Consommateurs. Société de Production et d’Importation Nom : METEM TEKNOLOJI SISTEMLERI SAN. VE TIC. LTD. STI. Adresse : Kemankes Mah. Gumus Halka Sok. Bozburun Is Hanı No:4 Kat:2 Karakoy / Istanbul / TURQUIE Téléphone : 0212 292 24 24 Fax : 0212 292 24 48 Produit Type : Appareils sans fil Marque : Heider Modèle : Pro5 Code barre et N° de Série : ..........................Date et lieu de livraison : ..........................Durée de la Garantie : 2 ans Durée Maximale de la Réparation : 20 jours ouvrables Société de Distribution Nom : ..........................Adresse : .......................... -
Seite 89: Conditions De Garantie
1. La durée de la garantie prend effet à compter de la date de livraison du produit et elle est de 2 (deux) ans. 2. Tous les composants du produit sont couverts par la garantie de notre société. 3. En cas de panne pendant la durée de la garantie, le temps de réparation est ajouté à la période de garantie. La durée de la réparation est de maximum 30 (trente) jours ouvrab- les. Ce délai commence à compter de la date de la notification par le centre d’assistance ou, en son absence, le vendeur, le distributeur, l’agent, le représentant, l’importateur, le fabricant ou le fournisseur. Si la panne n’est pas réparée dans les 15 (quinze) jours, le producteur-fournisseur ou l’importateur est tenu de proposer au consommateur, pendant toute la durée de la réparation, un produit aux caractéristiques similaires. 4. Pendant toute la période de garantie, si une panne est due soit à cause d’un défaut maté- riel et de main d’oeuvre, soit à cause d’un défaut de montage, la réparation s’effectuera gratuitement, sans aucun coût supplémentaire pour la main d’oeuvre, la pièce de rechange ou autres situations similaires. 5. Si le consommateur a exercé son droit de réparation, mais; À partir de la date du retour du produit, au cours d’une année et à condition qu’il soit dans la période de garantie; si la même panne survient plus de deux fois ou si des pannes différentes surviennent plus de quatre fois ou bien durant toute la période de garantie s’il survient plus de six pannes différentes et ces pannes empêchent toute utilisation de ce produit, si le délai maximal pour la réparation est dépassé, le consommateur, dans le cas où le centre d’assistance de la société n’est pas disponible, peut réclamer, dans cet ordre, au vendeur, au distributeur, à l’agent, au représentant, à l’importateur ou au producteur-fournisseur un rapport décri- vant l’impossibilité de trouver une solution à la panne et exiger ainsi l’échange sans frais supplémentaire du produit, le remboursement du montant ou une remise calculée sur la base de la panne. 6. La garantie ne couvre pas les pannes survenues à la suite d’une utilisation non conforme aux instructions contenues dans le manuel d’utilisation. 7. Pour tous les problèmes liés à cette garantie, vous pouvez contacter la Direction Générale de la Concurrence et de la Protection des Consommateurs du Ministère de l’Industrie et du Commerce. - Seite 90 ATTENTION Vous devez présenter la carte de garantie accompagnée de l’originale de la facture d’achat. Conserver s’il vous plait vos documents. Ne pas ouvrir l’appareil, il doit fonctionner uniquement avec les accessoires fournis, n’essayez pas de le réparer. Sinon, l’appareil ne sera pas couvert par la garantie. Soyez prudent lors de l’utilisation de l’appareil, protégez-le des chocs, des températures élevées et de la poussière excessive. Tous les problèmes causés par ces raisons ne sont pas couverts par la garantie. En cas d’ouverture de l’appareil par des personnes non habilitées, l’appareil ne sera pas couvert par la garantie.
-
Seite 91: Radio - Dcs Canal, Le Numéro Et Codes De Frequence
PMR 446 RADIO DCS CANAL, LE NUMÉRO ET CODES DE FREQUENCE NUMÉRO FREQUENCE NUMÉRO FREQUENCE NUMÉRO FREQUENCE NUMÉRO FREQUENCE (hz) (hz) (hz) (hz) - Seite 92 w w w . m e t e m t e k n o l o j i . c o m w w w . m e t e m . e u...
- Seite 93 ENGLISH 2-29 DEUTSCH 31-59 FRANÇAIS 61-89 ESPAÑOL 91-119 ITALIANO 121-149 TÜRKÇE 151-179...
- Seite 94 RADIO PORTÁTIL- CANAL DE CTSS, NÚMERO Y CÓDIGOS DE FRECUENCIA .......93 DESCRIPCIÓN GENERAL ......................94 ADVERTENCIAS / PRECAUCIONES ...................95 DESEMBALAJE Y CONTROL DE LOS EQUIPOS ................96 Accesorios Estándar ............................96 Accesorios Opcionales ..........................96 COLOCACIÓN DE LOS ACCESORIOS ..................97 Colocación Del Clip De Cinturón ........................ 97 Colocación De Micrófonos y Auriculares ....................
-
Seite 95: Radio Portátil- Canal De Ctss, Número Y Códigos De Frecuencia
PMR 446 RADIO PORTÁTIL- CANAL DE CTSS, NÚMERO Y CÓDIGOS DE FRECUENCIA CTCSS NÚMERO FRECUENCIA (hz) CTCSS NÚMERO FRECUENCIA (hz) CTCSS Off 131.8 67.0 136.5 71.9 141.3 74.4 146.2 77.0 151.4 79.7 156.7 82.5 162.2 85.4 167.9 88.5 173.8 91.5 179.9 94.8 186.2... -
Seite 96: Descripción General
DESCRIPCIÓN GENERAL HEIDER PRO5 PMR 446 ara asegurar el correcto uso y ob- tener más información sobre las diferentes características técnicas de nuestra radio, por favor lea cuidado- samente este manual. Esta radio móvil privada PMR446 con su capacidad única de monitorización que permite comunicaciones de dos vías en el área local, es un transceptor... -
Seite 97: Advertencias / Precauciones
ADVERTENCIAS / PRECAUCIONES HEIDER PRO5 PMR 446 • Sólo servicios técnicos autorizados son elegibles para comprobar y reparar su dispositivo. • No desmonte ni trate de reparar la radio, por cualquier motivo. • No exponga la radio a la luz solar directamente por largos periodos de tiempo o no deje en ambientes calurosos. • No coloque la radio sobre una superficie inestable. • Proteja la radio contra el agua, el polvo y la humedad. • No opere la radio en las zonas donde hay un riesgo de explosión y no cargue la batería en dichas condiciones. SEGURIDAD Es importante que el usuario sepa y reconozca los riesgos derivados de la operación de cualquier radio. ATENCIÓN Por favor apague su radio en los siguientes lugares: • Areas donde explosivos puede estar presente y otras áreas potencialmente... -
Seite 98: Desembalaje Y Control De Los Equipos
DESEMBALAJE Y CONTROL DE HEIDER PRO5 PMR 446 LOS EQUIPOS Retire la Radio de la caja con cuidado. Le recomendamos que revise los siguientes artículos. Si hay piezas faltantes o dañadas, por favor póngase en contacto con nosotros. ACCESORIOS ESTÁNDAR... -
Seite 99: Colocación De Los Accesorios
COLOCACIÓN DE LOS ACCESORIOS HEIDER PRO5 PMR 446 COLOCACIÓN DEL CLIP DE CINTURÓN Inserte el clip de cinturón en la parte posterior de la batería como se muestra en la figura 1. Figura 1 ¡Atención! No utilice ningún adhesivo para apretar los tornillos cuando se inserta el clip de cinturón. -
Seite 100: Carga De La Batería
COLOCACIÓN DE LOS ACCESORIOS HEIDER PRO5 PMR 446 CARGA DE LA BATERÍA Si la batería no se ha utilizado anteriormente o si la batería está vacía, entonces puede cargar la batería conectándola en enchufe EXT DC del cargador de batería como se muestra en la figura. Si 12 ~ 16 v de Alimentación CC está... -
Seite 101: Creconocimiento Del Dispositivo
RECONOCIMIENTO DEL DISPOSITIVO HEIDER PRO5 PMR 446 Español... -
Seite 102: Descripciones De Las Teclas De Control
DESCRIPCIONES DE LAS TECLAS DE CONTROL HEIDER PRO5 PMR 446 Botón de búsqueda se utiliza para ajustar la frecuencia de funcionamiento, nivel de vo- lumen, opciones de menú y otros ajustes. Para activar el botón [BUSCAR] tire el botón [BUSCAR] para desbloquear la búsqueda de mecánica y luego presione el botón BUSCAR. -
Seite 103: Pantalla Lcd
PANTALLA LCD HEIDER PRO5 PMR 446 En determinadas operaciones y algunas funciones están activas aparecen iconos Ch-01 de la pantalla. Conocer el significado de los indicadores y cómo configurar 446.006 las funciones de la radio proporciona conveniencia para usted. SÍMBOLO DESCRIPCIÓN... -
Seite 104: Descripciones De Menú
DESCRIPCIONES DE MENÚ HEIDER PRO5 PMR 446 ELEMENTO DESCRIPCIÓN CONFIGURACIÓN DEL MENÚ Español RXCODE OFF/CTCSS/DCS SQL (Silenciador) LINTERNA (Iluminación LCD) OFF/ON/ Botón SEÑAL SONORA (Tono de teclado) OFF/ON OFF/1-9 AHORRA (Economizador de Batería) ON/OFF TOT (Temporizador de Apagado) OFF/30/60/90/120/150/180S SCANM (Modo Scan) - Seite 105 LIGHT Pulse el botón [MENÚ], gire el botón [BUSCAR] hacia la derecha o hacia la izquierda, luego vaya a MENU [03] LINTERNA. BEEP Pulse el botón [MENÚ], gire el botón [BUSCAR] hacia la derecha o hacia la izquierda, luego vaya a MENU [04] SEÑAL SONORA. Pulse el botón [MENÚ], gire el botón [BUSCAR] hacia la derecha o hacia la izquierda, luego vaya a MENU [05] VOX.
-
Seite 106: Operación
OPERACIÓN HEIDER PRO5 PMR 446 BOTÓN ON/OFF Asegúrese de que la batería está conectada y la carga es completa. Conecte la antena a la toma de antena en el panel superior. Pulse el botón [ON / OFF] y, a continuación usted verá... -
Seite 107: Marcha Directa
MARCHA DIRECTA HEIDER PRO5 PMR 446 RXCODE En algunos casos, es posible que desee recibir llamadas solamente de personas o grupos específicos. Usando llamada selectiva en estas situaciones, puede ignorar las llamadas no deseadas de otras personas que están utilizando la misma frecuencia. -
Seite 108: Sql (Ajuste De Supresión)
5. Para salir del modo de funcionamiento normal, pulse el botón [MENU] o [PTT]. ILUMINACION ( LCD Retroiluminación con tecla ON/OFF) Heider PRO5, tiene una luz de iluminación de color rojo para un uso cómodo durante la noche. Esta función no sólo reduce las distorsiones en la visión de la noche a un nivel mínimo, pero también... -
Seite 109: Señal Sonora (Tono De Teclado On/Off)
MARCHA DIRECTA HEIDER PRO5 PMR 446 El procedimiento para ajustar el modo ligero es de la siguiente manera: 1. Pulse el botón [MENÚ], gire el botón [BUSCAR], luego vaya a MENU [04] LINTERNA. 2. Para entrar en el modo de ajuste, pulse el botón [U/V] 3. -
Seite 110: Vox (Transmisión Operada Por Voz)
MARCHA DIRECTA HEIDER PRO5 PMR 446 VOX (Transmisión Operada por Voz) VOX, elimina la necesidad de cambiar el modo de transmisión de forma manual para cada mensaje que desea enviar. Cuando el sistema de circuito VOX detecta que usted habla con el micrófono, la radio pasa automáticamente a la transmisión. Por favor, siga las siguientes instrucciones: 1. -
Seite 111: Economizador De Batería
HEIDER PRO5 PMR 446 SAVE (Economizador de Batería) Heider PRO5, tiene función de ahorro de batería para una comunicación (transmisión) eficaz. Con esta función si la señal recibida es fuerte, entonces la potencia de salida se reduce automáticamente es decir no hay ninguna necesidad de salida de alta potencia. -
Seite 112: Tot(Temporizador De Apagado)
[MENU] o [PTT]. SCANM (Modo Scan) Heider PRO5 le permite escanear los canales de memoria de radio, bandas de operación o de una parte de estas bandas. La radio espera automáticamente en las señales encontradas y le permite comunicarse con la emisora que desee. Siga las instrucciones para activar el modo de escaneo: Español... -
Seite 113: (Bclo) Bloqueo De Canal Ocupado
MARCHA DIRECTA HEIDER PRO5 PMR 446 1. Pulse el botón [MENÚ], gire el botón [BUSCAR], luego vaya a MENU [16] SCANM 2. Luego pulse la tecla [U / V], entre en el modo de ajuste. 3. Girando el botón [BUSCAR] hacia la derecha o hacia la izquierda, haga el ajuste de SCANM: TO/CO . -
Seite 114: Funciones Y Ajustes Adicionales
FUNCIONES Y AJUSTES ADICIONALES HEIDER PRO5 PMR 446 FUNCIÓN DE ALARMA DE EMERGENCIA 1. Presione y mantenga el botón [F / ALERT] durante 1/2 segundos. 2. Ajuste el modo de alarma de emergencia, así se escuchará la alarma de emergencia. -
Seite 115: Escáner De Radio Fm
FUNCIONES Y AJUSTES ADICIONALES HEIDER PRO5 PMR 446 ESCÁNER DE FM RADIO En el modo de FM Radio, con el fin de escanear todas las bandas, pulse el botón [F/ ALERT] y luego presione el botón [MENU]. Para escanear los bandas menor a mayor o de mayor a menor, gire botón [SEARCH] hacia la derecha o hacia la izquierda. -
Seite 116: Especificaciones Técnicas
ESPECIFICACIONES TÉCNICAS HEIDER PRO5 PMR 446 Rango de frecuencia PMR446 (446.00625MHz-446.09375MHz) Capacidad de canales 8 Canales Voltaje de funcionamiento 3.7V Batería estándar 1500mAh Duración de la batería 8-12 horas (5-5-90 ciclo de trabajo) Estabilidad de frecuencia 2.5 ppm (-20°C - +60°C) Temperatura de funcionamiento -30°C - +60°C... -
Seite 117: Declaración De Conformidad
Directiva de Equipos de Terminales de Radio y Telecomunicaciones 1999/5/CE (R&TTE) Empresa: METEM TEKNOLOJİ SİSTEMLERİ SAN. VE TİC. LTD. ŞTİ. Kemankes Mah. Gumus Halka Sok. Bozburun Is Hanı No:4 Kat:2 Karakoy / Istanbul / TURQUÍA En virtud de la Directiva 1999/5/CE del, tomando todas las responsabilidades y cumpliendo todos los requisitos necesarios, declaramos y aceptamos que PMR446 PRO5 cumple con con los siguientes estándares: Medical: EN 60950-1:2006+A11:2009 EMC: EN 301 489-1 V1.9.2 EN 301 489-5 V 1.3.1 Radio: EN 300 296-1 V 1.3.1 EN 300 296-2 V 1.3.1 De conformidad con el anexo IV de Directiva 1999/5/CE (R&TTE), se prestó atención a los... -
Seite 118: Certificado De Garantía
Compañía de Producción e Importación Nombre : METEM TEKNOLOJI SISTEMLERI SAN. VE TIC. LTD. STI. Kemankes Mah. Gumus Halka Sok. Bozburun Is Hanı No:4 Kat:2 Dirección Karakoy / Istanbul / TURQUÍA Teléfono : +90 212 292 24 24 Faks : +90 212 292 24 48 Producto Tipo : RADIOS MÓVILES Marca : Heider Modelo : Pro5 Código de barras y no. serie : ..........................Fecha y lugar de entrega : ..........................Duración de la Garantía : 2 años Duración Máxima de Reparación : 20 días laborables Empresa Distribuidora Nombre : ..........................Dirección : ..........................Teléfono : .......................... -
Seite 119: Condiciones De La Garantía
1. El período de garantía comienza desde el momento de la entrega del producto y tiene una duración de dos (2) años. 2. Todos los componentes del producto están cubiertos por la garantía de nuestra sociedad. 3. En caso de fallo durante el período de garantía, el tiempo pasado en la reparación se añade al período de garantía. La duración de la reparación es de un máximo de 30 (treinta) días de trabajo. Este periodo comienza en la fecha de la notificación por el centro de servicio o, en su ausencia, al vendedor, distribuidor, agente, representante, importador, fabricante y proveedor. En caso de que el defecto no se puede remediar dentro de los 15 (quince) días, el productor, el proveedor o el importador, durante la duración de la reparación, tiene la obligación de entregar al consumidor un producto de características similares. 4. En caso de que, durante el período de vigencia de la garantía, un fracaso debido a defec- tos en los materiales, mano de obra o montaje, no se les pedirá ningún cargo adicional por el costo de mano de obra , repuesto u otras situaciones similares, y para reparar. 5. En caso de que el consumidor haya ejercido el derecho de reparación, pero A partir de la fecha la devolución del producto, siempre que esté dentro del periodo de garantía, si el mismo error aparece más de dos veces o si diferentes daños se produce más de cuatro veces durante el período de garantía y si el número total de estos fallos es seis veces se considera que es imposible de usar el producto en caso de que se exceda el plazo máximo para la reparación el consumidor, en caso de que el centro de servicio no está disponible, puede demandar el cambio o el reembolso del producto respectivamente por parte del vendedor, distribuidor, agente, representante, importador o productor y proveedor sobre la base del informe de fallo que documenta la imposibilidad en la solución para el fracaso. - Seite 120 ATENCIÓN En todos los requisitos, usted debe presentar el documento de garantía acompañado de la factura original de compra. Por favor, mantenga todos sus documentos. No abra el dispositivo de ninguna manera, su funcionamiento debe ser sólo con los accesorios suministrados, no trate de repararlo. De lo contrario, el dispositivo no será cubierto por la garantía. Tenga cuidado al usar su dispositivo para que no afectada por el choque, las altas temperaturas y el polvo excesivo. Todas las fallas causadas por estas situaciones no están cubiertos por la garantía. Si el dispositivo se abre por personas no autorizadas, el dispositivo no estará...
-
Seite 121: Radio Portátil- Canal De Dcs, Número Y Códigos De Frecuencia
PMR 446 RADIO PORTÁTIL- CANAL DE DCS, NÚMERO Y CÓDIGOS DE FRECUENCIA FRECUENCIA FRECUENCIA FRECUENCIA FRECUENCIA NÚMERO (hz) NÚMERO (hz) NÚMERO (hz) NÚMERO (hz) - Seite 122 w w w . m e t e m t e k n o l o j i . c o m w w w . m e t e m . e u...
- Seite 123 ENGLISH 2-29 DEUTSCH 31-59 FRANÇAIS 61-89 ESPAÑOL 91-119 ITALIANO 121-149 TÜRKÇE 151-179...
- Seite 124 RİCETRASMİTTENTE - CANALE CTSS, NUMERO E CODİCİ FREQUENZA ......123 PANORAMICA GENERALE ......................124 AVVERTENZE/PRECAUZIONI....................125 ESTRAZIONE DALL’IMBALLAGGIO E CONTROLLO DELLA STRUMENTAZIONE ....126 Accessori Standard............................126 Accessori Opzionali ............................126 POSIZIONAMENTO DEGLI ACCESSORI..................127 Posizionamento Della Clip Per Cintura ....................127 Posizionamento Delle Cuffie E Eel Microfono ..................127 Posizionamento Della Pila...........................
-
Seite 125: Ri̇cetrasmi̇ttente - Canale Ctss, Numero E Codi̇ci̇ Frequenza
RİCETRASMİTTENTE PMR 446 - CANALE CTSS, NUMERO E CODİCİ FREQUENZA CTCSS NUMERO FREQUENZA (hz) CTCSS NUMERO FREQUENZA (hz) CTCSS Off 131.8 67.0 136.5 71.9 141.3 74.4 146.2 77.0 151.4 79.7 156.7 82.5 162.2 85.4 167.9 88.5 173.8 91.5 179.9 94.8 186.2 97.4 192.8... -
Seite 126: Panoramica Generale
PANORAMICA GENERALE HEIDER PRO5 PMR 446 razie per l’acquisto della nostra ricet- rasmittente. Leggere attentamente il manuale dell’utente per avere tutte le informazioni in merito alle diverse caratteristi- che tecniche della nostra ricetrasmittente. Questo dispositivo con la sua capacità in classe PMR446, è... -
Seite 127: Avvertenze/Precauzioni
AVVERTENZE/PRECAUZIONI HEIDER PRO5 PMR 446 • Non fate aprire o riparare il dispositivo da altre persone se non dai tecnici competenti del servizio. • Non smontate la ricetrasmittente e non provate a ripararla per qualsiasi motivo. • Non lasciate la ricetrasmittente per lungo tempo sotto la luce diretta del sole e non tenetela in luoghi molto caldi. • Non posizionate la ricetrasmittente su superficie mobili. • Proteggete la ricetrasmittente dalla polvere, dall’umidità e dai liquidi. • Non attivare la ricetrasmittente nei luoghi o nelle situazioni in cui c’è il rischio di esplosione, non caricate la batteria in questo tipo di situazioni. SICUREZZA È importante che l’utente sia a conoscenza e comprenda i rischi che derivano dall’attivazione della ricetrasmittente. AVVERTENZA Siete pregati di disattivare la ricetrasmittente nelle situazioni qui di seguito: • Nei luoghi in cui si trovano degli esplosivi o in cui potrebbero verificarsi delle esplosioni (gas infiammabile, particelle di polvere, polveri metalliche, polveri di grano e simili), • Nelle stazioni di benzina,... -
Seite 128: Estrazione Dall'imballaggio Econtrollo Della Strumentazione
ESTRAZIONE DALL’IMBALLAGGIO E HEIDER PRO5 PMR 446 CONTROLLO DELLA STRUMENTAZIONE Estraete la ricetrasmittente dalla sua scatola facendo attenzione. Consigliamo di controllare le componenti elencate qui di seguito. Nel caso in cui ci siano delle parti mancanti o danneggiate, siete pregati di contattarci. -
Seite 129: Posizionamento Degli Accessori
POSIZIONAMENTO DEGLI ACCESSORI HEIDER PRO5 PMR 446 POSIZIONAMENTO DELLA CLIP PER CINTURA Posizionate la clip per cintura posteriormente alla pila come mostrato in figura 1. Figura 1 Attenzione! Quando posizionate la clip per cintura non utilizzare colla per fissare la vite. -
Seite 130: Ricarica Della Pila
POSIZIONAMENTO DEGLI ACCESSORI HEIDER PRO5 PMR 446 RICARICA DELLA PILA Se la pila non è stata utilizzata prima o se la ricarica è terminate , può essere ricaricata collegandola alla pre- sa EXT DC del dispositivo come mostrato in figura. Se si ha una potenza DC 12~16 volt, può... -
Seite 131: Presentazione Del Dispositivo
PRESENTAZIONE DEL DISPOSITIVO HEIDER PRO5 PMR 446 Italiona... -
Seite 132: Spiegazioni Dei Tasti Di Controllo
SPIEGAZIONI DEI TASTI DI CONTROLLO HEIDER PRO5 PMR 446 Il tasto principale CERCA, è utilizzato per la regolazione della frequenza, il livello del volume, le opzioni del menu e per altre impostazioni. Per ruotare il tasto CERCA, aprire la [CERCA] chiusura di ricerca meccanica, tirare il tasto e quindi spingere il pulsante CERCA. -
Seite 133: Schermo Lcd
SCHERMO LCD HEIDER PRO5 PMR 446 Quando si effettuano determinate operazioni o quando determinate Ch-01 funzioni sono attive, sullo schermo saranno visibili dei simboli. Conoscere 446.006 il significato di tali simboli e sapere come regolare funzioni della ricetrasmittente vi renderà le cose più... -
Seite 134: Spiegazioni Del Menu
SPIEGAZIONI DEL MENU HEIDER PRO5 PMR 446 ARTICOLO SPIEGAZIONE IMPOSTAZIONE MENU RXCODE OFF/CTCSS/DCS SQL (Squelch) LIGHT (LCD illuminazione) OFF/ON/Key SES (Suono tastiera) OFF/ON OFF/1-9 SAVE (Risparmio energetico) ON/OFF TOT (Timer Intervallo) OFF/30/60/90/120/150/180S SCANM (Modalità Scan) TO/CO BCLO (Omissione Canali Occupati) - Seite 135 Premere il pulsante [MENU], ruotare il tasto [CERCA] in senso orario o LIGHT in senso antiorario, fino a MENU [03] LIGHT. Premere il pulsante [MENU], ruotare il tasto [CERCA] in senso orario o BEEP in senso antiorario, fino a MENU [04] BEEP. Premere il tasto [MENU], ruotare il tasto [CERCA] in senso orario o in senso antiorario fino a MENU [05] VOX.
-
Seite 136: Attivazione
ATTIVAZIONE HEIDER PRO5 PMR 446 ACCENSIONE/SPEGNIMENTO Assicuratevi che la pila sia posizionata e che la ricarica sia completa. Collegate l’antenna alla presa ANTENNA sul pannello superiore. Premere il tasto [ON/OFF] e per 2 secondi verrà visualizzato sullo schermo LCD il voltaggio DC e si sentirà... -
Seite 137: Funzioni Avanzate
FUNZIONI AVANZATE HEIDER PRO5 PMR 446 RXCODE In alcune situazioni vorrete ascoltare solo le chiamate effettuate da determinate persone o da determinati gruppi. In questo caso, utilizzando la chiamata selettiva, potrete ignorare le chiamate indesiderate provenienti da altre persone che utilizzano la stessa frequenza. -
Seite 138: Sql (Eliminazine Disturbi)
5. Per USCIRE dalla modalità di funzionamento normale premere il tasto [MENU] o [PPT]. LIGHT (Illuminazione LCD ACCESO/Tasto/SPENTO) Heider PRO5, è dotato di una luce di illuminazione rossa che permette un facile utilizzo anche di notte. L’illuminazione rossa riduce al minimo le distorsioni ottiche e permette di vedere facilmente lo schermo nell’... -
Seite 139: Beep (Tono Tastiera Acceso/Spento)
FUNZIONI AVANZATE HEIDER PRO5 PMR 446 Per impostare la modalità luce eseguire le operazioni seguenti: 1. Premere il tasto[MENU], ruotare il tasto [CERCA] fino a MENU [04] LIGHT. 2. Per entrare nella modalità impostazione premere il tasto [U/V]. 3. Ruotando il tasto[CERCA] in senso orario o antiorario effettuate le impostazioni ON/ OFF/ e Key. -
Seite 140: Vox (Comunicazione Vocale)
FUNZIONI AVANZATE HEIDER PRO5 PMR 446 VOX (Comunicazione vocale) VLa modalità VOX, elimina la necessità di cambiare manualmente la modalità di comunicazione nell’invio di ogni comunicazione. Quando il sistemaVOX percepisce che avete iniziato a parlare al microfono, la ricetrasmittente passa automaticamente in modalità... -
Seite 141: Save (Risparmio Energetico)
HEIDER PRO5 PMR 446 SAVE (Risparmio Energetico) Heider PRO5, è dotato della caratteristica risparmio energetico per garantirvi una comunicazione efficiente. Insieme a questa particolarità, quando il segnale in arrivo è potente, l’uscita della potenza è regolata in modo automatico e viene ridotta. Ad esempio, non è... -
Seite 142: Tot (Timer Intervallo)
[MENU] o [PPT]. SCANM (Modalità Scanner) Heider PRO5 vi dà la possibilità di scannerizzare i canali in memoria, le bande di funzionamento o parte di tali bande. La ricetrasmittente si ferma sui segnali automaticamente quando li incontra e permette lo stabilirsi di una connessione con la stazione desiderata. -
Seite 143: Bclo (Omissione Canali Occupati)
FUNZIONI AVANZATE HEIDER PRO5 PMR 446 1. Premere il pulsante [MENU], ruotare il tasto [CERCA] fino a MENU [16] SCANM. 2. Dopo aver premuto il tasto [U/V] entrare nella modalità impostazione. 3. Ruotanso il tasto [CERCA] in senso orario o antiorario SCANM: effettuare le impostazioni TO/CO. -
Seite 144: Funzioni Aggiuntive E Impostazioni
FUNZIONI AGGIUNTIVE E IMPOSTAZIONI HEIDER PRO5 PMR 446 FUNZIONE ALLARME URGENTE 1. Tenere premuto il pulsante [F/ALERT] per circa 1/2 secondi. 2. Impostate la modalità allarme urgente. In questo modo si potrà sentire l’allarme situazione urgente. 3. Per USCIRE dalla modalità di funzionamento normale premere il tasto [PPT]. -
Seite 145: Ricerca Canali Radio Fm
FUNZIONI AGGIUNTIVE E IMPOSTAZIONI HEIDER PRO5 PMR 446 RICERCA CANALI RADIO FM Nella modalità Radio FM, per scannerizzare tutte le bande premere il tasto [F/ALERT], quindi premere il tasto [MENU]. Per cercare la banda dal basso verso l’alto o viceversa, ruotare il tasto [CERCA] in senso orario o in senso antiorario. -
Seite 146: Carattertistiche Tecniche
CARATTERISTICHE TECNICHE HEIDER PRO5 PMR 446 Raggio di Frequenza PMR446 (446.00625MHz-446.09375MHz) Capacità Canali 8 Kanal Voltaggio di Funzionamento 3.7V Pila Standard 1500mAh Vita Pila (ciclo di funzionamento 5-5-90) 8-12 ore Stabilità Frequenza 2.5 ppm (-20°C - +60°C) Temperatura di Funzionamento -30°C - +60°C... -
Seite 147: Declaración De Conformidad
Direttiva per le Ricetrasmittenti e Strumentazioni Terminali per la Telecomunicazione 1999/5/EC (T & TTE) Società: Metem Teknoloji Sistemleri San. Ve Tic. Ltd. Sti. Kemankes Mah. Gumus Halka Sok. Bozburun Is Hanı No:4 Kat:2 Karakoy / Beyoglu / ISTANBUL / TURCHIA Conformemente alla direttiva 1999/5/EC, avendo adempiuto a tutte le condizioni necessarie, di- chiariamo sotto la nostra responsabilità che il prodotto PMR446 PRO5 è conforme agli standard elencati di seguito: Medico: EN 60950-1:2006+A11:2009 EMC: EN 301 489-1 V1.9.2 EN 301 489-5 V 1.3.1 Ricetrasmittente: EN 300 296-1 V 1.3.1 EN 300 296-2 V 1.3.1 In base al comma 4 della direttiva T&TTE 1999/5/EC è stata prestata attenzione ai criteri di conformità nelle modalità di valutazione. Il prodotto di cui sopra è certificato CE. Data e luogo di emissione: 30 Marzo 2012,Turchia Firma: Yusuf Kırtorun... -
Seite 148: Certificato Di Garanzia
Protezione del Consumatore. Società di Produzione e di Importazione Nome : METEM TEKNOLOJI SISTEMLERI SAN. VE TIC. LTD. STI. Indirizzo : Kemankes Mah. Mumhane Cad. Gumus Halka Sk. No:4 Kat:2 Karakoy / Istanbul / TURKEY Telefono : +90 212 292 24 24 Fax : +90 212 292 24 48 Prodotto Tipo : RICETRASMITTENTE Marca : Heider Modello : Pro5 Codice a barra e n. di serie : ..........................Data e luogo di consegnay : ..........................Durata della Garanzia : 2 anni Durata Massima Riparazione : 20 giorni lavorativi Società Distributrice Nome : ..........................Indirizzo : .......................... -
Seite 149: Condizioni Di Garanzia
1. La durata della garanzia ha inizio dal momento di consegna del prodotto ed ha una durata di 2 (due) anni. 2. Tutte le componenti del prodotto sono coperte dalla garanzia della nostra società. 3. In caso di guasti durante la validità della garanzia, il periodo trascorso in riparazione viene aggiunto al periodo di garanzia. La durata della riparazione è di massimo 30 (trenta) giorni lavorativi. Questo periodo ha inizio dalla data di notifica da parte del centro assistenza o in sua mancanza al venditore, distributore, agenzia, rappresentante, importatore, produttore- fornitore. Nel caso in cui non si riesca a risolvere il guasto entro 15 (quindici) giorni, il produttore-fornitore o l’importatore, per il periodo di durata della riparazione, è obbligato a consegnare al consumatore un prodotto con caratteristiche simili. 4. Nel caso in cui, durante il periodo di validità della garanzia, si verifichi un guasto a causa di difetti dovuti al materiale, alla mano d’opera o al montaggio, non verrà chiesta alcuna tariffa aggiuntiva per il costo della mano d’opera, del pezzo di ricambio o di altre situazioni simili e per la riparazione 5. Se il consumatore ha usufruito del diritto di riparazione ma Dalla data di riconsegna del prodotto, a condizione che non sia superato il periodo di garanzia, si verifica lo stesso guasto più di due volte o si verificano per più di quattro volte danni differenti oppure nel... -
Seite 150: Ri̇cetrasmi̇ttente - Canale Dsc, Numero E Codi̇ci̇ Frequenza
ATTENZIONE In tutte le vostre richieste dovete presentare il certificato di garanzia accompagnato dalla fattura di acquisto originale. Siete pregati di conservare tutti i vostri documenti. Non aprire in nessun modo il dispositivo, il suo funzionamento deve essere solo con gli accessori forniti, non cercare di ripararlo. In caso contrario il dispositivo non sarà coperto dalla garanzia. Nell’utilizzo del dispositivo fate attenzione che non venga danneggiato da colpi, da alte temperature e da polvere eccessiva. Tutti i guasti derivanti da queste situazioni non sono coperti dalla garanzia. Nel caso in cui facciate aprire il dispositivo da personale non autorizzato il dispositivo non verrà... - Seite 151 RİCETRASMİTTENTE PMR 446 - CANALE DSC, NUMERO E CODİCİ FREQUENZA CANALE FREQUENZA CANALE FREQUENZA CANALE FREQUENZA CANALE FREQUENZA (hz) (hz) (hz) (hz)
- Seite 152 w w w . m e t e m t e k n o l o j i . c o m w w w . m e t e m . e u...
- Seite 153 ENGLISH 2-29 DEUTSCH 31-59 FRANÇAIS 61-89 ESPAÑOL 91-119 ITALIANO 121-149 TÜRKÇE 151-179...
- Seite 154 CTCSS KANAL NUMARA VE FREKANS KODLARI ..............153 GENEL TANIM ..........................154 UYARILAR ...........................155 AMBALAJDAN ÇIKARMA VE EKİPMANLARIN KONTROLÜ .............156 Standart Aksesuarlar ............................ 156 İsteğe Bağlı Aksesuarlar ..........................156 AKSESUARLARIN YERLEŞTİRİLMESİ ..................157 Kemer Klipsinin Takılması ..........................157 Kulaklık ve Mikrofonun Takılması ......................157 Pilin Yerleştirilmesi............................
-
Seite 155: Ctcss Kanal Numara Ve Frekans Kodlari
PMR 446 TELSİZ CTCSS KANAL NUMARA VE FREKANS KODLARI CTCSS NUMARA FREKANS (hz) CTCSS NUMARA FREKANS (hz) CTCSS Off 131.8 67.0 136.5 71.9 141.3 74.4 146.2 77.0 151.4 79.7 156.7 82.5 162.2 85.4 167.9 88.5 173.8 91.5 179.9 94.8 186.2 97.4 192.8 100.0... -
Seite 156: Genel Tanim
GENEL TANIM HEIDER PRO5 PMR 446 elsizimizi satın aldığınız için teşekkür ederiz. Telsizimizin farklı teknik özellikleri hakkında bilgi edinmek için kullanım kılavuzu- nu dikkatli bir şekilde okuyunuz. Bu cihaz PMR446 sınıfında eşsiz izle- me kapasitesiyle yerel alanda iki yön- lü amatör telsiz iletişimini sağlayan lisanssız mikrominyatür FM telsizdir. -
Seite 157: Uyarilar
UYARILAR / ÖNLEMLER HEIDER PRO5 PMR 446 • Cihazınızı yetkili servis teknisyenlerinden başkasına açtırmayınız veya tamir ettirmeyiniz. • Herhangi bir nedenden ötürü telsizi parçalarına ayırmayınız veya tamir etmeye çalışmayınız. • Telsizi uzun süre doğrudan güneş ışığına maruz bırakmayınız ve çok sıcak ortamlarda saklamayınız. -
Seite 158: Ambalajdan Çikarma Ve Eki̇pmanlarin Kontrolü
AMBALAJDAN ÇIKARMA HEIDER PRO5 PMR 446 VE EKİPMANLARIN KONTROLÜ Telsizi kutusundan dikkatlice çıkarınız. Aşağıda belirtilen parçaları kontrol etmeniz önerilir. Söz konusu parçalardan eksik veya hasarlı olan var ise bizimle iletişime geçiniz. STANDART AKSESUARLAR MADDE MİKTAR Adaptör Li-iyon Pil Kulaklık Kemer Klipsi El Kayışı... -
Seite 159: Aksesuarlarin Yerleşti̇ri̇lmesi̇
AKSESUARLARIN YERLEŞTİRİLMESİ HEIDER PRO5 PMR 446 KEMER KLİPSİNİN TAKILMASI Kemer klipsini Resim 1’de gösterilen pilin arkasındaki bölüme takınız. Resim 1 Dikkat! Kemer klipsini takarken vidayı sıkılaştırmak için yapıştırıcı kullanmayınız. Yapıştırıcılardaki akrilik asit pil paneline zarar verebilir. KULAKLIK VE MİKROFONUN TAKILMASI Resim 2 Kulaklık ve mikrofon uçlarını... -
Seite 160: Pilin Şarj Edilmesi
AKSESUARLARIN YERLEŞTİRİLMESİ HEIDER PRO5 PMR 446 PİLİN ŞARJ EDİLMESİ Pil daha önce kullanılmadıysa ya da pilin şarjı bit- mişse pil şekilde gösterildiği gibi şarj cihazının EXT DC soketine bağlanarak şarj edilebilir. 12~16 voltluk DC güç mevcutsa pilin şarj edilmesi için opsiyonel DC adaptörü... -
Seite 161: Ci̇hazi Tanima
CİHAZI TANIYIN HEIDER PRO5 PMR 446 Türkçe... -
Seite 162: Kontrol Tuşlarinin Açiklamalari
KONTROL TUŞLARININ AÇIKLAMALARI HEIDER PRO5 PMR 446 Esas ARAMA butonu çalışma frekansının ayarlanması, ses düzeyi, menü seçimleri ve diğer ayalar için kullanılır. Bu ARAMA butonunu çevirmek için mekanik arama kilidini [ARAMA] açmak üzere butonu çekiniz ve ardından ARAMA butonuna basınız. -
Seite 163: Lcd Ekran
LCD EKRAN AÇIKLAMALARI HEIDER PRO5 PMR 446 Belli işlemler yapılırken veya belli özellikler aktif durumdayken ekran Ch-01 simgeleri otomatik olarak görünecektir. Bu göstergelerin anlamını ve 446.006 fonksiyonların nasıl ayarlanacağını bilmeniz önemlidir. SİMGE AÇIKLAMA İkincil tuş takımı aktif (F/ALERT) butonuna basınız. -
Seite 164: Menü Açiklamalari
MENÜ AÇIKLAMALARI HEIDER PRO5 PMR 446 MENÜ AÇIKLAMA AYARLAR MADDESİ RXCODE OFF/CTCSS/DCS SQL (Bastırma) LIGHT (LCD Aydınlatması) OFF/ON/Key SES (Tuş Takımı Sesi) OFF/ON OFF/1-9 SAVE (Pil Tasarrufu) ON/OFF TOT (Mola Zamanlayıcı) OFF/30/60/90/120/150/180S SCANM (Tarama Modu) TO/CO BCLO (Meşgul Kanal Atlama) ON/OFF MENÜ... - Seite 165 LIGHT [MENU] tuşuna basınız, [ARAMA] butonunu saat yönünde veya saat yönünün tersine çeviriniz, MENU [03] LIGHT’a geliniz. BEEP MENU] tuşuna basınız, [ARAMA] butonunu saat yönünde veya saat yönünün tersine çeviriniz, MENU [04] BEEP’e geliniz. [MENU] tuşuna basınız, [ARAMA] butonunu saat yönünde veya saat yönünün tersine çeviriniz, MENU [05] VOX’a geliniz.
-
Seite 166: Telsi̇zi̇ Çaliştirma
TELSİZİ ÇALIŞTIRMA HEIDER PRO5 PMR 446 AÇMA / KAPAMA Pilin takılı ve şarjın dolu olduğundan emin olunuz. Anteni en üst paneldeki ANTEN soketine bağlayınız. [ON/OFF] tuşuna basınız ve LCD üzerinde 2 saniye boyunca mevcut DC voltajı görünecek ve bip sesi duyulacaktır. -
Seite 167: İleri̇ Çaliştirma
İLERİ ÇALIŞTIRMA HEIDER PRO5 PMR 446 RXCODE Bazı durumlarda yalnızca belli kişilerden veya gruplardan yapılan aramaları duymak isteyebilirsiniz. Bu tür durumlarda seçici aramayı kullanarak aynı frekansı kullanan diğer kullancılardan gelen aramaları göz ardı edebilirsiniz. Alınan sinyali aşağıdaki talimatlara göre ayarlayınız: [MENU] tuşuna basınız, [ARAMA] butonunu çeviriniz,... -
Seite 168: Sql (Bastırma Ayarı)
5. Normal çalıştırma moduna ÇIKIŞ yapmak için [MENU] veya [PPT] tuşlarına basınız. LIGHT (LCD Aydınlatma AÇIK/Tuş/KAPALI) Heider PRO5, gece boyunca rahat bir kullanım için kırmızı renkte bir aydınlatma ışığına sahiptir. Kırmızı aydınlatma gece görüşlerindeki bozulmaları en az seviyeye indirirken karanlıkta ekranınızın net bir şekilde görünmesini sağlar. -
Seite 169: Beep (Tuş Takımı Sesi Açık/Kapalı)
İLERİ ÇALIŞTIRMA HEIDER PRO5 PMR 446 Işık modunu ayarlamak için prosedür aşağıdaki gibidir: 1. [MENU] tuşuna basınız, [ARAMA] butonunu çeviriniz, MENU [04] LIGHT’a geliniz. 2. Ayar moduna girmek için [U/V] tuşuna basınız. 3. [ARAMA] butonunu saat yönünde veya saat yönünün tersine çevirerek ON/OFF/ ve Key ayarlarını... -
Seite 170: Vox (Sesle Çalışan İletişim)
İLERİ ÇALIŞTIRMA HEIDER PRO5 PMR 446 VOX (Sesle Çalışan İletim) VOX, her ileti göndermek istediğinizde iletim modunu manuel olarak değiştirme gerekliliğini ortadan kaldırır. VOX devre sistemi mikrofona konuşmaya başladığınızı algıladığında, telsiz otomatik olarak iletim moduna geçer. Lütfen aşağıdaki talimatları izleyiniz: 1. -
Seite 171: Save (Pil Tasarrufu)
İLERİ ÇALIŞTIRMA HEIDER PRO5 PMR 446 SAVE (Pil Tasarrufu) Heider PRO5, etkili bir iletişim için (iletim) pil tasarrufu özelliğine sahiptir. Bu özellikle birlikte alınan sinyalin güçlü olması durumunda güç çıkışı otomatik düzenlenerek azaltılır. Örnek vermek gerekirse tekrarlayıcı istasyona yakın mesafelerde sessizleştirme erişimi için yüksek güç... -
Seite 172: Tot (Mola Zamanlayıcı)
5. Normal çalıştırma moduna ÇIKIŞ yapmak için [MENU] veya [PPT]’ye basınız. SCANM (Tarama Modu) Heider PRO5 telsiz bellek kanallarını, çalışma bantlarını veya bu bantların bir kısmını taramanıza olanak verir. Telsiz karşılaştığı sinyaller üzerinde otomatik olarak duraksar ve istenilen istasyonla iletişim kurulmasını sağlar. Tarama modunu etkinleştirmek için aşağıdaki talimatları... -
Seite 173: Bclo (Meşgul Kanal Atlama)
İLERİ ÇALIŞTIRMA HEIDER PRO5 PMR 446 1. [MENU] tuşuna basınız, [ARAMA] butonunu çeviriniz, MENU [16] SCANM’ye geliniz. 2. [U/V] tuşuna bastıktan sonra ayar moduna giriniz. 3. [ARAMA] butonunu saat yönünde veya saat yönünün tersine çevirerek SCANM: TO/CO ayarlarını yapınız. 4. Ayarı kaydetmek için [U/V] tuşuna basınız. -
Seite 174: İlave Fonksi̇yonlar Ve Ayarlar
İLAVE FONKSİYONLAR VE AYARLAR HEIDER PRO5 PMR 446 ACİL ALARM ÖZELLİĞİ 1. [F/ALERT] tuşuna yaklaşık 1/2 saniye basılı tutunuz. 2. Acil alarm modu’nu ayarlayınız. Böylece acil durum alarmı duyulacaktır. 3. Normal çalıştırma moduna ÇIKIŞ yapmak için [PPT] tuşuna basınız. FM RADYO FONKSİYONU 1. -
Seite 175: Fm Radyo Taraması
İLAVE FONKSİYONLAR VE AYARLAR HEIDER PRO5 PMR 446 FM RADYO TARAMASI FM Radyo modunda, tüm bandı taramak için [F/ALERT] butonuna basınız ve ardından [MENU] tuşuna basınız. Bandı düşükten yükseğe veya yüksekten düşüğe taramak için [ARAMA] butonunu saat yönünde veya saat yönünün aksine çeviriniz. Belli kanalı... -
Seite 176: Tekni̇k Özelli̇kler
TEKNİK ÖZELLİKLER HEIDER PRO5 PMR 446 Frekans Aralığı PMR446 (446.00625MHz-446.09375MHz) Kanal Kapasitesi 8 Kanal Çalışma Voltajı: 3.7V Standart Pil 1500mAh Pil Ömrü 8-12 saat (5-5-90 çalışma döngüsü) Frekans Stabilitesi 2.5 ppm (-20°C - +60°C) Çalışma Sıcaklığı -30°C - +60°C Anten Empedansı... -
Seite 177: Uygunluk Beyani
Telsiz ve Telekomünikasyon Terminal Ekipmanları 1999/5/EC (T&TTE) Yönetmeliği Firma: Metem Teknoloji Sistemleri San. Ve Tic. Ltd. Şti. Kemankeş Mah. Gümüş Halka Sok. Bozburun İş Hanı No:4 Kat:2 Karaköy/Beyoğlu/İSTANBUL/ TÜRKİYE 1999/5/EC yönetmeliği dahilinde PMR446 PRO5 adlı ürünün tüm sorumluluklar üstlenilerek ve gerekli tüm şartlar yerine getirilerek aşağıda belirtilen standartlara uygunluğu tarafımızca kabul ve beyan edilir. -
Seite 178: Garanti̇ Belgesi̇
Bakanlığı Tüketicinin Korunması ve Piyasa Gözetimi Genel Müdürlüğü tarafından izin verilmiştir. İmalatçı ve İthalatçı Firmanın Ünvanı : METEM TEKNOLOJİ SİSTEMLERİ SAN. VE TİC. LTD. ŞTİ. Merkez Adresi : Kemankeş Mah. Mumhane Cad. Gümüş Halka Sk. No:4 Bozburun İşhanı 2/2 Karaköy / Beyoğlu / İstanbul / Türkiye Telefon : 0212 292 24 24 Faks : 0212 292 24 48 Malın Cinsi : TELSİZ CİHAZLARI Markası : Heider Modeli : Pro5 Bandrol ve Seri No : ..........................Teslim Tarihi ve Yeri : ..........................Garanti Süresi : 2 Yıl Azami Tamir Süresi : 20 İş Günü Satıcı Firmanın Ünvanı : ..........................Adres : .......................... -
Seite 179: Garanti̇ Şartlari
1. Garanti süresi malın teslim tarihinden itibaren başlar ve 2 (iki) yıldır. 2. Ürünün bütün parçaları dahil olmak üzere tamamı firmamızın garanti kapsamındadır. 3. Ürünün garanti süresi içerisinde arızalanması durumunda tamirde geçen süre garanti süresine eklenir. Ürünün tamir süresi en fazla 30 (otuz) iş günüdür. Bu süre ürüne ilişkin arızanın teknik servise, teknik servisin olmaması durumunda ise satıcı, bayii, temsilci acente, ithalatçı ya da imalatçı-üreticiden herhangi birine bildirilmesinden itibaren başlar. Ürün arızasının 15 (on beş) gün içinde giderilememesi durumunda ithalatçı ya da imalatçı üretici, ürün tamir edilinceye kadar benzer özelliklere sahip bir başka ürünü tüketicinin kullanımına tahsis etmek zorundadır. 4. Ürünün garanti süresi boyunca gerek malzeme ve işçilik gerekse montaj hatası nedeni ile arızalanması durumunda işçilik, değiştirilen parça bedeli vb. herhangi bir isim altında hiçbir ücret talep edilmeksizin tamiri yapılacaktır. 5. Tüketicinin onarım hakkını kullanmasına rağmen, belirlenen garanti süresi içinde kalmak şartıyla, bir yıl içerisinde aynı arızanın ikiden fazla tekrarlanması, farklı arızaların toplamının altıdan fazla olması sonucunda tüketicinin ürünü kullanamaması... - Seite 180 DİKKAT Garanti Belgesi ve faturanızı tüm başvurularınızda ibraz etmeniz gerekmektedir. Lütfen belgelerinizi saklayınız. Cihazınızı hiçbir şekilde açmayınız ve cihazı başka bir aksesuar ile çalıştırmayınız. Cihazın arızalanması durumunda kendiniz tamir etmeye çalışmayınız. Cihazınızı kullanırken yüksek ısı ve aşırı tozdan zarar görmemesine özen gösteriniz. Yukarıda belirtilen nedenlerden ötürü ortaya çıkabilecek problem ya da arızalar garanti kapsamı dışındadır. Cihazınızın yetkisiz kişiler tarafından açılması sonucunda cihazınız garanti dışında kalır. Garanti dışı kalan cihazlar için değiştirme, para iadesi ve ücretsiz servis hizmeti verilmez. Cihazı satın alan müşterilerimiz bu şartları kabul etmiş sayılır. İMALATÇI-İTHALATÇI FİRMA METEM TEKNOLOJİ SİSTEMLERİ SAN. VE TİC. LTD. ŞTİ. Kemankeş Mah. Mumhane Cad. Gümüş Halka Sk. No:4 Bozburun İşhanı 2/2 Karaköy / Beyoğlu / İstanbul / Türkiye Tel: 0212 292 24 24 YETKİLİ SERVİS İSTASYONU TS 13193 Yetkili Servisler- telsiz cihazları İLERİ ELEKTRONİK – YARCAN FEYZİOĞLU Gazipaşa Mah. Tekke Cami Sok. No: 25 TRABZON Tel: 0462 321 06 64 Cihazınızın garanti süresi teslim tarihinden itibaren başlar ve 2 (iki) yıldır.
-
Seite 181: Dcs Kanal Numara Ve Frekans Kodlari
PMR 446 TELSİZ DCS KANAL NUMARA VE FREKANS KODLARI FREKANS FREKANS FREKANS FREKANS NUMARA (hz) NUMARA (hz) NUMARA (hz) NUMARA (hz) - Seite 182 w w w . m e t e m t e k n o l o j i . c o m w w w . m e t e m . e u...
- Seite 184 Headquarters Operation Research & Development Call Center Metem International BV Metem Teknoloji LTD Kabelweg 43, 1014 BA Necatibey Cad No 61 Amsterdam - Nederland Karakoy - Istanbul - TURKEY www.metemteknoloji.com - www.metem.eu...