MB QUART PKC 116 Einbauanleitung Und Betriebsanleitung
Quicklinks
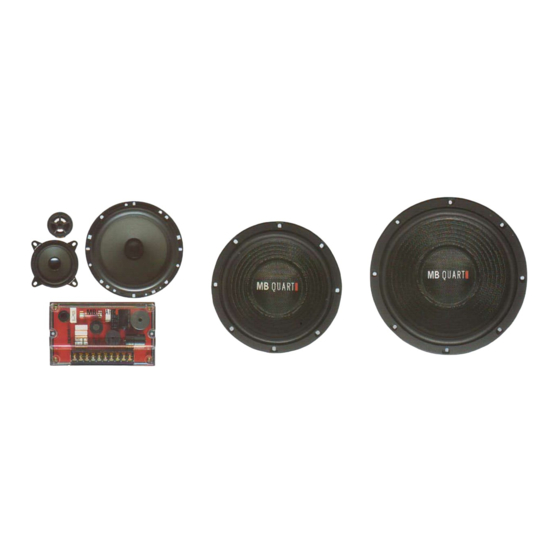
Q U A R T M O B I L
H ERZ L IC H E N GL Ü CKW U NS CH
Mit dem Kauf eines Car-Hifi Lautsprechersets aus dem Hause MB QUART, haben Sie ein tech-
nisch und qualitativ hochwertiges Produkt erworben. Vor dem Einbau des Lautsprechersets,
lesen Sie bitte sorgfältig die nachfolgenden Hinweise dieser Montageanleitung durch.
ALL GE M E INE S
Beachten Sie bei Einbau und Betrieb des Lautsprechersets die Sicherheitsbestimmungen über
tragende Karosserieteile, die Bestimmungen der StVZO sowie die Vorschriften der Fahrzeug-
hersteller. Informieren Sie sich, ob Sie evtl. fahrzeugspezifische MB QUART Einbauadapter
benötigen. Schützen Sie Ihre Lautsprecher bei Einbau und Betrieb vor Beschädigungen wie
Spritzwasser oder Überlastung. Achten Sie bei der Verdrahtung auf korrekte Polung.
(+ = gekennzeichnete Leitung)
EINBAU VON LAUTSPRECHERKOMPONENTEN IN
VORHANDENE FAHRZEUGSCHÄCHTE
Entfernen Sie vorsichtig die Lautsprecherabdeckungen bzw. bereits montierte Lautsprecher
in Ihrem Fahrzeug. Verbinden Sie die Anschlüsse der Lautsprecher mit den Elektronikkom-
ponenten wie umseitig beschieben (Polung beachten!). Montieren Sie die Lautsprecher im
Fahrzeugschacht und führen Sie einen ersten Hörtest durch. Nach Feststellung der korrekten
Funktion können die Lautsprecherabdeckungen wieder montiert werden. Bitte vergewissern
Sie sich dabei, daß die Funktion der Lautsprecher nicht durch die Lautsprecherabdeckung etc.
beeinträchtigt wird.
EINBAU VON LAUTSPRECHERKOMPONENTEN MIT
DEN BEIGEFÜGTEN EINBAURINGEN
Wählen Sie anhand der Maßskizzen, auf welche Art Sie Ihre Lautsprecher montieren können (nur
Einbauring/Gitter oder Ein- und Aufbauring/Gitter). Beachten Sie, daß eine für den Einbauring
ausgeschnittene Montageöffnung nicht mehr zur Montage von Ein- und Aufbauring verwendet
werden kann. Ferner muß nach erfolgter Montage gewährleistet sein, daß keine beweglichen
Teile (Fensterkurbel, Seitenfenster, Türöffner etc.) den montierten Lautsprecher berühren.
Schneiden Sie unter Verwendung der Einbauschablone die gewünschte Montageöffnung sorgfäl-
tig aus. Montieren Sie den Einbauring bzw. Ein- und Aufbauring mit dem entsprechenden Monta-
gematerial (s.Skizze). Bereiten Sie die Verkabelung vor und schließen Sie die Lautsprecher wie
umseitig beschrieben an. Montieren Sie die Lautsprecher mit den beigelegten Spezialschrauben
und führen Sie einen ersten Hörtest durch. Nach Feststellung der korrekten Funktion können Sie
die Abdeckgitter und die MB QUART Logos montieren.
EIN STEL LUN G DE S H OC H TON PE GE LS
Bevor Sie Veränderungen an den werkseitigen Einstellungen Ihrer Frequenzweiche vornehmen,
schalten Sie bitte alle Komponenten Ihrer Musikanlage aus.
Entfernen Sie den Deckel der Frequenzweiche durch Lösen der vier Befestigungsschrauben an
der Gehäuseoberseite.
Bitte Stellen Sie durch Umstecken des Jumpers 113/116 Ihre Frequenzweiche gemäß der
Produktbezeichnung Ihres Lautsprechersets ein.
EINSTELLUNG IM STANDARD- ODER BI-WIRE MODUS
Der Hochtonpegel der Frequenzweiche ist werkseitig auf O dB, d. h. auf maximalen Pegel
eingestellt. Sie können diesen Pegel in - 1,5 dB Stufen bis zu - 6 dB absenken. Zum Absenken
müssen Sie lediglich den Jumper mit der Bezeichnung TWEETER um eine Position umstecken.
Führen Sie nach diesem Schritt eine Hörprobe durch. Falls der Hochtonpegel noch immer zu
laut ist, schalten Sie Ihre Anlage wieder ab und stecken den Jumper um eine weitere Position
um. Haben Sie den Pegel gefunden, verschließen Sie bitte wieder das Gehäuse Ihrer Frequenz-
weiche bei abgeschalteter Anlage.
EINSTELLUNG IM BI-AMP MODUS
Im BI-AMP Betrieb führen Sie bitte die Pegeleinstellungen über die „Gain- bzw. Levelregler"
Ihrer Verstärker durch. Vor dem Einschalten sollten diese Regler entsprechend der Anleitung
der Gerätehersteller eingestellt sein. Es hat sich als sinnvoll erwiesen eine Baßanhebung durch
Reduzierung des Hochtonpegels zu erwirken. Hierdurch wird gleichzeitig evtl. Verstärkerrau-
schen reduziert.
Art.-Nr. 90 -7722
E I N B A U A N L E I T U N G / I N S T U C C I O N E S D E M O N TA J E / I N S TA L L AT I O N I N S T R U C T I O N S
Al comprar un juego de altavoces de alta fidelidad para automóviles de la casa MB QUART ha
adquirido un producto de alta tecnología y gran calidad. Antes de montar el juego de altavoces,
sírvase leer detenidamente las siguientes instrucciones para el montaje.
Al montar y utilizar el juego de altavoces debe observar el cumplimiento de las normas de
seguridad sobre piezas de carrocería portantes, las normas del código de circulación y las
prescripciones del fabricante de su vehículo.
Infórmese sobre si necesita adaptadores de montaje MB QUART específicos para su vehículo.
Al montar y utilizar los altavoces, protéjalos siempre de los posibles deterioros que pueden
causar, por ejemplo, las salpicaduras o las sobrecargas. Al conectar los cables, asegúrese de
que la polaridad es la correcta (+ = cable marcado).
MONTAJE DE LOS COMPONENTES DE LOS ALTAVOCES EN
HUECOS YA EXISTENTES EN EL VEHÍCULO
Retire con cuidado las cubiertas para altavoces o el juego de altavoces que estín montados en
su vehículo. Conecte los altavoces con los componentes electrónicos tal y como se describe al
dorso (¡atienda a la polaridad!). Monte los altavoces en los huecos del vehículo y realice un pri-
mer test de audición. Una vez que haya comprobado su correcto funcionamiento puede volver
a montar las cubiertas de los altavoces; al hacerlo, asegúrese de ni estas cubiertas ni ning·n
otro factor puedan menoscabar el funcionamiento
de los altavoces.
MONTAJE DE LOS COMPONENTES DE LOS
ALTAVOCES CON LOS ANILLOS ADJUNTOS
Atendiendo a los esquemas de medidas, seleccione el modo apropiado para montar los altavo-
ces (con anillo de montaje empotrado/rejilla o con anillo de montaje empotrado y superpuesto/
rejilla). Tenga presente que si se hace un recorte para en montaje con el anillo de montaje
empotrado luego ya no se podrº montar el anillo de montaje empotrado y superpuesto.
Después del montaje hay que asegurarse de que ninguna pieza móvil (manivela alzacristales,
ventanilla lateral, manilla de la puerta, etc.) pueda rozar con el altavoz montado.
Recorte minuciosamente el hueco para el montaje sirviéndose de la plantilla que haya elegido.
Monte el anillo de montaje empotrado o el de montaje empotrado y superpuesto usando el
material apropiado (véase el esquema). Prepare los cables y conecte los altavoces tal y como
se describe al dorso. Monte los altavoces usando los tornillos especiales adjuntos y realice un
primer test de audición. Después de haber comprobado que funcionan correctamente puede
montar la rejilla cobertora y el logotipo
MB QUART.
A JUST E DEL NI VEL D E A GUDO S
Antes de modificar los ajustes de fábrica del divisor de frecuencia, desconecte todos los
componentes de su equipo de música. Desmonte la tapa del divisor de frecuencia soltando los
cuatro tornillos de sujeción que hay en la parte superior de la carcasa.
Ajuste el filtro divisor de frcuencia enchufando el jumper 113/116 como corresponda a la
denominacion de su juego de altavoces.
AJUSTE EN EL MODO STANDARD O BI-WIRE
El nivel de agudos del divisor de frecuencia se suministra de fábrica con el ajuste O dB, es
decir, con el nivel máximo. Si lo prefiere, usted puede reducir este nivel en escalones de -1,5
dB hasta un máximo de -6 dB. Para ello solamente hay que conmutar el jumper con la palabra
TWEETER desplazándolo una posición. Después de haber dado este paso, pruebe el sonido. En
el caso de que el nivel de agudos siga siendo demasiado alto, vuelva a desconectar el equipo y
desplace el jumper otra posición más. Una vez que el nivel sea de su agrado, cierre la carcasa
de su divisor de frecuencia teniendo el equipo desconectado.
AJUSTE EN EL MODO BI-AMP
Estando en el modo de operación BI-AMP, efectúe los ajustes del nivel de sonido con los regula-
dores de ganancia y/o de nivel del amplificador. Estos reguladores deben estar correctamente
ajustados ya antes de conectar el equipo, de acuerdo con las instrucciones del fabricante. Está
comprobado que es preferible elevar los sonidos graves reduciendo el nivel de agudos; de este
modo también se reducirón los ruidos que pudieran provenir del amplificador.
P K C 1 1 6
ENHORA BUENA
IND ICA CI ONES GENER ALE S
C ON G R ATU LAT IO N S
With the purchase of a MB QUART car hi-fi loudspeaker set, you have acquired a high quality
product. Before installing the loudspeaker set, please read the following assembly instructions
carefully.
G E NE RA L
During installation and operation of the loudspeaker set, please observe the safety require-
ments of the structural body parts, the local regulations authorizing the use of vehicles for road
traffic as well as the provisions of the vehicle manufacturers.
Check to see if you need vehicle-specific MB QUART mounting adapters.
Protect your loudspeakers during installation and operation from damage, e.g. from water
spray or overloading. Observe the correct polarity (cable marked +) when wiring.
INSTALLATION OF LOUDSPEAKER COMPONENTS
IN EXISTING VEHICLE SLOTS
Carefully remove the loudspeaker covers or loudspeaker already installed in your vehicle.
Connect the terminals of the loudspeakers to the electronic components, as described overleaf
(observe polarity!). Assemble the loudspeakers in the vehicle slots and carry out an initial sound
test. After ensuring the loudspeakers are functioning correctly, the loudspeaker covers can be
fitted again. When doing this, please ensure that the function of the loudspeaker is not restric-
ted by the loudspeaker covers etc.
INSTALLATION OF LOUDSPEAKER COMPONENTS
WITH THE ENCLOSED MOUNTING RINGS
Using the dimensioned sketches, choose how you can assemble your loudspeakers (only moun-
ting ring/grille or mounting-assembly ring/grille). Be aware that the assembly opening cut for
the mounting ring can no longer be used for assembling the mounting-assembly ring.
Furthermore, it must be ensured that after assembling, no moving parts (window handle, side
window, door handle etc) touch the assembled loudspeaker.
Using the mounting template, carefully cut out the required assembly opening. Assemble
the mounting ring or mounting-assembly ring with the corresponding assembly material (see
sketch). Prepare the cabling and connect the loudspeaker as described overleaf. Assemble the
loudspeaker with the enclosed special screws and carry out an initial sound test. After ensuring
the loudspeakers are functioning correctly, the cover grilles and the MB Quart logo can be
attached.
A DJ US T MEN T O F T HE T WEET ER LEV EL
Before you can make any changes to the factory settings of your crossover network please
switch off all components of your stereo system. Remove the cover of the crossover network
by releasing the four fastening screws on the top of the housing.
SETTING IN STANDARD OR BI-WIRE MODE
The tweeter level of the crossover network is factory set to 0 dB, i.e. set to maximum level.
You can reduce this level in -1,5 dB steps up to -6 dB. To reduce it you only need to move the
jumper marked TWEETER down a position. Carry out an audio test after this has been done. If
the tweeter level is still too loud, switch the system off again and move the jumper one position
further down. If you have found the right level, please close the housing of your crossover net-
work again with the system off.
SETTING IN BI-AMP MODE
In BI-AMP operation, please set the level using the „gain or level controllers" of your amplifiers.
Before the system is switched on, these controllers should be set in accordance with the
instructions of your system's manufacturer. Raising the bass by reducing the tweeter level has
in the past proven to be a useful measure. By doing this, any possible noise of the amplifier is
reduced.

Verwandte Anleitungen für MB QUART PKC 116


Inhaltszusammenfassung für MB QUART PKC 116
- Seite 1 Mit dem Kauf eines Car-Hifi Lautsprechersets aus dem Hause MB QUART, haben Sie ein tech- Al comprar un juego de altavoces de alta fidelidad para automóviles de la casa MB QUART ha With the purchase of a MB QUART car hi-fi loudspeaker set, you have acquired a high quality nisch und qualitativ hochwertiges Produkt erworben.
- Seite 2 Q U A R T M O B I L P K C 1 1 6 Einbaumasse RCC 116 Einbaumasse RCC 116, Einbauring und Gitter Einbaumasse RCC 116, Ein- und Aufbauring und Gitter Mounting dimensions RCC 116 Monting dimensions RCC 116, mounting ring and grille Monting dimensions RCC 116, mounting and assembly ring and grille Medidas de montaje RCC 116 Medidas de montaje RCC 116, anillo de montaje empotrado y rejilla...