Herunterladen Inhalt Inhalt Diese Seite drucken

Werbung

Verfügbare Sprachen
  • DE

Verfügbare Sprachen

  • DEUTSCH, seite 11
GIK
K13
GLUE B
BOARD INS
PIÈGE
À INSECTE
INSEC
CTENVAL ME
TRAMP
PA PARA IN
INSEK
KTENFALLE
ARMAD
DILHA PAR
USER M
MANUAL
NOTICE
E D'EMPLOI
GEBRU
IKERSHAND
MANUA
AL DEL USUA
BEDIEN
NUNGSANLE
MANUA
AL DO UTILIZ
SECT TRAP
– 2x 15W
ES À FEUILL
LE COLLAN
ET VANGFO
OLIE – 2x 15
NSECTOS CO
ON HOJA A
MIT KLEBE
EFOLIE - 2x
RA INSECTO
OS COM FAI
DLEIDING
ARIO
ITUNG
ZADOR
TE – 2x 15
W
5 W
ADHESIVA -
- 2x 15W
x 15W
IXA ADESIV
VA - 2x 15W
3
5
 
7
 
9
 
1
1
 
1
3
 
W

Werbung

Inhaltsverzeichnis
loading

Inhaltszusammenfassung für Perel GIK13

  • Seite 1 GLUE B BOARD INS SECT TRAP – 2x 15W PIÈGE À INSECTE ES À FEUILL LE COLLAN TE – 2x 15 INSEC CTENVAL ME ET VANGFO OLIE – 2x 15 TRAMP PA PARA IN NSECTOS CO ON HOJA A ADHESIVA - - 2x 15W INSEK KTENFALLE...
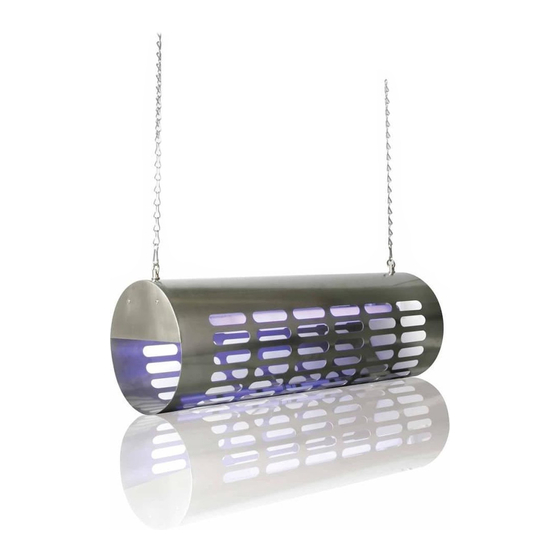
  • Seite 2 GIK13 UV-lamp suspension point (2x) starter power socket IEC C14 tube UV point de suspension (2x) starter prise d’alimentation IEC C14 UV-lamp ophangpunt (2x) starter IEC C14 voedingsaansluiting tubo UV gancho de suspensión (2x) arrancador entrada alimentación IEC C14 UV-Lampe Aufhängehaken (2x)
  • Seite 3 If in dou ubt, contact yo our local waste e disposal aut thorities. Thank yo ou for choosing Perel! Please re ead the manual thoroughly befo ore bringing this s device into ser rvice. If the dev vice was damag...
  • Seite 4: Technical Specifications

    When suspending from the ceiling, mount 2 hooks (not incl.) to the ceiling. Make sure the ceiling is strong enough to carry the weight of the GIK13. Attach the chains to the hooks and the other ends to the suspension points of the GIK13.
  • Seite 5 GIK1 OTICE D ’EMPLOI 1. Int troduction Aux rési idents de l'Uni ion européenn Des info ormations envi ironnementale es importantes s concernant c ce produit Ce symbo ole sur l'appare il ou l'emballage e indique que l’ élimination d’un n appareil en fin n de vie peut po olluer...
  • Seite 6: Spécifications Techniques

    Remarque : Prévoir une prise de courant à proximité directe de l’endroit de montage. • Le GIK13 se prête à un usage en pose libre ou à un montage au plafond (chaines incluses). • Lors d’un montage au plafond, monter 2 crochets (non inclus) au plafond. Veiller à ce que le plafond puisse supporter le poids du GIK13.
  • Seite 7 GIK1 GEBRU UIKERSHA ANDLEID DING 1. Inl eiding Aan alle e ingezetenen v van de Europe ese Unie Belangr ijke milieu-inf formatie betre effende dit pro oduct Dit symbool op p het toestel of d de verpakking g geeft aan dat, al ls het na zijn lev venscyclus word weggeworpen,...
  • Seite 8: Technische Specificaties

    • Bij een plafondmontage, monteer 2 haken (niet meegeleverd) in het plafond. Zord dat de haken en het plafond het gewicht van de GIK13 kunnen dragen. Bevestig de kettingen aan de haken en aan de ophangpunten van de GIK13. b. Vangbord •...
  • Seite 9 ¡Gracias por haber comp prado el GIK13 ! Lea atentame nte las instrucc iones del manua al antes de usar rlo. Si el aparat to ha sufrido alg gún daño en el t...
  • Seite 10: Especificaciones

    Al montarlo al techo, fije 2 ganchos (no incl.) al techo. Asegúrese de que el techo pueda soportar el peso del GIK13. Fije las cadenas a los ganchos y a los puntos de suspensión del GIK13. b. La hoja adhesiva •...
  • Seite 11: Sic Cherheitshin Nweise

    GIK1 BEDIE ENUNGS ANLEITU 1. Ein nführung An alle E Einwohner der r Europäischen n Union Wichtige e Umweltinfor rmationen übe er dieses Produ Dieses Symbol auf dem Produ kt oder der Ver packung zeigt a an, dass die Ent sorgung dieses Produktes nach h seinem Lebens...
  • Seite 12: Technische Daten

    • Bei einer Deckenmontage, befestigen Sie 2 Haken (nicht mitgeliefert) an der Decke. Beachten Sie, dass die Haken und die Decke das Gewicht des GIK13 tragen können. Befestigen Sie die Ketten an den Haken und Aufhängepunkten des GIK13. b. Klebefolie •...
  • Seite 13 íduos. Obrigada a por ter adquiri do o GIK13! Le eia atentamente e as instruções d deste manual a ntes de o usar. Caso o aparelh ho tenha sofrido...
  • Seite 14: Especificações Técnicas

    • Se optar por pendurar no tecto, coloque 2 ganchos (não incl.) no tecto. Certifique-se que o tecto é suficientemente resistente para suportar o GIK13. Prenda as correntes aos ganchos e as outras duas extremidades aos suportes do GIK13. A faixa adesiva •...
  • Seite 15 - out dommage provoqué par une négligence, volontaire ou non, une Velleman® Service and Quality Warranty utilisation ou un entretien incorrects, ou une utilisation de l’appareil Velleman® has over 35 years of experience in the electronics world contraire aux prescriptions du fabricant ; and distributes its products in more than 85 countries.
  • Seite 16 Garantía de servicio y calidad Velleman® Treibriemen, usw. (unbeschränkte Liste). - Schäden verursacht durch Brandschaden, Wasserschaden, Blitz, Velleman® disfruta de una experiencia de más de 35 años en el Unfälle, Naturkatastrophen, usw. mundo de la electrónica con una distribución en más de 85 países. - Schäden verursacht durch absichtliche, nachlässige oder Todos nuestros productos responden a normas de calidad rigurosas y unsachgemäße Anwendung, schlechte Wartung, zweckentfremdete...

Inhaltsverzeichnis