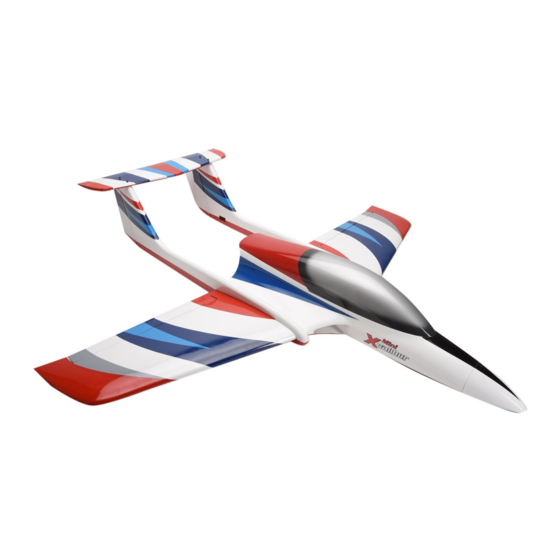
JSM Mini Xcalibur E Anleitung
Quicklinks
Instructions
Specification:
Wingspan: 1310mm (51.6")
Length:
1340mm (52.8")
Weight:
4.2Kg (9.3lbs) (Approx.)
Radio:
7x Channel (Required)
Servos:
7 Mini (Required)
Fan/Motor: 90mm & 8S Brushless Motor (Required)
ESC:
100A HV Brushless (Required)
LiPo:
8S (2 x 4S) Hi-Energy 4500mAh
(Recommended)
Bauanleitung
Technische Daten:
Spannweite:
1.310mm
Länge:
1.340mm
Abfluggewicht ca: 4.200g
RC-Anlage:
ab 7+ Kanäle (empfohlen)
Servos:
7 Stück (empfohlen)
Impeller:
90mm Brushless (empfohlen)
Regler:
100 A HV Brushless (empfohlen)
Antriebsakku:
2x LiPo 4s 14,8 V 4.500mAh
(empfohlen)

Verwandte Anleitungen für JSM Mini Xcalibur E

Inhaltszusammenfassung für JSM Mini Xcalibur E
- Seite 1 Bauanleitung Instructions Specification: Technische Daten: Wingspan: 1310mm (51.6”) Spannweite: 1.310mm Length: 1340mm (52.8”) Länge: 1.340mm Weight: 4.2Kg (9.3lbs) (Approx.) Abfluggewicht ca: 4.200g Radio: 7x Channel (Required) RC-Anlage: ab 7+ Kanäle (empfohlen) Servos: 7 Mini (Required) Servos: 7 Stück (empfohlen) Fan/Motor: 90mm & 8S Brushless Motor (Required) Impeller: 90mm Brushless (empfohlen) ESC:...
- Seite 2 General Notices Routine Pre-Flight Checks Make sure you read this safety information and the instructions before building your model. Follow exactly the recommended procedures and • Before switching on the receiver, ensure that the throttle control on the settings given in the instructions. transmitter is in the motor stop position.
-
Seite 3: Wichtige Hinweise
Wichtige Hinweise Routineprüfungen vor dem Start Lesen Sie vor dem Bau Ihres Modells unbedingt die Sicherheitshinweise genau durch. Halten Sie sich stets an die in den Anleitungen empfohlenen • Bevor Sie den Empfänger einschalten vergewissern Sie sich, dass der Vorgehensweisen und Einstellungen. Gasknüppel auf Stopp / Leerlauf steht. - Seite 4 Introduction Congratulations on your purchase of the Mini Xcalibur E Jet. The Mini Xcalibur E takes all of the best flying characteristics from its bigger counterparts and incorporates them into a compact and practical package. This high performance model is ideal for use as a first EDF or as a sports EDF model and is practical to store and transport.
-
Seite 5: Zusätzlich Benötigte Artikel
Einführung Herzlichen Glückwunsch zum Kauf der Mini Xcalibur E Jet. Die Mini Xcalibur E vereinigt die großartigen Flugeigenschaften seiner größeren Brüder in einem kompakten und praktischem Paket. Dieses Hochleistungs- Modell ist Ideal für den Einsatz als erstes Jet- oder Sport Jetmodell geeignet, und ist durch die geringen Abmessungen einfach zu lagern und zu transportieren. - Seite 6 Step 1 | Schritt 1 Glue the hinges into the aileron as shown, using epoxy or a similar high quality, high strength glue, whilst protecting the hinge point with a drop of oil or grease. Allow to cure. Kleben Sie die Scharniere mit Epoxid, oder einem hochqualitativen, festen Klebstoff in die Querruder, wie gezeigt.
- Seite 7 Step 5 | Schritt 5 Install the aileron servo hatch using 4 screws supplied taking care to ensure it is fitted on the correct side and the colour scheme matches. Nun befestigen Sie den Servodeckel mit den vier mitgelieferten Schrauben. Achten Sie darauf, dass dieser an der richtigen Seite angebracht ist, und zum Farbschema passt.
- Seite 8 Step 10 | Schritt 10 Connect a suitable extension lead to the rudder servo and secure the leads together. Feed the extension lead down the boom using the same process as the wing and screw the servo into position. Befestigen Sie ein passendes Verlängerungskabel am Ruderservo und verbinden und sichern die Kabel miteinander.
- Seite 9 Step 15 | Schritt 15 Screw the flap servo in position and assemble the short linkage as shown. Schrauben Sie das Klappen- Servo an seinen Platz, und montieren die Anlenkung, wie gezeigt. Step 16 | Schritt 16 Slot the main wing spar through the fuselage. If the spar is a tight fit then a light dust of talc will reduce friction.
- Seite 10 When operating, the units may pull significant total current, especially tricycle setups like the Mini Xcalibur E. We recommend the use of a special retract ‘Y’ lead (part number P-CFCYLG) as this separates the signal from the power allowing you to use a separate battery to bypass the receiver to reduce the current load.
- Seite 11 Step 19 | Schritt 19 Assemble the nose leg as shown (use a thread locking compound), fitting the wheel, retaining collet and cable arm. Then cut the closed loop cable in half and attach the end of each cable to the arm and crimp the brass tubes to secure.
- Seite 12 Step 23 | Schritt 23 Screw the nose wheel steering servo in place and attach the horn. Feed the nose leg closed loop wire through the adjusters and secure the wire using the brass crimps ensuring the servo & wheel are centred. Schrauben Sie das Lenkservo für das Bugrad an seinen Platz und befestigen das Horn.
- Seite 13 Step 27 | Schritt 27 Now slide your 90mm fan unit into the glass intake about 2-3mm and secure to the fan unit to the mounting rails as shown, you may need to put plywood packers under your fan unit to achieve the right level and thrustline.
- Seite 14 Step 31 | Schritt 31 Temporarily install your radio battery next to the steering servo. Its final position may need to be changed after balancing the model to achieve the correct balance point. Legen Sie vorübergehend den Empfängerakku an den Platz neben dem Servo. Der entgültige Platz wird erst beim Einstellen des Schwerpunktes festgelegt.
- Seite 15 Control Throws | Ruderausschläge Use the following control throws as a starting point, when you have experience and are comfortable with the model then you can increase or decrease them to suit your flying style. Verwenden Sie folgende Einstellungen als Ausgangspunkt. Wenn Sie Erfahrung haben und mit dem Modell vertraut sind, können Sie die Einstellungen erhöhen, oder verringen, passend zu Ihrem Flugstil.
- Seite 16 We recommend the use of a long runway for first flights, particularly if this is the first EDF model you have flown. The Mini Xcalibur E a good practical sized model with a matching sporty performance. Due to the nature of EDF power it can take a longer than you may expect to build take off speed, especially on grass, but once airborne speed builds quickly.
- Seite 17 – note that more power will be required due to the increased drag of the flap. You will find that the Mini Xcalibur E is very stable in the landing configuration and it should be relatively simple to position the model for an accurate touchdown, the stability once on the ground being excellent due to the wide track of the main wheels.
- Seite 18 Vergnügen, im Kunstflug, Rollen, Loopings, Drehungen usw. zu fliegen. Ebenso einfach ist der Langsamflug. Die Mini Xcalibur E ist sehr stabil und einfach zu fliegen. Wir hoffen, dass es Ihnen Spaß macht Ihre Mini Xcalibur E zu fliegen, genau so wie wir es genossen haben die Vorserienmodelle im Test zu fliegen!
- Seite 19 Take care when using Li-Po batteries and high power electric power systems. Consult the manufacturer for detailed safety instructions. Always fly the Mini Xcalibur E in a safe location at a recognised club. For further information on flying in the UK, please contact:...
- Seite 20 Spare parts are available for the Mini Xcalibur-E all Ripmax stocked model shops. In case of any difficulty, any product queries, or to locate your local Ripmax stockist, please write to the address below or visit www.ripmax.com Ersatzteile sind für den Mini Xcalibur-E in allen Ripmax Modellfachgeschäften verfügbar. Sollten Sie irgendwelche Schwierigkeiten mit Ihrem Produkt haben, oder den örtlichen Ripmax Fachhändler nicht finden, dann schreiben Sie bitte an die angegebene Adresse, oder besuchen Sie unsere Webseite unter www.ripmax.de WEEE...