Herunterladen Inhalt Inhalt Diese Seite drucken
Panasonic HRS100400E Bedienungsanleitung

Panasonic HRS100400E Bedienungsanleitung

Interchangeable lens for digital camera
Inhaltsverzeichnis

Werbung

Verfügbare Sprachen
  • DE

Verfügbare Sprachen

  • DEUTSCH, seite 12
Operating Instructions
INTERCHANGEABLE LENS FOR DIGITAL CAMERA
H-RS100400
Model No.
Please read these instructions carefully before using this product, and save this manual for future use.
E
SQT1200-2
F0116YD2117

Werbung

Inhaltsverzeichnis
loading

Inhaltszusammenfassung für Panasonic HRS100400E

  • Seite 1 Operating Instructions INTERCHANGEABLE LENS FOR DIGITAL CAMERA H-RS100400 Model No. Please read these instructions carefully before using this product, and save this manual for future use. SQT1200-2 F0116YD2117...
  • Seite 2: Inhaltsverzeichnis

    Contents The lens can be used with a digital camera compatible with the lens mount standard for the “Micro Four Thirds System”. Information for Your Safety........ 2 • It cannot be mounted on the Four Thirds mount Precautions............3 specification camera. Supplied Accessories ........
  • Seite 3: Precautions

    ENGLISH – When detaching the lens from the digital camera, -If you see this symbol- take care to ensure that sand, dust, splashes of Disposal of Old Equipment water etc., do not get into the lens or the Only for European Union and countries with recycling terminals.
  • Seite 4: Supplied Accessories

    • To prevent dust and other particles from accumulating on • If condensation occurs, turn the power off and leave it for about or entering the lens, attach the lens rear cap when the lens two hours. Once the camera acclimatizes to the surrounding is not in use.
  • Seite 5: Names And Functions Of Components

    Names and Functions of [LOCK]: Locks the zoom ring. [UNLOCK]: Unlocks the zoom ring. Components • Do not rotate the zoom ring when the zoom lock ring is set to [LOCK]. 5 Zoom ring Rotate the zoom ring when you wish to take large (tele) or wide (wide angle) pictures.
  • Seite 6: Attaching/Detaching The Lens

    • To prevent dust and other particles from accumulating on Note or entering the lens, be sure to attach the lens cap/lens rear cap after detaching the lens from the digital camera. • If you zoom after focusing, focusing errors may occur. After zooming, please perform the focusing again.
  • Seite 7 ∫ Attaching the Lens Hood (Supplied Accessory) Note • When using the lens with the supplied lens hood, check if 1 Rotate the lens hood screw in the the lens hood screw has become loose. direction of the arrow to loosen it ( 1 ). •...
  • Seite 8: Using The Tripod Mount

    Using the Tripod Mount Attach a tripod to the tripod mount of the lens and not to that of the digital camera. If the lens or digital camera prevents the tripod from being attached, attach the supplied external tripod mount to the lens.
  • Seite 9: Cautions For Use

    Cautions for Use • Refer also to the operating instructions of the digital camera. • When the unit is not going to be used for a prolonged Take care not to drop or knock the lens. Also take care period, we recommend storing with a desiccant (silica gel). not to put a lot of pressure on the lens.
  • Seite 10: Specifications

    Specifications Specifications are subject to change without notice. INTERCHANGEABLE LENS FOR DIGITAL CAMERA “LEICA DG VARIO-ELMAR 100-400 mm/F4.0-6.3 ASPH./POWER O.I.S.” Focal length f=100 mm to 400 mm (35 mm film camera equivalent: 200 mm to 800 mm) Aperture type 9 diaphragm blades/circular aperture diaphragm Maximum aperture F4.0 (Wide) to F6.3 (Tele) Minimum aperture value...
  • Seite 11: Limited Warranty (Only For Australia)

    SQT1200...
  • Seite 12: Informationen Für Ihre Sicherheit

    Inhalt • Wenn die Kamera durch elektromagnetische Felder anderer Geräte gestört wird und Fehlfunktionen auftreten, Informationen für Ihre Sicherheit ....12 schalten Sie die Kamera aus. Nehmen Sie den Akku Vermeidung von Störungen ......13 heraus und/oder trennen Sie das Netzadapter ab. Setzen Sie den Akku dann wieder ein und/oder stecken Sie das Beiliegendes Zubehör........
  • Seite 13: Vermeidung Von Störungen

    DEUTSCH • LEICA ist ein eingetragenes Markenzeichen der Leica Vermeidung von Störungen Microsystems IR GmbH. ELMAR ist ein eingetragenes Markenzeichen der Leica Camera AG. Die Herstellung der ∫ Objektivpflege LEICA DG-Objektive erfolgt unter Verwendung von • Dieses Objektiv verfügt über eine staub- und Messinstrumenten und Qualitätssicherungssystemen, die von spritzwasserdichte Konstruktion.
  • Seite 14: Beiliegendes Zubehör

    • Üben Sie keinen zu starken Druck auf das Objektiv aus. – Eine Klimaanlage bläst kalte Luft direkt auf das Objektiv • Schmutz auf dem Objektiv (Wasser, Öl, Fingerabdrücke – Die Kamera wird bei hoher Luftfeuchte verwendet usw.) kann zu schlechteren Bildern führen. Wischen Sie •...
  • Seite 15: Bezeichnungen Und Funktionen Der Einzelnen Kamerateile

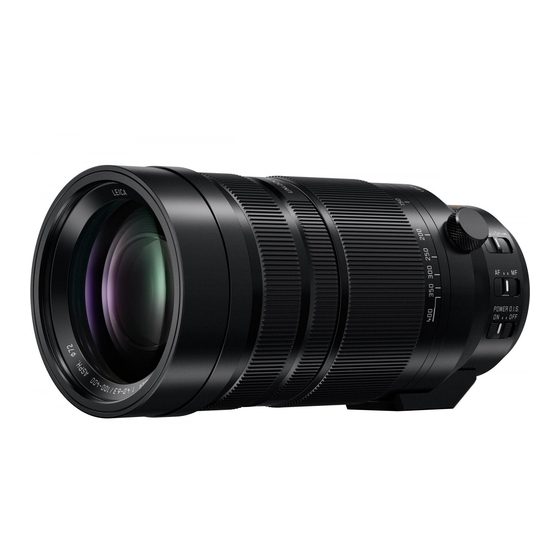
    Bezeichnungen und Funktionen [LOCK]: Arretiert den Zoomring. [UNLOCK]: Gibt den Zoomring wieder frei. der einzelnen Kamerateile • Drehen Sie nicht am Zoomring, wenn der Zoom- Feststellring in die Position [LOCK] gedreht wurde. 5 Zoomring Drehen Sie am Zoomring, wenn Sie Aufnahmen mit Tele oder Aufnahmen mit Weitwinkel machen möchten.
  • Seite 16: Objektiv Ansetzen/Abnehmen

    Hinweis • Bringen Sie den Objektivdeckel/hinteren Objektivdeckel an, wenn Sie das Objektiv von der Digital-Kamera • Wenn Sie nach dem Fokussieren den Zoom verwenden, abnehmen, damit keine Staub- oder anderen Partikel auf kann es zu Fokussierungsproblemen kommen. Bitte stellen Sie nach dem Zoomvorgang erneut scharf. die Linse oder in das Objektiv geraten.
  • Seite 17: Gegenlichtblende Aufsetzen (Mitgeliefertes Zubehör)

    ∫ Gegenlichtblende aufsetzen • Wenn Sie eine Gegenlichtblende und das Blitzlicht (Mitgeliefertes Zubehör) gleichzeitig verwenden, wird das Blitzlicht durch die Gegenlichtblende abgeschirmt, was dazu führt, dass sich der 1 Drehen Sie den Schraubverschluss der untere Teil des Bildschirms verdunkelt (Vignettierung) und es Gegenlichtblende in Pfeilrichtung, um unmöglich ist, die Lichtmenge zu justieren.
  • Seite 18: Stativanschluss

    Stativanschluss Befestigen Sie das Stativ nicht am Stativanschluss der Digital- Kamera, sondern am Stativanschluss des Objektivs. Wenn es durch das Objektiv oder die Digital-Kamera nicht möglich ist, das Stativ zu befestigen, bringen Sie den • Vergewissern Sie sich vor der Benutzung, dass die mitgelieferten externen Stativanschluss am Objektiv an.
  • Seite 19: Vertikale/Horizontale Ausrichtung Ändern

    ∫ Vertikale/horizontale Ausrichtung ändern • Wenn Sie die Digitalkamera mit angebrachtem Objektiv tragen, halten Sie sowohl die Digitalkamera als auch das Sie können den Ausrichtungs-Feststellknopf ( 1 ) lösen, um Objektiv. das Objektiv zusammen mit der Digital-Kamera ( 2 ) zu Wenn in der Umgebung der Kamera Pestizide oder drehen.
  • Seite 20: Fehlerbehebung

    • Weiter Informationen finden Sie auch in der Fehlerbehebung Bedienungsanleitung der Kamera. Wenn ich die Kamera ein- oder ausschalte oder das • Wenn für längere Zeit kein Einsatz erfolgt, lagern Sie das Objektiv gemeinsam mit einem Trocknungsmittel (Silica- Objektiv wackelt höre ich ein ratterndes Geräusch. •...
  • Seite 21: Spezifikationen

    Spezifikationen Die Spezifikationen können ohne Ankündigung geändert werden. WECHSELOBJEKTIV FÜR DIGITAL-KAMERA “LEICA DG VARIO-ELMAR 100-400 mm/F4.0-6.3 ASPH./POWER O.I.S.” Brennweite f=100 mm bis 400 mm (Kleinbild-Äquivalent: 200 mm bis 800 mm) Blende 9 Blendenlamellen/runde Öffnungsblende Maximale Blendenöffnung F4.0 (Weitwinkel) bis F6.3 (Tele) Minimale Blende Objektivaufbau 20 Elemente in 13 Gruppen (1 asphärische ED-Linse, 2 ED-Linsen, 1 UED-Linse)
  • Seite 22: Précautions À Prendre

    Table des matières • Il ne peut pas être monté sur les appareils à monture Four Thirds Précautions à prendre ........22 • Les illustrations de l’appareil photo numérique de ce manuel Précautions ........... 23 d’utilisation prennent le DMC-GH4 comme exemple. Accessoires fournis .........
  • Seite 23: Précautions

    FRANÇAIS -Si vous voyez ce symbole- Précautions L’élimination des équipements usagés ∫ Entretien de l’objectif Applicable uniquement dans les pays membres de • Cet objectif possède un dispositif anti-poussière et anti- l’Union européenne et les pays disposant de éclaboussure. Lorsque vous l’utilisez, soyez attentif aux systèmes de recyclage.
  • Seite 24: Accessoires Fournis

    • N’appuyez pas avec force sur l’objectif. – Lorsque l’air frais d’un climatiseur arrive directement sur l’objectif • Lorsqu’il a des salissures (eau, huile, traces de doigts, etc.) – Lorsque l’appareil est utilisé ou placé dans un endroit humide sur la surface de l’objectif, cela peut avoir une incidence sur •...
  • Seite 25: Noms Et Fonctions Des Composants

    Noms et fonctions des composants [LOCK] : Verrouille la bague de zoom. [UNLOCK] : Déverrouille la bague de zoom. • Ne faites pas tourner la bague de zoom lorsque la bague de verrouillage du zoom est réglée sur [LOCK]. 5 Bague de zoom ournez la bague de réglage du zoom pour une prise de vue rapprochée (téléobjectif) ou à...
  • Seite 26: Fixation/Retrait De L'objectif

    • Avant d’installer l’objectif sur l’appareil photo numérique, Note retirez le capuchon d’objectif arrière. ( 1 , 2 ) • Si vous zoomez après avoir fait la mise au point, une erreur de mise au point peut survenir. Après avoir zoomé, veuillez refaire la mise au point.
  • Seite 27: Utilisation Des Parasoleils

    Utilisation des parasoleils ∫ Fixation du parasoleil (Fourni) Tournez la vis du parasoleil dans le sens de la L’objectif est doté d’un parasoleil coulissant intégré et d’un flèche pour le desserrer ( 1 ). parasoleil fourni. Avec ce dernier, vous pouvez bloquer encore plus efficacement la lumière supplémentaire.
  • Seite 28: Utilisation De La Monture Pour Trépied

    Utilisation de la monture pour Note • Lorsque vous utilisez l’objectif avec le parasoleil fourni, trépied vérifiez si la vis du parasoleil a été desserrée. • Si vous utilisez un parasoleil et le flash en même temps, le parasoleil bloquera la lumière du flash, causant Fixez un trépied à...
  • Seite 29 ∫ Installation de la monture externe pour trépied ∫ Changement de l’orientation verticale/ (fournie) horizontale Vous pouvez débloquer le bouton de verrouillage de Insérez la vis de fixation de la monture externe l’orientation ( 1 ) pour faire tourner l’objectif ainsi que pour trépied ( 1 ) dans la monture pour trépied l’appareil photo numérique ( 2 ).
  • Seite 30: Précautions D'utilisation

    – Où l’eau pourrait mouiller l’objectif Précautions d’utilisation – Où il y a des vibrations – À l’intérieur d’un véhicule • Reportez-vous également au manuel d’utilisation de Prenez soin de ne pas faire tomber ni de cogner l’objectif. l’appareil photo. De plus ne mettez pas trop de pression dessus.
  • Seite 31: Spécifications

    Spécifications Ces spécifications peuvent subir des changements sans avis préalable. OBJECTIF INTERCHANGEABLE POUR APPAREIL PHOTO NUMÉRIQUE “LEICA DG VARIO-ELMAR 100-400 mm/F4.0-6.3 ASPH./POWER O.I.S.” Distance focale f=100 mm à 400 mm (Équivalent à un film de 35 mm : 200 mm à 800 mm) Type d’ouverture 9 lamelles de diaphragme/diaphragme à...
  • Seite 32: Información Para Su Seguridad

    Índice El objetivo puede usarse con una cámara digital compatible con el estándar de montaje de objetivos del “Micro Four Información para su seguridad ......32 Thirds System”. • No se puede montar en una cámara con estándar de Prevención contra las averías ....... 33 soporte Four Thirds Accesorios suministrados........
  • Seite 33: Prevención Contra Las Averías

    ESPAÑOL -Si ve este símbolo- – Coloque la lente en una cámara digital con resistencia al polvo y las salpicaduras. Eliminación de Aparatos Viejos – Al retirar la lente de la cámara digital, tenga cuidado y Solamente para la Unión Europea y países con asegúrese de que la arena, polvo, salpicaduras de sistemas de reciclado.
  • Seite 34: Accesorios Suministrados

    • Para evitar que se introduzcan o acumulen polvo y otras – En lugares húmedos partículas en la lente, instale la tapa trasera de esta • Una vez de que la cámara se haya aclimatado a la cuando no la utilice. temperatura ambiente en empañamiento desaparece •...
  • Seite 35: Nombres Y Funciones De Los Componentes

    Nombres y funciones de los [LOCK]: Bloquea el anillo del zoom. [UNLOCK]: Desbloquea el anillo del zoom. componentes • No gire el anillo del zoom cuando el anillo de bloqueo del zoom está en [LOCK]. 5 Anillo del zoom Gire el anillo del zoom cuando quiere tomar imágenes grandes (teleobjetivo) o anchas (granangular).
  • Seite 36: Unir Y Quitar El Objetivo

    Unir y quitar el objetivo Nota • Si hace zoom después de hacer enfoque, pueden ocurrir Para obtener información sobre cómo colocar y retirar errores de enfoque. Luego de hacer zoom, realice de la lente, consulte las instrucciones de funcionamiento nuevo el enfoque.
  • Seite 37: Cómo Usar Las Viseras De La Lente

    Cómo usar las viseras de la lente ∫ Unión de la visera del objetivo (Accesorio suministrado) La lente viene con una visera deslizante integrada y una 1 Gire el tornillo de la visera de la lente en la visera de la lente suministrada. Con esta última, puede dirección de la flecha para aflojarla ( 1 ).
  • Seite 38: Cómo Usar El Montaje Del Trípode

    Cómo usar el montaje del Nota • Cuando utilice la lente con la visera de la lente trípode suministrada, compruebe si el tornillo de la visera de la lente se ha aflojado. • Si utiliza una visera de la lente y el flash a la vez, la visera Fije un trípode al montaje del de la lente bloqueará...
  • Seite 39: Precauciones Para El Uso

    Gire el tornillo de fijación del montaje del trípode externo en la dirección de las flechas para fijarlo firmemente. • Después de cambiar la orientación, apriete la perilla de bloqueo de la orientación con firmeza y compruebe que no está floja. Precauciones para el uso Tenga cuidado de no hacer caer el objetivo ni le choque contra.
  • Seite 40: Búsqueda De Averías

    • De ninguna manera la unidad debe ser usada o No utilice gasolina, diluyente, alcohol u otros agentes almacenada en uno de los siguientes lugares ya que lo de de limpieza parecidos para limpiar la unidad. hacerlo podría perjudicarla o producir un funcionamiento •...
  • Seite 41: Especificaciones

    Especificaciones Las especificaciones están sujetas a cambio sin previo aviso. ÓPTICA INTERCAMBIABLE PARA CÁMARA DIGITAL “LEICA DG VARIO-ELMAR 100-400 mm/F4.0-6.3 ASPH./POWER O.I.S.” Longitud focal f=100 mm a 400 mm (Igual a una cámara de película de 35 mm: de 200 mm a 800 mm) Tipo de abertura 9 aspas de diafragma/Diafragma de apertura circular Apertura máxima...
  • Seite 42: Informazioni Per La Sua Sicurezza

    Informazioni per la sua sicurezza Indice Informazioni per la sua sicurezza ....42 Tenere l’unità il più possibile lontana da apparecchi Prevenzione guasti ........44 elettromagnetici (come forni a microonde, TV, Accessori in dotazione........45 videogiochi, radiotrasmittenti, linee dell’alta tensione, Nomi e funzioni dei componenti ......
  • Seite 43 ITALIANO • Four Thirds™ e il logo Four Thirds sono marchi o marchi -Se vedete questo simbolo- registrati di Olympus Corporation, in Giappone, negli Stati Smaltimento di vecchie apparecchiature Uniti, nell’Unione Europea e in altri paesi. Solo per Unione Europea e Nazioni con sistemi di •...
  • Seite 44: Prevenzione Guasti

    • Per migliorare la resistenza alla polvere e agli schizzi di questo Prevenzione guasti obiettivo, nella sezione di innesto dell’obiettivo è presente una protezione in gomma. Dopo aver cambiato obiettivo diverse ∫ Custodia dell’obiettivo volte, potreste rilevare che la protezione in gomma ha lasciato •...
  • Seite 45: Accessori In Dotazione

    Accessori in dotazione ∫ Informazioni sulla condensa (Appannamento dell’obiettivo) • La condensa si forma quando si verificano differenze di I codici dei prodotti sono aggiornati a gennaio 2016. È temperatura e umidità come quelle descritte sotto. La possibile che subiscano delle modifiche. condensa può...
  • Seite 46: Nomi E Funzioni Dei Componenti

    Nomi e funzioni dei componenti [LOCK]: Blocca la ghiera dello zoom. [UNLOCK]: Sblocca la ghiera dello zoom. • Non ruotare la ghiera dello zoom quando la ghiera di blocco dello zoom è impostata su [LOCK]. Ghiera dello zoom Ruotare la ghiera dello zoom quando si desidera riprendere immagini ravvicinate (teleobiettivo) o di grande ampiezza (grandangolo).
  • Seite 47: Installazione/Rimozione Dell'obiettivo

    • Per evitare che polvere ed altre particelle si accumulino Nota sull'obiettivo o penetrino al suo interno, fissare il • Se si zooma dopo aver messo a fuoco, possono verificarsi errori di copriobiettivo/copriobiettivo posteriore dopo aver rimosso messa a fuoco. Dopo aver zoomato, mettere nuovamente a fuoco. l'obiettivo dalla fotocamera digitale.
  • Seite 48 ∫ Installazione del paraluce Nota (Accessorio in dotazione) • Quando si utilizza l'obiettivo con il paraluce in dotazione, verificare che la vite del paraluce non si sia allentata. Ruotare la vite del paraluce nella direzione • Se si usa contemporaneamente un paraluce ed il flash, il indicata dalla freccia per allentarla ( 1 ).
  • Seite 49: Utilizzo Dell'attacco Del Treppiede

    Utilizzo dell'attacco del treppiede Fissare un treppiede all'attacco del treppiede dell'obiettivo e non a quello della fotocamera digitale. Se l'obiettivo o la fotocamera digitale impediscono l'installazione del treppiede, fissare all'obiettivo l'attacco del treppiede esterno in dotazione. • Controllare che la vite di fissaggio dell'attacco del •...
  • Seite 50: Precauzioni Per L'uso

    Precauzioni per l’uso • Vedere anche le istruzioni per l’uso della fotocamera digitale. • Quando si prevede di non utilizzare l’unità per un periodo prolungato, si consiglia di porvi accanto un disseccante (silica Fare attenzione a non lasciar cadere o a non urtare l’obiettivo. gel).
  • Seite 51: Specifiche

    Specifiche È possibile che le specifiche subiscano delle modifiche senza preavviso. LENTI INTERCAMBIABILI PER FOTOCAMERA DIGITALE “LEICA DG VARIO-ELMAR 100-400 mm/F4.0-6.3 ASPH./POWER O.I.S.” Lunghezza focale f=100 mm a 400 mm (equivalente per fotocamera con pellicola da 35 mm: 200 mm a 800 mm) Tipo di apertura 9 lamelle diaframma/diaframma con apertura circolare Apertura massima...
  • Seite 52: 安全注意事項

    • 本使用說明書中的數位相機圖例以 DMC-GH4 為例進行說 目錄 明。 安全注意事項 ......52 • 由於產品的不斷改進,本說明書中所描述的產品外觀和規 故障預防 ....... 53 格可能與實際所購買的產品有所不同。 • Micro Four Thirds™ 和 Micro Four Thirds 標誌是 Olympus 操作部中文表示對照表 ....54 Corporation 在日本、美國、歐盟和其他國家的商標或註冊 提供的附件 ......54 商標。 元件的名稱及功能 ......55 • Four Thirds™ 和 Four Thirds 標誌是 Olympus Corporation 取下鏡頭...
  • Seite 53: 故障預防

    中文 (繁體) • 為了防止灰塵和其他顆粒積聚在鏡頭上或者進入鏡頭,請 故障預防 在不使用鏡頭時安裝鏡頭後蓋。 ∫ • 為了保護鏡頭接觸點 1,請勿在其安裝面朝下的狀態下放 鏡頭保養 • 本鏡頭具有防塵和防濺構造。 使用時,請注意以下幾點。 置鏡頭。 此外,請勿讓鏡頭接觸點變髒。 如果鏡頭不正確工作,請向經銷商或離您最近的服務中心 諮詢。 – 請將鏡頭安裝到防塵和防濺的數位相機上 。 – 從數位相機上取下鏡頭時 , 請注意確保沙子 、 灰塵 、 飛濺的 水滴等沒有進入到鏡頭或端口中 。 – 使用內置滑動鏡頭遮光罩時 , 請確保沙子和灰塵等顆粒沒 有附著到鏡筒上 , 內置滑動鏡頭遮光罩滑動的地方 。 – 本鏡頭不防水 , 無法用於水中拍攝 。 對於防濺 , 本鏡頭採用 減少水進入的構造...
  • Seite 54: 操作部中文表示對照表

    操作部中文表示對照表 提供的附件 產品號碼截至 2016 年 1 月為準 。 此後可能會有變更 。 SYQ0679 SFC0360 SYF0074 VFC4605 SYQ0680 鏡頭袋 鏡頭遮光罩 鏡頭蓋 鏡頭後蓋 外部三腳架台座 • 購買時,鏡頭後蓋和鏡頭蓋安在可換鏡頭上。 SQT1200...
  • Seite 55: 元件的名稱及功能

    元件的名稱及功能 [LOCK]: 鎖定變焦環 。 [UNLOCK]: 解鎖變焦環 。 • 變焦鎖定環設定到 [LOCK] 時,請勿轉動變焦環。 5 變焦環 想要拍攝較大 (遠攝) 或較寬 (廣角) 圖片時 , 請轉動變焦環 。 6 三腳架台座 (P58) 7 方向鎖定旋鈕 (P58) 8 O.I.S. 開關 將本鏡頭安裝到了相機時 , 如果將 O.I.S. 開關設定到 [ON] , 穩定器功能會被設定為啟動 。 • 使用三腳架時,建議將 O.I.S. 開關設定到 [OFF]。 9 [AF/MF] 開關...
  • Seite 56: 安裝 / 取下鏡頭

    ∫ 安裝濾鏡 注意 • 如果同時使用 2 個以上的濾鏡,可能會出現暈影。 • 如果在對焦後變焦,可能會出現對焦誤差。 變焦後,請重 • 可以在安裝著濾鏡的狀態下安裝鏡頭蓋或提供的鏡頭遮光 新進行對焦。 罩。 • 在非常安靜的情況下,在動態影像錄製過程中可能會錄製 • 不能將轉換鏡頭或轉接器安裝到該鏡頭上。 可以使用濾 上自動對焦的工作音。 這並非故障。 在這種情況下,切換 鏡,但安裝其他任何元件可能會對鏡頭造成損壞。 到手動對焦會改善該狀況。 • 如果在錄製動態影像時將 O.I.S. 設定到 [ON] , 可能會錄製上 使用鏡頭遮光罩 工作音。 如果您介意,建議將 O.I.S. 開關設定到 [OFF] 並 將相機安裝到三腳架上。 本鏡頭有內置滑動鏡頭遮光罩和提供的鏡頭遮光罩 。 用後者 , 安裝...
  • Seite 57 ∫ 安裝鏡頭遮光罩 (提供的附件) 注意 • 在安裝著提供的鏡頭遮光罩的狀態下使用鏡頭時,請確認 朝箭頭指示的方向轉動鏡頭遮光罩螺絲將其鬆開 鏡頭遮光罩螺絲是否變鬆動。 ( 1 )。 • 如果同時使用鏡頭遮光罩和閃光燈,鏡頭遮光罩會遮住閃 插入鏡頭遮光罩直到停止為止 (2)。 光燈發出的光,從而導致畫面的下方變暗 (暈影)並且使 得不能調整光量。 建議不同時使用鏡頭遮光罩和閃光燈。 朝箭頭指示的方向轉動鏡頭遮光罩螺絲牢牢地固 • 攜帶時,可以以相反的方向暫時 定住鏡頭遮光罩 (3)。 安裝提供的鏡頭遮光罩。 • 請勿靠僅持拿內置滑 動鏡頭遮光罩或提供 的鏡頭遮光罩來攜帶 鏡頭。 SQT1200...
  • Seite 58: 使用三腳架台座

    使用三腳架台座 將三腳架安裝到鏡頭的三腳架台 座上而不安裝到數位相機的上 。 如果鏡頭或數位相機妨礙三腳架 安裝 , 請將提供的外部三腳架台 座安裝到鏡頭上 。 • 例如,使用電池把手 (DMW-BGGH3) 時,會接觸到三腳架 的雲台,妨礙三腳架安裝。 在這種情況下,請將提供的外 • 使用前,請確認外部三腳架台座安裝螺絲不鬆動。 部三腳架台座安裝到鏡頭上。 • 切勿擊打外接三腳架接環或對其用力過猛。 • 即使使用外部三腳架台座,介面單元 (DMW-YAGH/AG- YAGH) 也會妨礙三腳架安裝。 在這種情況下,請將三腳架 安裝到介面單元上的適當的三腳架插孔上。 ∫ 改變縱向 / 橫向 可以鬆開方向鎖定旋鈕 ( 1 ) 以和數位相機一起轉動鏡頭 ∫ 安裝外部三腳架台座 (提供) ( 2 ) 。...
  • Seite 59: 使用時的注意事項

    • 請勿觸摸本裝置的電觸點。 這樣做可能會導致本裝置發生 使用時的注意事項 故障。 • 請勿拆卸或改裝本裝置。 請務必小心 , 切勿跌落或撞擊鏡頭 。 還要務必小心 , 切勿在鏡 請勿使用汽油 、 稀釋劑 、 酒精或其他類似的清潔劑清潔本裝 頭上施加過多壓力 。 置 。 • 請注意不要讓裝有鏡頭的包跌落,因為這樣可能會損壞鏡 • 使用溶劑會損壞鏡頭或導致表面漆剝落。 頭。相機可能會停止正常操作,可能無法繼續拍攝圖片。 • 請用一塊乾軟布擦袪灰塵或手印。 • 在安裝著鏡頭的狀態下攜帶數位相機時,請將數位相機和 • 請用乾的除塵布擦去鏡頭接口橡膠、變焦環、變焦鎖定 鏡頭都握住。 環、對焦環或內置滑動鏡頭遮光罩上的污垢和灰塵。 在相機周圍使用殺蟲劑或其他揮發性的物質時 , 請勿使其接 • 請勿使用廚房清潔劑或經化學方法處理過的抹布。 觸到鏡頭...
  • Seite 60 規格 規格如有變更 , 恕不另行通知 。 數位相機用可替換鏡頭 “LEICA DG VARIO-ELMAR 100-400 mm/F4.0-6.3 ASPH./POWER O.I.S.” f=100 mm 至 400 mm 焦距 (相當於 35 mm 菲林相機 : 200 mm 至 800 mm) 9 片控光片 / 圓形虹膜光圈 光圈類型 F4.0 (廣角) 至 F6.3 (遠攝) 最大光圈 最小光圈值...
  • Seite 61: Информация Для Вашей Безопасности

    РУССКИЙ ЯЗЫК Информация для вашей безопасности Содержание Информация для вашей безопасности..61 Храните прибор вдали от источников Правила эксплуатации ........ 62 электромагнитного излучения (например, Принадлежности, входящие в комплект ..64 микроволновых печей, телевизоров, оборудования Названия и функции составных частей ..64 для...
  • Seite 62: Правила Эксплуатации

    • Micro Four Thirds™ и знаки логотипа Micro Four Thirds Правила эксплуатации являются товарными знаками или зарегистрированными товарными знаками Olympus ∫ Уход за объективом Corporation в Японии, Соединенных Штатах, • У данного объектива пыленепроницаемое и Европейском Союзе и других странах. брызгозащищенное...
  • Seite 63 ∫ кольца объектива в месте прикрепления объектива на О конденсации (Запотевании объектива) корпусе цифровой камеры. Это не влияет на ее работу. • Конденсация происходит при разнице в температуре и За информацией о смене резинового уплотнительного влажности, как описано ниже. Конденсация может кольца...
  • Seite 64: Принадлежности, Входящие В Комплект

    Принадлежности, Названия и функции входящие в комплект составных частей Номера изделий верны по состоянию на январь 2016 г. Они могут изменяться. SYQ0679 SFC0360 SYF0074 VFC4605 SYQ0680 1 Чехол для объектива 6 7 8 9 10 2 Бленда объектива Поверхность линзы 3 Крышка...
  • Seite 65: Установка/Снятие Объектива

    [LOCK]: Кольцо трансфокатора блокируется. Примечание [UNLOCK]: Кольцо трансфокатора разблокируется. • Если использовать функцию увеличения после выполнения • Не поворачивайте кольцо трансфокатора, когда кольцо фокусировки, фокусировка может оказаться неправильной. блокировки трансфокатора установлено на [LOCK]. После увеличения выполните фокусировку повторно. 5 Кольцо трансфокатора •...
  • Seite 66: Использование Бленд Объектива

    • Чтобы пылинки и другие частицы не скапливались на рекомендуется заблокировать кольцо трансфокатора объективе и не попадали внутрь, после снятия кольцом блокировки трансфокатора. объектива с цифровой фотокамеры обязательно ∫ Присоединение бленды объектива наденьте крышку объектива/заднюю крышку (Принадлежность в комплекте) объектива. ∫...
  • Seite 67: Использование Крепления Для Штатива

    Использование крепления для штатива Примечание • Во время использования объектива с блендой Прикрепляйте штатив к объектива, поставляемой в комплекте, проверяйте, не креплению для штатива на ослаб ли винт бленды объектива. объективе, а не на цифровой • Если бленда объектива и вспышка используются одновременно, фотокамере.
  • Seite 68 ∫ Прикрепление внешнего крепления для ∫ Изменение вертикальной/горизонтальной штатива (поставляется в комплекте) ориентации Если ослабить ручку блокировки ориентации ( 1 ), можно Вставьте винт внешнего крепления для штатива повернуть объектив вместе с цифровой фотокамерой ( 2 ). ( 1 ) в крепление для штатива на объективе. Таким...
  • Seite 69: Предосторожности При Использовании Фотокамеры

    Предосторожности при – Г де присутствует вибрация – В автомобиле использовании фотокамеры • См. также инструкции по эксплуатации цифровой камеры. • Если камера не будет использоваться в течение длительного времени, рекомендуется хранить ее вместе с влагопоглотителем Старайтесь не ронять и не ударять объектив. Также (силикагелем).
  • Seite 70: Технические Характеристики

    Технические характеристики Технические характеристики могут быть изменены без уведомления. СМЕННЫЙ ОБЪЕКТИВ ДЛЯ ЦИФРОВОЙ ФОТОKAMEРЫ “LEICA DG VARIO-ELMAR 100-400 мм/F4.0-6.3 ASPH./POWER O.I.S.” Фокусное расстояние f=100 мм до 400 мм (Эквивалент 35 мм пленочной камеры: от 200 мм до 800 мм) Тип диафрагмы 9 лепестки...
  • Seite 71 Установленный производителем в порядке п. 2 ст. 5 Федерального Закона РФ “О защите прав потребителей” срок службы данного изделия равен 7 годам с даты производства при условии, что изделие используется в строгом соответствии с настоящей инструкцией по эксплуатации и применимыми техническими стандартами. SQT1200...
  • Seite 72 Manufactured by: Panasonic Corporation Kadoma, Osaka, Japan Importer for Europe: Panasonic Marketing Europe GmbH Panasonic Testing Centre Winsbergring 15, 22525 Hamburg, Germany Panasonic Corporation Web Site: http://www.panasonic.com  Panasonic Corporation 2016...

Inhaltsverzeichnis