VEVOR TR15045200 Originalanleitung
Reifenregal
Inhaltsverzeichnis
Technical Support and E-Warranty Certificate www.vevor.com/support
TIRE RACK
MODEL:TR15045200, TR13050180
We continue to be committed to provide you tools with competitive price.
"Save Half", "Half Price" or any other similar expressions used by us only
represents an estimate of savings you might benefit from buying certain tools
with us compared to the major top brands and does not necessarily mean to cover
all categories of tools offered by us. You are kindly reminded to verify carefully
when you are placing an order with us if you are actually Saving
Half in comparison with the top major brands.
Inhaltsverzeichnis

Verwandte Anleitungen für VEVOR TR15045200


Inhaltszusammenfassung für VEVOR TR15045200
- Seite 1 Technical Support and E-Warranty Certificate www.vevor.com/support TIRE RACK MODEL:TR15045200, TR13050180 We continue to be committed to provide you tools with competitive price. "Save Half", "Half Price" or any other similar expressions used by us only represents an estimate of savings you might benefit from buying certain tools with us compared to the major top brands and does not necessarily mean to cover all categories of tools offered by us.
- Seite 2 This is the original instruction, please read all manual instructions carefully before operating. VEVOR reserves a clear interpretation of our user manual. The appearance of the product shall be subject to the product you received. Please forgive us that we won't inform you again if there are any technology or software updates on our product.
-
Seite 3: Important Safeguards
IMPORTANT SAFEGUARDS WARNING: Read and understand this entire manual before operating or servicing this product. Failure to follow these warnings and instructions can cause personal injury or damage to valuable property. • Avoid children using the product. And this product is not a toy. Do not allow children to play. -
Seite 4: Part List
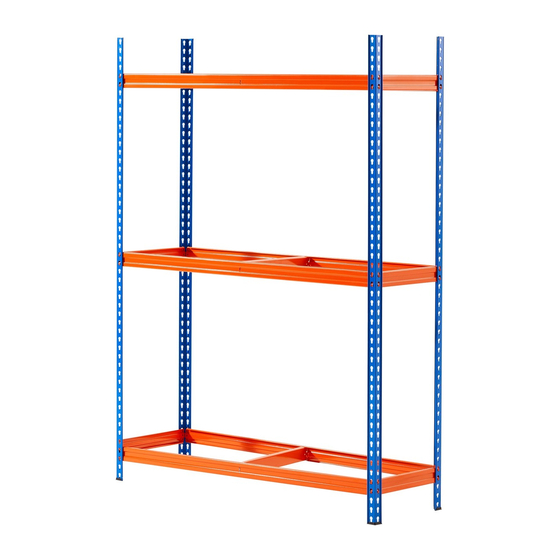
SPECIFICATION Model TR15045200 TR13050180 L*W*H: L*W*H: Size 1500*450*1980mm 1300*500*1790mm Number of layers placed Capacity 18 tyres 12 tyres PART LIST identifier Name Picture TR15045200, TR13050180 Upright Front & Back Beam Side Beam Centre Support Plastic foot Manual - 3 -... - Seite 5 Tire Rack Assemble STEP1. Select two upright A and push on plastic feet G to the bases. Insert a short side beam C into the key holes at the lowest shelf level required. Ensure the beam is 90 degrees to the upright. - 4 -...
- Seite 6 Fig.1 STEP2. Tap beam C with a Rubber mallet to ensure the end studs are fully located in the bottom of the keyholes on both uprights. Lean the uprights A against a wall for support if needed. Note: An assistant is recommended for installation. Fig.2 - 5 -...
- Seite 7 STEP3. Repeat steps 1 and 2 until you have created a "ladder style frame” Tip: Now is a good time to check the space between beams suits the items you want to store on the shelves and adjust as required. Fig.3 STEP4.
- Seite 8 STEP5. Take two long beams B and insert them into the key holes on One frame at the same height as the short beams. Tap into place with a rubber mallet. Fig.5 STEP6. Insert the other ends of the beams B into the second frame as in step 5.
- Seite 9 Step7. Repeat steps 5 and 6 to add the remaining long beams. Ensure that each long beam is located at the same height as the side beams. Fig.7 Step8. Locate a centre support beam D on to the metal studs on the centre of each long beam B.
- Seite 10 Fig.8 Step9. The bay is now completed and ready to use. Fig.9 - 9 -...
- Seite 11 Manufacturer: Shanghaimuxinmuyeyouxiangongsi Address: Shuangchenglu 803nong11hao1602A-1609shi, baoshanqu, shanghai 200000 CN. Imported to AUS: SIHAO PTY LTD. 1 ROKEVA STREETEASTWOOD NSW 2122 Australia Imported to USA: Sanven Technology Ltd. Suite 250, 9166 Anaheim Place, Rancho Cucamonga, CA 91730 YH CONSULTING LIMITED. C/O YH Consulting Limited Office 147, Centurion House, London Road, Staines-upon-Thames, Surrey, TW18 4AX E-CrossStu GmbH...
- Seite 12 Technical Support and E-Warranty Certificate www.vevor.com/support...
- Seite 13 Machine Translated by Google Assistance t echnique e t c ertificat d e g arantie é lectronique w ww.vevor.com/support SUPPORT D E P NEU MODÈLE : T R15045200, T R13050180 Nous c ontinuons à n ous e ngager à v ous f ournir d es o utils à d es p rix c ompétitifs.
- Seite 14 à n ous c ontacter : A ssistance t echnique e t c ertificat d e g arantie électronique w ww.vevor.com/support Il s 'agit d e l a n otice d 'utilisation d 'origine. V euillez l ire a ttentivement t outes ...
-
Seite 15: Mesures D E S Écurité I Mportantes
Machine Translated by Google MESURES D E S ÉCURITÉ I MPORTANTES AVERTISSEMENT : L isez e t c omprenez l 'intégralité d e c e m anuel a vant d'utiliser o u d 'entretenir c e p roduit. L e n onrespect d e c es les ... - Seite 16 Machine Translated by Google SPÉCIFICATION Modèle TR15045200 TR13050180 Longueur*largeur*hauteur : Longueur*largeur*hauteur : Taille 1500*450*1980mm 1300*500*1790mm Nombre d e couches p lacées Capacité 18 p neus 12 p neus LISTE D ES P IÈCES Qté N° d 'identifiant Image TR15045200, TR13050180 Droit Avant e t a rrière Faisceau Poutre ...
- Seite 17 Machine Translated by Google Assemblage d u s upport à p neus ÉTAPE 1 . S électionnez d eux m ontants A e t p oussez l es p ieds e n p lastique G v ers l es b ases. Insérez ...
- Seite 18 Machine Translated by Google Fig.1 ÉTAPE 2 . T apez s ur l a p outre C a vec u n m aillet e n c aoutchouc p our v ous a ssurer q ue l es goujons d 'extrémité s ont b ien p lacés d ans l e b as d es t rous d e s errure d es d eux m ontants. Appuyez ...
- Seite 19 Machine Translated by Google ÉTAPE 3 . R épétez l es é tapes 1 e t 2 j usqu'à c e q ue v ous a yez c réé u n « cadre d e s tyle é chelle » Astuce : ...
- Seite 20 Machine Translated by Google ÉTAPE 5 . P renez d eux l ongues p outres B e t i nsérezles d ans l es t rous d e s errure d u c adre O ne à l a même ...
- Seite 21 Machine Translated by Google Étape 7 . R épétez l es é tapes 5 e t 6 p our a jouter l es p outres l ongues r estantes. A ssurezvous q ue c haque poutre l ongue e st s ituée à l a m ême h auteur q ue l es p outres l atérales. Fig.7 Étape ...
- Seite 22 Machine Translated by Google Fig.8 Étape 9 . L a b aie e st m aintenant t erminée e t p rête à ê tre u tilisée. Fig.9 9 ...
- Seite 23 Machine Translated by Google Fabricant : S hanghaimuxinmuyeyouxiangongsi Adresse : Shuangchenglu 8 03nong11hao1602A1609shi, b aoshanqu, s hanghai 200000 C N. Importé e n A ustralie : S IHAO P TY L TD. 1 R OKEVA S TREETEASTWOOD NSW 2 122 A ustralie Importé a ux É tatsUnis : S anven T echnology L td. S uite 2 50, 9 166 A naheim Lieu, ...
- Seite 24 Machine Translated by Google Assistance t echnique e t c ertificat d e g arantie électronique w ww.vevor.com/support...
- Seite 25 Machine Translated by Google Technischer Support und E-Garantie-Zertifikat www.vevor.com/support REIFENREGAL MODELL:TR15045200, TR13050180 Wir sind weiterhin bestrebt, Ihnen Werkzeuge zu wettbewerbsfähigen Preisen anzubieten. „Sparen Sie die Hälfte“, „Halber Preis“ oder andere ähnliche Ausdrücke, die wir verwenden, stellen nur eine Schätzung der Ersparnis dar, die Sie beim Kauf bestimmter Werkzeuge bei uns im Vergleich zu den großen Topmarken erzielen können, und decken nicht unbedingt alle von uns...
- Seite 26 Dies ist die Originalanleitung. Bitte lesen Sie alle Anweisungen sorgfältig durch, bevor Sie das Gerät in Betrieb nehmen. VEVOR behält sich eine klare Auslegung unserer Bedienungsanleitung vor. Das Erscheinungsbild des Produkts richtet sich nach dem Produkt, das Sie erhalten haben. Bitte verzeihen Sie uns, dass wir Sie nicht erneut informieren, wenn es Technologie- oder Software-Updates für unser Produkt gibt.
-
Seite 27: Wichtige Sicherheitshinweise
Machine Translated by Google WICHTIGE SICHERHEITSHINWEISE WARNUNG: Lesen Sie das gesamte Handbuch sorgfältig durch, bevor Sie Betrieb oder Wartung dieses Produkts. Die Nichtbeachtung dieser Warnungen und Anweisungen können zu Verletzungen oder Schäden führen zu wertvollem Eigentum. • Vermeiden Sie die Verwendung des Produkts durch Kinder. Und dieses Produkt ist kein Spielzeug. Erlauben Sie Kindern zu spielen. -
Seite 28: Spezifikation
Machine Translated by Google SPEZIFIKATION Modell TR15045200 TR13050180 L*B*H: L*B*H: Größe 1500 x 450 x 1980 mm 1300 x 500 x 1790 mm Anzahl der Schichten platziert Kapazität 18 Reifen 12 Reifen TEILELISTE Menge Nr.-Kennung Name Bild TR15045200, TR13050180 Aufrecht Vorder- und Rückseite... -
Seite 29: Reifenregal Zusammenbauen
Machine Translated by Google Reifenregal zusammenbauen SCHRITT 1. Wählen Sie zwei Pfosten A aus und drücken Sie die Kunststofffüße G an die Sockel. Stecken Sie einen kurzen Seitenträger C in die Schlüssellöcher auf der niedrigsten benötigten Regalebene. Stellen Sie sicher, dass der Träger einen Winkel von 90 Grad zum Pfosten hat. - 4 -... - Seite 30 Machine Translated by Google Abb. 1 SCHRITT 2. Klopfen Sie mit einem Gummihammer auf Balken C, um sicherzustellen, dass die Endbolzen vollständig im Boden der Schlüssellöcher an beiden Pfosten sitzen. Lehnen Sie die Pfosten A bei Bedarf zur Unterstützung an eine Wand. Hinweis: Für die Installation wird eine Hilfsperson empfohlen.
- Seite 31 Machine Translated by Google SCHRITT 3. Wiederholen Sie die Schritte 1 und 2, bis Sie einen „Leiterrahmen“ erstellt haben. Tipp: Prüfen Sie jetzt, ob der Abstand zwischen den Balken für die Gegenstände, die Sie in den Regalen lagern möchten, geeignet ist, und passen Sie ihn ggf. an. Abb.3 SCHRITT 4.
- Seite 32 Machine Translated by Google SCHRITT 5. Nehmen Sie zwei lange Balken B und stecken Sie sie in die Schlüssellöcher an einem Rahmen auf gleicher Höhe wie die kurzen Balken. Klopfen Sie sie mit einem Gummihammer fest. Abb.5 SCHRITT 6. Stecken Sie die anderen Enden der Balken B in den zweiten Rahmen wie in Schritt 5.
- Seite 33 Machine Translated by Google Schritt 7. Wiederholen Sie die Schritte 5 und 6, um die restlichen langen Balken hinzuzufügen. Stellen Sie sicher, dass sich jeder lange Balken auf der gleichen Höhe wie die Seitenbalken befindet. Abb.7 Schritt 8. Setzen Sie einen mittleren Stützbalken D auf die Metallbolzen in der Mitte jedes langen Balkens B.
- Seite 34 Machine Translated by Google Abb.8 Schritt 9. Die Bucht ist nun fertig und einsatzbereit. Abb.9 - 9 -...
- Seite 35 Machine Translated by Google Hersteller: Shanghaimuxinmuyeyouxiangongsi Adresse: Shuangchenglu 803nong11hao1602A-1609shi, baoshanqu, Shanghai 200000 CN. Nach AUS importiert: SIHAO PTY LTD. 1 ROKEVA STREETEASTWOOD NSW 2122 Australien Importiert in die USA: Sanven Technology Ltd. Suite 250, 9166 Anaheim Ort, Rancho Cucamonga, CA 91730 YH CONSULTING LIMITED.
- Seite 36 Machine Translated by Google Technischer Support und E-Garantie-Zertifikat www.vevor.com/support...
- Seite 37 Machine Translated by Google Supporto tecnico e certificato di garanzia elettronica www.vevor.com/support PORTA PNEUMATICI MODELLO:TR15045200, TR13050180 Continuiamo a impegnarci per fornirvi strumenti a prezzi competitivi. "Risparmia la metà", "Metà prezzo" o qualsiasi altra espressione simile da noi utilizzata rappresenta solo una stima del risparmio che potresti ottenere acquistando determinati utensili con noi rispetto ai principali marchi principali e non significa necessariamente coprire tutte le categorie di utensili da noi offerti.
- Seite 38 Questa è l'istruzione originale, si prega di leggere attentamente tutte le istruzioni del manuale prima di utilizzare. VEVOR si riserva una chiara interpretazione del nostro manuale utente. L'aspetto del prodotto sarà soggetto al prodotto ricevuto. Vi preghiamo di perdonarci se non vi informeremo di nuovo se ci sono aggiornamenti tecnologici o software sul nostro prodotto.
-
Seite 39: Importanti Misure Di Sicurezza
Machine Translated by Google IMPORTANTI MISURE DI SICUREZZA ATTENZIONE: leggere e comprendere l'intero manuale prima funzionamento o la manutenzione di questo prodotto. La mancata osservanza di queste le avvertenze e le istruzioni possono causare lesioni personali o danni a beni di valore. • Evitare che i bambini utilizzino il prodotto. -
Seite 40: Elenco Dei Pezzi
Machine Translated by Google SPECIFICHE Modello TR15045200 TR13050180 L*L*A: L*L*A: Misurare 1500*450*1980mm 1300*500*1790mm Numero di strati posizionati Capacità 18 pneumatici 12 pneumatici ELENCO DEI PEZZI Quantità No. identificativo Nome Immagine TR15045200, TR13050180 Verticale Davanti e dietro Trave Trave laterale Centro... - Seite 41 Machine Translated by Google Montaggio del porta-pneumatici FASE 1. Selezionare due montanti A e spingere i piedini di plastica G sulle basi. Inserire una trave laterale corta C nei fori della chiave al livello di ripiano più basso richiesto. Assicurarsi che la trave sia a 90 gradi rispetto al montante. - 4 -...
- Seite 42 Machine Translated by Google Fig.1 STEP2. Battere la trave C con un martello di gomma per assicurarsi che i perni terminali siano completamente posizionati nella parte inferiore dei fori della serratura su entrambi i montanti. Appoggiare i montanti A contro una parete per supporto, se necessario.
- Seite 43 Machine Translated by Google PASSO 3. Ripetere i passaggi 1 e 2 fino a creare una "cornice in stile scala" Suggerimento: questo è il momento giusto per verificare che lo spazio tra le travi sia adatto agli oggetti che vuoi riporre sugli scaffali e, se necessario, regolarlo. Figura 3 FASE 4.
- Seite 44 Machine Translated by Google STEP5. Prendi due travi lunghe B e inseriscile nei fori della chiave su One frame alla stessa altezza delle travi corte. Batti in posizione con un martello di gomma. Figura 5 PASSO 6. Inserire le altre estremità delle travi B nel secondo telaio come in passo 5.
- Seite 45 Machine Translated by Google Fase 7. Ripetere le fasi 5 e 6 per aggiungere le travi lunghe rimanenti. Assicurarsi che ogni trave lunga sia posizionata alla stessa altezza delle travi laterali. Figura 7 Fase 8. Posizionare una trave di supporto centrale D sui perni metallici al centro di ogni trave lunga B.
- Seite 46 Machine Translated by Google Figura 8 Fase 9. La baia è ora completata e pronta per l'uso. Figura 9 - 9 -...
- Seite 47 Machine Translated by Google Produttore: Shanghaimuxinmuyeyouxiangongsi Indirizzo: Shuangchenglu 803nong11hao1602A-1609shi, baoshanqu, shanghai 200000 CN. Importato in AUS: SIHAO PTY LTD. 1 ROKEVA STREETEASTWOOD Nuovo Galles del Sud 2122 Australia Importato negli USA: Sanven Technology Ltd. Suite 250, 9166 Anaheim Luogo, Rancho Cucamonga, CA 91730 CONSULENZA YH LIMITATA.
- Seite 48 Machine Translated by Google Supporto tecnico e certificato di garanzia elettronica www.vevor.com/support...
- Seite 49 Machine Translated by Google Soporte t écnico y c ertificado d e g arantía e lectrónica w ww.vevor.com/support PORTLANTAS P ARA N EUMÁTICOS MODELO: T R15045200, T R13050180 Seguimos c omprometidos a b rindarle h erramientas a p recios c ompetitivos.
- Seite 50 A sistencia t écnica y c ertificado d e g arantía e lectrónica www.vevor.com/support Estas s on l as i nstrucciones o riginales, l ea a tentamente t odas l as i nstrucciones d el manual a ntes d e u tilizar e l p roducto. V EVOR s e r eserva u na i nterpretación c lara d e n uestro ...
-
Seite 51: Medidas D E S Eguridad I Mportantes
Machine Translated by Google MEDIDAS D E S EGURIDAD I MPORTANTES ADVERTENCIA: L ea y c omprenda t odo e ste m anual a ntes d e operar o r eparar e ste p roducto. E l i ncumplimiento d e e stas Las ... - Seite 52 Machine Translated by Google ESPECIFICACIÓN Modelo TR15045200 TR13050180 Largo*Ancho*Alto: Largo*Ancho*Alto: Tamaño 1500*450*1980mm 1300*500*1790mm Número d e capas c olocadas Capacidad 18 n eumáticos 12 n eumáticos LISTA D E P IEZAS CANTIDAD Imagen No. i dentificador Nombre TR15045200, TR13050180 Vertical Delante ...
- Seite 53 Machine Translated by Google Montaje d el p ortaequipajes p ara n eumáticos GRAMO PASO 1 . S eleccione d os m ontantes A y e mpuje l os p ies d e p lástico G h acia l as b ases. Inserte ...
- Seite 54 Machine Translated by Google Fig.1 PASO 2 . G olpee l a v iga C c on u n m azo d e g oma p ara a segurarse d e q ue l os p ernos d e l os e xtremos estén ...
- Seite 55 Machine Translated by Google PASO 3 . R epita l os p asos 1 y 2 h asta q ue h aya c reado u n " marco e stilo e scalera". Consejo: A hora e s u n b uen m omento p ara c omprobar q ue e l e spacio e ntre l as v igas s e a dapta a l os a rtículos q ue desea ...
- Seite 56 Machine Translated by Google PASO 5 . T ome d os v igas l argas B e i ntrodúzcalas e n l os o rificios d e l a e structura U no a la m isma a ltura q ue l as v igas c ortas. G olpee c on u n m azo d e g oma p ara c olocarlas e n s u lugar.
- Seite 57 Machine Translated by Google Paso 7 . R epita l os p asos 5 y 6 p ara a gregar l as v igas l argas r estantes. A segúrese d e q ue c ada v iga l arga e sté u bicada a ...
- Seite 58 Machine Translated by Google Figura 8 Paso 9 . L a b ahía y a e stá c ompleta y l ista p ara u sarse. Figura 9 9 ...
- Seite 59 Machine Translated by Google Fabricante: S hanghaimuxinmuyeyouxiangongsi Dirección: S huangchenglu 8 03nong11hao1602A1609shi, b aoshanqu, s hanghai 200000 C N. Importado a A ustralia: S IHAO P TY L TD. 1 R OKEVA S TREETEASTWOOD Nueva G ales d el S ur 2 122 A ustralia Importado ...
- Seite 60 Machine Translated by Google Soporte t écnico y c ertificado d e g arantía electrónica w ww.vevor.com/support...
- Seite 61 Machine Translated by Google Wsparcie techniczne i certyfikat gwarancji elektronicznej www.vevor.com/support STOJAK NA OPONY MODEL:TR15045200, TR13050180 Nadal staramy się oferować Państwu narzędzia w konkurencyjnych cenach. „Oszczędź połowę”, „Połowa ceny” lub inne podobne wyrażenia używane przez nas stanowią jedynie szacunkowe oszczędności, jakie możesz uzyskać, kupując u nas określone narzędzia w porównaniu z głównymi markami i niekoniecznie oznaczają...
- Seite 62 E-Gwarancji www.vevor.com/support To jest oryginalna instrukcja, przed użyciem należy uważnie przeczytać wszystkie instrukcje. VEVOR zastrzega sobie jasną interpretację naszej instrukcji obsługi. Wygląd produktu będzie zależał od produktu, który otrzymałeś. Prosimy o wybaczenie, że nie poinformujemy Cię ponownie, jeśli w naszym produkcie pojawią się jakiekolwiek aktualizacje technologiczne lub oprogramowania.
- Seite 63 Machine Translated by Google WAŻNE ZABEZPIECZENIA OSTRZEŻENIE: Przed przystąpieniem do użytkowania należy przeczytać i zrozumieć całą instrukcję. obsługi lub serwisowania tego produktu. Nieprzestrzeganie tych ostrzeżenia i instrukcje mogą spowodować obrażenia ciała lub szkody do wartościowego mienia. • Unikaj używania produktu przez dzieci. Produkt ten nie jest zabawką. Nie pozwól dzieciom się...
-
Seite 64: Specyfikacja
Machine Translated by Google SPECYFIKACJA Model TR15045200 TR13050180 Dł.*Szer.*Wys.: Dł.*Szer.*Wys.: Rozmiar 1500*450*1980 mm 1300*500*1790 mm Liczba warstwy umieszczone Pojemność 18 opon 12 opon LISTA CZĘŚCI ILOŚĆ Nazwa Nr identyfikatora Zdjęcie TR15045200, TR13050180 Pionowo Przód i tył Belka Belka boczna Centrum... - Seite 65 Machine Translated by Google Montaż stojaka na opony KROK 1. Wybierz dwa słupki A i dociśnij do podstaw plastikowe nóżki G. Włóż krótką belkę boczną C do otworów na klucze na najniższym wymaganym poziomie półki. Upewnij się, że belka jest ustawiona pod kątem 90 stopni do pionu. - 4 -...
- Seite 66 Machine Translated by Google Rys.1 KROK 2. Uderz w belkę C gumowym młotkiem, aby upewnić się, że kołki końcowe są całkowicie umieszczone w dolnej części otworów na klucze na obu słupkach. W razie potrzeby oprzyj słupki A o ścianę, aby uzyskać wsparcie. Uwaga: Zaleca się...
- Seite 67 Machine Translated by Google KROK 3. Powtarzaj kroki 1 i 2, aż utworzysz „ramę w stylu drabiny” Wskazówka: Teraz jest dobry moment, aby sprawdzić, czy przestrzeń między belkami jest odpowiednia do przedmiotów, które chcesz przechowywać na półkach, i w razie potrzeby ją dostosować. Ryc.3 KROK 4.
- Seite 68 Machine Translated by Google KROK 5. Weź dwie długie belki B i włóż je do otworów na klucze w ramie One na tej samej wysokości co krótkie belki. Wbij je na miejsce gumowym młotkiem. Ryc.5 KROK 6. Włóż pozostałe końce belek B do drugiej ramy, jak na rysunku krok 5.
- Seite 69 Machine Translated by Google Krok 7. Powtórz kroki 5 i 6, aby dodać pozostałe długie belki. Upewnij się, że każda długa belka znajduje się na tej samej wysokości co belki boczne. Ryc.7 Krok 8. Umieść środkową belkę podporową D na metalowych kołkach na środku każdej długiej belki B.
- Seite 70 Machine Translated by Google Ryc.8 Krok 9. Zatoka jest teraz ukończona i gotowa do użycia. Ryc.9 - 9 -...
- Seite 71 Machine Translated by Google Producent: Shanghaimuxinmuyeyouxiangongsi Adres: Shuangchenglu 803nong11hao1602A-1609shi, baoshanqu, szanghaj 200000 CN. Importowane do AUS: SIHAO PTY LTD. 1 ROKEVA STREETEASTWOOD NSW 2122 Australia Importowane do USA: Sanven Technology Ltd. Suite 250, 9166 Anaheim Miejsce, Rancho Cucamonga, CA 91730 YH CONSULTING LIMITED.
- Seite 72 Machine Translated by Google Wsparcie techniczne i certyfikat gwarancji elektronicznej www.vevor.com/support...
- Seite 73 Machine Translated by Google Technische ondersteuning en e-garantiecertificaat www.vevor.com/support BANDENREK MODEL:TR15045200, TR13050180 Wij streven er voortdurend naar om u gereedschappen tegen concurrerende prijzen te leveren. "Save Half", "Half Price" of andere soortgelijke uitdrukkingen die wij gebruiken, geven alleen een schatting van de besparingen die u kunt behalen door bepaalde gereedschappen bij ons te kopen in vergelijking met de grote topmerken en betekent niet noodzakelijkerwijs dat alle categorieën...
- Seite 74 Dit is de originele instructie, lees alle handleidingen zorgvuldig door voordat u het product gebruikt. VEVOR behoudt zich een duidelijke interpretatie van onze gebruikershandleiding voor. Het uiterlijk van het product is afhankelijk van het product dat u hebt ontvangen.
-
Seite 75: Belangrijke Veiligheidsmaatregelen
Machine Translated by Google BELANGRIJKE VEILIGHEIDSMAATREGELEN WAARSCHUWING: Lees en begrijp deze hele handleiding voordat u het bedienen of onderhouden van dit product. Het niet naleven van deze Waarschuwingen en instructies kunnen persoonlijk letsel of schade veroorzaken tot waardevolle eigendommen. • Voorkom dat kinderen het product gebruiken. En dit product is geen speelgoed. Gebruik het niet kinderen laten spelen. - Seite 76 Machine Translated by Google SPECIFICATIE Model TR15045200 TR13050180 L*B*H: L*B*H: Maat 1500*450*1980mm 1300*500*1790mm Aantal lagen geplaatst Capaciteit 18 banden 12 banden ONDERDELENLIJST Hoeveelheid Nee. identificatie Naam Afbeelding TR15045200, TR13050180 Rechtop Voor- en achterkant Straal Zijbalk Centrum Steun Kunststof voet Handmatig...
- Seite 77 Machine Translated by Google Bandenrek monteren STAP 1. Selecteer twee staanders A en duw de plastic voetjes G op de bases. Plaats een korte zijbalk C in de sleutelgaten op het laagste vereiste plankniveau. Zorg ervoor dat de balk 90 graden ten opzichte van de staander staat. - 4 -...
- Seite 78 Machine Translated by Google Afb.1 STAP 2. Tik op balk C met een rubberen hamer om ervoor te zorgen dat de eindbouten volledig in de bodem van de sleutelgaten op beide staanders zitten. Leun de staanders A tegen een muur voor ondersteuning indien nodig. Let op: bij de installatie wordt een assistent aanbevolen.
- Seite 79 Machine Translated by Google STAP 3. Herhaal stappen 1 en 2 totdat je een "ladderstijl frame" hebt gemaakt Tip: Dit is een goed moment om te controleren of de ruimte tussen de balken geschikt is voor de spullen die u op de planken wilt opbergen en deze indien nodig aan te passen. Figuur 3 STAP 4.
- Seite 80 Machine Translated by Google STAP 5. Neem twee lange balken B en steek ze in de sleutelgaten op het One frame op dezelfde hoogte als de korte balken. Tik ze op hun plaats met een rubberen hamer. Figuur 5 STAP 6. Plaats de andere uiteinden van de balken B in het tweede frame zoals in stap 5.
- Seite 81 Machine Translated by Google Stap 7. Herhaal stap 5 en 6 om de resterende lange balken toe te voegen. Zorg ervoor dat elke lange balk zich op dezelfde hoogte bevindt als de zijbalken. Afbeelding 7 Stap 8. Plaats een centrale steunbalk D op de metalen stijlen in het midden van elke lange balk B. Tik deze op zijn plaats en herhaal dit voor alle niveaus.
- Seite 82 Machine Translated by Google Afbeelding 8 Stap 9. De baai is nu voltooid en klaar voor gebruik. Afbeelding 9 - 9 -...
- Seite 83 Machine Translated by Google Fabrikant: Shanghaimuxinmuyeyouxiangongsi Adres: Shuangchenglu 803nong11hao1602A-1609shi, baoshanqu, shanghai 200000 CN. Geïmporteerd naar AUS: SIHAO PTY LTD. 1 ROKEVA STREETEASTWOOD NSW 2122 Australië Geïmporteerd naar de VS: Sanven Technology Ltd. Suite 250, 9166 Anaheim Plaats, Rancho Cucamonga, CA 91730 YH CONSULTING LIMITED.
- Seite 84 Machine Translated by Google Technische ondersteuning en e- garantiecertificaat www.vevor.com/support...
- Seite 85 Machine Translated by Google Teknisk support och e-garanticertifikat www.vevor.com/support DÄCKHÅLLARE MODELL: TR15045200, TR13050180 Vi fortsätter att vara engagerade i att ge dig verktyg till konkurrenskraftiga priser. "Spara hälften", "halva priset" eller andra liknande uttryck som används av oss representerar bara en uppskattning av besparingar du kan dra nytta av att köpa vissa verktyg hos oss jämfört med de stora toppmärkena och betyder inte nödvändigtvis att täcka...
- Seite 86 Detta är den ursprungliga instruktionen, läs alla instruktioner noggrant innan du använder den. VEVOR reserverar sig för en tydlig tolkning av vår användarmanual. Utseendet på produkten är beroende av den produkt du fått. Ursäkta oss att vi inte kommer att informera dig igen om det finns någon teknik eller mjukvaruuppdateringar på...
-
Seite 87: Viktiga Säkerhetsåtgärder
Machine Translated by Google VIKTIGA SÄKERHETSÅTGÄRDER VARNING: Läs och förstå hela denna manual innan använda eller serva denna produkt. Underlåtenhet att följa dessa varningar och instruktioner kan orsaka personskada eller skada till värdefull egendom. • Undvik att barn använder produkten. Och den här produkten är inte en leksak. Gör inte det låta barn leka. - Seite 88 Machine Translated by Google SPECIFIKATION Modell TR15045200 TR13050180 L*B*H: L*B*H: Storlek 1500*450*1980mm 1300*500*1790mm Antal lager placerade Kapacitet 18 däck 12 däck DELLISTA ANTAL Nr. identifierare Namn Bild TR15045200, TR13050180 Upprätt Fram & Baksida Balk Sidobalk Centrum Stöd Plastfot Manuell - 3 -...
- Seite 89 Machine Translated by Google Montering av däckställ STEG1. Välj två stående A och tryck på plastfötter G till baserna. Sätt in en kort sidobalk C i nyckelhålen på den lägsta hyllnivå som krävs. Se till att strålen är 90 grader mot upprättståendet. - 4 -...
- Seite 90 Machine Translated by Google Fig.1 STEG2. Knacka på balk C med en gummiklubba för att säkerställa att ändtapparna är helt placerade i botten av nyckelhålen på båda stolparna. Luta stolparna A mot en vägg för stöd vid behov. Obs: En assistent rekommenderas för installation. Fig.2 - 5 -...
- Seite 91 Machine Translated by Google STEG 3. Upprepa steg 1 och 2 tills du har skapat en "stege stil ram" Tips: Nu är ett bra tillfälle att kontrollera att utrymmet mellan balkar passar de föremål du vill förvara på hyllorna och justera efter behov. Fig.3 STEG 4.
- Seite 92 Machine Translated by Google STEG 5. Ta två långa balkar B och sätt in dem i nyckelhålen på En ram i samma höjd som de korta balkarna. Knacka på plats med en gummiklubba. Fig. 5 STEG 6. Sätt in de andra ändarna av balkarna B i den andra ramen som i steg 5.
- Seite 93 Machine Translated by Google Steg 7. Upprepa steg 5 och 6 för att lägga till de återstående långa strålarna. Se till att varje lång balk är placerad på samma höjd som sidobalkarna. Fig. 7 Steg 8. Placera en central stödbalk D på metalltapparna i mitten av varje lång balk B.
- Seite 94 Machine Translated by Google Fig. 8 Steg 9. Viken är nu färdig och redo att användas. Fig. 9 - 9 -...
- Seite 95 Machine Translated by Google Tillverkare: Shanghaimuxinmuyeyouxiangongsi Adress: Shuangchenglu 803nong11hao1602A-1609shi, baoshanqu, shanghai 200000 CN. Importerad till AUS: SIHAO PTY LTD. 1 ROKEVA STREETEASTWOOD NSW 2122 Australien Importerad till USA: Sanven Technology Ltd. Suite 250, 9166 Anaheim Place, Rancho Cucamonga, CA 91730 YH CONSULTING LIMITED.
- Seite 96 Machine Translated by Google Teknisk support och e-garanticertifikat www.vevor.com/support...