Herunterladen Inhalt Inhalt Diese Seite drucken
Inhaltsverzeichnis

Werbung

Verfügbare Sprachen
  • DE

Verfügbare Sprachen

  • DEUTSCH, seite 61

Werbung

Inhaltsverzeichnis
loading

Inhaltszusammenfassung für Scholtes MULTIPLO.1 F

  • Seite 1: Inhaltsverzeichnis

    Programmazione della durata di una cottura Deutsch, 61 Blocco dei comandi Funzione BOOST Spegnimento del piano cottura Dispositivi di sicurezza MULTIPLO.1 F Descrizione tecnica dei modelli MULTIPLO.1 SF Consigli pratici per l’uso dell’apparecchio Accessori in dotazione Kit optional Precauzioni e consigli, 9...
  • Seite 2: Installazione

    Installazione ! È importante conservare questo libretto per poterlo consultare in ogni momento. In caso di vendita, di cessione o di trasloco, assicurarsi che resti insieme all’apparecchio per informare il nuovo proprietario sul funzionamento e sui relativi avvertimenti. ! Leggere attentamente le istruzioni: ci sono importanti 700 min informazioni sull’installazione, sull’uso e sulla sicurezza.
  • Seite 3: Collegamento Elettrico

    Collegamento monofase LATO ANTERIORE DEL PIANO COTTURA Se il piano è dotato di cavo di Blu Marrone Verde / Giallo alimentazione già collegato, allacciarlo alla rete rispettando il PIANO DI APPOGGIO colore dei fili come da schema a fianco. Il conduttore giallo-verde PIANO COTTURA dovrà...
  • Seite 4: Descrizione Dell'apparecchio

    Descrizione dell’apparecchio Pannello di controllo Il pannello di controllo che qui viene descritto è rappresentato a fini esemplificativi: può non essere una esatta riproduzione del modello acquistato. Display Spia TIMER DI Spia ZONA DI COTTURA PROGRAMMAZIONE ZONA DI COTTURA SELEZIONATA PROGRAMMATA Display Tasto...
  • Seite 5: Avvio E Utilizzo

    Avvio e utilizzo Programmazione della durata di una La colla applicata sulle guarnizioni lascia alcune cottura tracce di grasso sul vetro. Prima di utilizzare l’apparecchio, si raccomanda di eliminarle con un prodotto specifico per la manutenzione non ! È possibile programmare tutte le zone di cottura abrasivo.
  • Seite 6: Blocco Dei Comandi

    Il contaminuti ! La performance ottimale si raggiunge con zona di cottura fredda. Il piano di cottura deve essere acceso. Premere il tasto per selezionare la zona di cottura Il contaminuti permette di impostare una durata fino a 99 minuti. unica ed i tasti fino a raggiungere la 1.
  • Seite 7: Descrizione Tecnica Dei Modelli

    Descrizione tecnica dei modelli Segnale acustico Alcune anomalie, quali: Piani cottura MULTIPLO.1 F • un versamento sull’area dei comandi, MULTIPLO.1 SF • una pressione esercitata a lungo su un tasto, Zone di cottura Potenza (in W) possono provocare l’emissione di un segnale acustico.
  • Seite 8: Accessori In Dotazione

    Accessori in dotazione Cesto vapore con relativo supporto e maniglie Vasca cottura Mettere l’acqua nella vasca Può essere utilizzata come cottura e inserire il cesto una normale pentola per vapore con relativo supporto realizzare arrosti, sughi, ecc... come in figura. Chiudere il All’interno della vasca sono coperchio vetro in dotazione riportati i livelli massimi di...
  • Seite 9: Precauzioni E Consigli

    Precauzioni e consigli L’apparecchio è stato progettato e costruito Per evitare ogni rischio di interferenze tra il piano di in conformità alle norme internazionali di sicurezza. cottura e il pacemaker, quest'ultimo dovrà essere Queste avvertenze sono fornite per ragioni di sicurezza e realizzato in conformità...
  • Seite 10: Manutenzione E Cura

    Manutenzione e cura • Se il piano è particolarmente sporco, strofinare con Escludere la corrente elettrica un prodotto specifico per la pulizia delle superfici in vetroceramica, sciacquare e asciugare. Prima di ogni operazione isolare l’apparecchio dalla rete di alimentazione elettrica. •...
  • Seite 11 Single cooking zone operation The timer Deutsch, 61 Programming the cooking time Control panel lock BOOST function Switching off the hob MULTIPLO.1 F Safety devices MULTIPLO.1 SF Technical description of the models Practical advice on using the appliance Accessories supplied Optional extra kit...
  • Seite 12: Installation

    Installation ! Before operating your new appliance please read this instruction booklet carefully. It contains important information concerning the safe operation, installation and maintenance of the appliance. ! Please keep these operating instructions for future 700 min reference. Pass them on to any new owners of the appliance.
  • Seite 13: Electrical Connection

    Single-phase connection FRONT SIDE OF HOB Blue Brown Green/Yellow If the hob is fitted with a supply cable, connect it to the mains, SUPPORTING SURFACE observing the colour coding of the The yellow- wires (see diagram). UNDERSIDE green earth wire must be 5 cm OF HOB longer than the other wires.
  • Seite 14: Description Of The Appliance

    Description of the appliance Control panel The control panel described in this manual is only a representative example: it may not exactly match the panel on your appliance. PROGRAMME PROGRAMMED TIMER SELECTED COOKING ZONE display COOKING ZONE indicator light indicator light POWER LEVEL INCREASE FRONT...
  • Seite 15: Start-Up And Use

    Start-up and use The glue applied on the gaskets leaves traces of 1. Select the cooking zone using the corresponding grease on the glass. Before using the appliance, we control. recommend you remove these with a special non- 2. Adjust the power level of the cooking zone. abrasive cleaning product.
  • Seite 16: The Timer

    The timer Press button to select the single cooking zone The hob must be switched on. then press buttons to select the The timer allows for setting a time of up to 99 maximum power level "16". minutes. The vertical position of the cooking recipient may be 1.
  • Seite 17: Technical Description Of The Models

    Technical description of the models Buzzer This can also indicate several irregularities: Hobs MULTIPLO.1 F • Something has been spilt on the control panel. MULTIPLO.1 SF • A button has been pressed for too long. All of the Cooking zone Power (W) above situations may cause the buzzer to sound.
  • Seite 18: Accessories Supplied

    Accessories supplied Steamer basket with special rest and handles Cooking recipient Pour water into the cooking This may be used as a normal recipient and insert the saucepan, to cook pan- steamer basket and its roasted dishes, sauces, etc… special rest, as shown in the The maximum fill levels for figure.
  • Seite 19: Precautions And Tips

    Precautions and tips The induction hob generates short range This appliance has been designed and manufactured in electromagnetic fields. compliance with international safety standards. The To avoid all risks of interference between the hob and following warnings are provided for safety reasons and the pacemaker, the pacemaker should be made in must be read carefully.
  • Seite 20: Care And Maintenance

    Care and maintenance • To remove more stubborn dirt, use a suitable scraper Switching the appliance off (this is not supplied with the appliance). Remove spills as soon as possible, without waiting for the Disconnect your appliance from the electricity appliance to cool, to avoid residues forming crusty supply before carrying out any work on it.
  • Seite 21: Italiano, 1 English,11 Français

    Le minuteur Deutsch, 61 Programmation de la durée de cuisson Verrouillage des commandes Fonction BOOST Extinction de la table de cuisson MULTIPLO.1 F Les sécurités MULTIPLO.1 SF Description technique des modèles Conseils d’utilisation de l’appareil Accessoires fournis Kit en option Précautions et conseils, 29...
  • Seite 22: Installation

    Installation ! Conserver ce mode d’emploi pour pouvoir le consulter à tout moment. En cas de vente, de cession ou de déménagement, veiller à ce qu’il suive l’appareil pour informer le nouveau propriétaire sur son fonctionnement et lui fournir les conseils correspondants. ! Lire attentivement les instructions : elles contiennent 700 min des conseils importants sur l’installation, l’utilisation et la...
  • Seite 23: Raccordement Électrique

    Raccordement monophasé CÔTÉ AVANT DE LA TABLE DE CUISSON Si la table est équipée d’un câble Bleu Marron Vert / Jaune d’alimentation déjà raccordé, le PLAN DE brancher au réseau en respectant TRAVAIL la couleur des fils comme illustré dans le schéma ci-contre. TABLE DE CUISSON conducteur de mise à...
  • Seite 24: Description De L'appareil

    Description de l’appareil Tableau de bord Le tableau de bord qui est décrit n’a qu’une valeur d’exemple : il peut ne pas correspondre au modèle acheté. Afficheur Voyant MINUTEUR Voyant FOYER PROGRAMMATEUR FOYER PROGRAMMÉ SÉLECTIONNÉ INDICATEUR Touche Touche Touche DE PUISSANCE AUGMENTATION ON/OFF SÉLECTION...
  • Seite 25: Mise En Marche Et Utilisation

    Mise en marche et utilisation La colle utilisée pour les joints laisse des traces de 1. Sélectionner le foyer à l’aide de la commande graisse sur le verre. Nous conseillons de les éliminer correspondante (pour l’allumage simultané des avant d’utiliser l’appareil à l’aide d’un produit foyers est aussi possible : voir chapitre précédent) d’entretien non abrasif.
  • Seite 26: Verrouillage Des Commandes

    La cuve peut être maintenue en position verticale 1. Appuyer sur la touche de programmation jusqu'à la fin de la cuisson. Une fois que la température d'ébullition et/ou de jusqu'à ce que le voyant minuteur s'allume friture est atteinte et après avoir éteint le foyer à l'aide des touches correspondantes, il est 2.
  • Seite 27: Description Technique Des Modèles

    Friture/bouillon 13-14-15 Bouillon/friture Réchauffer rapidement puis sélectionner un Description technique des modèles niveau de cuisson adéquat Tables de cuisson MULTIPLO.1 F MULTIPLO.1 SF Foyers Puissance (en W) Arrière I 1400 W Avant I 1400 W Puissance totale 2800 Légende :...
  • Seite 28: Accessoires Fournis

    Accessoires fournis Panier vapeur, support et poignées Mettre l’eau dans la cuve et Cuve de cuisson introduire le panier et son Peut être utilisée comme support conformément à casserole normale pour la l’illustration. Fermer le préparation de rôtis, sauces, couvercle en verre fourni. Au etc.
  • Seite 29: Précautions Et Conseils

    Précautions et conseils Cet appareil a été conçu et fabriqué conformément aux A ce propos, nous ne pouvons assurer que la normes internationales de sécurité. Ces consignes de conformité de notre produit. Pour tous sécurité sont très importantes et doivent être lues renseignements quant à...
  • Seite 30: Nettoyage Et Entretien

    Nettoyage et entretien Mise hors tension • Pour enlever les salissures en relief, utiliser un grattoir spécial (non fourni avec l’appareil). Intervenir dès que possible, ne pas attendre que Avant toute opération de nettoyage ou d’entretien l’appareil ait refroidi afin d’éviter toute incrustation couper l’alimentation électrique de l’appareil.
  • Seite 31: Espanol

    Deutsch, 61 Programación de la duración de una cocción Bloqueo de los mandos Función BOOST Apagado de la placa MULTIPLO.1 F Dispositivos de seguridad MULTIPLO.1 SF Descripción técnica de los modelos Consejos prácticos para el uso del aparato Accesorios en dotación...
  • Seite 32: Instalación

    Instalación ! Es importante conservar este manual para poder consultarlo en todo momento. En el caso de venta, de cesión o de mudanza, verifique que permanezca junto al aparato para informar al nuevo propietario sobre su funcionamiento y sobre las advertencias correspondientes.
  • Seite 33: Conexión Eléctrica

    Conexión monofásica PARTE DELANTERA DE LA PLACA DE COCCIÓN Si la placa posee cable de Azul Marrón Verde/Amarillo alimentación ya instalado, PLANO DE conéctelo a la red respetando el APOYO color de los cables como se muestra en el esquema de al lado. PLACA DE COCCIÓN El conductor amarillo-verde DADA VUELTA...
  • Seite 34: Descripción Del Aparato

    Descripción del aparato Panel de control El panel de control se describe a continuación a modo de ejemplo: puede no ser una exacta reproducción del modelo adquirido. Pantalla TEMPORIZADOR Piloto DE PROGRAMACIÓN Piloto ZONA DE COCCIÓN ZONA DE PROGRAMADA COCCIÓN Pantalla Botón Botón...
  • Seite 35: Puesta En Funcionamiento Y Uso

    Puesta en funcionamiento y uso Programación de la duración de una cocción La cola aplicada sobre las juntas deja algunas trazas de grasa en el vidrio. Antes de utilizar el aparato, se recomienda eliminarlas con un producto específico para ! Se pueden programar todas las zonas de cocción para el mantenimiento, no abrasivo.
  • Seite 36: El Contador De Minutos

    El contador de minutos Presione el botón para seleccionar la zona de La encimera debe estar encendida. cocción única y los botones hasta El contador de minutos permite fijar una duración máxima alcanzar la potencia máxima "16". de 99 minutos. La posición vertical de la cuba se puede mantener hasta 1.
  • Seite 37: Descripción Técnica De Los Modelos

    Descripción técnica de los modelos Señal sonora Algunas anomalías, como: Placas de cocción MULTIPLO.1 F • un derrame sobre el área de mandos, MULTIPLO.1 SF • la presión sobre un botón ejercida por demasiado Zonas de cocción Potenza (in W) tiempo, pueden provocar la emisión de una señal...
  • Seite 38: Accesorios En Dotación

    Accesorios en dotación Cesto vapor con soporte y manijas Cuba de cocción Colocar el agua en la cuba de Puede emplearse como una cocción e introducir el cesto olla normal para guisar vapor con su soporte como asados, salsas, etc. Dentro indica la figura.
  • Seite 39: Precauciones Y Consejos

    Precauciones y consejos El aparato ha sido proyectado y fabricado en Para evitar todo riesgo de interferencias entre la palca conformidad con las normas internacionales sobre y el marcapasos, éste último deberá ser realizado en seguridad. Estas advertencias se suministran por conformidad con las normas vigentes.
  • Seite 40: Mantenimiento Y Cuidados

    Mantenimiento y cuidados • Si la placa está particularmente sucia, refriéguela con Interrumpir el suministro de corriente un producto específico para la limpieza de las eléctrica superficies vitrocerámicas, enjuáguela y séquela. Antes de realizar cualquier operación, desconecte el • Para eliminar las acumulaciones de suciedad más aparato de la red de alimentación eléctrica.
  • Seite 41: Instruções De Utilização

    O contador de minutos Deutsch, 61 Programar a duração de uma cozedura Bloqueio dos comandos Função BOOST Desligar o plano de cozedura MULTIPLO.1 F Dispositivos de segurança MULTIPLO.1 SF Descrição técnica dos modelos Conselhos práticos para utilizar esta aparelhagem Acessórios fornecidos Conjunto opcional Precauções e conselhos, 49...
  • Seite 42: Instalação

    Instalação ! É importante guardar este folheto para poder consultá- lo a qualquer momento. No caso de venda, cessão ou mudança, assegure-se que o mesmo permanece com o aparelho para informar o novo proprietário sobre o funcionamento e sobre as respectivas advertências. ! Leia com atenção as instruções: há...
  • Seite 43: Ligação Eléctrica

    Ligação monofásica LADO ANTERIOR DO PLANO DE COZEDURA Se o plano estiver provido de cabo Azul Castanho Verde/Amarelo de alimentação já ligado, ligá-lo à PLANO DE rede eléctrica respeitando a cor APOIO dos fios como indicado no esquema ao lado. O condutor PLANO DE amarelo-verde, deverá...
  • Seite 44: Descrição Do Aparelho

    Descrição do aparelho Painel de comandos O painel de comandos descrito a seguir está representado para fins explicativos: pode não ser uma exacta reprodução do modelo comprado. Display Indicador luminoso TIMER Indicador luminoso ZONA DE COZEDURA DE PROGRAMAÇÃO ZONA DE COZEDURA PROGRAMADA SELECCIONADA Display...
  • Seite 45: Início E Utilização

    Início e utilização A cola aplicada nas guarnições deixa alguns traços 2. Regular o nível de potência da zona de cozedura. de graxa no vidro. Antes de utilizar o aparelho, é 3. Carregue no botão de programação . O indicador recomendável eliminá-la com um produto não abrasivo correspondente à...
  • Seite 46: Bloqueio Dos Comandos

    ser mantida até o fim da cozedura. 1. Carregue no botão de programação até que o Alternativamente, uma vez alcançada a temperatura de ebulição e/ou fritura e desligada a chapa com as indicador do contador de minutos se acenda respectivas teclas, é possível colocar novamente a cuba na posição horizontal na zona anterior girando-a de 90º...
  • Seite 47: Descrição Técnica Dos Modelos

    13-14-15 Ferver/Fritar Aquecimento rápido e em seguida escolher o nível de cozedura adequado. Descrição técnica dos modelos MULTIPLO.1 F Planos de cozedura MULTIPLO.1 SF Zonas de cozedura Potência (em W) Traseira I 1400 W Dianteira I 1400 W Potência total...
  • Seite 48: Acessórios Fornecidos

    Acessórios fornecidos Cesto vapor com respectivo suporte e pegas Recipiente (cuba) de Coloque água no recipiente cozedura para a cozedura e introduza o Pode ser utilizado como uma cesto vapor com respectivo normal panela para preparar suporte, como indicado na carne assada, molhos, etc.
  • Seite 49: Precauções E Conselhos

    Precauções e conselhos Este aparelho foi projectado e fabricado em Em relação a isto, podemos garantir unicamente a conformidade com as normas internacionais de conformidade do nosso produto. Para informações segurança. Estas advertências são fornecidas por razões sobre a conformidade ou eventuais problemas de de segurança e devem ser lidas com atenção.
  • Seite 50: Manutenção E Cuidados

    Manutenção e cuidados Desligar a corrente eléctrica • Se o plano estiver muito sujo, esfregue com um produto específico para limpeza de superfícies em vidro cerâmica *, enxagúe e enxugue. Antes de realizar qualquer operação, desligue o aparelho da alimentação eléctrica. •...
  • Seite 51: Português, 41 Nederlands

    Werking van de enkele kookzone De timer Deutsch, 61 Programmering kooktijd Blokkering van de bediening BOOST functie Uitschakelen kookplaat MULTIPLO.1 F Veiligheidsmechanismen MULTIPLO.1 SF Technische beschrijving van de modellen Praktische tips voor het gebruik van het apparaat Bijgeleverde accessoires Kit accessoires...
  • Seite 52: Installatie

    Installatie aangrenzende oppervlakken en de achterwand ! Bewaar dit instructieboekje zorgvuldig voor eventuele raadpleging in de toekomst. Wanneer u het product vervaardigd zijn van een materiaal dat bestand is weggeeft, verkoopt, of wanneer u verhuist, dient u dit tegen temperaturen van boven de 65°C. boekje bij het apparaat te bewaren zodat waarschuwingen en informatie betreffende werking voorhanden blijven.
  • Seite 53: Elektrische Aansluiting

    Eenfasige aansluiting VOORZIJDE VAN DE KOOKPLAAT Als de kookplaat al beschikt over Blauw Bruin Groen/Geel een voedingskabel, moet u hem KEUKENBLAD aan het elektrische net verbinden door de kabelkleuren te bevestigen volgens het schema hiernaast. KOOKPLAAT geel/groene aardleiding moet 5 ONDERSTEBOVEN cm langer zijn ten opzichte van de andere leidingen.
  • Seite 54: Beschrijving Van Het Apparaat

    Beschrijving van het apparaat Bedieningspaneel Het bedieningspaneel dat hier wordt beschreven en afgebeeld geldt alleen als voorbeeld: het is mogelijk dat het niet precies overeenkomt met het door u aangeschafte model. Display Controlelampje PROGRAMMERINGSTIMER Controlelampje GEPROGRAMMEERDE GESELECTEERDE KOOKZONE KOOKZONE Display Toets TOENAME Toets Toets...
  • Seite 55: Starten En Gebruik

    Starten en gebruik De lijm die gebruikt is voor de afdichtingen laat wat 2. De gewenste stroomsterkte van het kookgedeelte instellen. vetvlekjes achter op het glas. Voordat u het apparaat gebruikt 3. Druk op de programmeertoets . Het controlelampje raden wij u aan de vlekken te verwijderen met een speciaal voor het betreffende kookgedeelte begint te knipperen.
  • Seite 56: Boost Functie

    2. Stel de gewenste kookduur in door middel van de toetsen bereiding m.b.v. de selectietoets . Kies het gewenste vermogen m.b.v. de toetsen 3. Bevestig door op de toets te drukken. De timer begint onmiddellijk met aftellen. Als de tijd Uitschakelen kookplaat verstreken is hoort u 10 seconden lang een geluidssignaal.
  • Seite 57: Technische Beschrijving Van De Modellen

    Zo nu en dan roeren 8-9-10 fruiten/Aanbraden 13-14-15 Frituren/Koken Technische beschrijving van de modellen Koken/Frituren Snelle verwarming. Kies daarna het juiste Kookplaten MULTIPLO.1 F bereidingsniveau MULTIPLO.1 SF Kookzones Vermogen (in W) Achter I 1400 W Voor I 1400 W Totaal vermogen...
  • Seite 58: Bijgeleverde Accessoires

    Bijgeleverde accessoires Stoommand met steunelement en handvatten Kuip voor het koken Doe het water in de kuip en Kan worden gebruikt als een plaats er de stoommand in normale pan voor het bereiden met het betreffende van braadstukken, sauzen, steunelement, zoals enz.
  • Seite 59: Voorzorgsmaatregelen En Advies

    Voorzorgsmaatregelen en advies Teneinde ieder risico van storing tussen de kookplaat Dit apparaat is ontworpen en vervaardigd volgens de en de pacemaker te vermijden moet deze laatste ook geldende internationale veiligheidsvoorschriften. Deze voldoen aan de geldende normen. aanwijzingen zijn geschreven voor uw veiligheid en u dient Wat dat betreft kunnen wij slechts de conformiteit van ze derhalve goed door te nemen.
  • Seite 60: Onderhoud En Verzorging

    Onderhoud en verzorging • Als de plaat erg vuil is moet hij worden De elektrische stroom afsluiten schoongemaakt met een speciaal middel voor keramiekplaten. Daarna moet u hem afspoelen en Sluit altijd eerst de stroom af voordat u tot enige afdrogen.
  • Seite 61: Deutsch

    Kochzonen ausschalten Betriebsweise der einzigen Kochzone Der Minutenzähler Deutsch, 61 Garzeit programmieren Schaltelemente sperren BOOST-Funktion Kochfeld ausschalten MULTIPLO.1 F Sicherheitsvorrichtungen MULTIPLO.1 SF Technische Beschreibung der Modelle Praktische Ratschläge zum Einsatz des Gerätes Mitgeliefertes Zubehör Set (Optional) Vorsichtsmaßregeln und Hinweise, 69...
  • Seite 62: Installation

    Installation integrierten freistehenden Kochfelder die ! Bewahren Sie diese Bedienungsanleitung bitte sorgfältig auf, damit Sie sie jederzeit zu Rate ziehen entsprechenden Mindestabstände einhalten (siehe können. Achten Sie bitte darauf, dass diese Abbildung). Die angrenzenden Oberflächen und die Bedienungsanleitung dem Gerät bei etwaigem Verkauf, Rückwand müssen aus geeignetem Material Umzug oder Übergabe an einen anderen Benutzer stets beschaffen sein, und eine Hitzebeständigkeit von 65...
  • Seite 63: Elektroanschluss

    Einphasenanschluss KOCHFELD - VORDERSEITE Wenn das Kochfeld mit einem Blau Braun Gelb/Grün bereits angeschlossenen AUFLAGE- FLÄCHE Versorgungskabel bestückt ist, dann ist dieses unter Berücksichtigung der Farben der KOCHFELD - Anschlussdrähte gemäß dem UNTENANSICHT nebenstehend abgebildeten Schaltplan an das Stromnetz Der gelb/grüne anzuschließen.
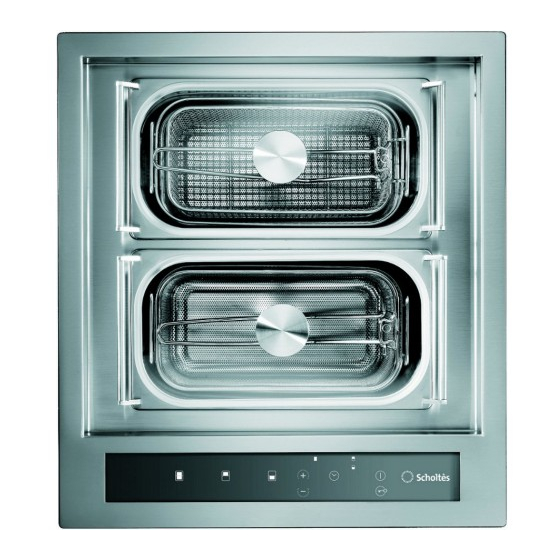
  • Seite 64: Beschreibung Des Gerätes

    Beschreibung des Gerätes Bedienfeld Das hier wiedergegebene Bedienfeld gilt als richtungsweisend: es handelt sich nicht unbedingt um eine genaue Widergabe des von Ihnen erworbenen Modells. Display Kontrollleuchte PROGRAMMIERTIMER Kontrollleuchte PROGRAMMIERTE GEWÄHLTE KOCHZONE KOCHZONE LEISTUNGSANZEIGE Taste ERHÖHEN Wähltaste Taste DER LEISTUNG KOCHZONE VORNE ON/OFF Taste WAHL...
  • Seite 65: Inbetriebsetzung Und Gebrauch

    Inbetriebsetzung und Gebrauch Der auf die Dichtungen aufgetragene Leim könnte 1. Die Kochzone über das jeweilige Schaltelement Fettspuren auf dem Glas hinterlassen. Es wird empfohlen, auswählen. Es ist auch möglich, den gleichzeitigen Betrieb diese vor der Verwendung des Gerätes mit einem der Kochzonen festzulegen (siehe vorhergehendes spezifischen nicht scheuernden Reinigungsmittel zu Kapitel).
  • Seite 66: Schaltelemente Sperren

    Die Minutenuhr maximale Leistung "16" erreicht ist. Die vertikale Position der Wanne kann bis zum Ende der Das Kochfeld muss eingeschaltet sein. Garzeit beibehalten werden. Mit dem Minutenzähler kann ein Zeitraum bis 99 Minuten Alternativ kann die Wanne wieder horizontal, also um 90° eingestellt werden.
  • Seite 67: Technische Beschreibung Der Modelle

    8-9-10 unen Frittieren/Sieden 13-14-15 Sieden/Frittieren Rasch erhitzen und danach die entsprechende Stufe auswählen. Technische Beschreibung der Modelle Kochfelder MULTIPLO.1 F MULTIPLO.1 SF Kochzonen Leistung (W) Hinten I 1400 W Vorne I 1400 W Gesamtleistung 2800 Legende: I = Einfache Induktionskochzone...
  • Seite 68: Mitgeliefertes Zubehör

    Mitgeliefertes Zubehör Dampfkochkorb mit Halterung und Griff Wasser in die Wanne geben Kochwanne und den Dampfkochkorb mit Verwendung als normales der entsprechenden Halterung Kochgeschirr für Braten, einführen (siehe Abbildung). Saucen usw. Die maximalen Die mitgelieferte Füllstände sind an der Glasabdeckung schließen. Innenwand der Wanne je nach Den Korb über die Garart gekennzeichnet:...
  • Seite 69: Vorsichtsmaßregeln Und Hinweise

    Vorsichtsmaßregeln und Hinweise Das Gerät wurde entsprechend den internationalen In dieser Hinsicht können wir nur für die Sicherheitsvorschriften entworfen und gebaut. Die im Übereinstimmung unseres Erzeugnisses Folgenden aus Sicherheitsgründen wiedergegebenen garantieren. Für Informationen hinsichtlich der Hinweise sollten aufmerksam gelesen werden. Konformität oder eventueller Unverträglichkeiten bitten wir Sie, sich an den behandelnden Arzt oder Dieses Gerät entspricht folgenden...
  • Seite 70: Reinigung Und Pflege

    Reinigung und Pflege • Starke Verschmutzungen lassen sich mit einem Gerät vom Stromnetz trennen zweckmäßigen Schaber entfernen (nicht im Lieferumfang enthalten). Verschmutzungen sollten so Vor jeder Reinigung und Pflege ist das Gerät vom schnell wie möglich - und nicht erst nach Abkühlen Stromnetz zu trennen.
  • Seite 72 07/2011 - 195083539.02 XEROX FABRIANO...

Diese Anleitung auch für:

Multiplo.1 sf

Inhaltsverzeichnis