Herunterladen Inhalt Inhalt Diese Seite drucken
Loewe 3D Orchestra Bedienungsanleitung
Vorschau ausblenden Andere Handbücher für 3D Orchestra:
Inhaltsverzeichnis

Werbung

Verfügbare Sprachen
  • DE

Verfügbare Sprachen

  • DEUTSCH, seite 1
Audiodesign
3D Orchestra 5.1 IS
3D Orchestra 3.1 IS
3D Orchestra Speaker
3D Orchestra Subwoofer
Bedienungsanleitung, Operating instructions, Mode d'emploi
Istruzioni per l'uso, Instrucciones de manejo, Gebruiksaanwijzing
Betjeningsvejledning, Käyttöohje, Bruksanvisning

Werbung

Inhaltsverzeichnis
loading

Inhaltszusammenfassung für Loewe 3D Orchestra

  • Seite 1 Audiodesign 3D Orchestra 5.1 IS 3D Orchestra 3.1 IS 3D Orchestra Speaker 3D Orchestra Subwoofer Bedienungsanleitung, Operating instructions, Mode d‘emploi Istruzioni per l‘uso, Instrucciones de manejo, Gebruiksaanwijzing Betjeningsvejledning, Käyttöohje, Bruksanvisning...
  • Seite 3: Inhaltsverzeichnis

    Lieferumfang ................4 Zubehör ..................4 Zu dieser Bedienungsanleitung ..........4 Zu Ihrer Sicherheit ...............5 TV-Software-Update ..............6 Aufstellen ..................6 Montage des Module 3D Orchestra Controller ......7 Lautsprecher anschließen ............8 Einmess-Mikrofon montieren .............8 Einmess-Mikrofon aufstellen/anschließen .......9 Automatische Raum-Akustik-Einmessung ........9 Menü Ton ..................10 LED-Anzeige am 3D Orchestra Speaker ........11...
  • Seite 4: Herzlich Willkommen

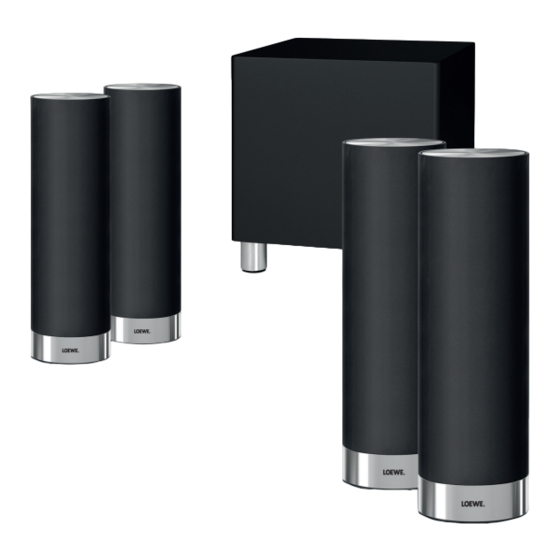
    Zuhörer im Raum. • 2x Loewe 3D Orchestra Speaker • Loewe 3D Orchestra Subwoofer Das Loewe 3D Orchestra IS ist ein integriertes 3D Home Cinema Spea- ker System. Das bedeutet, es ist geeignet für Loewe TV-Geräte mit • Einmess-Mikrofon Chassis SL 2xx in Verbindung mit der dazugehörigen Fernbedienung •...
  • Seite 5: Zu Ihrer Sicherheit

    Tuch ohne jedes scharfe oder scheu- Falsche Spannungen können das Gerät beschädigen. Dieses Gerät darf ernde Reinigungsmittel. Die 3D Orchestra Speaker sind textilbe- nur an ein Stromversorgungsnetz mit der auf dem Typenschild angege- spannt. Aufgrund von elektrostatischer Aufladung kann sich Staub benen Spannung und Frequenz mit dem mitgelieferten Netzkabel ange- auf der Lautsprecherabdeckung absetzen.
  • Seite 6: Aufstellen

    TV-Gerätes im Kapitel Software-Update beschrieben. Führen Sie te Unterlage. Die Lautsprecher sollten insbesondere bei Aufstellung das Update wie dort beschrieben durch. Ihr 3D Orchestra Sound- in oder auf Möbeln nicht über diese herausragen. system wird über das TV-Gerät automatisch mit Software-Updates Sie können die 3D Orchestra-Lautsprecher bzw.
  • Seite 7: Montage Des Module 3D Orchestra Controller

    Montage des Module 3D Orchestra Controller Montage des Module 3D Orchestra Controller Drücken Sie den Module 3D Orchestra Controller fest an die ange- brachten Klettbänder, um es zu fixieren. Montieren Sie den Module 3D Orchestra Controller z.B. an der Rück- seite des TV-Gerätes.
  • Seite 8: Lautsprecher An Stromversorgung Anschließen

    3D Orchestra - 8 - Bedienungsanleitung Lautsprecher anschließen Einmess-Mikrofon montieren Lautsprecher an Stromversorgung Einmess-Mikrofon montieren anschließen Das mitgelieferte Einmess-Mikrofon ist vor der Verwendung noch zusammenzustecken. Führen Sie zunächst die Mikrofonkabel durch Stecken Sie den kleinen Stecker (S) des mitgelieferten Netzkabels die Rohre/Kupplungen und den Fuß...
  • Seite 9: Einmess-Mikrofon Aufstellen/Anschließen

    • Optimierung des Klangs (Lautstärke, Frequenzgang, ggf. Sub- woofer). Schalten Sie das TV-Gerät sowie den 3D Orchestra Subwoofer ein. Stellen Sie sicher, dass alle 3D Orchestra Speaker mit der Netz-Stromversorgung verbunden sind. Starten Sie die automatische Raum-Akustik-Einmessung aus dem TV-Menü System-Einstellungen.
  • Seite 10: Menü Ton

    Das Menü Automatische Konfiguration des Lautsprechersystems erscheint. Im TV-Menü Ton (siehe Bedienungsanleitung TV-Gerät) werden Weiter. durch die Nutzung von 3D Orchestra Funktionen geändert bzw. neu hinzugefügt. Automatische Konfiguration des Lautsprechersystems Automatische Konfiguration des Lautsprechersystems Mit der nachfolgenden automatischen Konfiguration wird der Klang Ihres Tonkompo- Lautsprechersystems optimal an den Raum angepasst.
  • Seite 11: Led-Anzeige Am 3D Orchestra Speaker

    LED-Anzeige am 3D Orchestra Speaker LED-Anzeige am 3D Orchestra Speaker Raumeffekt 6 5 weitere ... markieren, Im 3D Orchestra Speaker ist eine weiße LED-Anzeige (L) eingebaut, 4 in nächste Spalte wechseln. die Sie über den Betriebszustand informiert. 6 5 Raumeffekt markieren, 4 in nächste Spalte wechseln.
  • Seite 12: 3D Orchestra-System Erweitern

    Wenn Sie Ihren 3D Orchestra Speaker bzw. Subwoofer neu anmelden möchten (z.B. wegen Erweiterung bzw. Veränderung des Soundsys- Über die Cinch-Buchse Line In / Subw kann der 3D Orchestra tems), so ist zunächst die bestehende Kopplung mit dem Module Subwoofer auch an anderen Audio-Systemen verwendet werden.
  • Seite 13: Fehlerbehebung

    LAN-Kabel vom TV-Gerät zum Module 3D Verbinden Sie mit dem mitgelieferten LAN- Kabel die Buchse DIGITAL AUDIO LINK Orchestra Controller nicht eingesteckt. des Module 3D Orchestra Controller mit der Buchse DIGITAL AUDIO LINK am TV-Gerät. Kein Ton. Das 3D Orchestra Soundsystem ist nicht Wiederholen Sie die automatische Raum- korrekt eingerichtet.
  • Seite 14: Technische Daten

    3D Orchestra - 14 - Bedienungsanleitung Technische Daten Schutz der Umwelt / Konformitätserklärung Technische Daten Module 3D Orchestra Controller Betriebstemperatur 5 °C ... 40 °C Feuchtigkeit 30 % ... 85 % (keine Kondensation) Abmessungen (ca.) 155 x 80 x 19 mm (B x H x T)
  • Seite 15 For your safety ................17 TV software update ..............18 Set-up ..................18 Installing the Module 3D Orchestra Controller ...... 19 Connecting the speakers ............20 Installing the measuring microphone ........20 Setting up / connecting the measuring microphone .... 21 Automatic room acoustic measurement .........
  • Seite 16: Welcome

    The Loewe 3D Orchestra IS is an integrated 3D Home Cinema Speaker • 2x Loewe 3D Orchestra Speakers System. This means that it is suitable for Loewe TV sets with SL 2xx • Loewe 3D Orchestra Subwoofer chassis in connection with their Loewe Assist remote controls together with the Loewe Assist Media user interface and that it uses the TV •...
  • Seite 17: For Your Safety

    Prevent metal items, needles, paper clips, liquids, wax, or similar items, from getting into the interior of the device. Such objects can Only use original accessories such as Loewe cause short circuits in the unit, which could possibly cause a fire.
  • Seite 18: Set-Up

    TV set. when placed in or on pieces of furniture. You can distribute the 3D Orchestra speakers or the subwoofer in the room as shown in the sketch. Only a mains outlet must be available...
  • Seite 19: Installing The Module 3D Orchestra Controller

    Controller Mount the Module 3D Orchestra Controller, for instance, on the rear side of the TV set. In many Loewe TV sets there is a possibility to mount the Module 3D Orchestra Controller directly in the rear cable duct of the TV set. This is shown as an example in the following figures.
  • Seite 20: Connecting The Speakers

    3D Orchestra - 20 - Instruction manual Connecting the speakers Installing the measuring microphone Connecting the speakers to the power Installing the measuring microphone supply Before using it, the supplied measuring microphone must be assem- bled. First, feed the microphone cable through the pipes / couplings Insert the small plug (S) of the supplied power cord into the power and the foot.
  • Seite 21: Setting Up / Connecting The Measuring Microphone

    Place the measuring microphone between the TV set and the opposite For the sound field of the 3D Orchestra sound system to be aligned opti- wall at a distance ratio of 2/3 to 1/3 as shown in the sketch below. The mally to your listening position, adjust the unit to your actual room.
  • Seite 22: Sound Menu

    (for example, with closed doors). After the measuring procedure, the posi- tions of the TV set and the 3D Orchestra Speakers must not be changed any longer. Similarly, the room (with respect to its acoustics) should not be signif- Under the menu item Sound mode, the original items will be replaced icantly altered.
  • Seite 23: Led Display On The 3D Orchestra Speaker

    LED display on the 3D Orchestra Speaker Spatial effect 6 5 Mark more ... , In the 3D Orchestra Speaker, a white LED (L) is installed that provides 4 go to next column. information on the operating status. 6 5 Mark Spatial effect, 4 go to next column.
  • Seite 24: Extending The 3D Orchestra System

    If you wish to relink your 3D Orchestra speaker and subwoofer again (e.g. due to an extension or modification of the sound system), the Via the RCA jack Line In / Subw the 3D Orchestra Subwoofer can be existing coupling with the Module 3D Orchestra Controller should first used in other audio systems as well.
  • Seite 25: Troubleshooting

    Orchestra Controller is not plugged in. 3D Orchestra Controller to the DIGITAL AUDIO LINK socket on the TV set. No sound. The 3D Orchestra sound system is not set up Repeat the room acoustic measurement (page correctly. 21). The volume is set to minimum.
  • Seite 26: Technical Data

    This equipment is in compliance with the essential requirements and other relevant provisions of Directive 1999/5/EC. It may be operated in all countries in the EU and also in Iceland, Norway and Switzerland. In France and Italy it may only be used indoors. You can find the complete declaration of conformity on our homepage www.loewe.de.
  • Seite 27: Mentions Légales

    Mise en place et raccordement du microphone de calibrage 33 Calibrage acoustique automatique de la pièce ......33 Menu Son ................... 34 Affichage des LED sur le 3D Orchestra Speaker ....35 Étendre le système 3D Orchestra ........... 36 Subwoofer .................. 36 Utilisation du Subwoofer avec d‘autres systèmes audio ......36...
  • Seite 28: Bienvenue

    • Module 3D Orchestra Controller • 2x Loewe 3D Orchestra Speaker Le Loewe 3D Orchestra IS est un système de haut-parleurs 3D Home • Loewe 3D Orchestra Subwoofer Cinema. Il a été spécialement conçu pour les téléviseurs Loewe avec châssis SL 2xx équipés de la télécommande Loewe Assist, y compris...
  • Seite 29: Pour Votre Sécurité

    Alimentation électrique abrasif. Les 3D Orchestra Speaker sont revêtus de textile. En raison Une tension incorrecte peut endommager l'appareil. Cet appareil doit de l'électricité statique, la poussière peut s'accumuler sur le couvercle être raccordé...
  • Seite 30: Mise À Jour Logicielle Tv

    Pour le montage mural des haut-parleurs 3D Orchestra, utilisez uni- quement les accessoires originaux Loewe, comme le Wall Mount 3D Orchestra Speaker Art.Nr. 71775001. Pour le montage des haut-parleurs 3D Orchestra sur un stand, utilisez le Floor Stand 3D Orchestra Speaker ; Art.Nr. 71765B00. 3D Orchestra...
  • Seite 31: Montage Du Module 3D Orchestra Controller

    Montage du Module 3D Orchestra Controller Pressez fermement le module 3D Orchestra Controller contre les Montez le Module 3D Orchestra Controller, par exemple, sur le panneau bandes velcro pour le fixer. arrière du téléviseur. Il existe de nombreux modèles de téléviseurs Loewe pour lesquels il est possible fixer le module 3D Orchestra Controller directement à...
  • Seite 32: Connecter Le Haut-Parleur

    3D Orchestra - 32 - Notice d'utilisation Connecter le haut-parleur Montage du microphone de calibrage Connecter le haut-parleur à l'alimentation Montage du microphone de calibrage électrique Le microphone de calibrage fourni doit être connecté avant l'utilisation. Introduisez tout d'abord le câble du microphone à travers les tuyaux/ Branchez le petit connecteur (S) du câble de secteur livré...
  • Seite 33: Mise En Place Et Raccordement Du Microphone De Calibrage

    Calibrage acoustique automatique de la pièce Placez le microphone de calibrage entre le téléviseur et le mur lui Afin que le champ sonore du système audio 3D Orchestra soit par- faisant face à une distance d'environ 2/3 à 1/3, comme dans l'illustra- faitement orienté...
  • Seite 34: Menu Son

    La configuration automatique des haut-parleurs a été effectuée avec succès. Composants 4 haut-parleurs et 1 subwoofers ont été configurés. du son Quitter l'assistant avec Appuyer sur BACK. Votre système audio 3D Orchestra est alors prêt à l'emploi. Vous pouvez maintenant enlever le micro- phone de calibrage.
  • Seite 35: Affichage Des Led Sur Le 3D Orchestra Speaker

    Affichage des LED sur le 3D Orchestra Speaker Effet surround 6 5 Sélectionner autres ... , Le 3D Orchestra Speaker comporte un affichage LED blanc (L) intégré 4 passer dans la colonne suivante. qui permet de voir l’état de fonctionnement.
  • Seite 36: Étendre Le Système 3D Orchestra

    Si vous souhaitez inscrire à nouveau votre 3D Orchestra Speaker ou Subwoofer (par exemple en raison d’une extension ou modification Avec la prise Cinch Line In / Subw, le 3D Orchestra Subwoofer du système sonore), il est nécessaire de réinitialiser le couplage exis- peut être utilisé...
  • Seite 37: Dépannage

    220-240 V 50/60 Hz. Connectez avec le câble LAN livré la prise DI- Câble LAN du téléviseur non branché dans le GITAL AUDIO LINK du module 3D Orchestra module 3D Orchestra Controller. Controller à la prise DIGITAL AUDIO LINK du téléviseur.
  • Seite 38: Caractéristiques Techniques

    - 38 - Notice d'utilisation Caractéristiques techniques Protection de l’environnement / Déclaration de conformité Caractéristiques techniques Module 3D Orchestra Controller Température de fonctionnement 5 °C ... 40 °C Taux d’humidité 30 % ... 85 % (pas de condensation) Dimensions (env.)
  • Seite 39: Informazioni Legali

    Informazioni sulle presenti istruzioni per l'uso ..... 40 Per la vostra sicurezza ............... 41 Aggiornamento software TV ............ 42 Installazione ................42 Montaggio di Module 3D Orchestra Controller ..... 43 Collegamento degli altoparlanti ..........44 Montaggio microfono di misurazione ........44 Installazione/collegamento microfono di misurazione ..45 Misurazione automatica acustica nello spazio .....
  • Seite 40: Benvenuti

    • 2x Loewe 3D Orchestra Speaker • Loewe 3D Orchestra Subwoofer Loewe 3D Orchestra IS è un sistema di altoparlanti 3D Home Cinema. È quindi adatto a TV Loewe con chassis SL 2xx, insieme al relativo • Microfono di misurazione telecomando Loewe Assist con guida utente Loewe Assist Media e •...
  • Seite 41: Per La Vostra Sicurezza

    I 3D Orchestra Speaker sono rivestiti di materiale tessile. Per effet- ghetta dell’apparecchio utilizzando il cavo di rete fornito. Il connettore to della carica elettrostatica la polvere può...
  • Seite 42: Aggiornamento Software Tv

    Interrompere con Interrompere con tatori. Per il montaggio a muro degli altoparlanti 3D Orchestra è necessario utilizzare l'apposito accessorio originale Loewe Wall Mount 3D Or- chestra Speaker, num. art. 71775001. Per il montaggio degli altoparlanti 3D Orchestra su un supporto è...
  • Seite 43: Montaggio Di Module 3D Orchestra Controller

    Controller direttamente nel vano cavi posto sul retro del TV. Esempi di disposizione sono rappresentati nelle figure. Ad esempio, con TV Loewe Individual applicare da 3 a 4 pezzi (corti) di nastro a strappo autoadesivo nelle posizioni contrassegnate sul retro di Module 3D Orchestra Controller.
  • Seite 44: Collegamento Degli Altoparlanti

    3D Orchestra - 44 - Manuale d'istruzioni Collegamento degli altoparlanti Montaggio microfono di misurazione Collegamento degli altoparlanti Montaggio microfono di misurazione all'alimentazione elettrica Per utilizzare il microfono di misurazione fornito è necessario assem- blarlo. Condurre prima di tutto il cavo del microfono nei tubi/innesti e Infilare il connettore piccolo (S) del cavo di rete fornito nella presa di rete nella base.
  • Seite 45: Installazione/Collegamento Microfono Di Misurazione

    Installazione/collegamento microfono di Misurazione automatica acustica nello spazio misurazione Affinché il campo sonoro del sistema audio 3D Orchestra sia regolato al meglio sulle posizioni degli ascoltatori, è necessario impostare Posizionare il microfono di misurazione tra il TV e la parete opposta a l'apparecchio in base alle caratteristiche del locale.
  • Seite 46: Menu Audio

    (ad es. a porte chiuse). Dopo aver effettuato la misurazione la posizione di TV e 3D Orchestra Speaker non deve essere modi- ficata. Allo stesso modo nemmeno la stanza (acu- Nel menu Modalità ascolto, i comandi originari vengono sostituiti stica) deve essere modificata in modo considere- dalle possibilità...
  • Seite 47: Effetto Surround

    LED su 3D Orchestra Speaker Effetto surround 6 5 Evidenziare altri ..In 3D Orchestra Speaker è integrato un LED (L) con la funzione di in- 4 Passare alla colonna successiva. formare in merito allo stato operativo. 6 5 Evidenziare Effetto surround.
  • Seite 48: Espansione Del Sistema 3D Orchestra

    è necessario ristabilire il collegamento presente con Module connettore Line In/Subw tramite il cavo RCA alla connessione Sub- 3D Orchestra Controller. Per fare ciò premere il tasto Reset (R) con un woofer/LFE della fonte audio. oggetto appuntito. In 3D Orchestra Speaker il tasto Reset è situato sul Il 3D Orchestra Subwoofer è...
  • Seite 49: Risoluzione Dei Guasti

    Inserire il cavo di alimentazione in una presa non è inserito. 220-240 V 50/60 Hz. Cavo LAN da TV a Module 3D Orchestra Con- Con il cavo LAN fornito collegare il connettore DIGITAL AUDIO LINK di Module 3D Orchestra troller non inserito.
  • Seite 50: Specifiche Tecniche

    Questo apparecchio è conforme ai requisiti base e alle ulteriori indicazioni corrispondenti della Direttiva 1999/5/CE. Esso può essere utilizzato in tutti i paesi dell’UE nonché in Islanda, Norvegia e Svizzera. In Francia e Italia l’utilizzo è consentito soltanto all’interno di ambienti chiusi. La dichiarazione di conformità completa è riportata nella nostra homepage www.loewe.de.
  • Seite 51 Colocación / conexión del micrófono de medición ....57 Medición automática de la acústica del área ......57 Menú Sonido ................58 Indicador LED en el 3D Orchestra Speaker ......59 Ampliación del sistema 3D Orchestra ........60 Subwoofer .................. 60 Uso del subwoofer en otros sistemas de audio ........60 Intensidad de graves ..................60...
  • Seite 52: Bienvenido

    • Module 3D Orchestra Controller • 2x Loewe 3D Orchestra Speaker El Loewe Loewe 3D Orchestra IS un hogar integrado cine 3D sistema de • Loewe 3D Orchestra Subwoofer altavoces. Esto significa que es apto para televisores Loewe con chasis SL 2xx en relación con su mando a distancia Loewe Assist junto con...
  • Seite 53: Por Su Seguridad

    Limpie el dispositivo y el mando a distancia solamente con un paño vocar una sobrecarga del material. húmedo, suave y limpio y sin utilizar agentes limpiadores corrosi- vos ni abrasivos. El 3D Orchestra Speaker están recubiertos de Suministro de corriente textiles. Debido a la carga electroestática, puede depositarse polvo Si se establece una tensión incorrecta pueden producirse daños en el...
  • Seite 54: Actualización De Software Tv

    Actualización de software. Realice la actualización en cada caso. como se describe allí. Su 3D Orchestra sistema en el televisor au- Coloque el dispositivo en una base horizontal, fija y plana. Los altavoces tomáticamente suministra con actualizaciones de software.
  • Seite 55: Montaje Del Módulo 3D Orchestra Controller

    Para fijarlo, presione firmemente el módulo 3D Orchestra Controller contra las cintas de velcro colocadas. Monte el módulo 3D Orchestra Controller, p. ej., en la parte posterior del televisor. Para muchos televisores Loewe existe la posibilidad de colocar el módulo 3D Orchestra Controller directamente en la caja de entrada de cables posterior del televisor.
  • Seite 56: Conexión De Altavoces

    3D Orchestra - 56 - Manual de instrucciones Conexión de altavoces Montaje del micrófono de medición Conexión de altavoces a la alimentación de Montaje del micrófono de medición corriente Antes de utilizarlo, el micrófono de medición suministrado también debe conectarse. En primer lugar, pase el cable del micrófono por los Enchufe el pequeño conector (S) del cable de red suministrado a la...
  • Seite 57: Colocación / Conexión Del Micrófono De Medición

    Conexión del micrófono de medición Continuar con Cancelar con Enchufe el la clavija de 3,5mm desde el extremo del cable del micrófo- no de medición en la toma MIC en el módulo 3D Orchestra Controller. 6 5 S eleccionar 3D Orchestra, OK confirmar. Continuar.
  • Seite 58: Menú Sonido

    (p. ej., con puertas cerradas). Una vez reali- zada la medición ya no debería modificarse la posición del televisor y de los 3D Orchestra Speaker. Tampoco debería modificarse significativamente el En la opción del menú Modo de audición se sustituyen las opciones área (desde una perspectiva acústica).
  • Seite 59: Indicador Led En El 3D Orchestra Speaker

    Indicador LED en el 3D Orchestra Speaker Efecto espacial 6 5 Marcar otros ... , En el 3D Orchestra Speaker hay integrado un indicador LED blanco 4 cambiar a la siguiente columna. (L) que le informa sobre el estado de funcionamiento.
  • Seite 60: Ampliación Del Sistema 3D Orchestra

    Reset se encuentra en la parte inferior del altavoz en la caja. En el 3D Orchestra Subwoofer, la tecla Reset se encuentra en el panel El 3D Orchestra Subwoofer es un subwoofer activo. Por tanto, en la parte trasera del subwoofer (véase la ilustración de la columna...
  • Seite 61: Solución De Problemas

    Uno o varios altavoces no están conectados Pulse la tecla Reset en el altavoz 3D Orchestra o el con su sistema 3D Orchestra, p. ej., después subwoofer 3D Orchestra. Repita la medición au- de una ampliación del sistema.
  • Seite 62: Datos Técnicos

    Este dispositivo cumple los principales requisitos y las demás disposiciones aplicables de la directiva 1999/5/CE. Puede operar en todos los países de la UE y adicionalmente en Islandia, Noruega y Suiza. En Francia y en Italia su uso está permitido únicamente en espacios interiores. Encontrará la declaración de conformidad completa en nuestra página web www.loewe.de.
  • Seite 63 Kalibratiemicrofoon monteren ..........68 Kalibratiemicrofoon opstellen/aansluiten ......69 Automatische kalibratie kamerakoestiek ......69 Menu Geluid ................70 LED-weergave op de 3D Orchestra speaker ......71 3D Orchestra-systeem uitbreiden ..........72 Subwoofer ...................72 Gebruik van de subwoofer aan andere audiosystemen ....... 72 Basintensiteit ....................72 Storingen verhelpen ..............73...
  • Seite 64: Van Harte Welkom

    Dit geldt evenzeer voor tv, audio en apparatuur. Naast het elegante en tijdloze design en de veelzijdige combinatiemogelijkheden voor • Kalibratiemicrofoon wat betreft kleur en plaatsing biedt uw Loewe 3D Orchestra ook in • Klittenbanden technologisch opzicht vele unieke voordelen.
  • Seite 65: Voor Uw Veiligheid

    De 3D Orchestra speakers zijn bespannen met textiel. Door worden aangesloten met de op het typeplaatje aangegeven spanning en elektrostatische lading kan zich stof op de luidsprekerafdekking ver- frequentie.
  • Seite 66: Tv-Software-Update

    U kunt de 3D Orchestra-luidsprekers of de subwoofer over de kamer verdelen, zoals op de afbeelding wordt getoond. In de buurt van elke SOFTWARE-UPDATE-WIZARD - Actuele software SOFTWARE-UPDATE-WIZARD - Actuele software Actuele software: 1.9.6.0...
  • Seite 67: Montage Van De Module 3D Orchestra Controller

    Voorbeelden daarvan ziet u op de volgende afbeeldingen. Klit bijv. bij Loewe Individual tv-toestellen 3 tot 4 stks. van de zelfhech- tende klittenbanden (kort) vast op de gemarkeerde plaatsen op de achterzijde van de module 3D Orchestra Controller.
  • Seite 68: Luidsprekers Aansluiten

    3D Orchestra - 68 - Gebruiksaanwijzing Luidsprekers aansluiten Kalibratiemicrofoon monteren Luidsprekers aansluiten op de voeding Kalibratiemicrofoon monteren De meegeleverde kalibratiemicrofoon dient voor gebruik nog in elkaar Steek de kleine stekker (S) van het meegeleverde netsnoer in het net- te worden gestoken. Leid eerst de microfoonkabel door de buizen/ contact aan de onderzijde van de luidspreker.
  • Seite 69: Kalibratiemicrofoon Opstellen/Aansluiten

    Verder met Afbreken met Kalibratiemicrofoon aansluiten Steek de klinkstekker 3,5 mm vanaf het kabeleinde van de kalibratie- microfoon in de bus MIC op de module 3D Orchestra Controller. 6 5 3 D Orchestra selecteren, OK bevestigen. Verder. Het menu Center-luidspreker kiezen verschijnt.
  • Seite 70: Menu Geluid

    Het menu Automatische configuratie van het luidsprekersysteem verschijnt. In het tv-menu Geluid (zie gebruiksaanwijzing tv-toestel) worden Verder. er door het gebruik van 3D Orchestra functies gewijzigd en nieuwe functies toegevoegd. Automatische configuratie van het luidsprekersysteem Automatische configuratie van het luidsprekersysteem...
  • Seite 71: Led-Weergave Op De 3D Orchestra Speaker

    LED-weergave op de 3D Orchestra speaker Ruimte effect 6 5 andere ... markeren, In de 3D Orchestra speaker is een wit LED-lampje (L) geïntegreerd die 4 naar volgende kolom wisselen. informatie over de werking geeft. 6 5 Ruimte effect markeren, 4 naar volgende kolom wisselen.
  • Seite 72: 3D Orchestra-Systeem Uitbreiden

    Orchestra Controller te worden gereset. Daarvoor drukt u de toets / Subw aan via een cinchkabel met de subwoofer-/LFE-aansluiting Reset (R) met een spits voorwerp in. Bij de 3D Orchestra speaker zit van de audiobron. de resettoets aan de onderzijde van de luidspreker in een schacht. Bij de 3D Orchestra subwoofer zit de resettoets op het achterpaneel van De 3D Orchestra Subwoofer is een actieve subwoofer.
  • Seite 73: Storingen Verhelpen

    Een of meer luidsprekers zijn niet met uw 3D Druk op de Reset-toets op de 3D Orchestra Orchestra-systeem verbonden, bijv. na een Speaker of 3D Orchestra Subwoofer. Herhaal de systeemuitbreiding.
  • Seite 74: Technische Gegevens

    Dit apparaat voldoet aan de fundamentele eisen en de andere overeenkomstige eisen van de richtlijn 1999/5/EU en mag in alle landen van de EU en ook in Ijsland, Noorwegen en Zwitserland worden gebruikt. In Frankrijk en Italië is het gebruik slechts binnenshuis toegestaan. De volledige conformiteitsverklaring vindt u op onze Homepage www.loewe.de.
  • Seite 75 Tilbehør ..................76 Om denne betjeningsvejledning ..........76 Sikkerhed ..................77 Opgradering af tv-software ............78 Opstilling ..................78 Montering af Module 3D Orchestra Controller .......79 Tilslutning af højttaler ............. 80 Montering af tilpasningsmikrofon .......... 80 Opstilling/tilslutning af tilpasningsmikrofon ......81 Automatisk rumakustiktilpasning ........... 81 Menuen Lyd .................82...
  • Seite 76: Hjerteligt Velkommen

    • Tilpasningsmikrofon 3D Orchestra også unikke fordele i teknologisk henseende. • Velcrobånd • LAN-kabel Det særlige ved Loewe 3D Orchestra IS er den intelligente kombination • 5x netkabel af innovative teknologier som f.eks. trådløse aktive højttalere, punkt- • Denne betjeningsvejledning lydgenerering og automatisk triangulær tilpasning.
  • Seite 77: Sikkerhed

    Strømforsyning 3D Orchestra Speaker har stof påspændt. På grund af statisk elektri- Forkert spænding kan beskadige apparatet. Dette apparat må kun til- citet kan der sætte sig støv på højttalerkabinettet. Dette kan om sluttes et strømforsyningsnet med den spænding og frekvens, som er...
  • Seite 78: Opgradering Af Tv-Software

    Til vægmonteringen af 3D Orchestra-højttalerne må du kun anvende det dertil beregnede originale Loewe-tilbehør Mount 3D Orchestra Speaker varenr. 71775001. Til monteringen af 3D Orchestra-højttalerne på en fod findes Floor Stand 3D Orchestra Speaker; varenr. 71765B00. 3D Orchestra 3D Orchestra...
  • Seite 79: Montering Af Module 3D Orchestra Controller

    3D Orchestra Controller direkte i kabelkanalen på tv-apparatets bagside. Dette vises med eksempler på de følgende illustrationer. På Loewe Individual tv-apparater skal du f.eks. klæbe 3 til 4 stk af de selvklæbende velcrobånd (korte) på de mærkede steder på bagsiden af Module 3D Orchestra Controller.
  • Seite 80: Tilslutning Af Højttaler

    3D Orchestra - 80 - Betjeningsvejledning Tilslutning af højttaler Montering af tilpasningsmikrofon Tilslutning af højttalerne til strømforsyningen Montering af tilpasningsmikrofon Den medfølgende tilpasningsmikrofon skal samles, inden den kan Sæt det lille stik (S) på det medfølgende netkabel i netstikket på siden bruges.
  • Seite 81: Opstilling/Tilslutning Af Tilpasningsmikrofon

    Automatisk rumakustiktilpasning Placer tilpasningsmikrofonen mellem tv-apparatet og den modståen- For at 3D Orchestra Soundsystems lydfelt kan rettes nøjagtigt mod de væg i en afstand på ca. 2/3 til 1/3 som vist på skitsen nedenfor. Den dine lyttepositioner, er det nødvendigt, at apparatet indstiller sig efter med rødt markerede mikrofon skal vende mod tv-apparatet.
  • Seite 82: Menuen Lyd

    Bemærk Bemærk Den automatiske højttalerkonfiguration blev gennemført. Lyd- Der blev konfigureret 4 højttaler(e) og 1 subwoofer(e). komponenter Afslut assistenten med Tryk BACK. Dit 3D Orchestra Soundsystem er nu klar til brug. Du kan fjerne den tilpasningsmikrofon nu.
  • Seite 83: Led-Indikatorer På 3D Orchestra Speaker

    LED-indikatorer på 3D Orchestra Speaker LED-indikatorer på 3D Orchestra Speaker Rumeffekt 6 5 Marker flere ... , I 3D Orchestra Speaker er der indbygget en hvid LED-indikator (L), 4 skift til næste spalte. som holder dig underrettet om driftstilstanden. 6 5 Marker Rumeffekt, 4 skift til næste spalte.
  • Seite 84: Udvidelse Af 3D Orchestra-Systemet

    Udvidelse af 3D Orchestra-systemet Brug af subwooferen på andre audiosystemer Når du vil registrere din 3D Orchestra Speaker hhv. subwoofer for første Via cinch-stikket Line In / Subw kan 3D Orchestra Subwoofer også gang (f.eks. ved en udvidelse eller ændring af dit soundsystem), skal bruges på...
  • Seite 85: Fejlafhjælpning

    Rumklangen er utydelig. til stereo. Lydvalg er indstillet til Mono eller Stereo. Indstil lydvalg til Surround (side 82). En eller flere 3D Orchestra speakere er ikke Kontroller spændingsforsyningen for 3D Or- tilsluttet lysnettet. chestra-speakerne. Det gengivne lyd-indhold er ikke optaget i Ingen afhjælpning.
  • Seite 86: Tekniske Data

    3D Orchestra - 86 - Betjeningsvejledning Tekniske data Miljøbeskyttelse / Overensstemmelseserklæring Tekniske data Module 3D Orchestra Controller Driftstemperatur 5 °C ... 40 °C Fugtighed 30 % ... 85 % (uden kondensering) Mål (ca.) 155 x 80 x 19 mm (B x H x D) Vægt...
  • Seite 87 Lisätarvikkeet ................88 Tietoja tästä käyttöohjeesta ........... 88 Käyttöturvallisuus ..............89 TV-ohjelmistopäivitys ............... 90 Sijoittaminen ................90 3D Orchestra Controller -moduulin asentaminen ....91 Kaiuttimien yhdistäminen............92 Kalibrointimikrofonin asentaminen .........92 Kalibrointimikrofonin sijoittaminen/yhdistäminen ....93 Automaattinen tila-akustiikan kalibrointi .......93 Valikko Ääni ................94 LED-näyttö...
  • Seite 88: Tervetuloa

    • Module 3D Orchestra Controller • 2x Loewe 3D Orchestra Speaker Loewe 3D Orchestra IS on integroitu 3D Home Cinema Speaker Sys- • Loewe 3D Orchestra Subwoofer tem. Tämä tarkoittaa, että se soveltuu rungolla SL 2xx varustettuihin Loewen TV-vastaanottimiin yhteydessä...
  • Seite 89: Käyttöturvallisuus

    Väärät jännitteet voivat vaurioittaa laitetta. Laitteen saa liittää verkko- raalilla liinalla ilman mitään voimakkaita tai hankaavia puhdistus- kaapelilla ainoastaan virtaverkkoon, jonka jännite ja taajuus vastaavat aineita. 3D Orchestra Speaker on päällystetty kankaalla. Sähköstaat- tyyppikilvessä ilmoitettuja arvoja. Laitteen verkkopistokkeen on oltava tisen latauksen johdosta voi kaiuttimen suojukseen kerääntyä pölyä.
  • Seite 90: Tv-Ohjelmistopäivitys

    Noudata vastaavaa asennusohjetta. sa käyttöohjeessa luvussa Ohjelmistopäivitys. Suorita ohjelmis- Aseta kaiuttimet vain tasaiselle, tukevalle ja vaakasuoralle alustalle. topäivitys siinä kuvatun mukaisesti. 3D Orchestra Soundsystem saa Erityisesti huonekalujen sisään tai päälle asennettaessa kaiuttimet ohjelmistopäivitykset automaattisesti TV-vastaanottimen kautta. eivät saa ulottua niiden reunojen yli.
  • Seite 91: Orchestra Controller -Moduulin Asentaminen

    3D Orchestra Controller -moduuli suoraan takaosassa olevaan TV-vastaanottimen kaapelikanavaan. Tämä on kuvattu esi- merkinomaisesti seuraavissa kuvissa. Kiinnitä esim. Loewe Individual TV-vastaanottimissa 3 - 4 kpl itselii- mautuvaa tarranauhaa (lyhyttä) merkittyihin kohtiin 3D Orchestra Controller -moduulin takaosassa. Yhdistä mukanatoimitetulla LAN-kaapelilla 3D Orchestra Controller -moduulin liitäntä...
  • Seite 92: Kaiuttimien Yhdistäminen

    3D Orchestra - 92 - Käyttöohje Kaiuttimien yhdistäminen Kalibrointimikrofonin asentaminen Kaiuttimien yhdistäminen virransyöttöön Kalibrointimikrofonin asentaminen Mukanatoimitettu kalibrointimikrofoni täytyy ennen käyttöä vielä Työnnä mukanatoimitetun verkkokaapelin pieni pistoke (S) kaiuttimen koota yhteen. Vie ensin mikrofonin johto putkien/kytkentöjen ja jalan alaosassa olevaan verkkoliitäntään. Vie verkkokaapeli tätä varten tar- läpi.
  • Seite 93: Kalibrointimikrofonin Sijoittaminen/Yhdistäminen

    • Äänen jaon optimointi. • Äänen (äänenvoimakkuus, taajuus, tarvittaessa Subwoofer) optimointi. Kytke TV-vastaanotin sekä 3D Orchestra Subwoofer päälle. Var- mista, että kaikki 3D Orchestra Speaker -kaiuttimet on yhdistet- ty virransyöttöön. Käynnistä automaattinen tila-akustiikan kalibrointita TV-valikosta Järjestelmäasetukset. HOME: Näkymän Home avaaminen.
  • Seite 94: Valikko Ääni

    Valmistumisen jälkeen automaattisesti huoneen sanoma tulos näytetään. Ohje Ohje Automaattinen kaiutinkonfigurointi onnistui. 4 kaiutinta ja Ääni- 1 subwooferia konfiguroitiin. komponentit Päätä apuohjelmat painikkeella Paina BACK. Nyt 3D Orchestra Soundsystem on käyttövalmis. Voit nyt poistaa asennus mikrofonin.
  • Seite 95: Led-Näyttö 3D Orchestra Speaker -Kaiuttimissa

    3D Orchestra - 95 - Käyttöohje Valikko Ääni LED-näyttö 3D Orchestra Speaker -kaiuttimissa LED-näyttö 3D Orchestra Speaker -kaiuttimissa Tilaefekti 6 5 Merkitse lisää ... , 3D Speaker Orchestra, valkoinen LED (L) on asennettu, joka tarjoaa 4 siirry seuraavaan sarakkeeseen. tietoa toimintatilan.
  • Seite 96: 3D Orchestra-Järjestelmän Laajentaminen

    Jos haluat alustaa uudelleen 3D Orchestra Speaker -kaiuttimen tai Subwooferin (esim. äänijärjestelmän laajentamisen tai muuttami- Jakkiliitännän Line In / Subw kautta voidaan 3D Orchestra Sub- sen takia), niin ensin täytyy olemassaoleva kytkentä moduuliin 3D woofer -kaiutinta käyttää myös muissa audiojärjestelmissä. Yhdistä...
  • Seite 97: Häiriönpoisto

    V+ kaukosäätimestä aktivoidaksesi äänen jälleen ja säädä tämän jälkeen äänenvoi- makkuus. Yksi tai useampia kaiutin ei ole yhdistettynä 3D Paina 3D Orchestra -kaiuttimen tai 3D Orchestra Orchestra -järjestelmään, esim. järjestelmän -subwooferin Reset-painiketta. Suorita auto- laajentamisen jälkeen. maattinen tila-akustiikan kalibrointi uudelleen (sivu 93).
  • Seite 98: Tekniset Tiedot

    3D Orchestra - 98 - Käyttöohje Tekniset tiedot Ympäristönsuojelu / Vaatimustenmukaisuusvakuutus Tekniset tiedot Module 3D Orchestra Controller Käyttölämpötila 5 °C ... 40 °C Kosteus 30%...85% (ei kondenssiveden muodostusta) Mitat (noin) 155 x 80 x 19 mm (L x K x S)
  • Seite 99 Tillbehör ................... 100 Om denna bruksanvisning ............. 100 För din säkerhet ............... 101 Uppdatering av TV-programvara ..........102 Uppställning ................102 Montering av Module 3D Orchestra Controller ....103 Ansluta högtalare..............104 Montera mätmikrofonen ............104 Ställa upp/ansluta mätmikrofonen ........105 Automatisk mätning av rumsakustik ........105 Ljudmeny...................106...
  • Seite 100: Hjärtligt Välkommen

    • 4 st Loewe 3D Orchestra Speaker vändarvänlighet. Det gäller för såväl TV som ljudanläggningar och • Loewe 3D Orchestra Subwoofer utrustning. Din Loewe 3D Orchestra har en elegant och tidlös design, och de många valmöjligheterna för färger och uppställningsalternativ • Mätmikrofon innebär också...
  • Seite 101: För Din Säkerhet

    Rengör högtalaren endast med en fuktig, mjuk, ren och ofärgad duk Felaktiga spänningar kan skada apparaten. Denna apparat får bara utan slipande eller frätande rengöringsmedel. 3D Orchestra Spe- anslutas till ett strömförsörjningsnät med den spänning och frekvens aker är klädd med tyg. Högtalarhöljet kan dra till sig damm till följd av som anges på...
  • Seite 102: Uppdatering Av Tv-Programvara

    Avbryt med Avbryt med Om du vill väggmontera 3D Orchestra-högtalarna så ska du bara an- vända Loewes särskilda originaltillbehör Wall Mount 3D Orchestra Speaker, artikelnummer 71775001. Om du vill montera 3D Orchestra-högtalaren på ett stativ så föreslår vi Floor Stand 3D Orchestra Speaker, artikelnummer 71765B00.
  • Seite 103: Montering Av Module 3D Orchestra Controller

    LAN-kabel AUDIO LINK Controller Lim, t ex Loewe Reference ID-TV 2 x magiska band (lång) till de angiv- na positioner (revben) i den vänstra bakre kabelkanal av TV-apparaten. Se till att minst tre eller fyra av de korta kardborrbanden används, och att de inte fästs på...
  • Seite 104: Ansluta Högtalare

    3D Orchestra - 104 - Bruksanvisning Ansluta högtalare Montera mätmikrofonen Ansluta högtalare till en strömkälla Montera mätmikrofonen Den medföljande mätmikrofonen ska sättas ihop innan den används. Sätt den lilla kontakten (S) på den medföljande nätkabeln till nätuttaget Led sedan mikrofonkabeln genom rören/kopplingarna och foten.
  • Seite 105: Ställa Upp/Ansluta Mätmikrofonen

    • Mätning av rummets akustiska förhållanden. • Optimering av ljudfördelningen. • Optimering av ljudet (volym, frekvensgång, eventuell subwoofer). Slå på TV-apparaten och 3D Orchestra Subwoofer. Se till att alla 3D Orchestra Speaker är anslutna till elnätet. Starta den automatiska mätningen av rumsakustiken via menyn Systeminställningar i TV-apparaten.
  • Seite 106: Ljudmeny

    Tips Tips Ljud- Den automatiska högtalarkonfigurationen slutfördes. komponenter 4 högtalare och 1 subwoofer har konfigurerats. Avsluta assistenten med Tryck på BACK. Din 3D Orchestra Soundsystem är nu klar att använda. Du kan nu ta bort mätmikrofonen.
  • Seite 107: Led-Indikatorer På 3D Orchestra Speaker

    LED-indikatorer på 3D Orchestra Speaker LED-indikatorer på 3D Orchestra Speaker Rumseffekt 6 5 Markera ytterligare ... , I 3D Orchestra Speaker finns en vit LED-indikator (L) som visar drift- 4 gå till nästa kolumn. läget . 6 5 Markera Rumseffekt, 4 gå...
  • Seite 108: Bygga Ut 3D Orchestra-Systemet

    Subwoofer Bygga ut 3D Orchestra-systemet Använda subwoofern med andra audiosystem Om du på nytt vill registrera din 3D Orchestra Speaker eller subwoofer, Via Cinch-uttaget Line In/Subw kan 3D Orchestra-subwoofern an- t.ex. om Soundsystem har utökats eller förändrats), så behöver du vändas tillsammans med andra audiosystem.
  • Seite 109: Felavhjälpning

    Lyssningssätt är inställt på Mono eller Ställ lyssningssätt på Surround (sidan 106). Stereo. En eller flera 3D Orchestra Speaker är inte Kontrollera att dina 3D Orchestra Speaker får anslutna till elnätet. ström. Det återgivna ljud-innehållet är inte inspelat i Ingen åtgärd.
  • Seite 110: Tekniska Data

    3D Orchestra - 110 - Bruksanvisning Tekniska data Miljöskydd / Överensstämmelseförklaring Tekniska data Module 3D Orchestra Controller Användningstemperatur 5°C– 40°C Luftfuktighet 30 %– 85 % (ingen kondensation) Mått (ca) 155 x 80 x 19 mm (B x H x D) Vikt...
  • Seite 111 Block D, Plot No. 7 Shanti Kunj www.3logic.pl Fax +34 - 913 29 16 75 Vasant Kunj E-mail: loewe@maygap.com New Delhi - 110070, India Tel +91 11 47 65 55 00 Fax +91 11 47 67 67 15 E-Mail: admin@navshiv.com © by Loewe Opta 02.04.13...
  • Seite 113 3D Orchestra - 113 -...
  • Seite 114 3D Orchestra - 114 -...

Inhaltsverzeichnis