Trix 66955 Bedienungsanleitung
Mobile station
Inhaltsverzeichnis
Verfügbare Sprachen
Verfügbare Sprachen
Kapitel
Inhaltsverzeichnis

Verwandte Anleitungen für Trix 66955

Inhaltszusammenfassung für Trix 66955
- Seite 1 Deutsch English Bedienungsanleitung Mobile Station 66955...
-
Seite 2: Inhaltsverzeichnis
Die Bedienungsanleitung ist Bestandteil des Produktes und muss deshalb aufbewahrt, sowie bei Weitergabe des Produktes mitgegeben werden. Gebr. Märklin & Cie. GmbH Stuttgarter Str. 55 - 57 73033 Göppingen 267994/0216/Sc1Ef Germany Änderungen vorbehalten www.trix.de © Gebr. Märklin & Cie. GmbH www.maerklin.com/en/imprint.html... -
Seite 3: Mobile Station
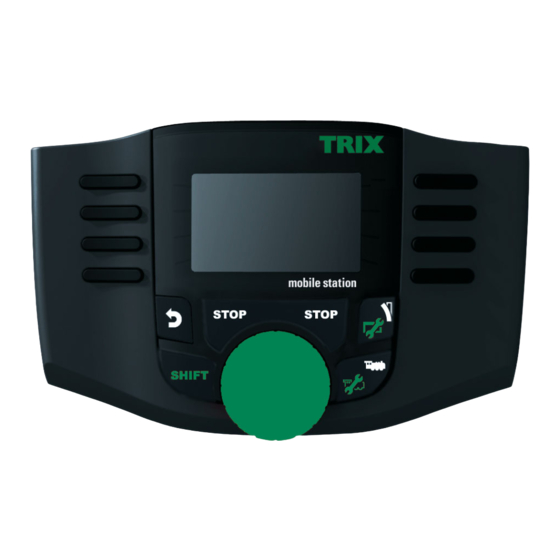
• Anschluss an Central Station 60213, 60214, 60215, 60216, 60226 • Anschluss an Terminal 60125 mittels Adapterkabel (610 479) 60124 Anschluss mit Gleisbox Vorbereitungen Pro Anlage darf nur eine Gleisbox ange- schlossen werden. Spur C-Gleis 66955 und /oder 66950... - Seite 4 Menü Bildschirm scrollen oder Auswahl Auswahl Bestätigen Aktive Lok Schritt zurück Magnetartikel Stop +Shift (Menü) Shift Lok Auswahl Fahrregler +Shift (Loks konfi gurieren) Fahrtrichtungswechsel Mobile Station Einstellungen Sprache dann zusätzlich drücken SHIFT Zum Wählen: scrollen Auswahl: Zum Wählen: Sprache scrollen Zum Wählen: scrollen Auswahl: Deutsch...
-
Seite 5: Lok Anlegen, Konfigurieren
Anlegen Auswahl Lok Icon und Lokname Auswahl Speicherplatz Lokliste; belegt Speicherplatz Lokliste; frei Magnetartikel Stop Shift Lok Auswahl Fahrregler Fahrtrichtungswechsel Shift+Fahrregler Lok-Schnellauswahl Es stehen 40 interne Speicherplätze zur Verfügung, davon 11 (10+1) aktive Lokomotiven. Der 11. Platz ist variabel d.h. wenn eine neue Lokkarte oder mfx Lok eingelesen wird, über- schreibt diese den 11. -
Seite 6: Lok Mit Lokkarte Anlegen
Lok mit Lokkarte anlegen Lokkarte einstecken, die Lokomotive Lokkarte einstecken, die Lokomotive ist sofort einsatzbereit. Hinweis: Ist der interne Lokspeicher voll, muss vor Aufnahme einer neuen Lok ein Spei- cherplatz gelöscht werden (Siehe S. 19) Lok erkennen Die zu erkennende Lok fx (MM2), DCC darf nur alleine auf der Gleisanlage stehen. Lokomotiven mit mfx-Decodern müssen nicht alleine auf der Gleisanlage stehen. - Seite 7 Lok wurde erkannt, in die Lokliste übernom- men und ist betriebsbereit. Name wird nur bei mfx-Decodern ange- zeigt, bei anderen Decodern nur das Daten- format und die Adresse. oder Lok wurde erkannt. Adresse existiert schon und wurde nicht automatisch in die Lokliste übernommen.
-
Seite 8: Lok Manuell Anlegen
Zum Wählen: SHIFT oder scrollen Wählen Sie eine Ihrer Lokomoti- ven in der Datenbank aus. Dies funktioniert nur, wenn die werkseitige Adresse der Loko- motive nicht verändert wurde. Lokomotive ist in die Lokliste übernommen und betriebs- bereit. Lok manuell anlegen Durch (evtl. - Seite 9 Wählen: Manuell anlegen Zum Wählen: scrollen Wählen: z.B.MM2 programmierbar Nachfolgende Schritte sind bei allen Decodertypen gleich. Die Deco- derauswahl ist maßgebend beim späteren Bearbeiten der Lok. Z.B. muss bei program- mierbaren Decodern die Änderung der Adresse auch an die Lok zum Speichern gesendet werden, nicht jedoch bei Lokomotiven mit Codierschalter.
- Seite 10 Name bestätigen Zum Wählen: scrollen Auswahl treffen Lokomotive ist in die Lokliste übernom- men und betriebsbereit. Fahren Die angelegten Lokomotiven sind mit dem Drehregler steuerbar, vorhandene Funktionen können über die Funktionstasten ausgelöst werden. f4 - f7 Funktionen f0 - f3 schalten f12 - f15 SHIFT...
- Seite 11 Keyboard Keyboard wechseln Keyboard-Adresse 1 - 320 Adresse (–) Adresse (+) blättern blättern Magnetartikel Magnetartikel schalten schalten Aktive Lok Stop Shift + Setup Shift Fahrmodus Fahrregler Fahrtrichtungswechsel Shift+Fahrregler Keyboard-Schnellauswahl Magnetartikelprotokoll Sie können hier einstellen, welches Datenprotokoll zum Schalten der Magnetartikel verwendet werden soll.
- Seite 12 Wählen: Keyboard Es stehen somit alle 320 Adressen für Magnetartikel angezeigt mit den Standardsymbolen zur Verfügung. Ist die Mobile Station an eine Central Station angeschlossen, werden die Magnetartikel mit den dort verwendeten Symbolen angezeigt (ausgenommen Drehscheibe und Lichtsignale. Lichtsignale werden als Formsignal dargestellt, die Drehscheibe mit den Standardsym- bolen für Magnetartikel).
-
Seite 13: Lok Konfigurieren
Tipp Durch Halten dieser Taste können SHIFT Sie schneller suchen. Keyboard Keyboard vorwärts zurück SHIFT Magnetartikel Schnellauswahl Lok konfi gurieren Dieses Menü dient zur individuellen Anpassung der Lok bzw. des Decoders. Es kann die Lokadresse, Loknamen sowie sämtliche CV Parameter bearbeitet werden. Inwieweit Ihre Lokomotive in diesem Menü... - Seite 14 Lok bearbeiten Auswahl: Name Vorgehensweise siehe Seite 9 Auswahl: Adresse Anwendbar nur bei programmierbaren Decodern, Vorgehensweise siehe Seite 9 Auswahl: Lok-Symbol Vorgehensweise siehe Seite 10 Funktionen Bitte prüfen Sie in Ihrer Lokanleitung, ob diese Einstellungen ausgeführt werden können. Auswahl: Lok-Funktion...
- Seite 15 Auswahl: Funktion F1 Auswahl: Symbol SHIFT Auswahl bestätigen Auswählen: Moment Auswählen: Dauer Auswählen: Zeit Auswählen: Zeit Auswahl bestätigen Auswahl bestätigen Auswahl: Vmin Auswahl Auswahl Auswahl bestätigen...
- Seite 16 Anfahrbeschleunigung / Bremsverzögerung Bitte prüfen Sie in Ihrer Lokanleitung, ob diese Einstellungen ausgeführt werden können. Auswahl: ACC Anfahrverzögerung Auswahl Auswahl Auswahl bestätigen Auswahl: Dec Bremsverzögerung Auswahl Auswahl Auswahl bestätigen Lautstärke Bitte prüfen Sie in Ihrer Lokanleitung, ob diese Einstellung ausgeführt werden kann. Auswahl: Vol Auswahl Auswahl...
- Seite 17 Folgende Auswahl ist nur für Lokomotiven mit DCC-Decoder Bitte prüfen Sie in Ihrer Lokanleitung, ob diese Einstellungen ausgeführt werden können. Auswahl: Fahrstufen Zum Wählen: scrollen Auswahl Lok programmieren Zum Wählen: scrollen Auswahl: Lok programmieren Auswahl Auswahl Auswahl bestätigen Stellen Sie zuerst den zu bearbeitenden CV-Wert (laut Ihrer Decoder-/Lokanleitung) ein und bestätigen die Auswahl.
- Seite 18 Lokkarte schreiben Lokkarte einstecken (siehe Seite 6) Auswahl: Lok- karte schreiben Auswahl Auswahl bestätigen Lok freigeben Auswahl: Lok freigeben Ein aktiver Speicherplatz wurde freigegeben. Der letzte Fahrbefehl und die eingeschalteten Funkti- onen bleiben erhalten. Zur Auswahl: Lok löschen scrollen Auswahl: Lok löschen Auswahl...
-
Seite 19: Lok Zurücksetzen
Lok löschen Auswahl Auswahl Zur Auswahl: Lok zurücksetzen scrollen Auswahl: Lok zurücksetzen Auswahl: Diese Funktion löst ein Reset des ja oder nein Lokdecoders aus (siehe Anleitung des Lokdecoders) Menü Information dann zusätzlich drücken SHIFT Auswahl: Information Zum Informieren: scrollen Sie erhalten hier Auskunft zur Seriennummer, Softwarestand, Hardwarestand, Stand der Lokdaten und Can-Bus. -
Seite 20: Reset
Pro Anlage darf nur eine Gleisbox ange- schlossen werden. Spur C-Gleis 66955 und /oder 66950 Es können maximal 2 Mobile Station an die Gleisbox angeschlossen werden. Es wird die „Master“ Mobile Station automatisch erkannt. Die andere Mobile Station wird dann auf „Slave“... -
Seite 21: Master/Slave Erkennen
Master/Slave erkennen So können Sie feststellen welche „Master“ Mobile Station bzw. „Slave“ ist. Sie stellen eine mfx Lok auf das Gleis, dann meldet sich die Lok auf die „Master“ Mobile Station oder dann zusätzlich drücken SHIFT Wählen. Information Zum Informieren: scrollen oder Lokomotiven übernehmen... -
Seite 22: Central Station
Central Station (ab 60213) Anschluss an Central Station Alternativ zum Terminal kann das Adapterkabel 60124 für eine weitere Mobile Station verwendet werden. 60124 Terminal 60125... - Seite 23 Lokomotive von Central Station übernehmen dann zusätzlich drücken SHIFT Auswahl: Auswählen:scrollen Auswählen Auswahl: BR 01 1103 Ausgewählte Lok kann nun mit der Mobile Station gefahren werden. Lok konfigurieren Bestätigen Bestätigen Konfigurieren und bearbeiten der Lok kann bei dieser Geräte-Anordnung nur mit der Central Station und dem dazugehörigen Programmiergleis ausgeführt werden.